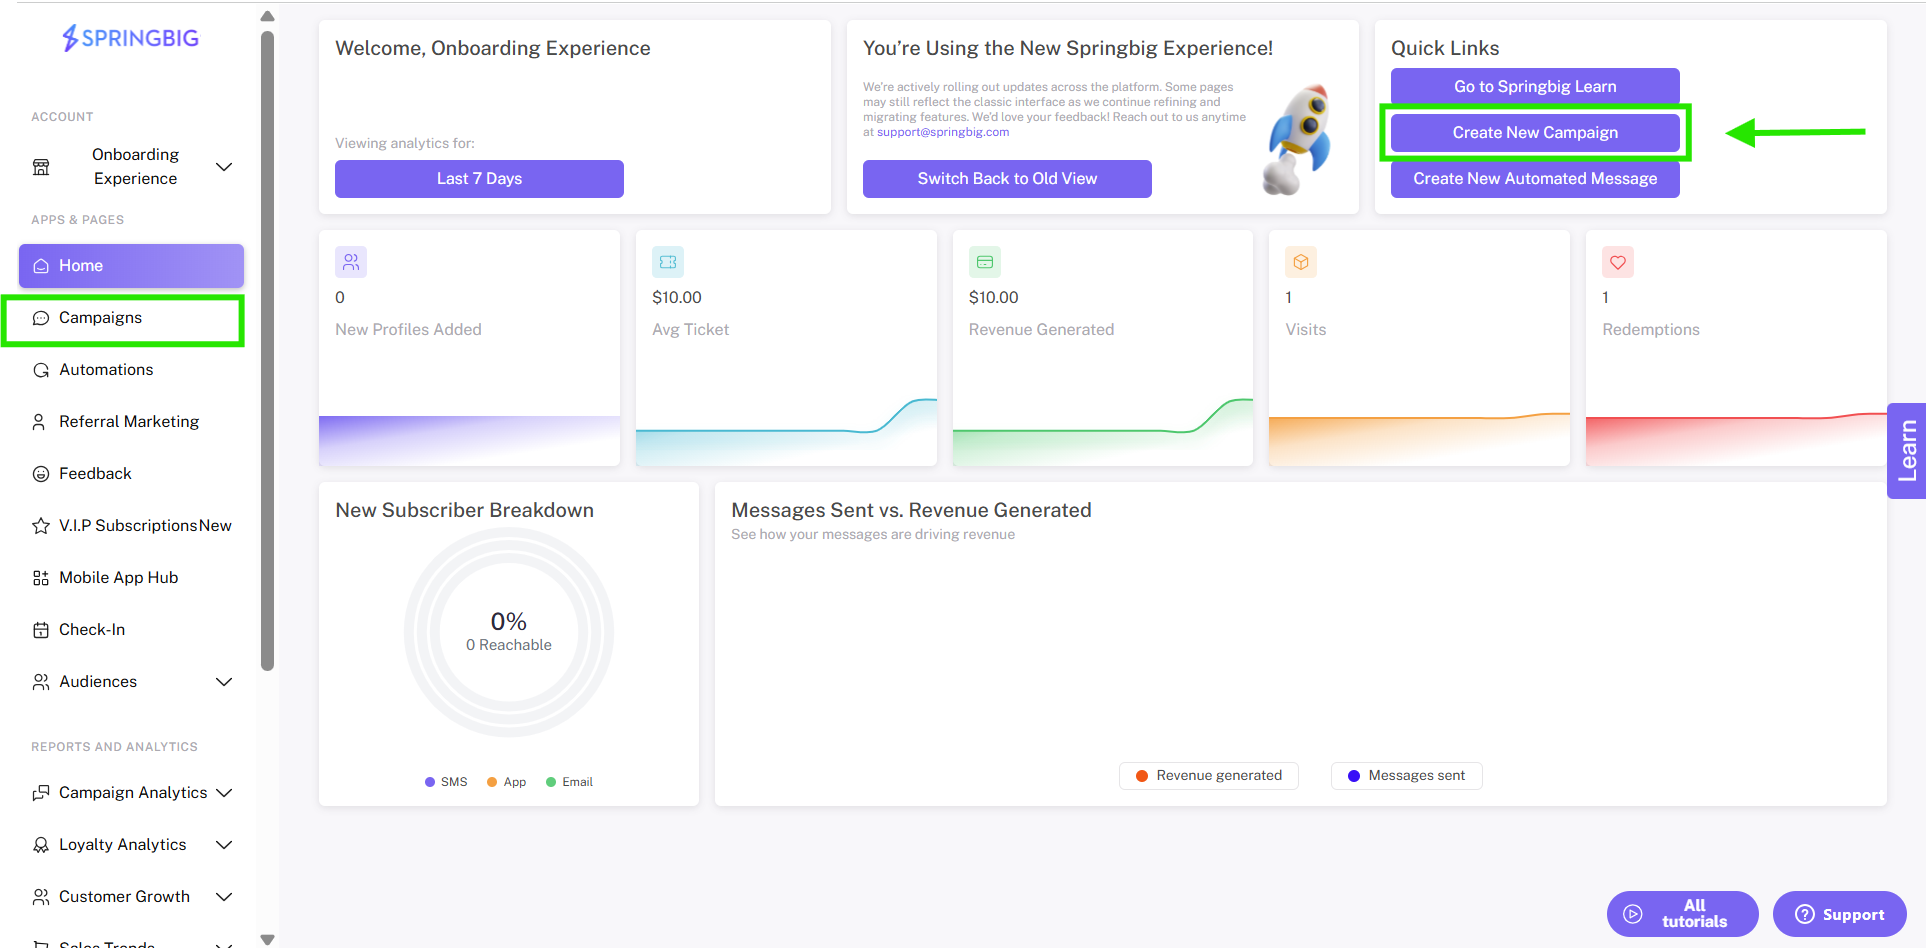
Step 1: From the home dashboard, you can click new campaign button located at the bottom of the home dashboard. You can also select campaigns from the main menu on any page of the platform, and then click the new campaign button from the campaigns page.
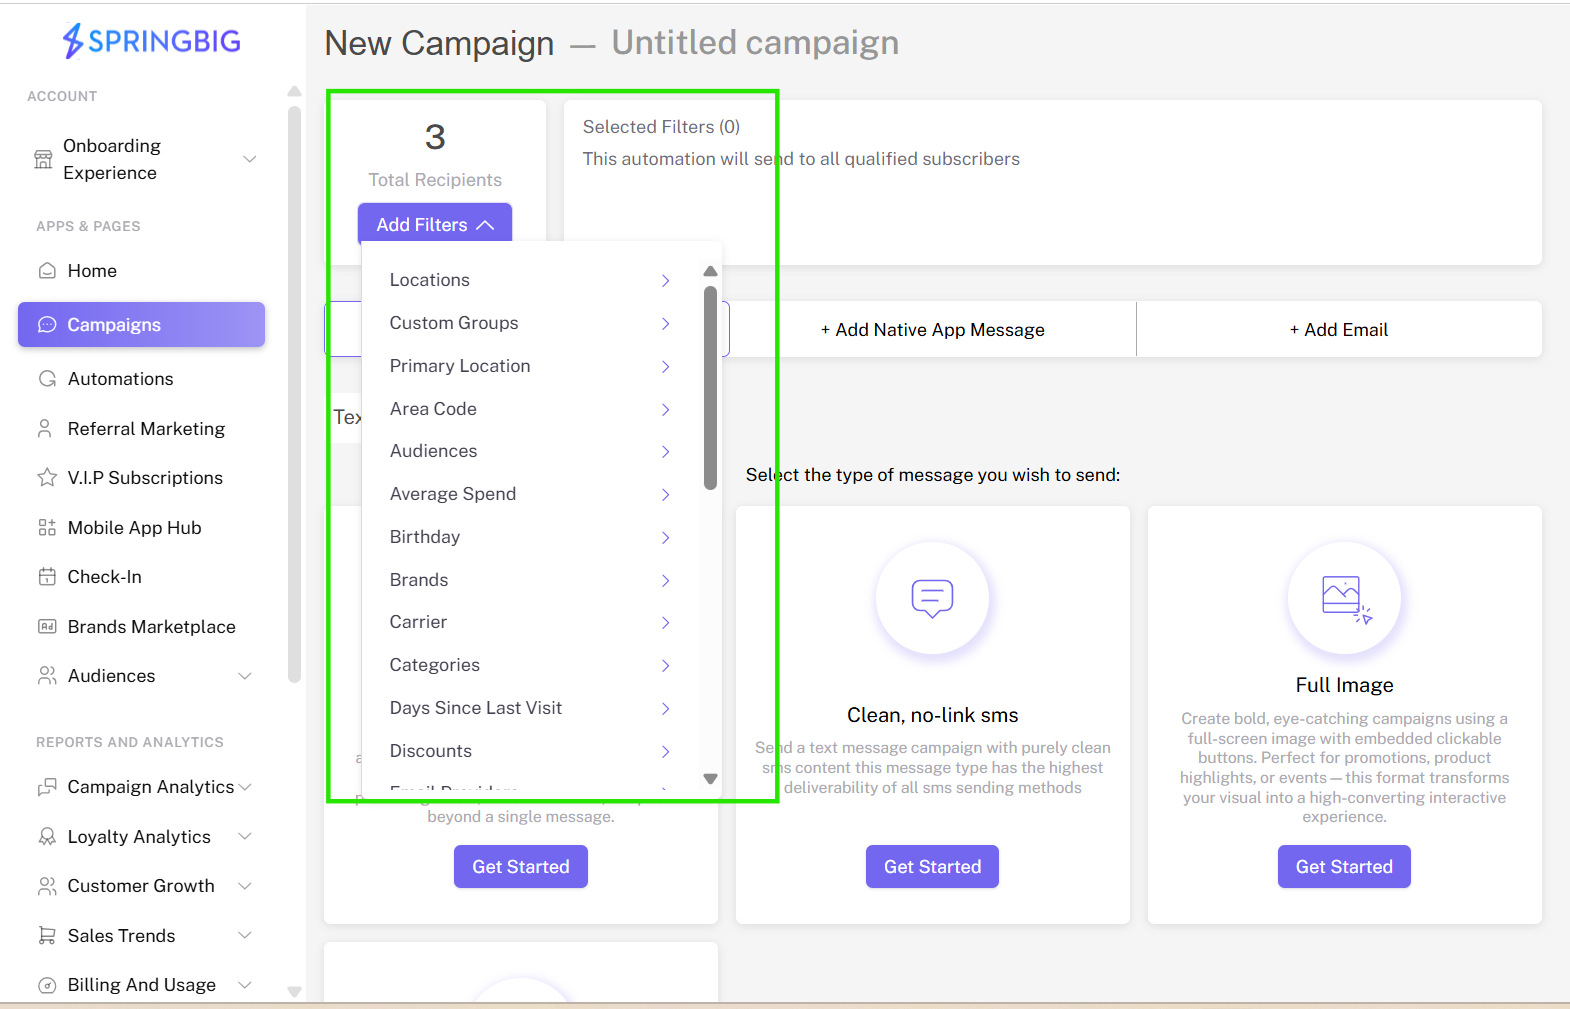
Step 2: When you create a new campaign, the recipient filters defaults to text all of your opted-in members. To filter your audience, open the recipient filters dropdown to see all the different ways you can segment your audiences into different groups.
Note: The number appearing in the parentheses shows the number of opted-in members currently included in your audience. This number will update if you change the filters. Use the recipient filters or check out the campaign caddie pop-up that will allow you to select recipients based on real-time data from your platform.
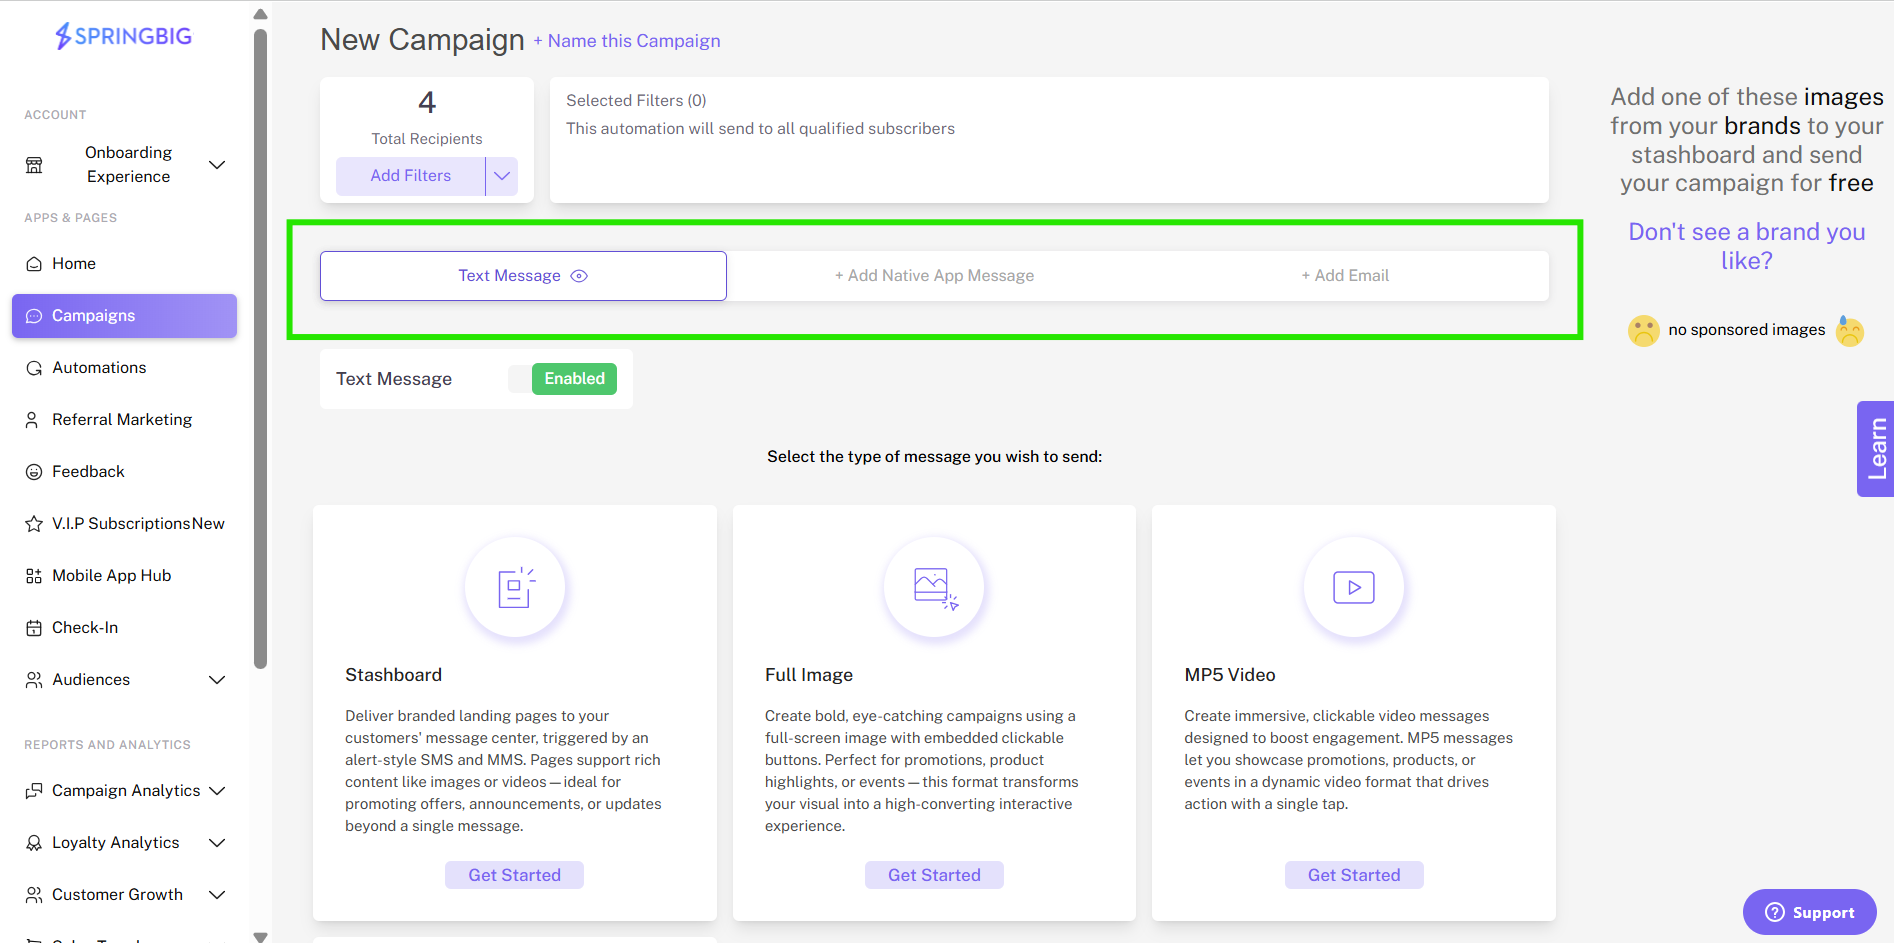
Step 3: Campaign method: Text is the default campaign method. To use multiple send methods, click + add native app message or + add email. To send an app message or email without a text campaign, toggle the disable option to close the text creator and then select your preferred campaign method.
Note: When you toggle the enable option next to text message, it will turn to disabled, which will indicate that you are not sending your campaign as a text message. Toggling to “+ add native app message” will enable native app messaging. If you do not wish to use this message type in your campaign, toggle it back to disabled.
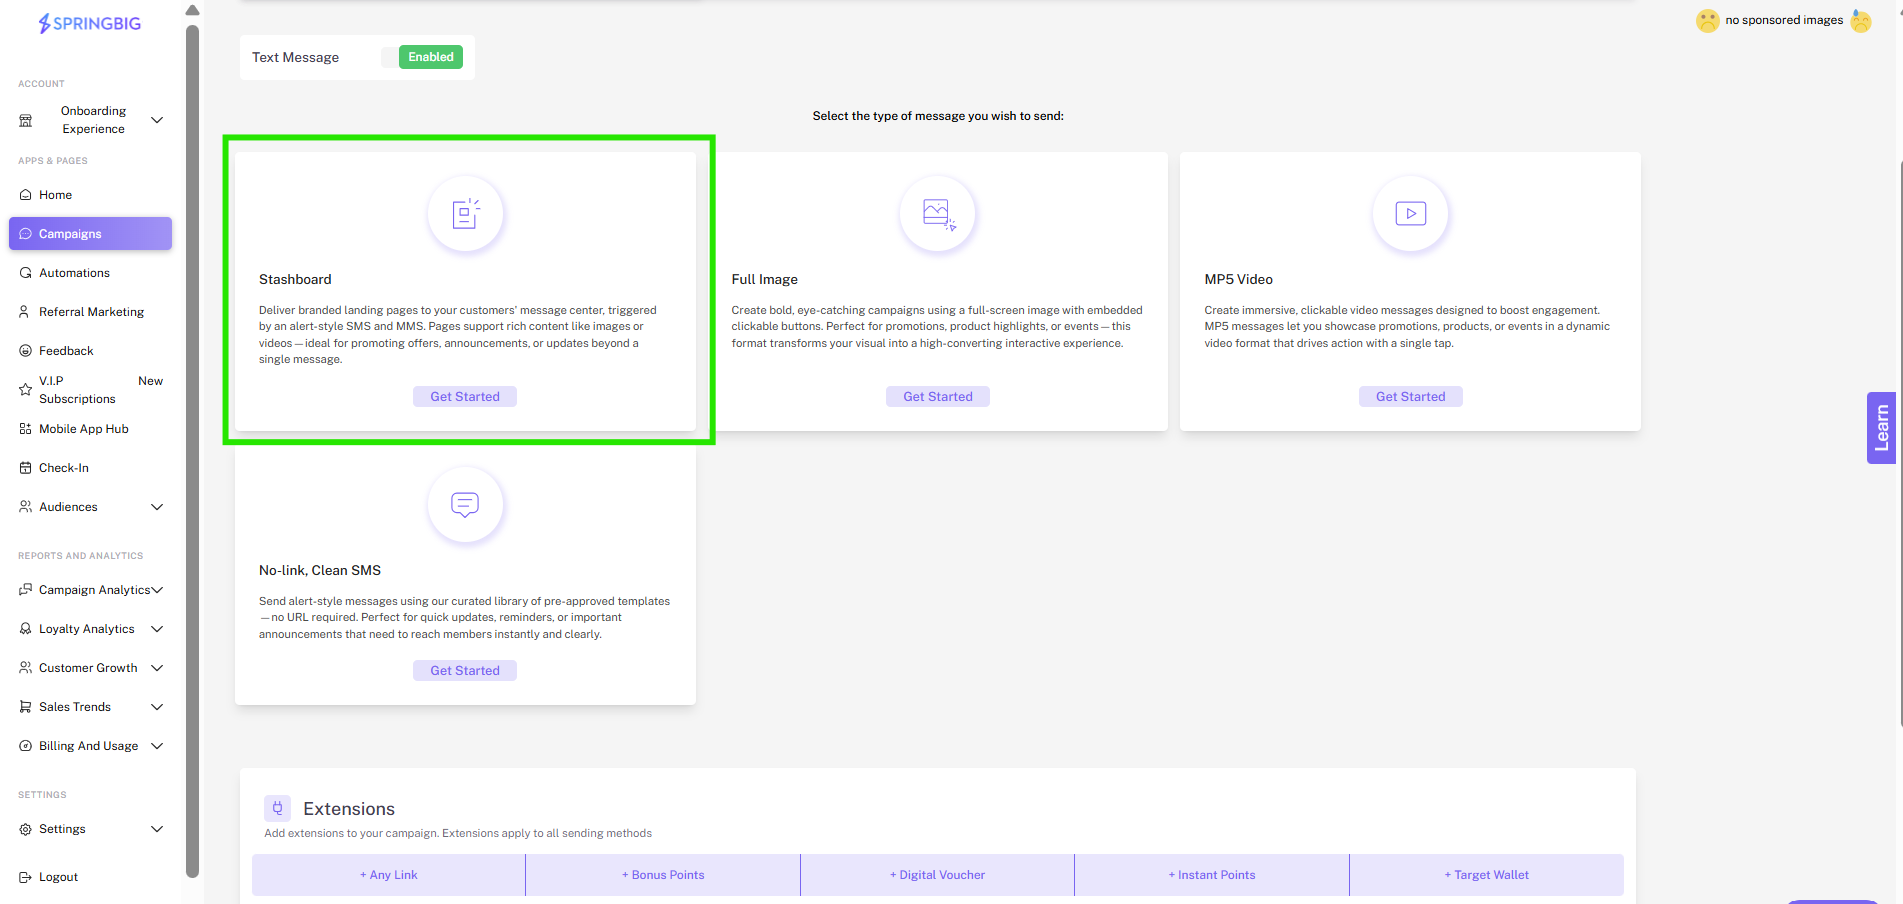
Your Stashboard is a passcode protected landing page that will show the content you add here. For your text campaign, use this section to create the content that will appear in your Stashboard message in the space provided.
Step 1: (Optional) Use the Add Image or Add Video buttons to add up to 5 images or a video that will be featured in your Stashboard.

Step 2: Add the messaging that will appear in your Stashboard in the space provided.
Note: This field cannot be empty.
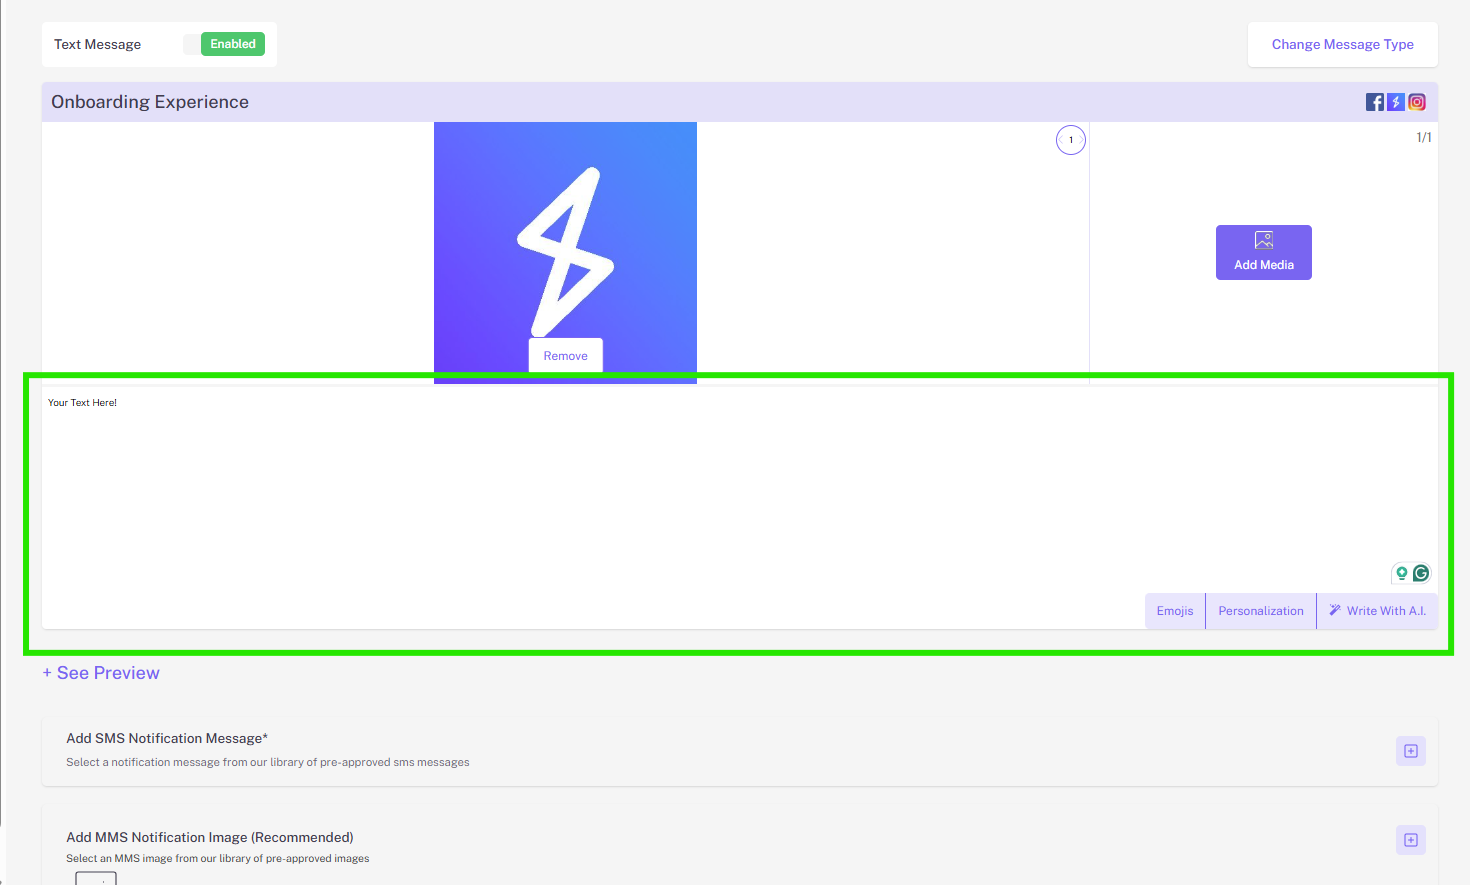
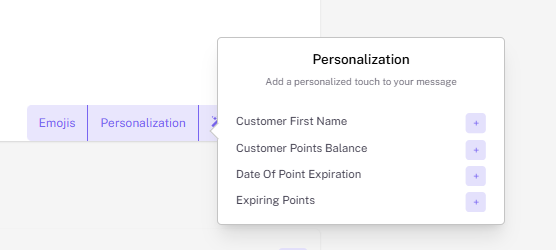
Step 3: (Optional) Add emojis and/or personalization.
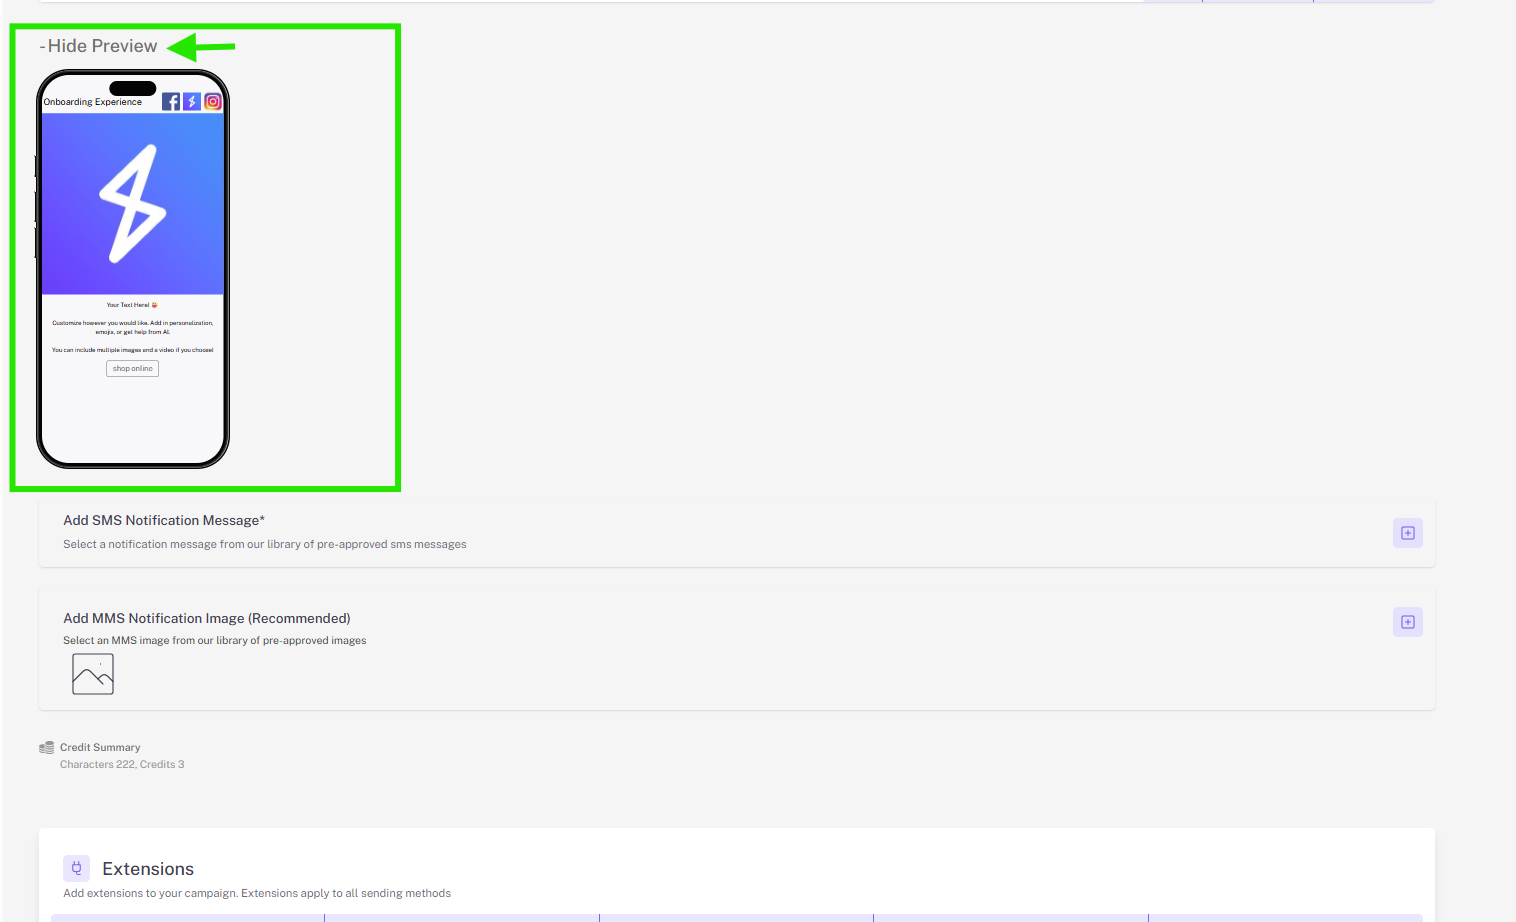
Step 4: Click + see preview to see a preview of what your Stashboard will look like.
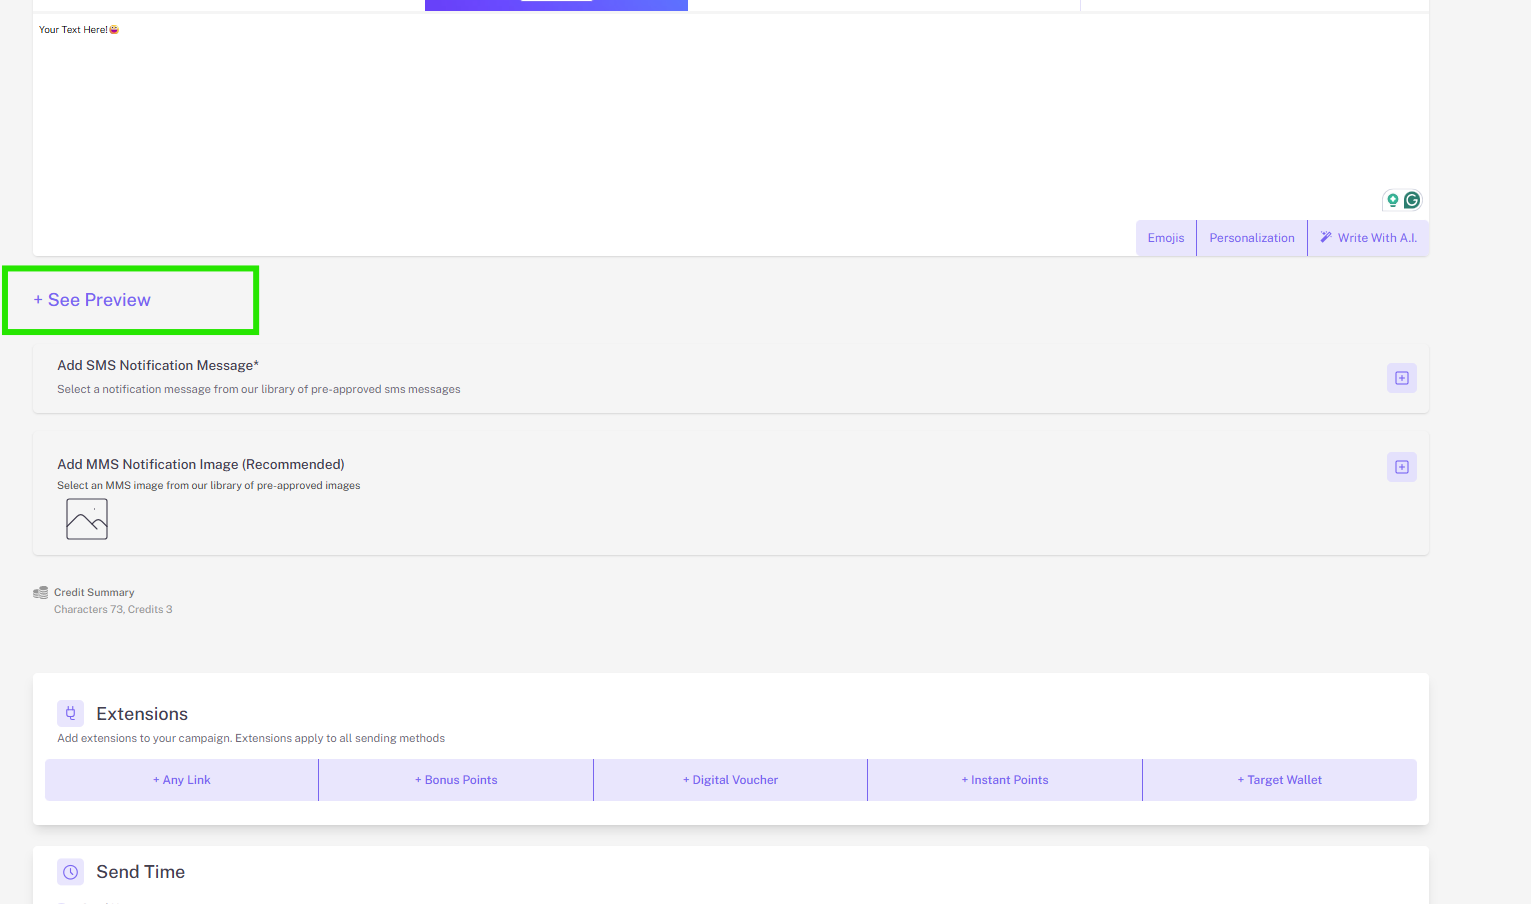
Note: Preview will allow you to see what your Stashboard will look like. Add text or images to view your preview. Your Stashboard will include your business name as well as Stashboard Header links that you can add in settings – account – stashboard settings. To close the preview, simply click hide preview option.
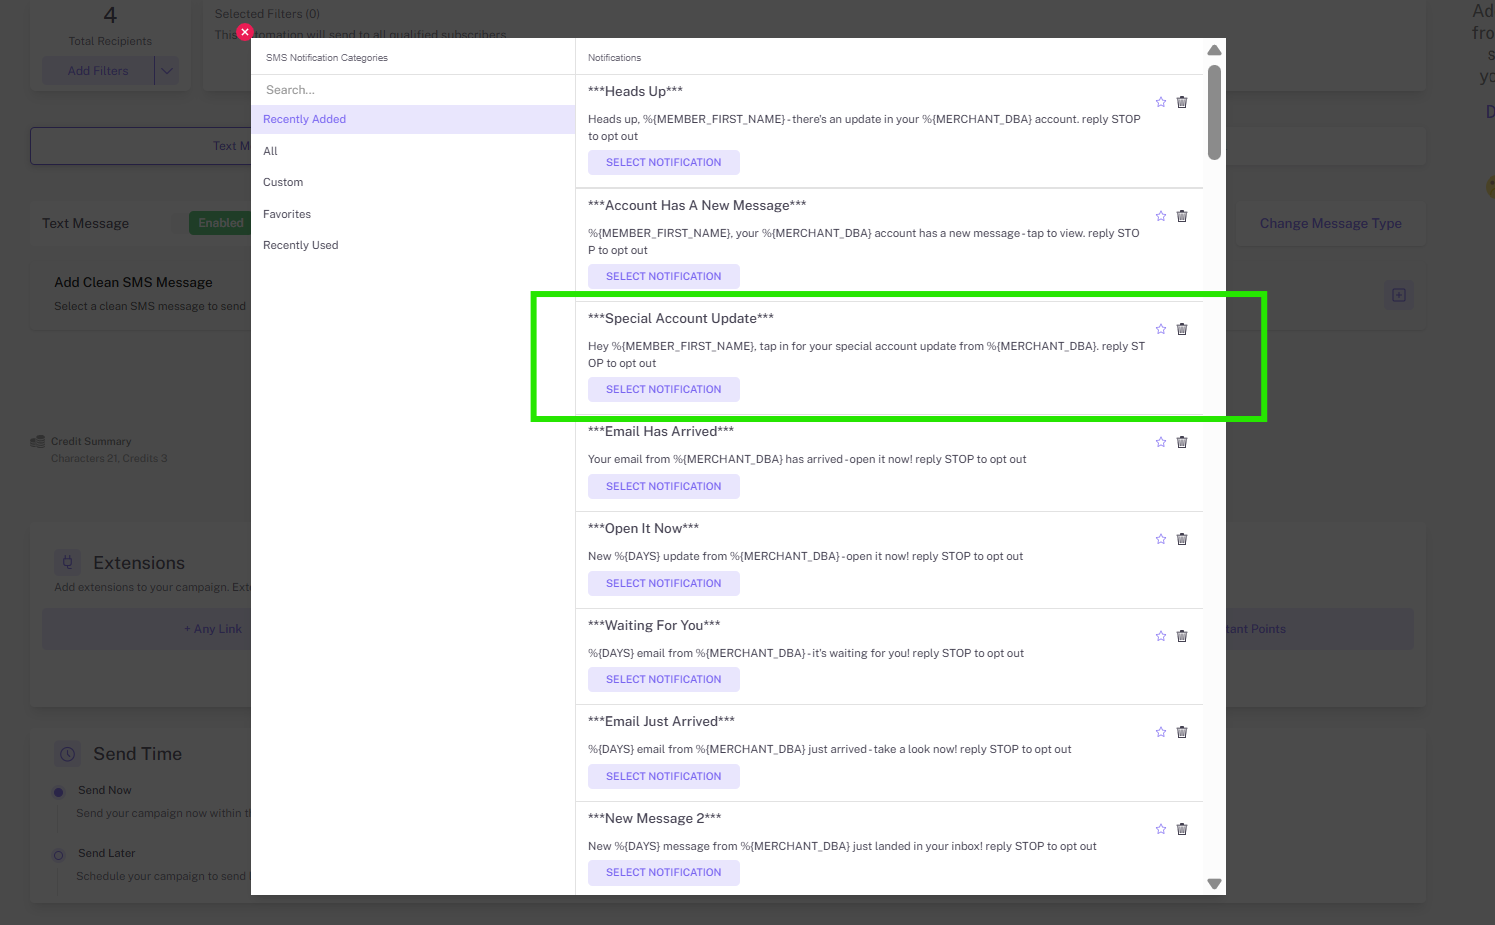
Step 5: Select pre-optimized SMS notification message, this is the text message that your customers will receive, leading them to your stashboard.


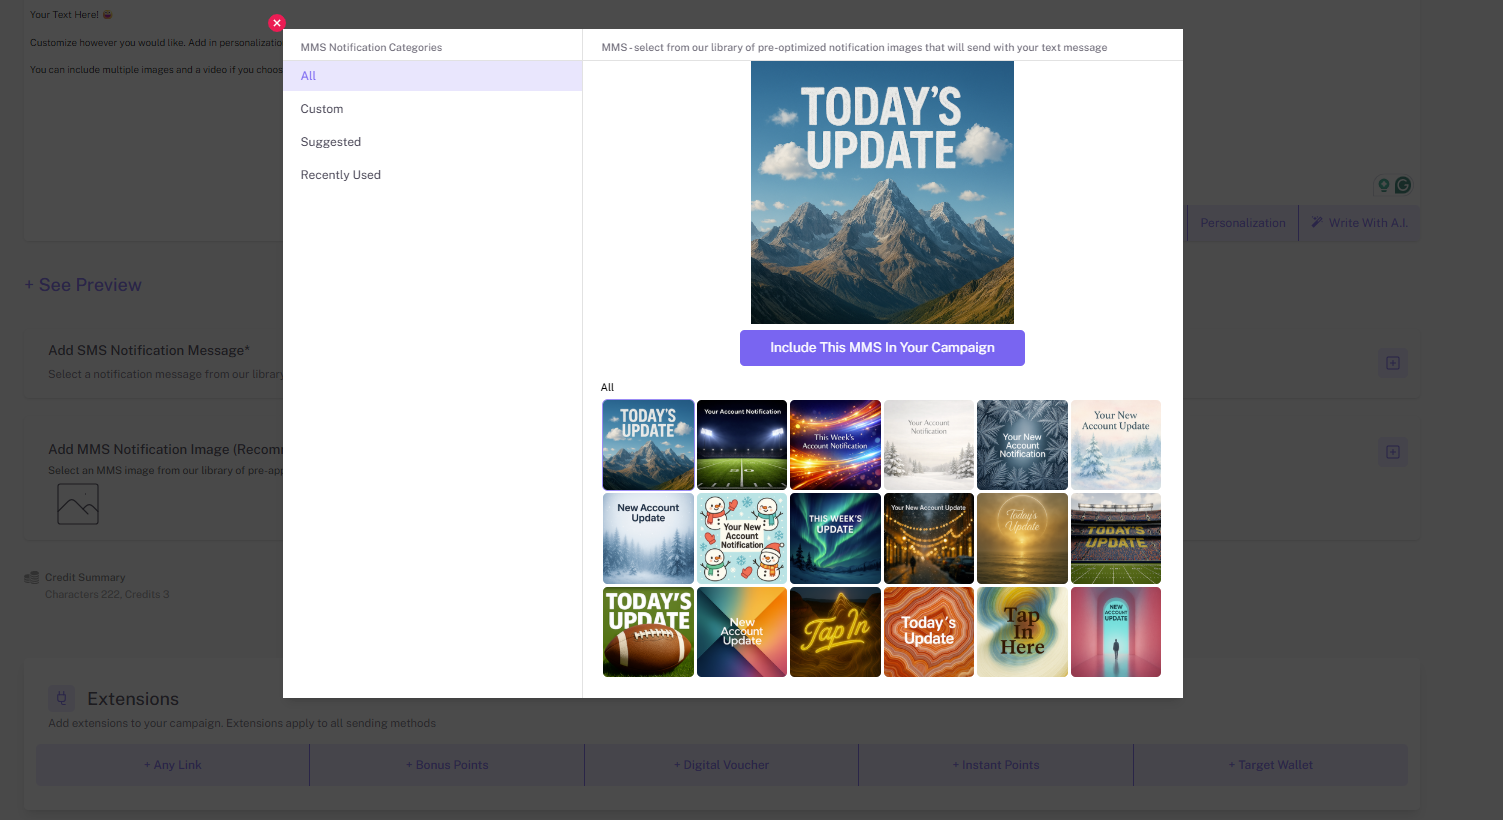
Step 6: (Recommended) Select an MMS notification message from our library. These images are designed to attract customers’ attention and drive them to click, and Springbig updates this image gallery with new content regularly. You can also have your own images approved and added by emailing them to messaging@springbig.com.

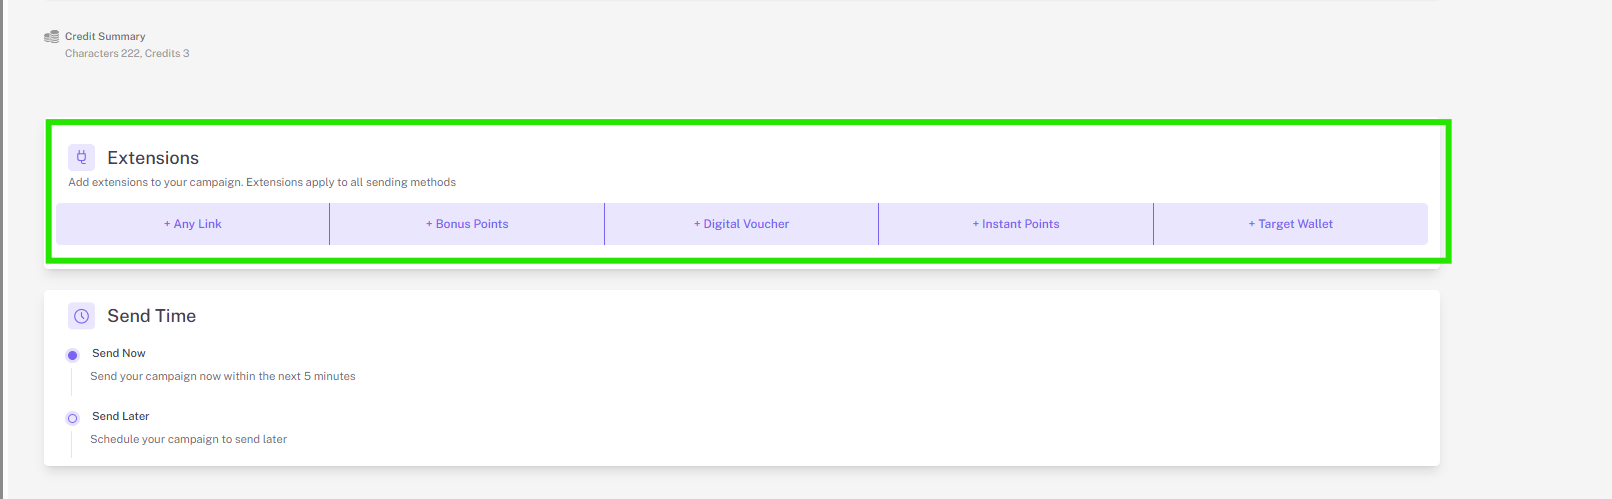
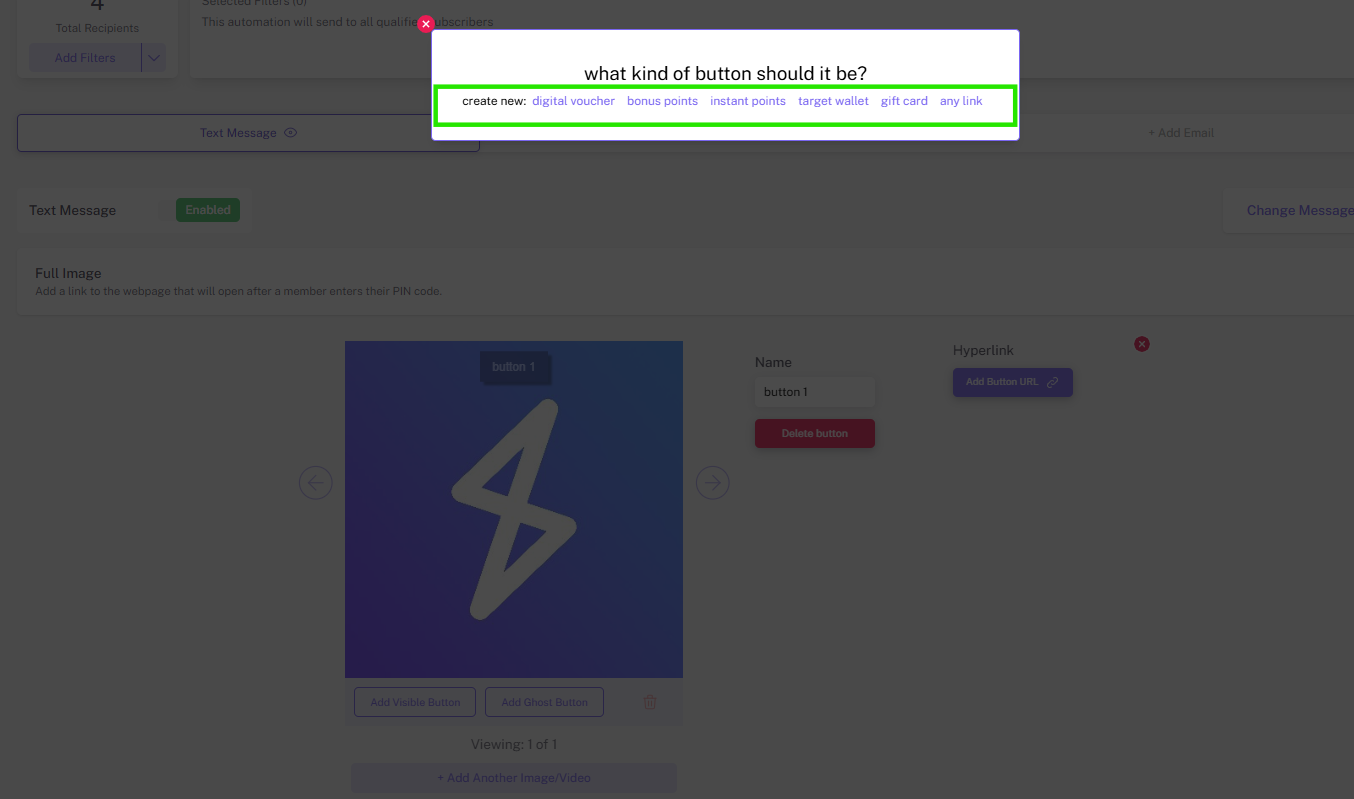
Step 7: (Optional) Click + add extension to include a digital voucher, bonus points, instant points, target wallet link, or any link.
Note: If you do not include an extension, a link titled shop online will be automatically uploaded and link to the URL you list in Basic Settings under online menu.
For more information on campaign extensions, check out the Extensions Guide here.
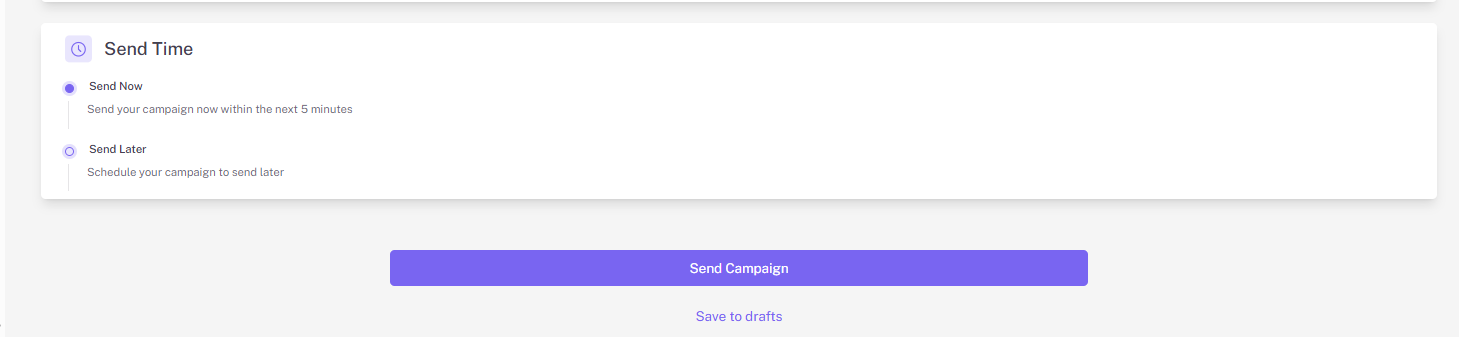
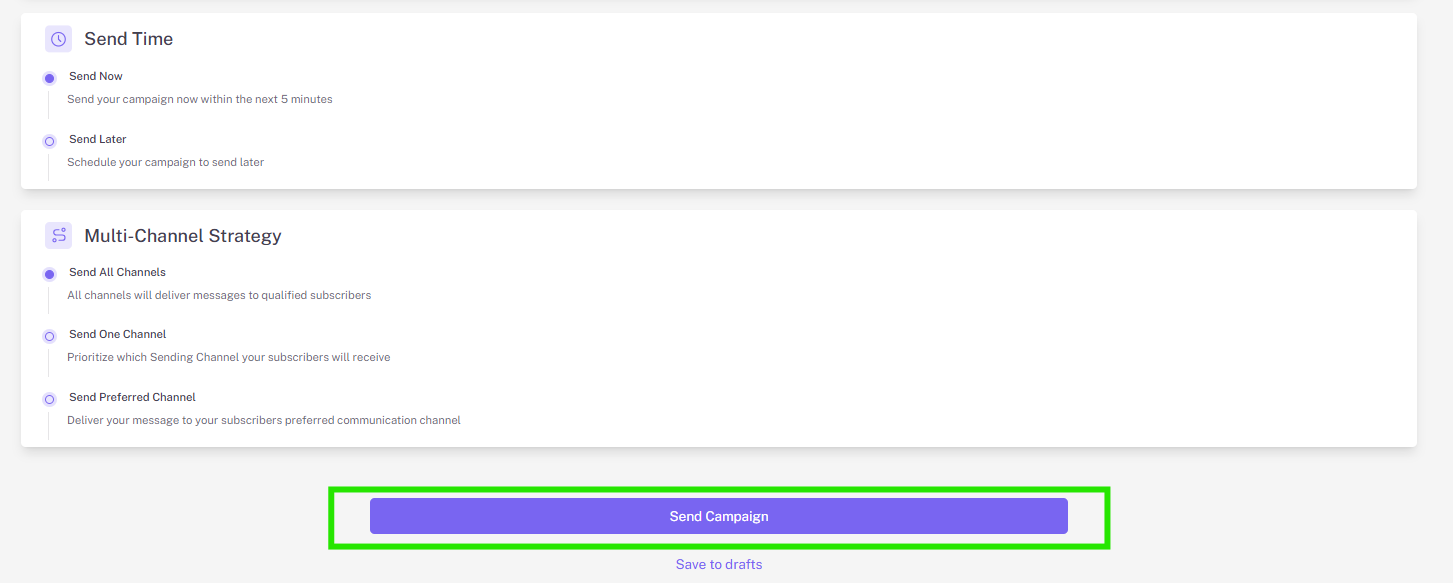
Step 1: Once you’re happy with your content, you are ready to send or schedule the campaign. Send now is the default setting, but you can also click the drop-down and select send later to schedule your text for another date / time.
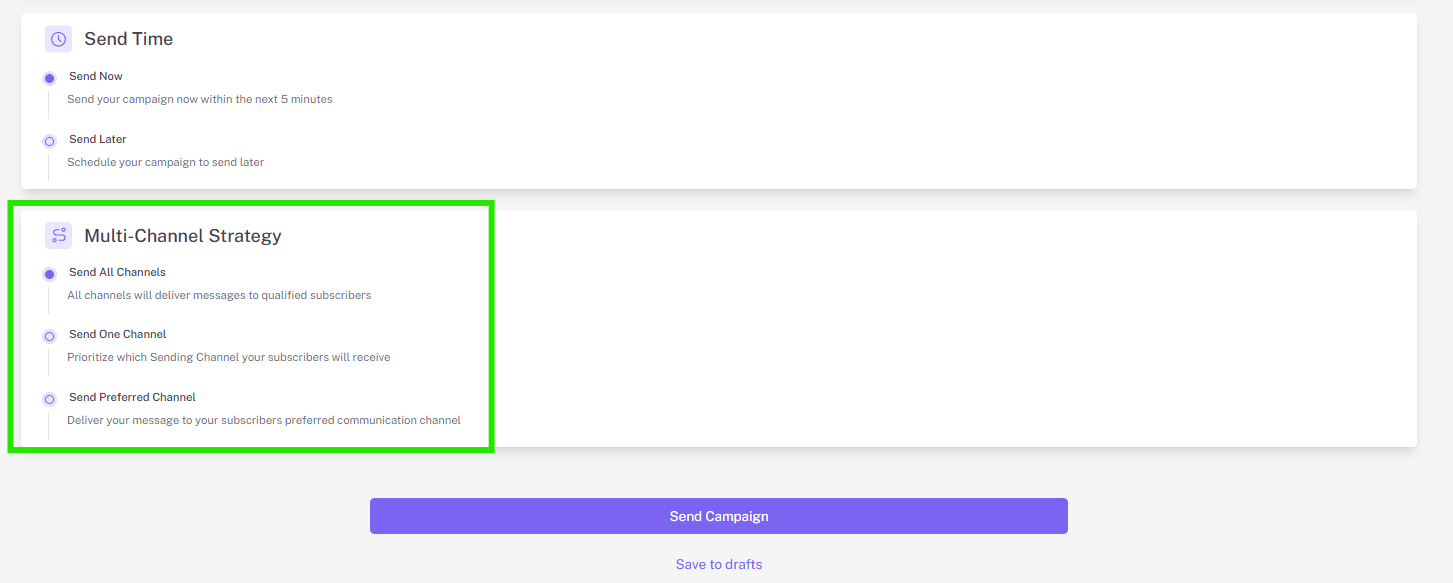
Step 2: If you are sending more than one method of campaign, you will see the send one methods and the send all methods options, which allows you to either send campaigns to all methods or prioritize one type of campaign to send to members who are opted in for multiple send methods.
Step 3: Click send campaign to complete your campaign
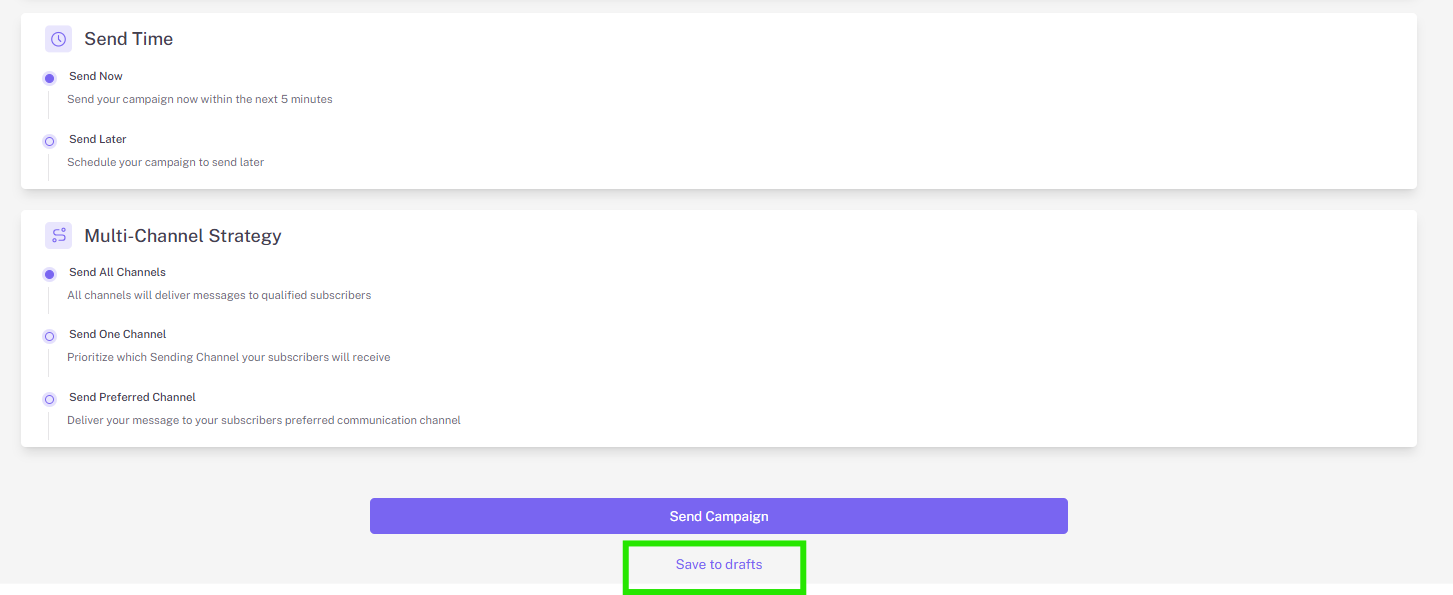
With campaign drafts, you can save your campaign creation progress and come back to them later. Simply click save to drafts under the send campaign button to save your text, images, video, extensions, and all details of the campaign you’re working on.
Note: If you don’t click save to drafts and instead try to simply exit out of the campaign creator, you’ll be given the option to save the campaign as a draft via a pop-up.
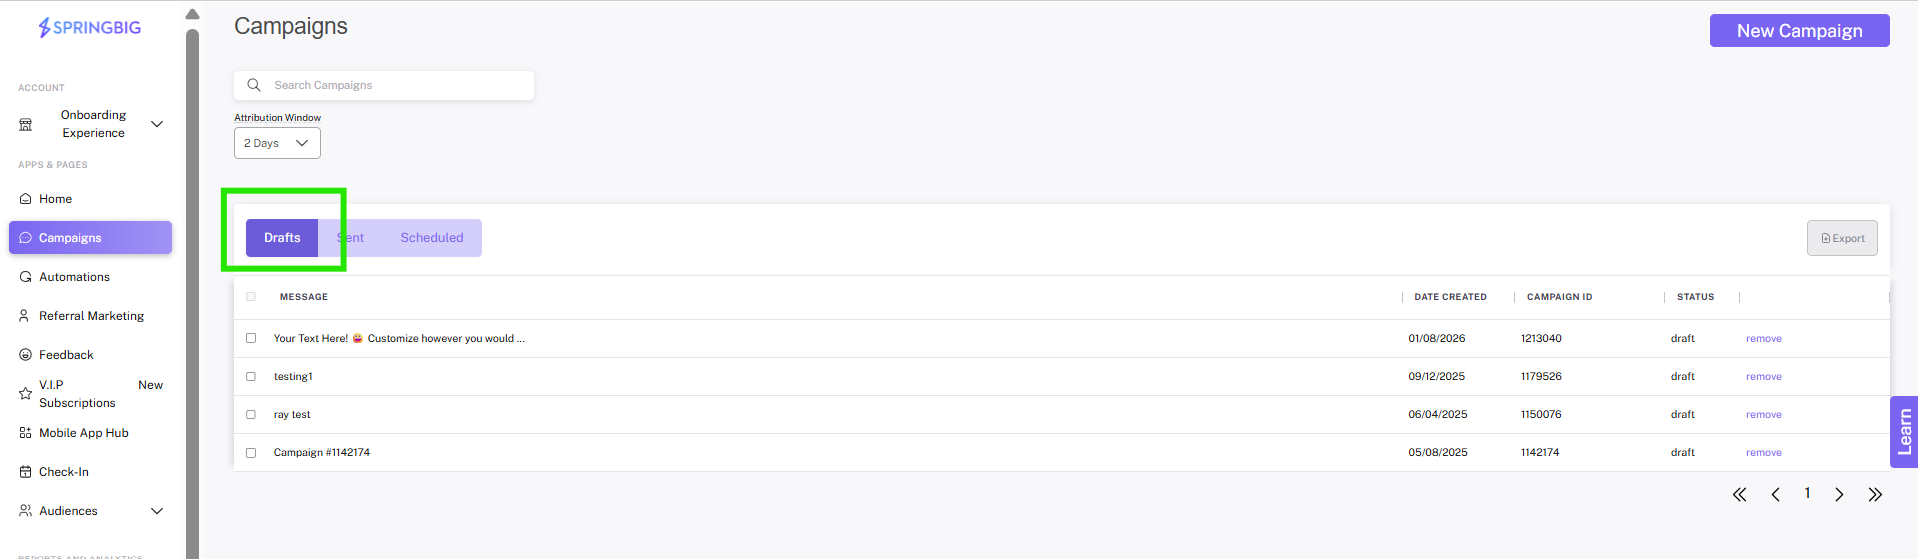
Once you’ve saved the campaign as a draft, you’ll be able to find it within the drafts tab of the campaigns page next to the other tabs: sending, sent, and scheduled. To start working on the draft again, simply click edit to resume working where you left off!
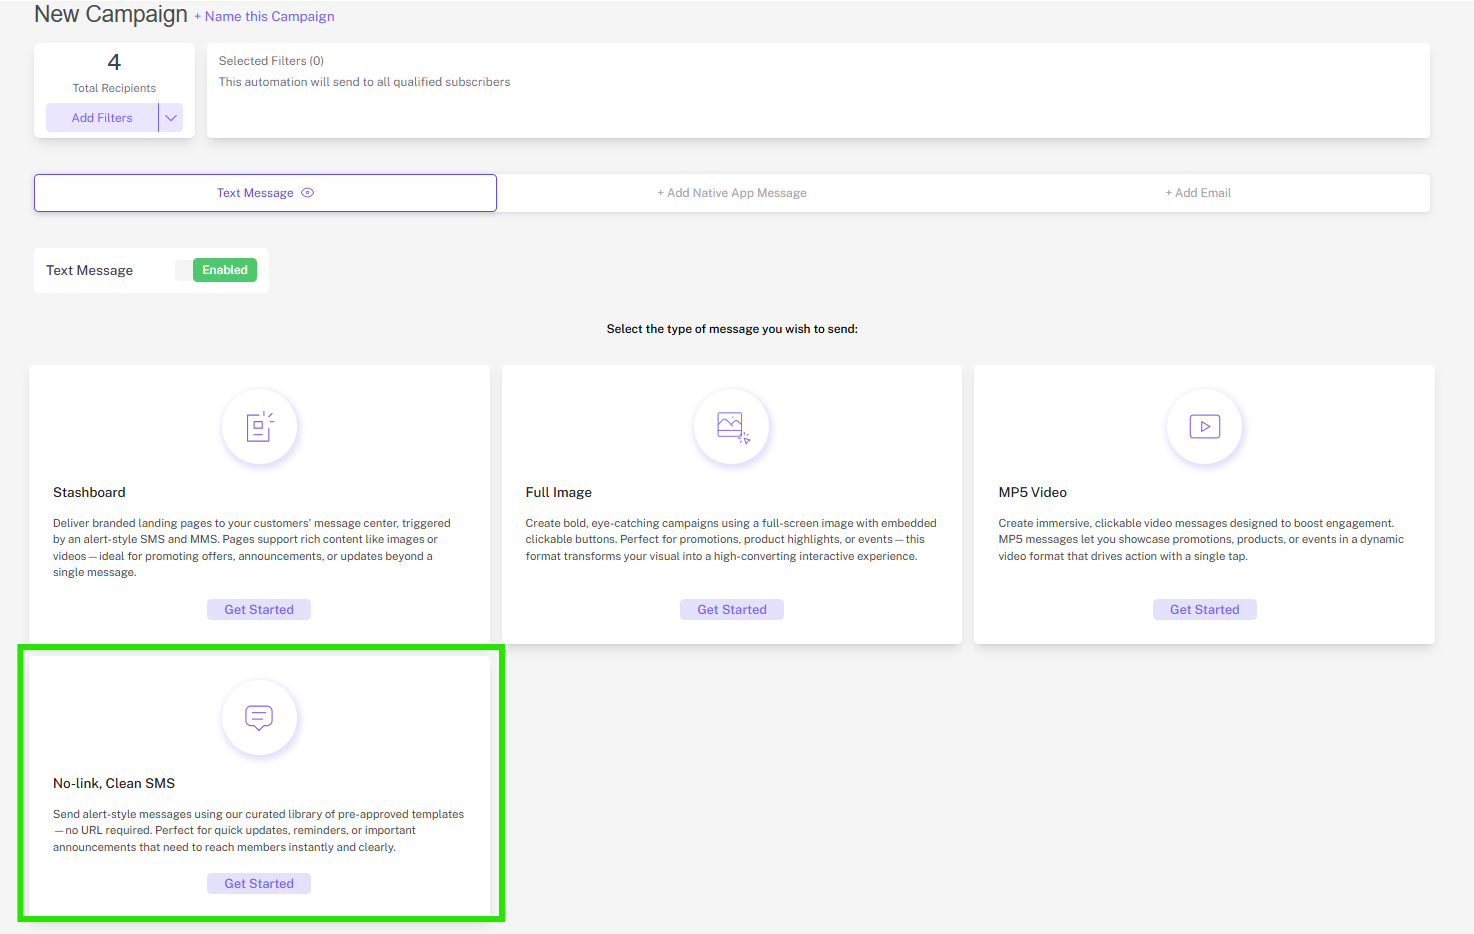
The Clean SMS feature will give retailers a number of delivery-optimized, clean sms template options to choose from that they can slightly customize. This message type will not include a link or an image. It will simply include the merchant’s configured sms content.
How to Use:
Step 1. Navigate to the campaigns page. Once there, under “text message”, select the “No-link, Clean SMS” option.
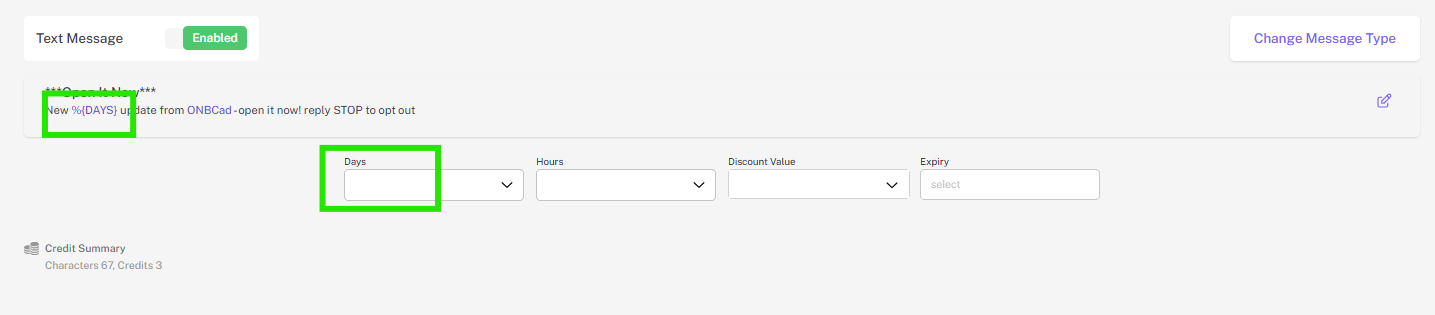
Step 2. Once selected, click “select message” and choose a message template from that drop-down.

Step 3. Once you’ve selected a template, you can customize that template by using the drop downs that appear under it. While these templates are not fully customizable, you are able to customize things such as days, hours, discount value, and expiry.
Tip:
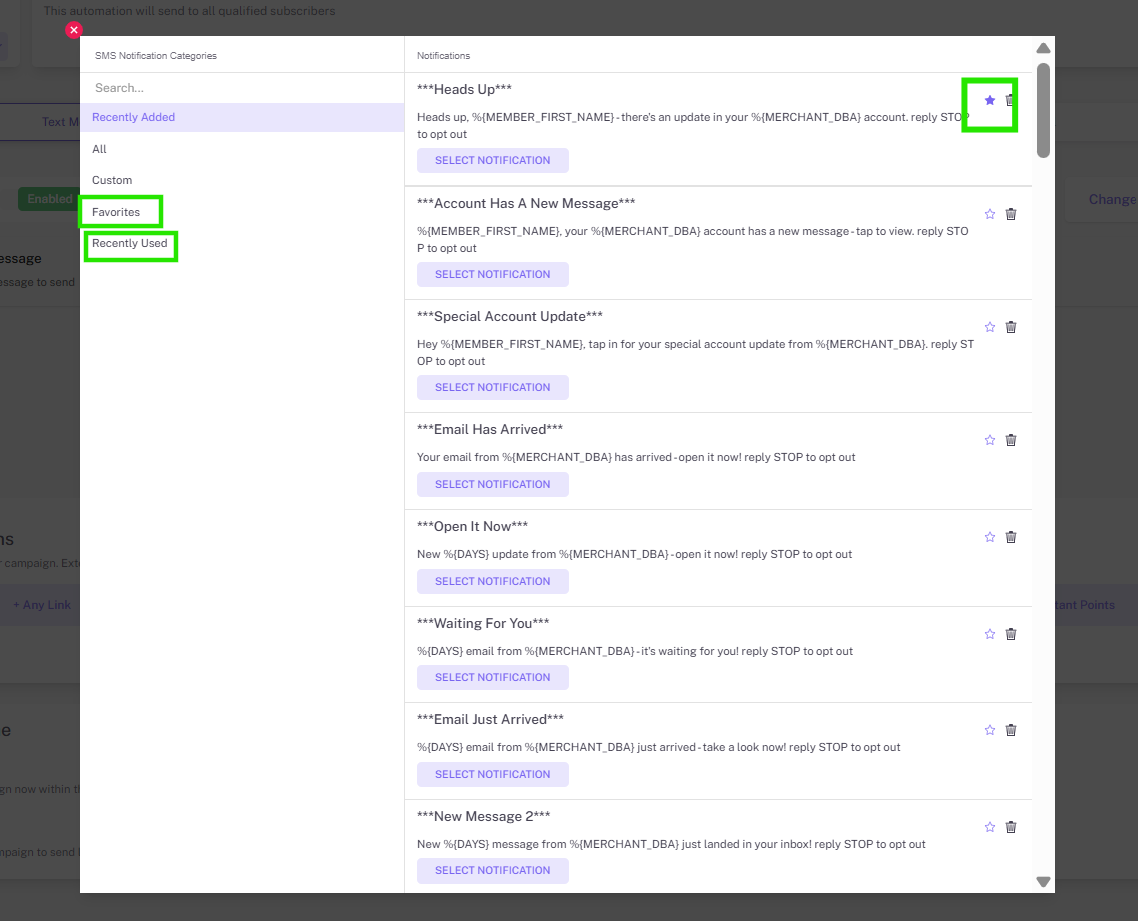
If you have a favorite template that you frequently use, within the “select clean sms template” drop down you can favorite that template by clicking the star.
You can also find recently used templates in the “recently used” section of the dropdown.
If the template does not have value substitutions for all fields (days, hours, discount value, and expiry), the fields that are excluded from the template will be grayed out.
Overview: The Clickable Images feature allows you to enhance your campaigns with interactive images by adding clickable buttons directly onto your visuals. When creating a campaign, simply select the new “full image” option, upload your image, and then place either visible or ghost buttons. Ghost buttons are ideal for images that already contain a call-to-action (CTA) since they make a designated area of the image clickable without altering its appearance. Visible buttons, on the other hand, allow full customization of text, size, color, and destination, offering flexibility to guide users to desired actions with ease.
How to Use:
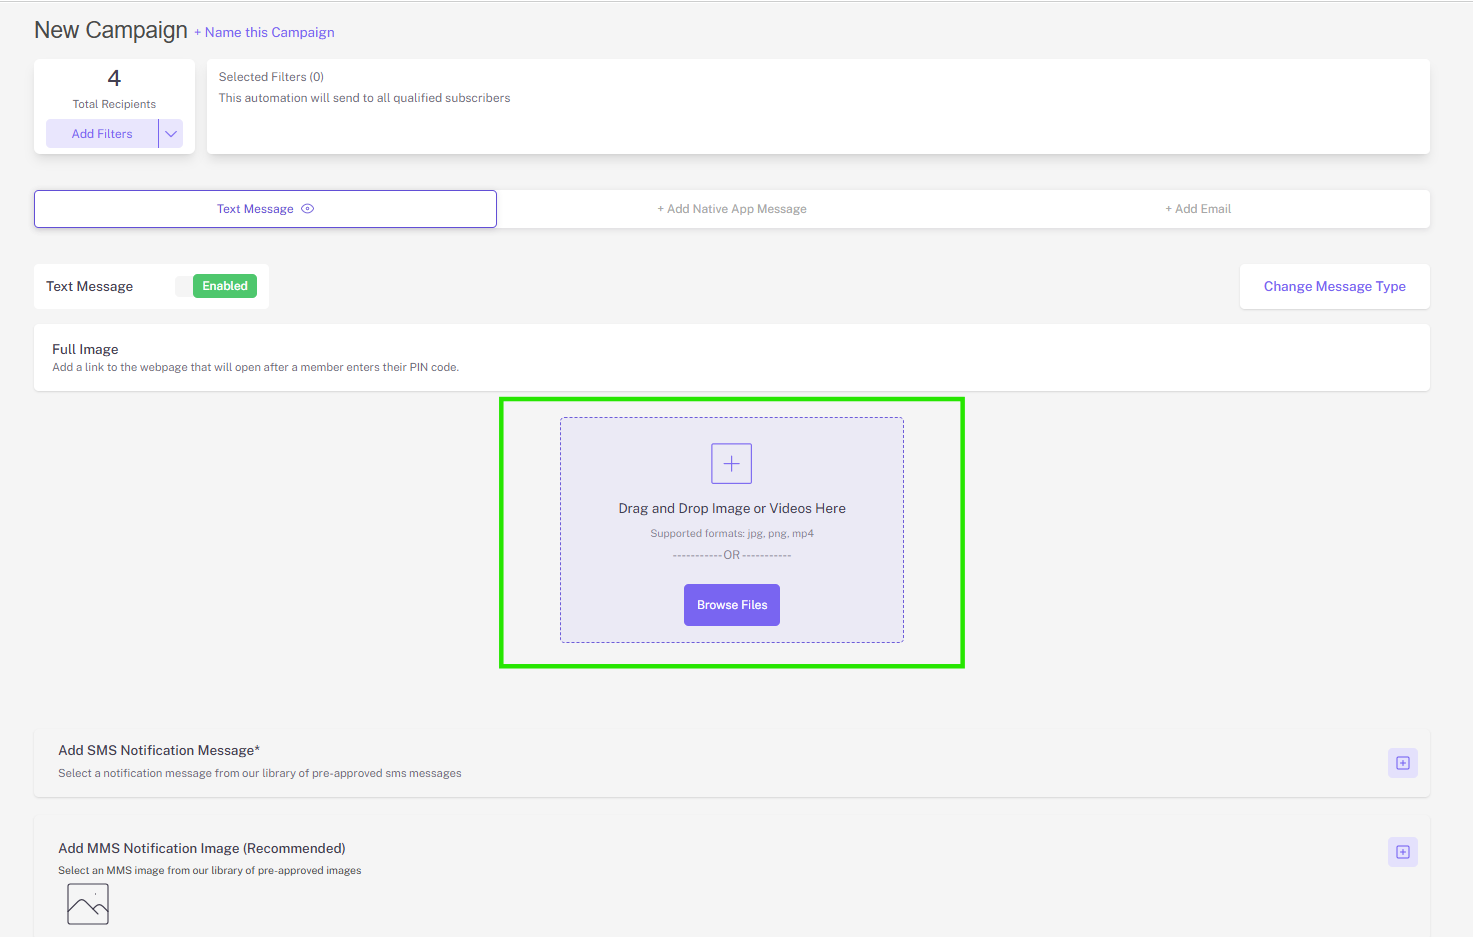
Step 1. Select the “full image” option when creating a new campaign
When creating a new campaign, on the text message tab you’ll see 2 options, the standard stashboard campaign, and full images (which is new with this feature). Click, “full image”

Step 2. Upload your image and a button or buttons
After you’ve selected “full image,” upload your image, and then add a button or buttons on top of that image. You’ll have the choice between adding a visible button to the image, or adding a ghost button (invisible button) to the image.
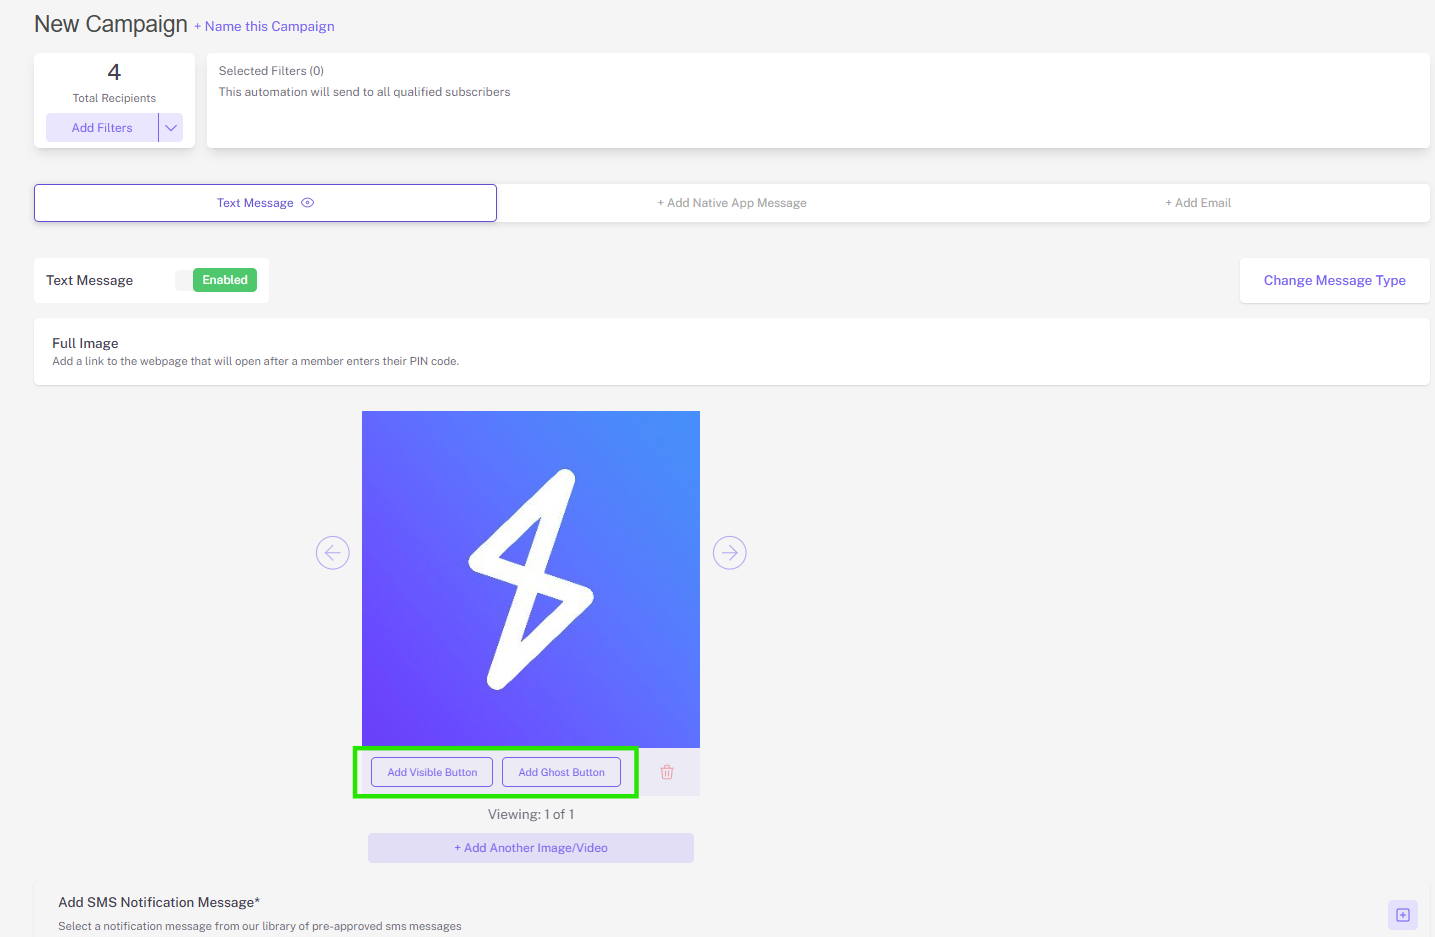
Tip: The ghost button is useful if your graphic already has a CTA button on it. By adding a ghost button over the selected area, it will make the area of the image where that button already is clickable and drive them to the desired destination
Step 3. Configure and customize your buttons
Ghost buttons
When customizing ghost buttons, you’ll be able to adjust the size of the area that will be made clickable, as well as select the desired destination that that area, when clicked, will drive them to.
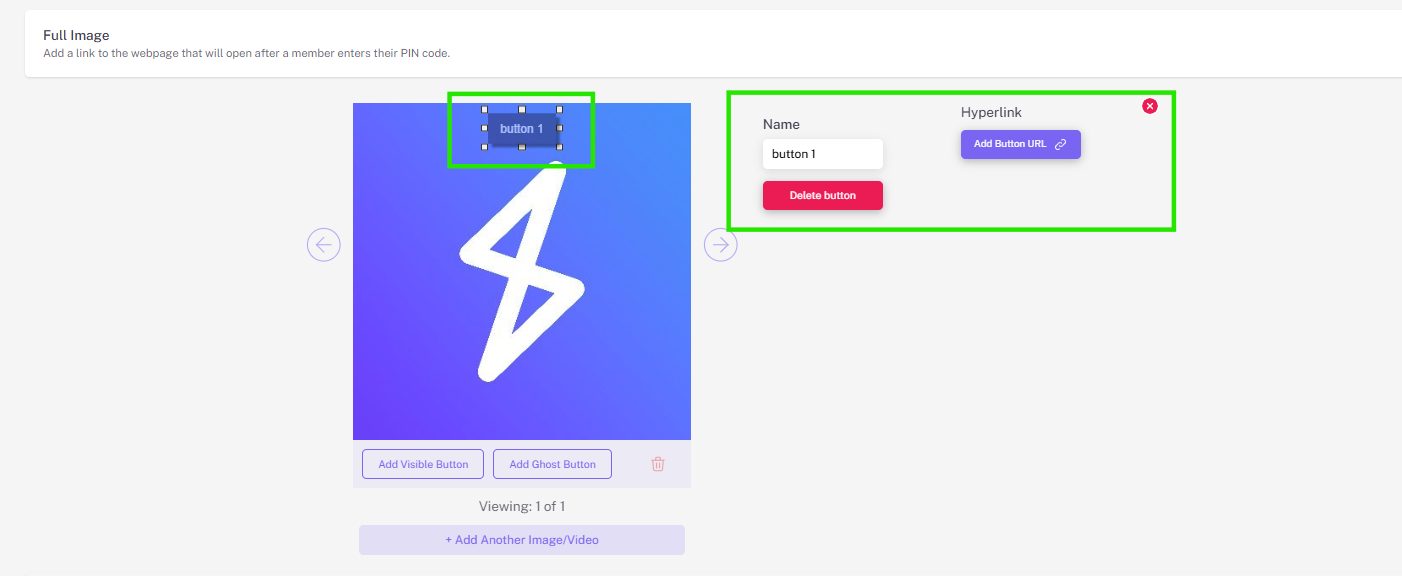
Tip: To customize where the button will drive customers, click the “add button URL” button within the customization widget.
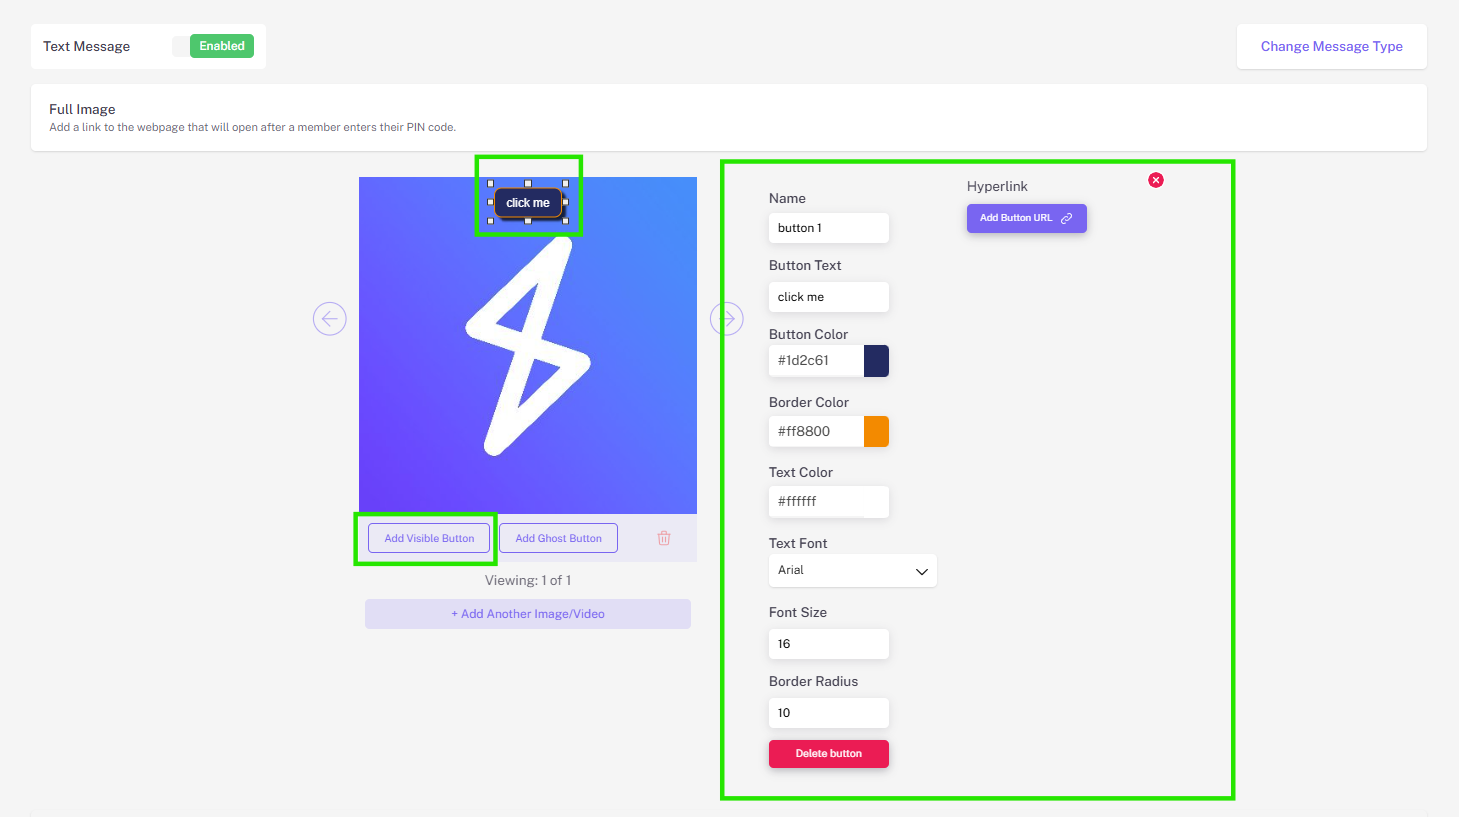
Visible buttons
When customizing visible buttons, you’re able to adjust the text displayed within the button, its size, its color, and the destination that the button will direct customers to when clicked
Step 4. Configure the rest of your campaign as usual!