NOTE: This guide is referencing our legacy Integration, pre dating January 1 2026
Welcome to the Springbig + Shopify Integration Guide!
In this course you will learn about:
Installing the Shopify Integration
Configuring rewards and offers
The redemption and order experience
Issuing refunds in admin and in the POS
Creating members in admin and in the POS
Creating visits in admin and in the POS
Processing order cancellations
Automating Marketing with Shopify Flow
To get started, please provide to your onboarding specialist/account manager your Shopify URL and approve the access request from Springbig, so our Integrations team can complete the setup.
Springbig + Shopify Integration Guide
User interface is subject to change at the discretion of your POS provider. For the most accurate and up-to-date information, please consult your POS provider directly.
Part 1: Loyalty Setup
Rewards Setup
*Rewards are only created in Springbig which will automatically sync to Shopify
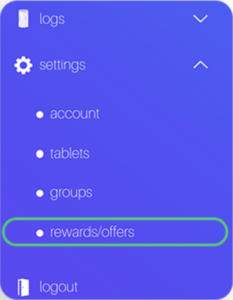
1. Navigate to the Springbig main menu, click settings, and then rewards/offers
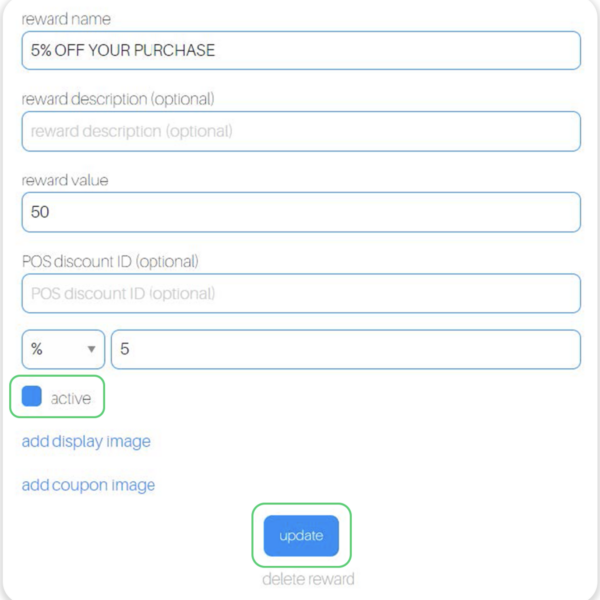
2. Shopify will retrieve the following required attributes:
Reward name
POS reward value
POS reward type (% or $).
POS discount amount
3. Click the active checkbox
4. Click update
Offer Setup
*Offers are only created in Springbig which will automatically sync to Shopify
These are 3 types of Springbig offers:
Member offers:
Direct to the left-hand Springbig menu
Click settings
Click rewards/offers
Scroll down
Click + new offer
Campaign offers:
Direct to the left-hand Springbig menu
Click campaigns
Click new campaign
Scroll down
Click add extension
Select digital voucher
Autoconnect offers:
Direct to the left-hand Springbig menu
Click autoconnects
Click new autoconnect
Select intended autoconnect
Select track offer
Offers Setup Continued:
Navigate to the Springbig main menu, click settings, and then rewards/offers
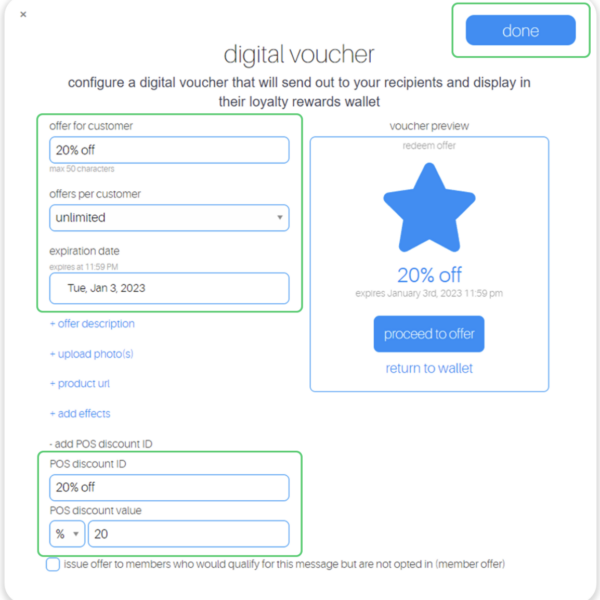
2. Fill in these required fields on the offer setup:
Offer for customer
Discount type (% or $)
Discount value
Expiration date
(Note: only member and autoconnect offers can be left as zero/omitted)
Offers per customer
3. Ensure the offer is saved/completed:
Member offer:
Click active
Click update
Campaign offer:
Click done
Autoconnect offer:
Click done on the bottom
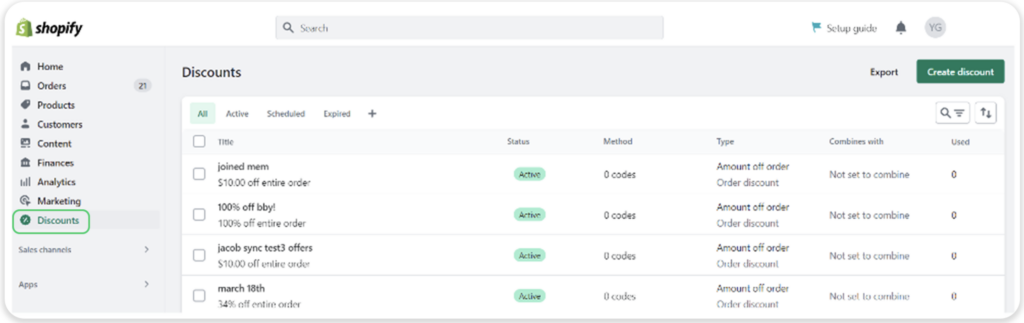
4. Navigate to the Shopify admin and click the Discounts page to view all synced Springbig rewards/offers
Note: Do not create discounts in Shopify since they’re only created in Springbig and automatically sync to Shopify
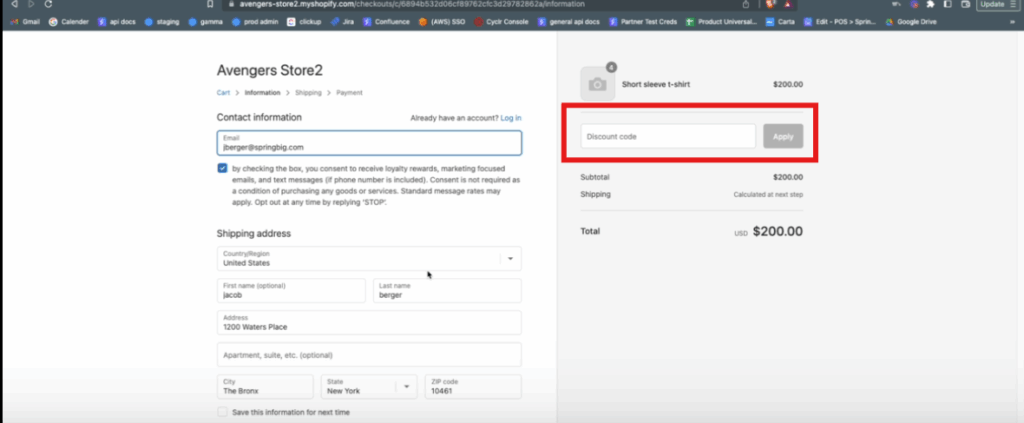
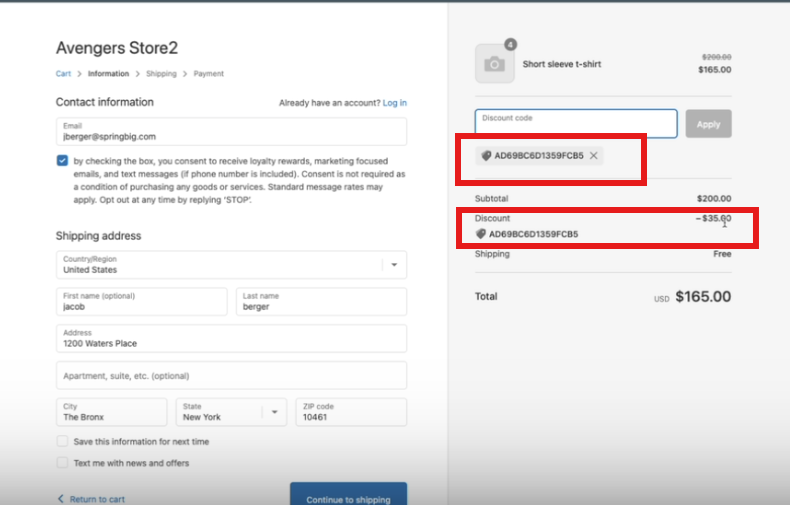
Part 2: Redemption Experience
At checkout, there is a discount code field:
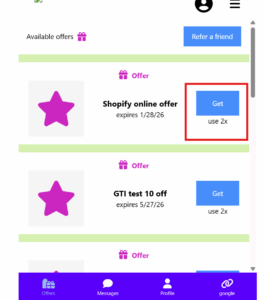
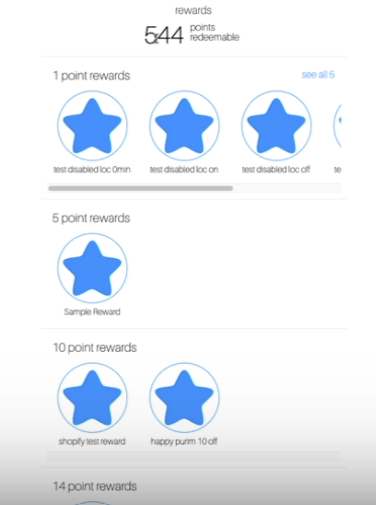
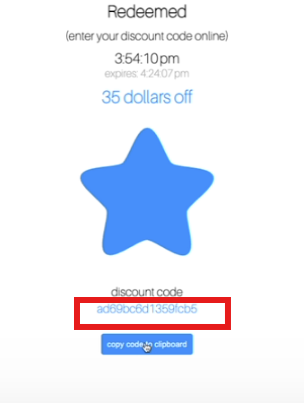
The customer will redeem the reward/offer in Springbig through their member wallet and copy the discount code. Select the reward or “get” the offer.
The discount code is to be put into the discount field in Shopify
Apply the discount code
The discount will be applied
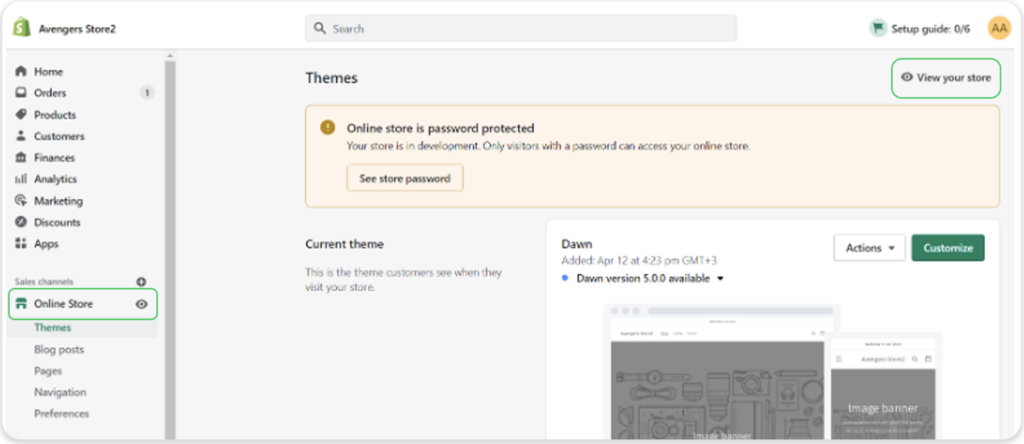
Part 3: Member/Order Experience
Once on Shopify, navigate to the left menu bar
From there, click on Online Store, then select View your store on the top right of your screen
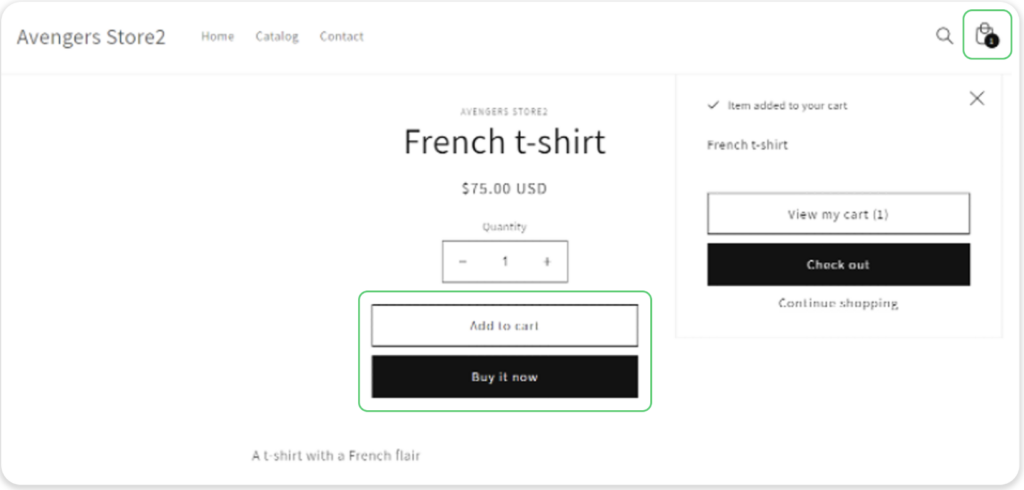
3. The user will be able to select the products for this transaction. They will have the option to click Buy it now or Add to cart to keep shopping.
Note: if they continue shopping, they will see the number of items in their cart over the bag icon on the top right. That is where they will click to proceed to Check out.
4. The user will then be prompted to input theirpersonal information including:
Phone number
Shipping address
5. Once these details are filled out, they will be prompted to select their shipping method
6. After they select their preferred shipping method they will be able to fill in their payment information
7. From there, they will confirm their billing address and then click Pay now to complete their transaction
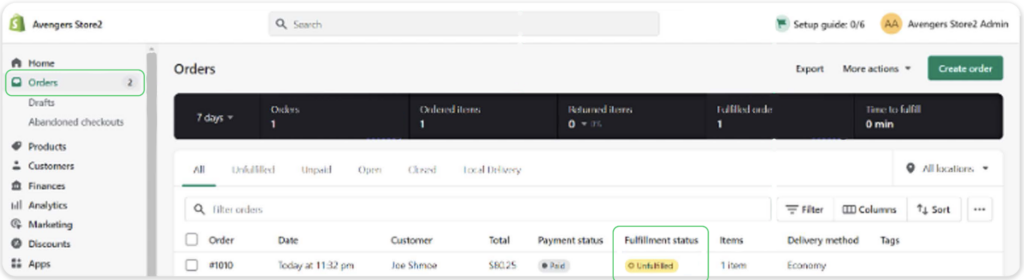
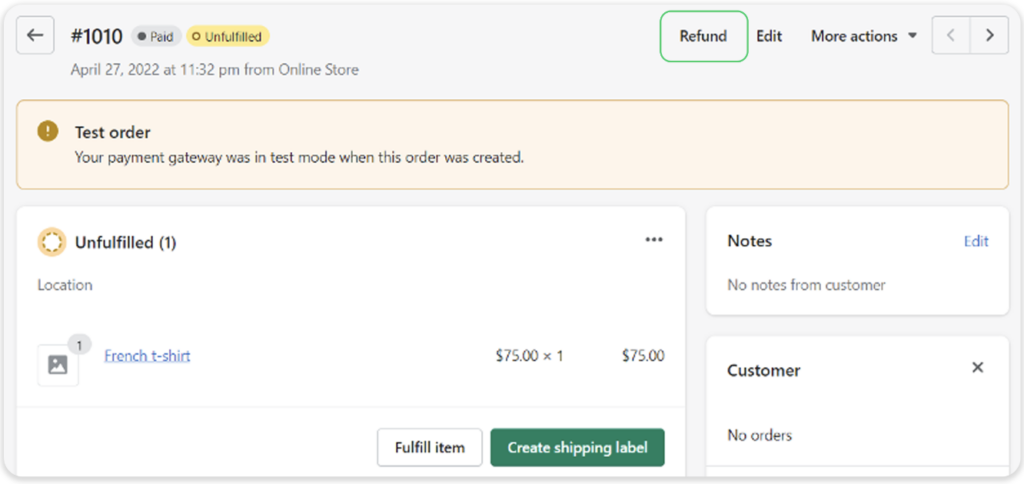
8. To complete the order, navigate to the left menu bar and click on Orders, then select the Unfulfilled order that you would like to fulfill
Part 4: Refund Experience
Navigate to the Orders page located on the left menu bar
Click on Unfulfilled orders to refund the transaction and click Refund
Note: returning the item systematically is not necessary since the order has not been completed or shipped out yet
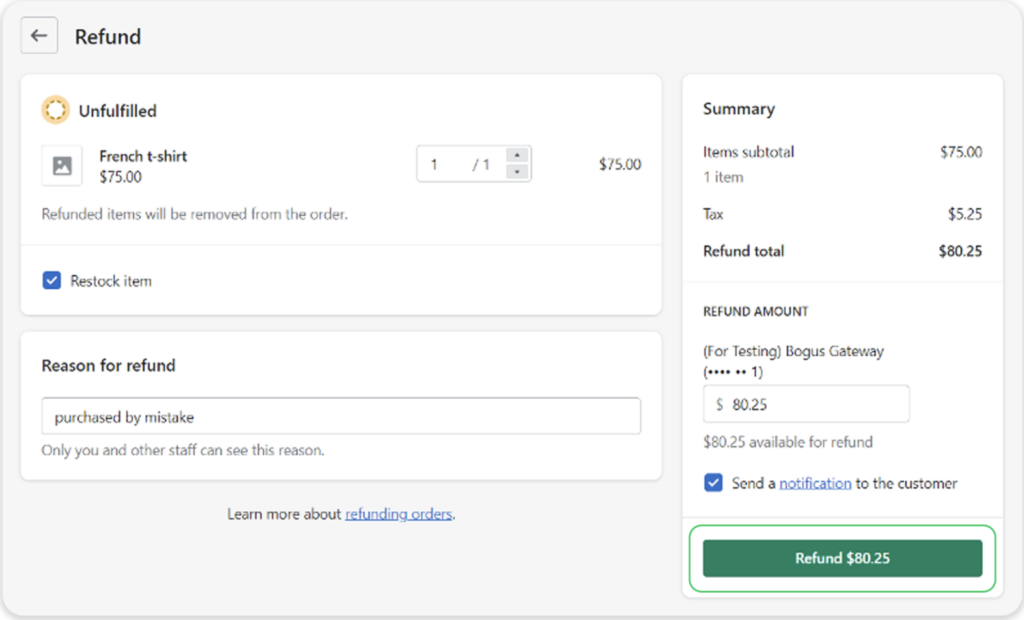
3. Once prompted, fill out the required information including:
Reason for refund
Refund amount
item(s) to return
4. Once complete, click Refund <amount>
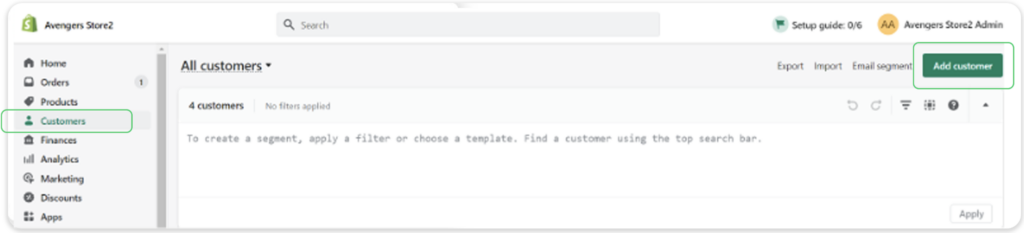
Part 5: Member Creation: Admin
1. Navigate to the Customers tab on the left menu bar, then click Add customer
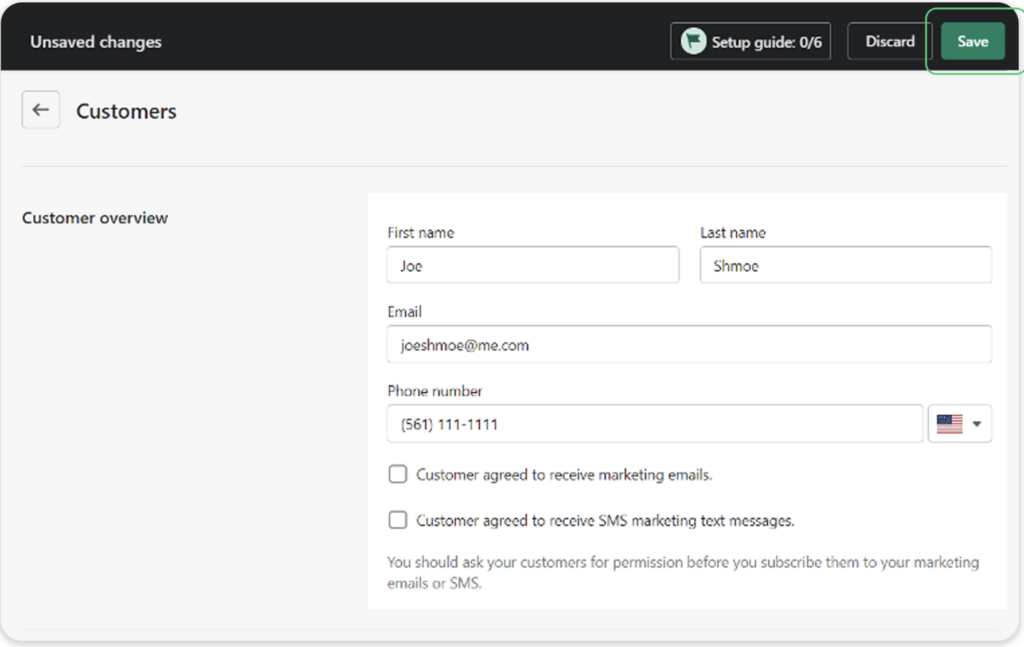
2. Fill out all the intended and required fields, and then click Save
3. Member attributes sent to Springbig:
First name
Last name
Address 1
Address 2
City
Region (state/province)
Zip code
Email address
Phone number
POS user
POS type
Allowed SMS
Allowed Email
Member attributes sent to Shopify from Springbig:
Customer ID
Email
Phone
Allowed SMS
Allowed Email
Part 6: Visit Creation: Admin
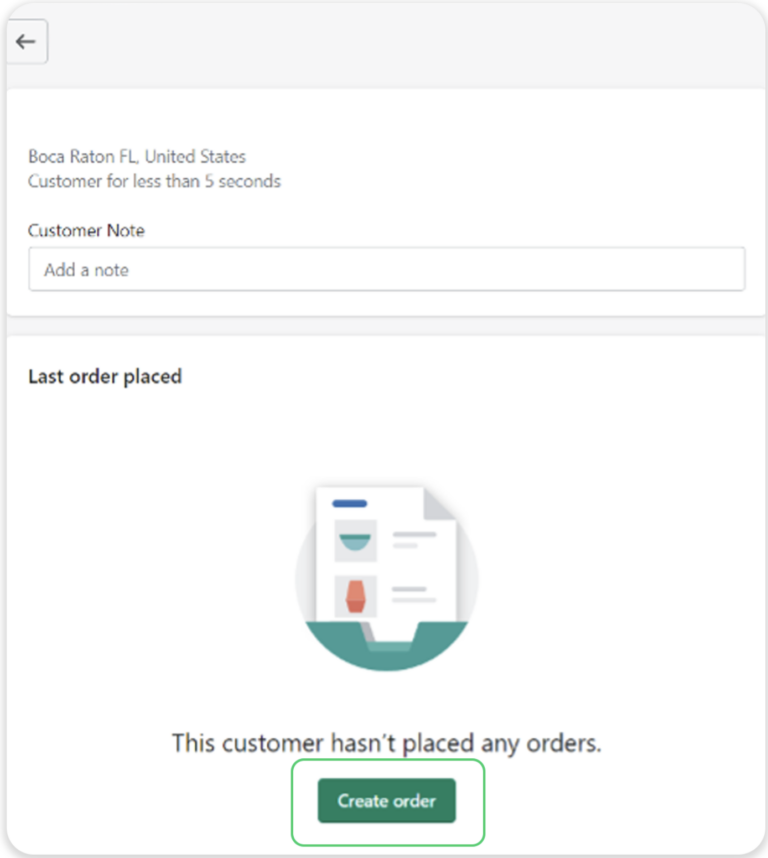
1. Navigate to the left menu bar and click Order, then click Create order
2. An alternative method of creating an order is
click the Customers tab
Select the intended customer
Click Create order
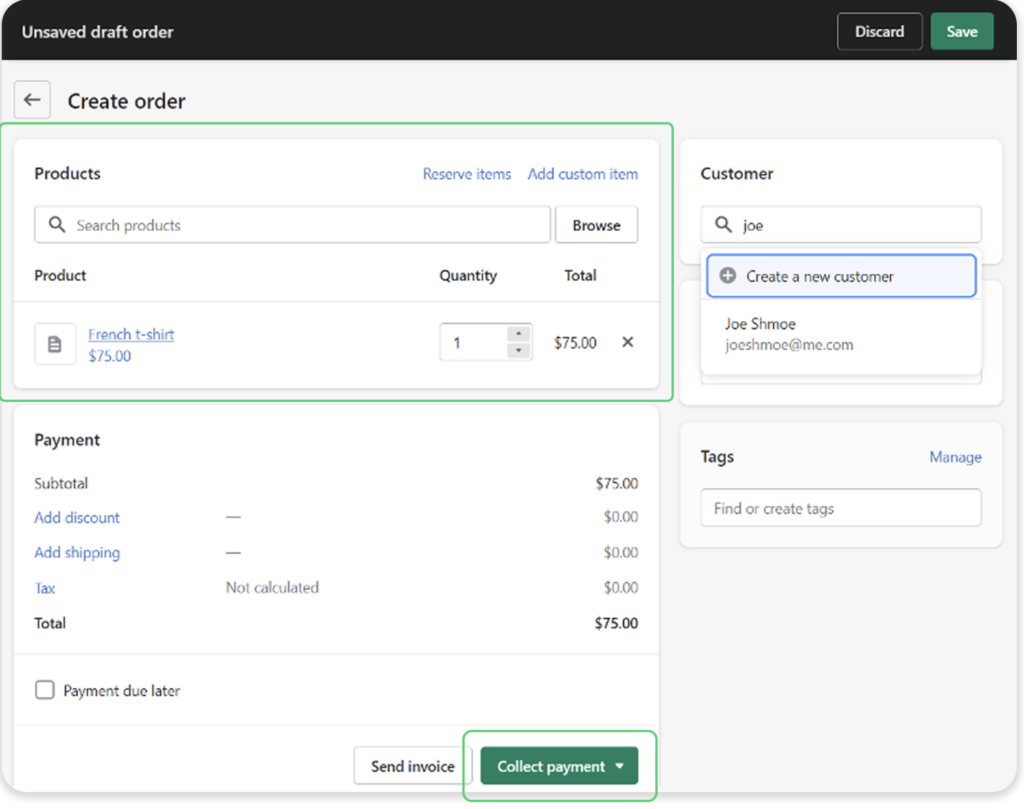
3. On the Orders page, search for the intended customer, browse the catalog, and select their product(s)
4. Click Collect payment to select the payment method
5. Visit attributes sent from Shopify to Springbig
POS type
POS item ID
Visit ID
Transaction date
Transaction total
Subtotal
Order source
Location
Total discounts
Total taxes
Item(s) price
SKU
Name
Quantity
Part 7: Order Cancellations
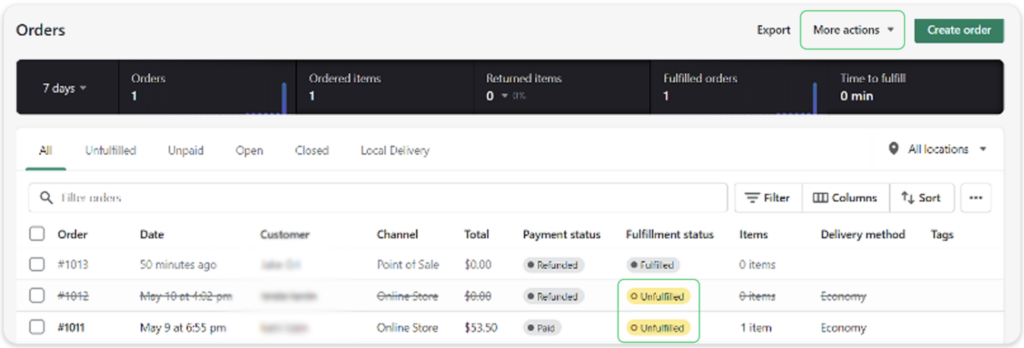
Navigate to the Orders page, select the intended order that has not yet been fulfilled, and then click More actions on the top right
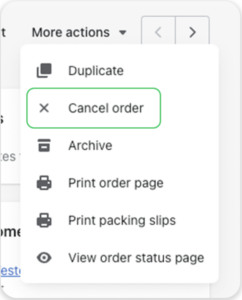
2. From the dropdown options, Click Cancel order
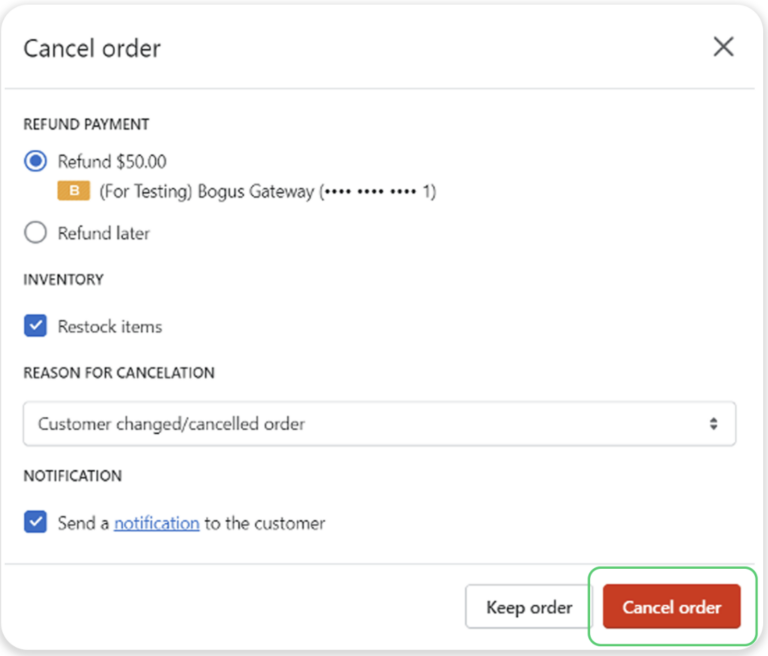
3. Fill out the required information, including:
Refund payment
Inventory restock
Reason for cancellation
4. Then click Cancel order
5. Once the order has been successfully canceled, the cancellation will display as Refunded and the line will be crossed off
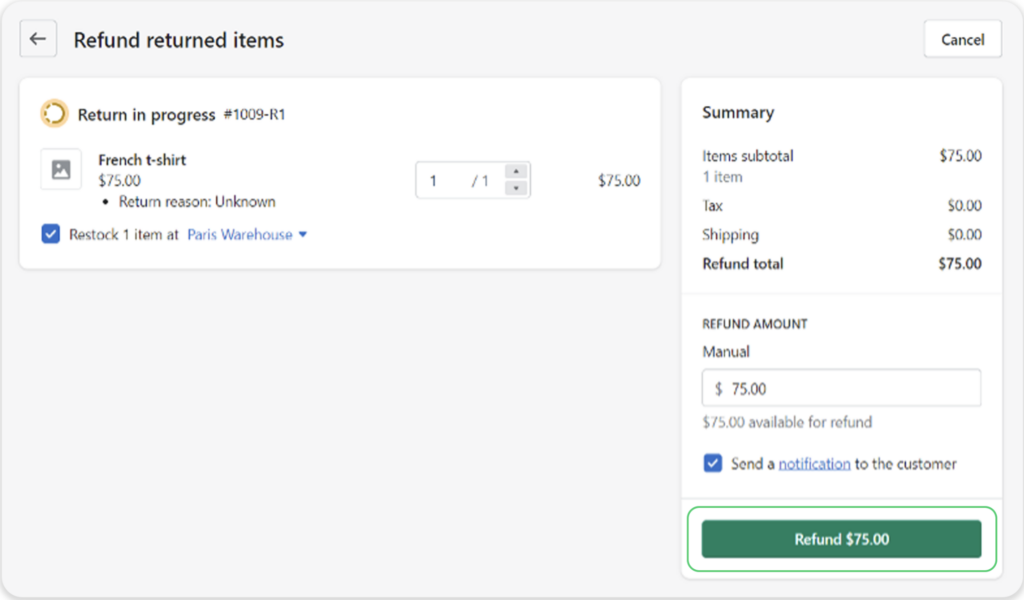
Part 8: Issuing Refund - Admin
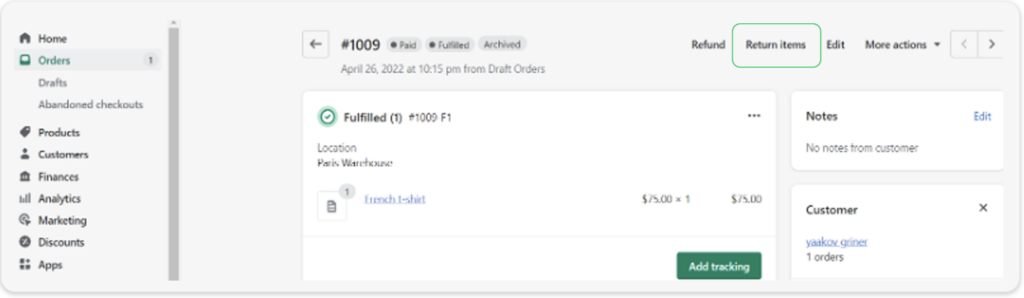
1. Navigate to the Orders page on the left menu and click on the intended order to refund
Note: before refunding an item, it must first be returned systematically.
2. Click Return items on the top right corner
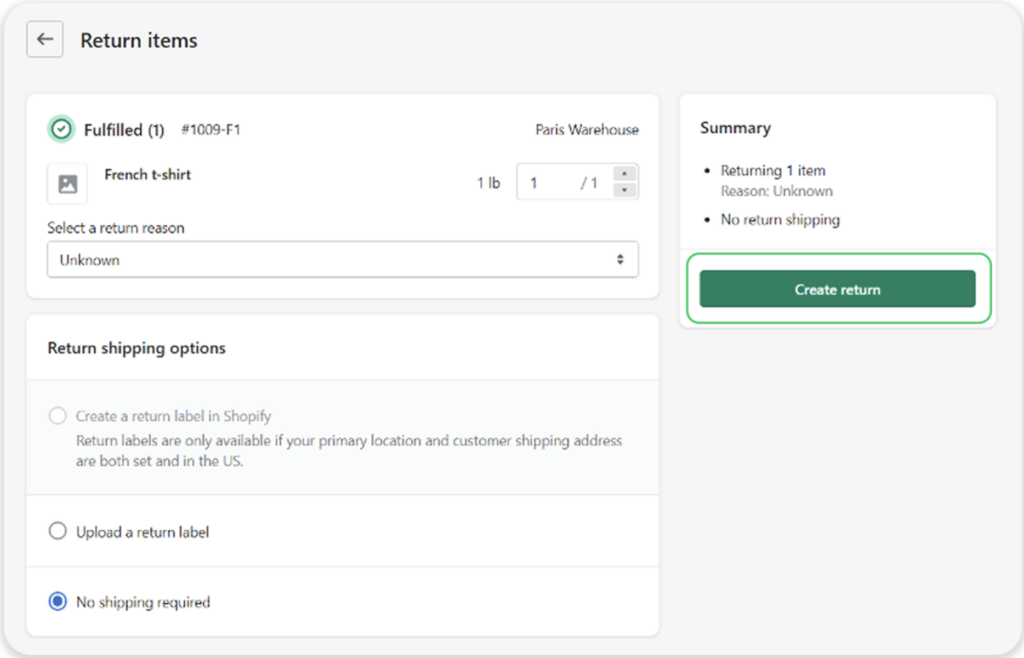
3. Once the necessary return requirements have been completed, click Create return
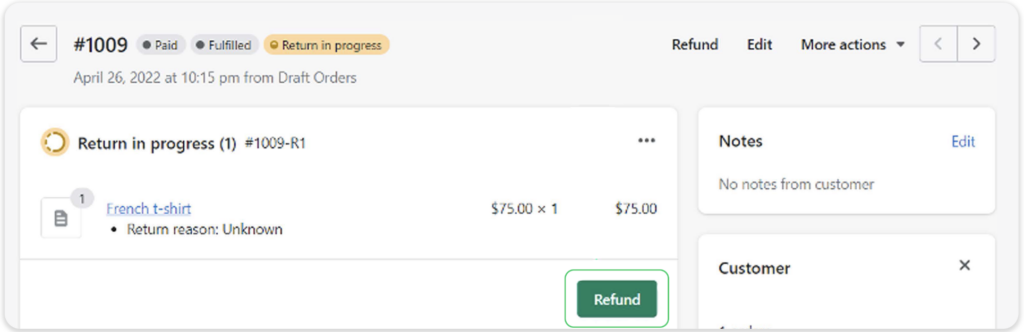
4. After the item(s) is returned, click Refund on the order
5. Fill in the required fields and click Refund <amount> to complete the refund process
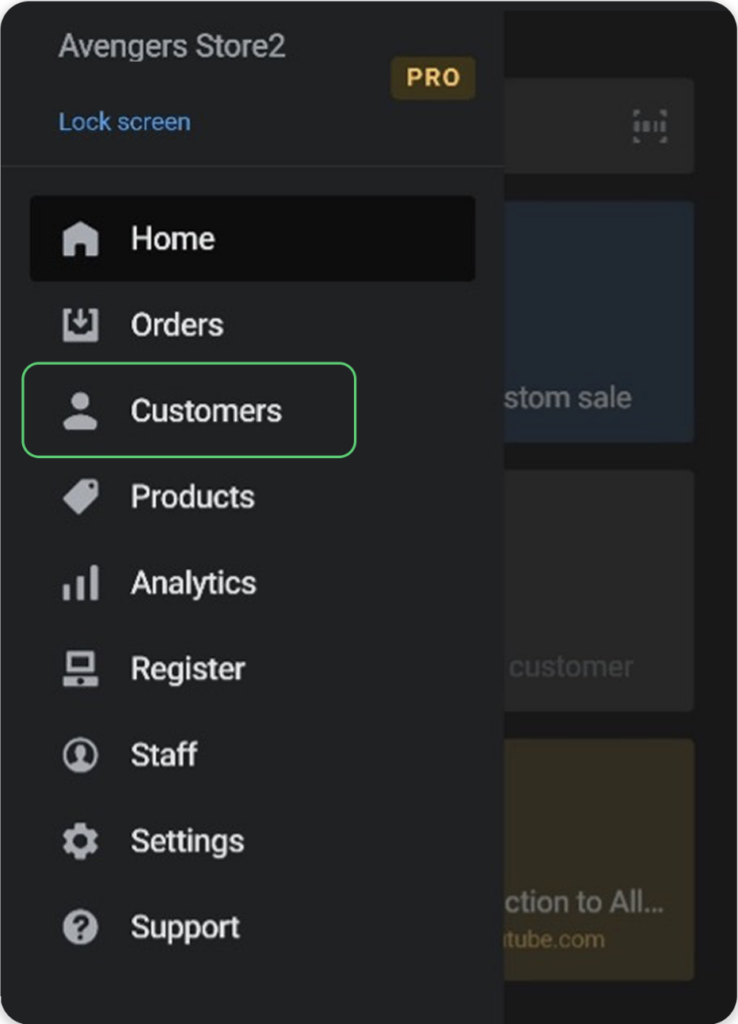
Part 9: Member Creation - POS
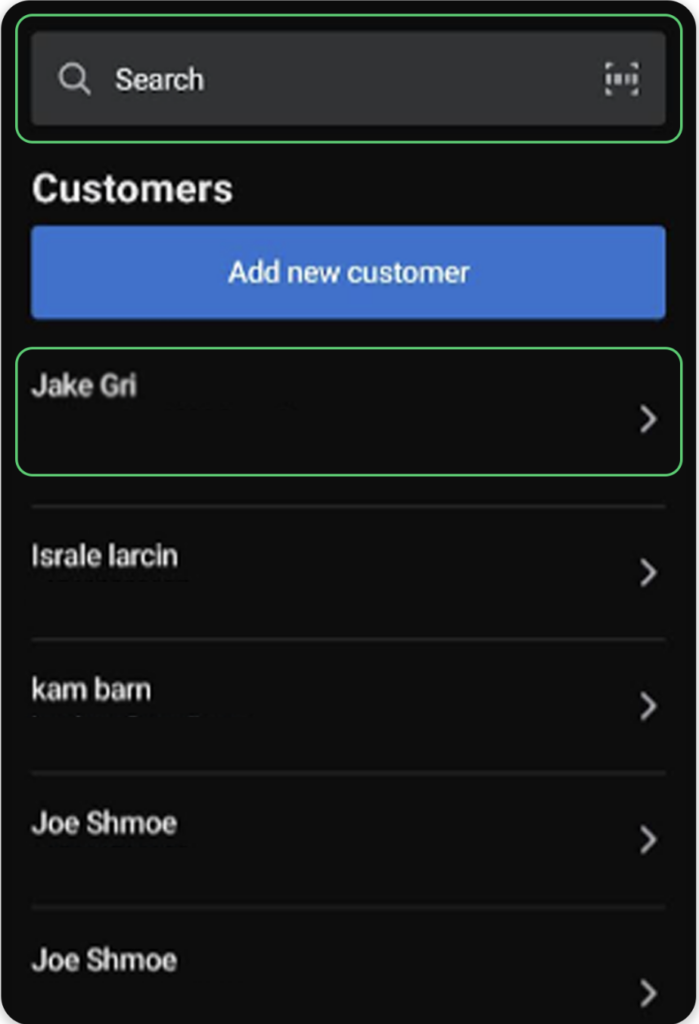
1. Navigate to the Customers tab on the bottom left menu
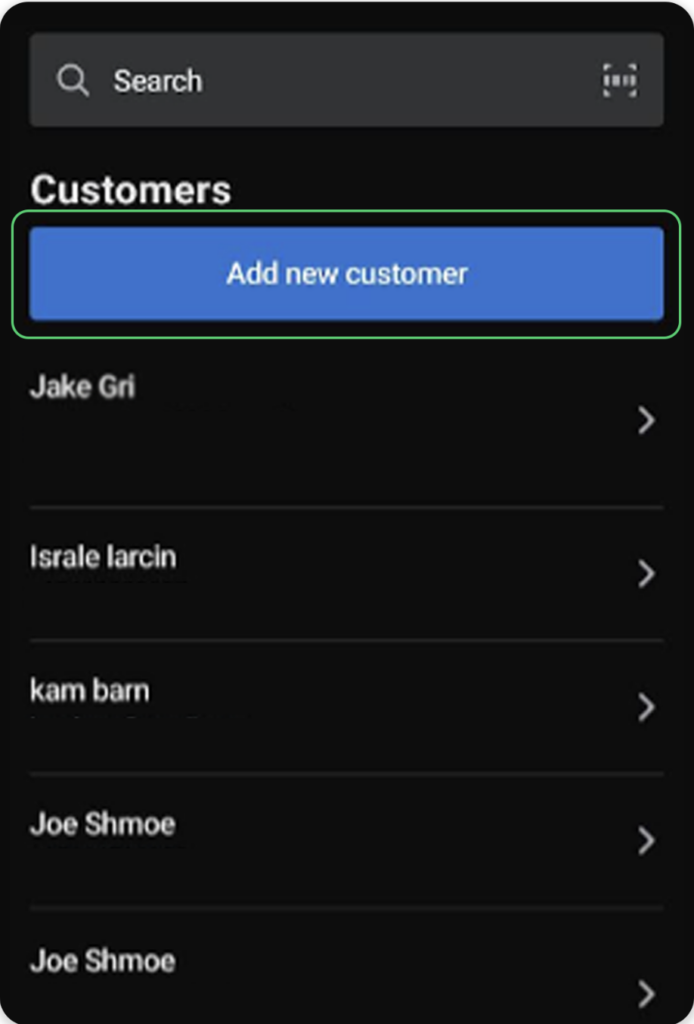
2. Next, click Add new customer
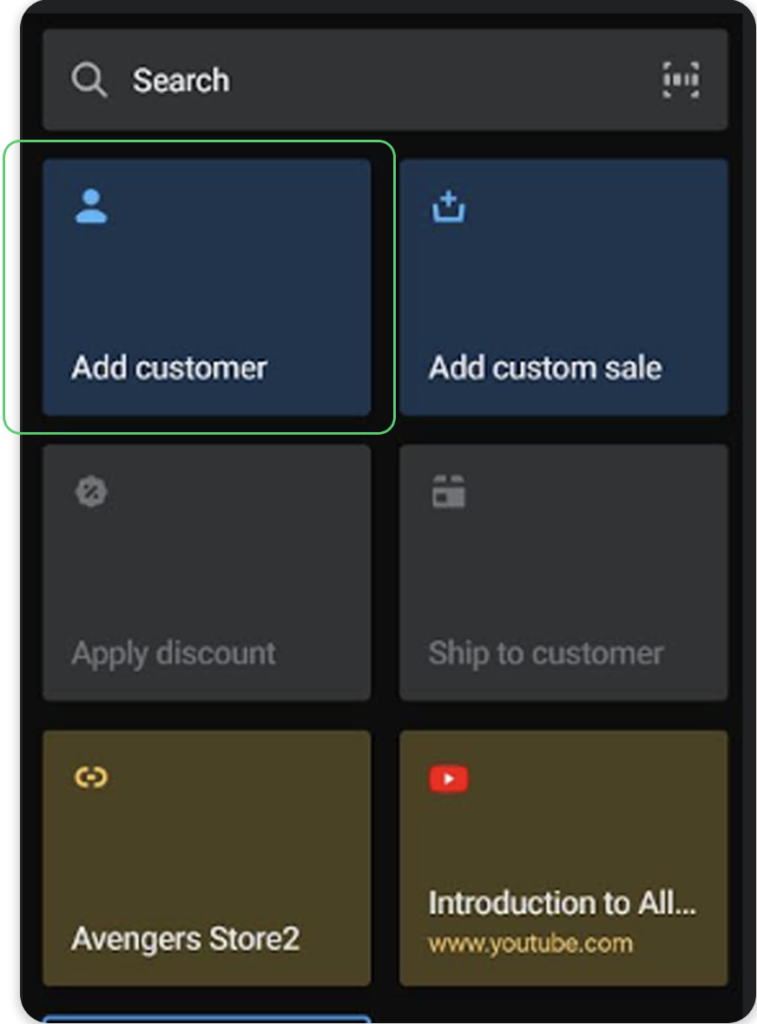
3. An alternative method of adding a customer:
On the homepage, click Add customer
Then on the next screen, click Add new customer
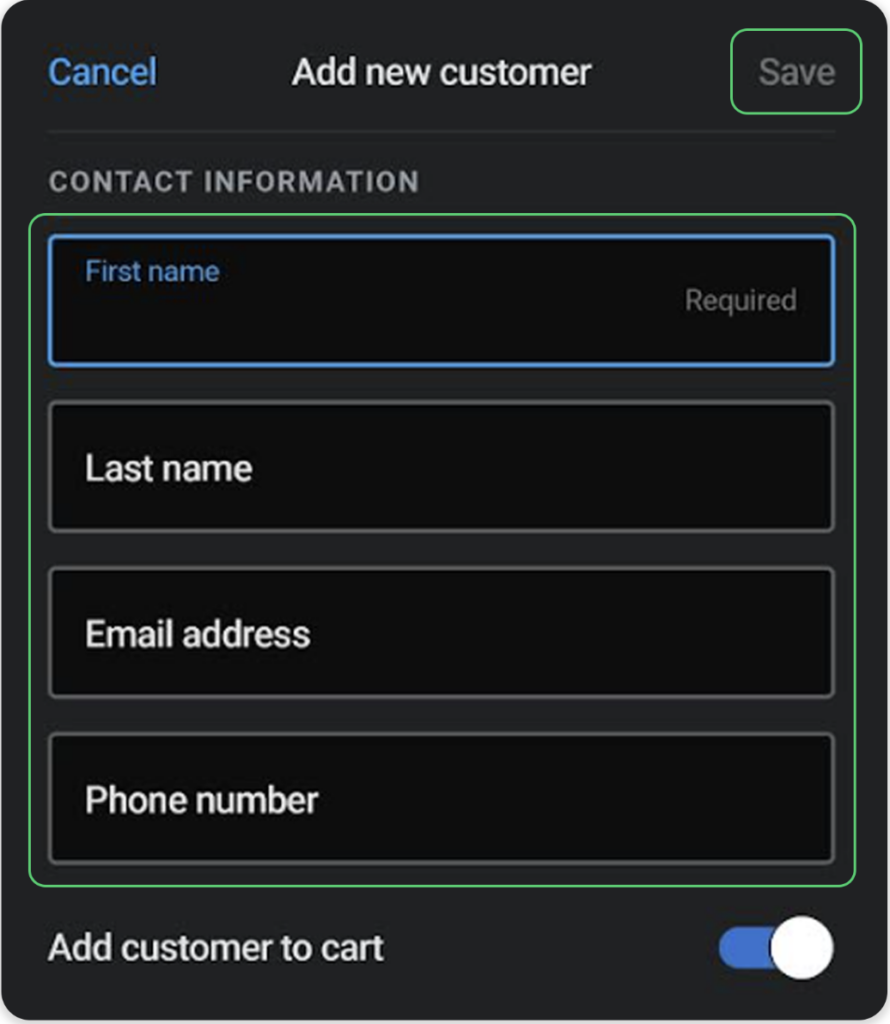
4. Fill out the member contact information as prompted, including:
First name
Last name
Email address
Phone numbe
5. Once completed, click Save on the top right
Part 10: Visit Creation - POS
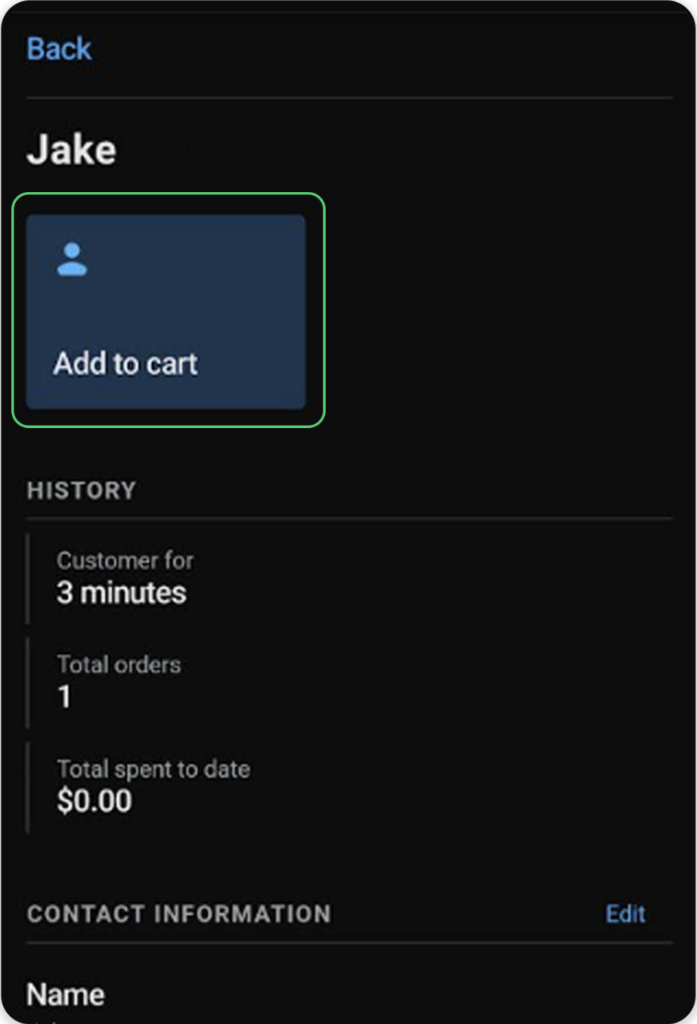
1. Once the member is checked in either by the search bar on the dashboard or by navigating to the Customers tab, click on the intended customer
2. Then click Add to cart
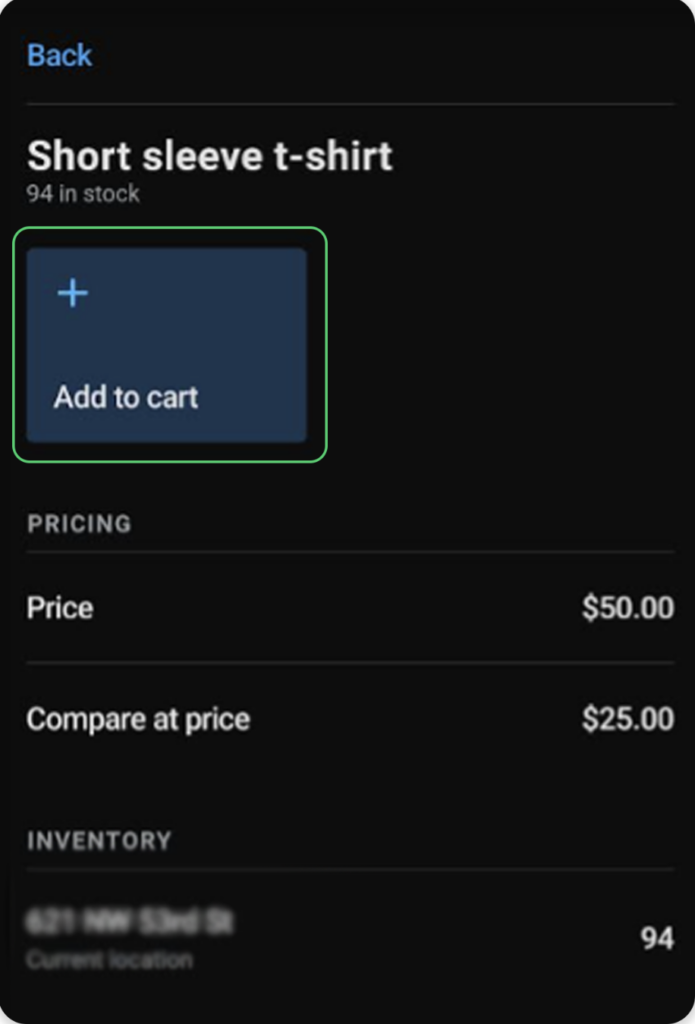
3. Next, navigate to the Products tab and select the intended product
4. Then click Add to cart
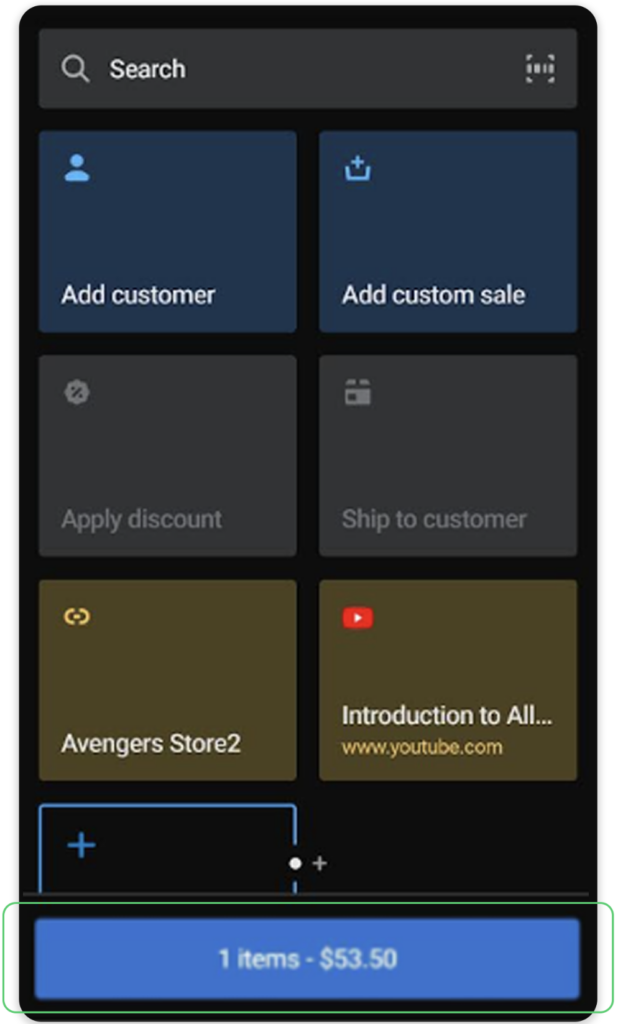
5. Navigate to the home tab and click on the blue button that specifies the cart total and number of items to checkout
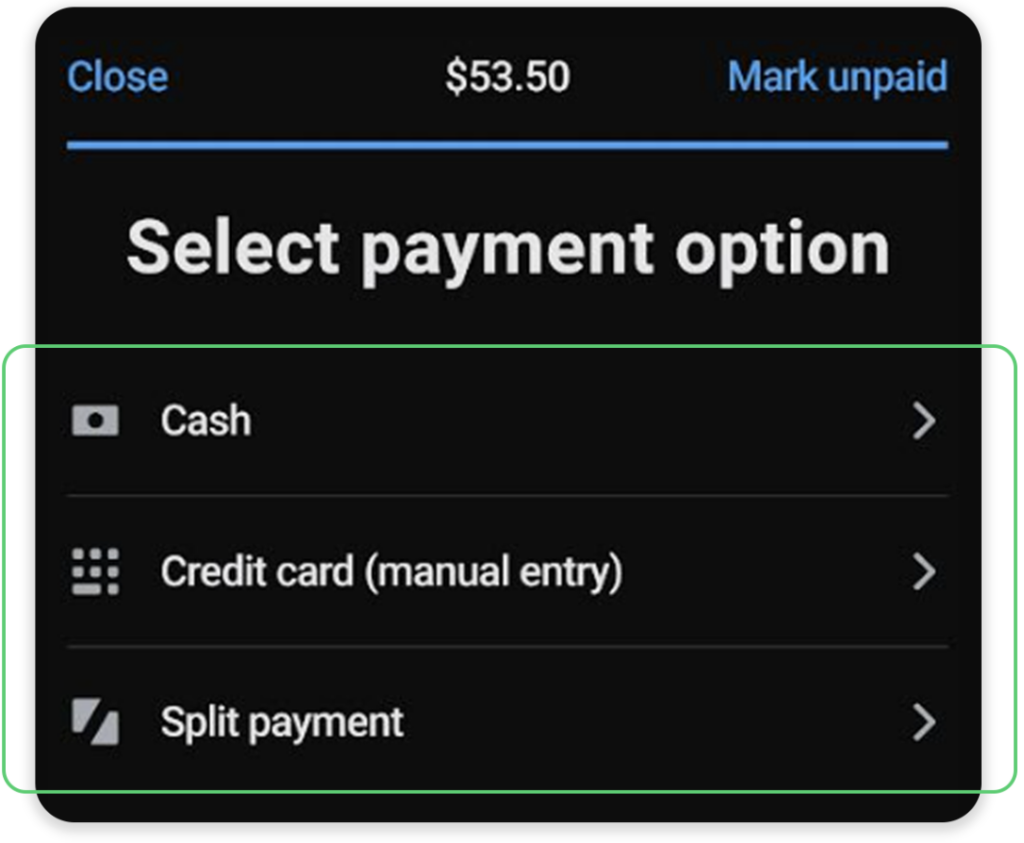
6. Then select your payment method
Part 11: Issuing Refunds - POS
1. Navigate to the Orders tab, search for and click on the order you’d like to refund
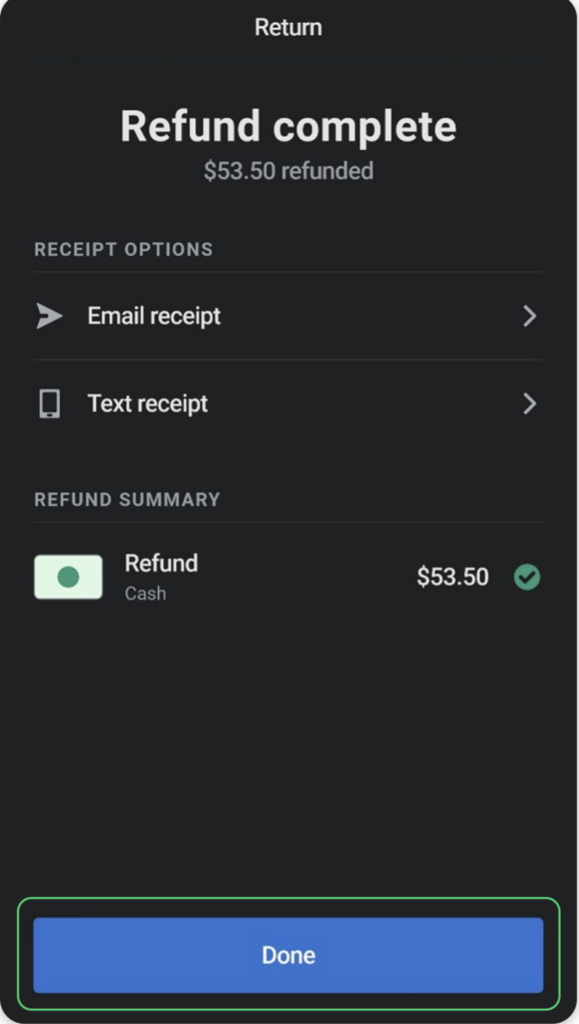
2. Once that order is opened, click Return
3. Next, scroll down to the bottom of the page and click Done to complete the return
Part 12: Automating Marketing with Shopify Flow + Springbig
Springbig’s integration with Shopify Flow gives you powerful automation tools to send personalized messages based on real-time customer actions.
Trigger Springbig SMS messages based on Shopify events or segments. Ensure customers are opted-in and deliver messages that drive immediate engagement.
Set up flows to automatically send Springbig email campaigns based on events like abandoned checkout, customer segmentation, or order actions. No coding required.