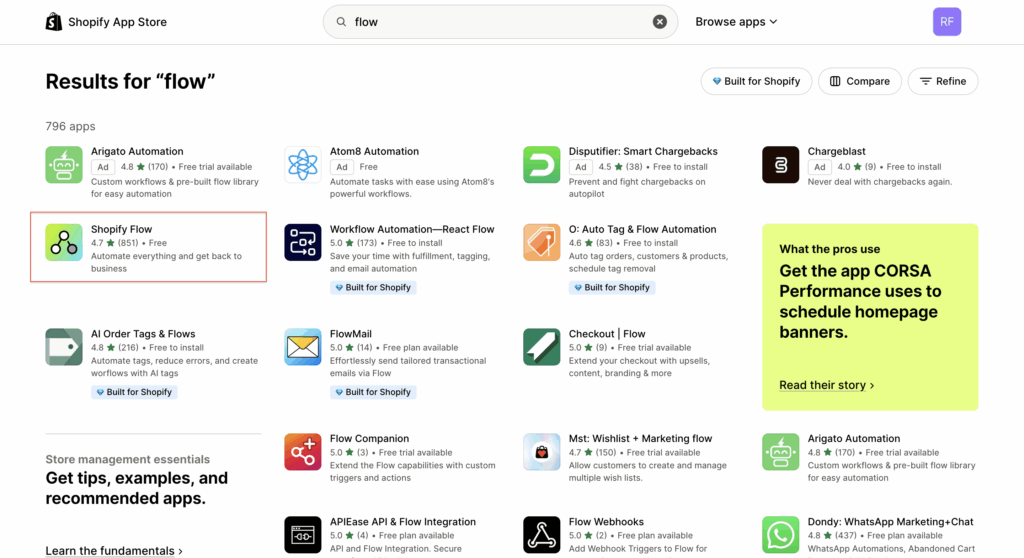
AUTOMATING SPRINGBIG EMAIL TRIGGERS USING SHOPIFY FLOWS
This guide walks you through setting up a Shopify Flow that automatically sends Email messages via Springbig. Merchants can now harness the rich customer and behavioral data from Shopify with Springbig’s Email marketing engine—all without leaving the Shopify admin.
What You’ll Learn
Set up Shopify Flow to send Email through Springbig
Use triggers like “Abandoned Cart” or customer segments
Create conditions to ensure customers are opted into Email
Create your email template in springbig
Send HTTP requests to Springbig to trigger emails
Manage API keys securely using Shopify secrets
WHY USE THIS INTEGRATION?
Through this integration, Shopify merchants gain access to the full power of Springbig’s Email marketing while leveraging the vast behavioral and transactional data available in Shopify. This combination allows merchants to:
Send personalized and timely emails
Re-engage customers who abandoned carts
Reward high-value or frequent shoppers
Win back customers who stopped engaging
Target based on product views, email inactivity, collection visits, and more
Think of this integration as unlimited segmentation + email automation= growth machine
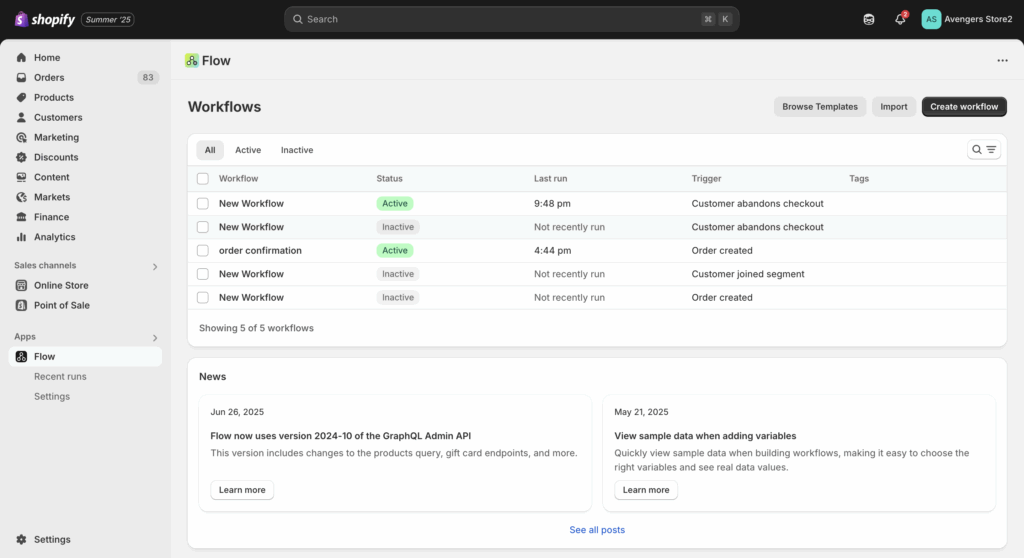
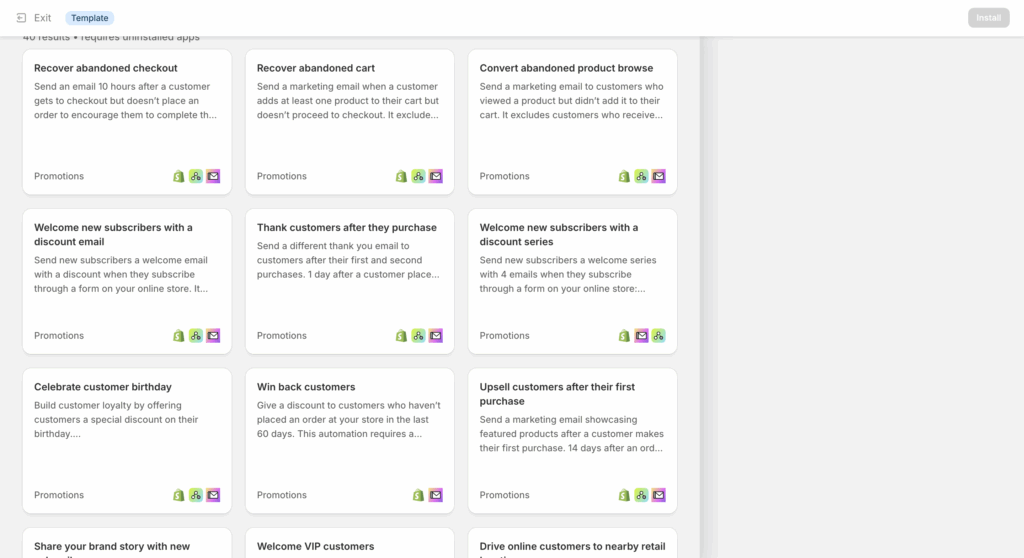
The following screenshot is browse templates. Take a look here to get some ideas on automation flows you can setup, however, they do need to be adjusted to trigger an Email message through Springbig
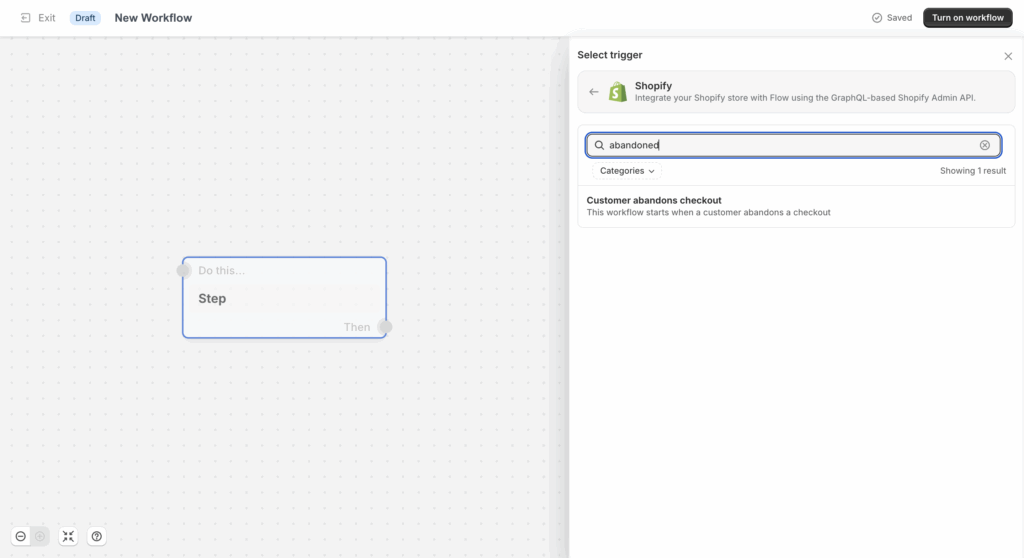
Step 3: Choose a Trigger
After selecting create workflow in the previous step, Click Select a trigger
click the shopify app on the right side of the page
here you will see a large list of triggers (75+) like: order created, refund created, etc..
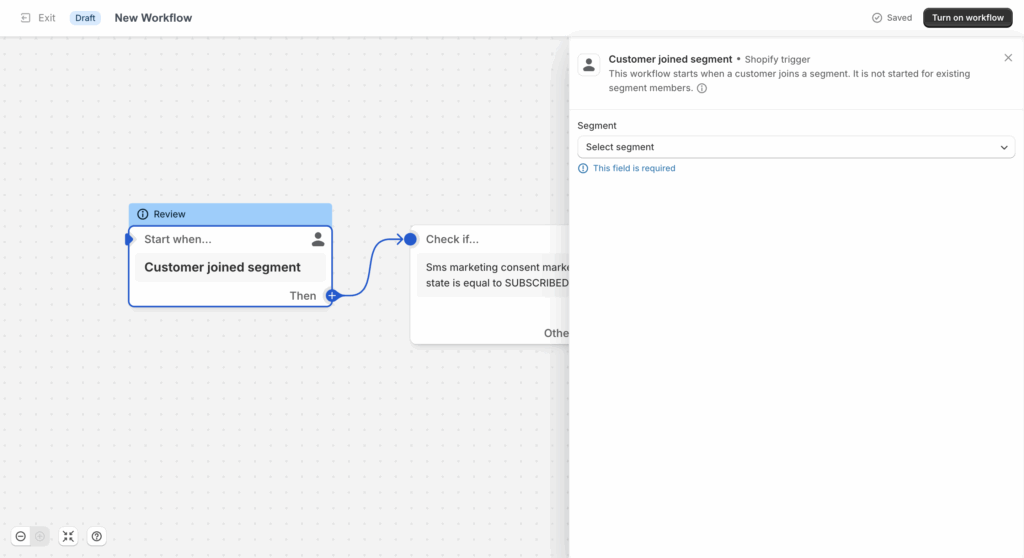
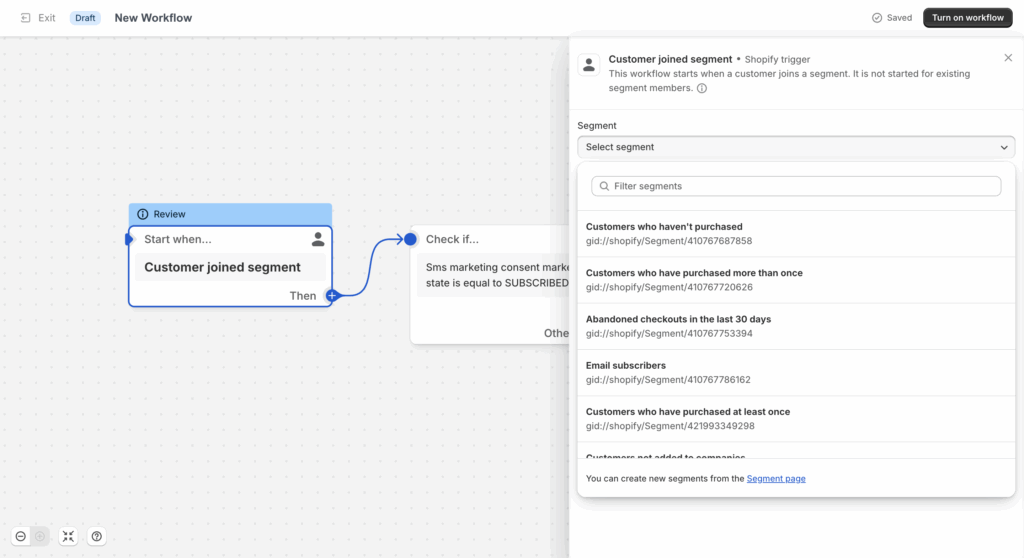
You can also use a segment-based trigger ‘customer joined segment’
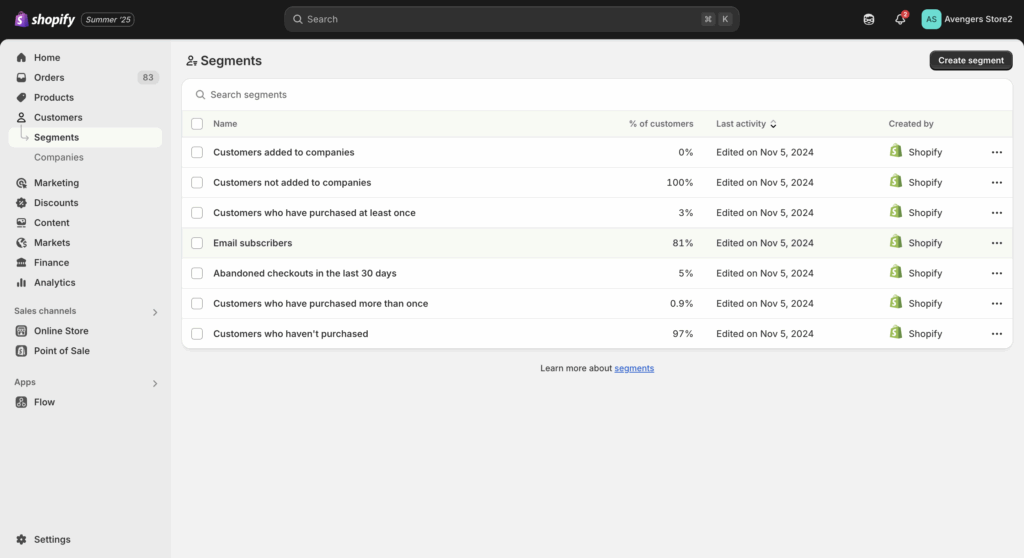
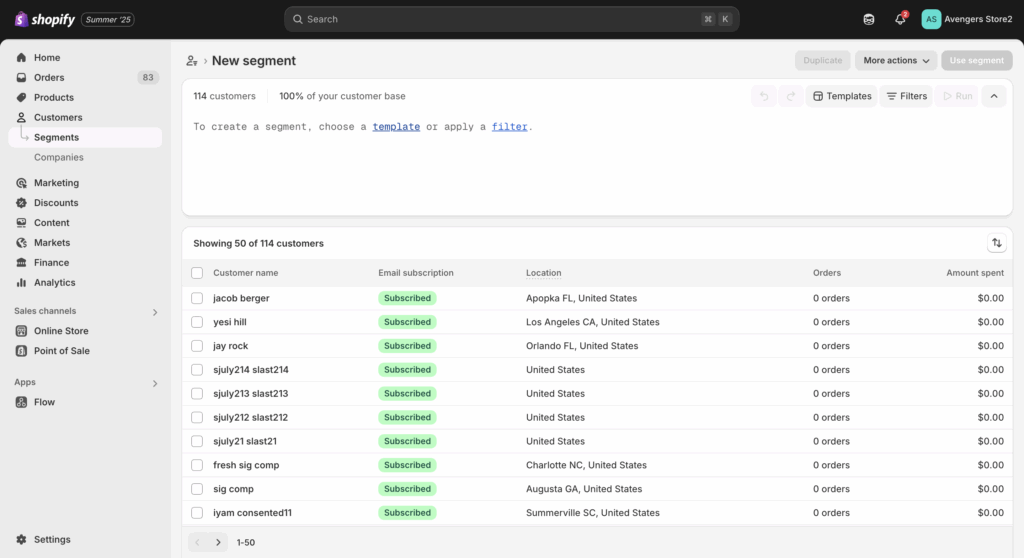
See the section below on how to create a segment
For this guide we will be using the example of ‘Customer abandons checkout’. Search for this trigger and select it.
An abandoned cart in Shopify is defined as a customer adding an item to their cart, going to checkout, filling in their details and then leaving the checkout, within 1 hour of inactivity.
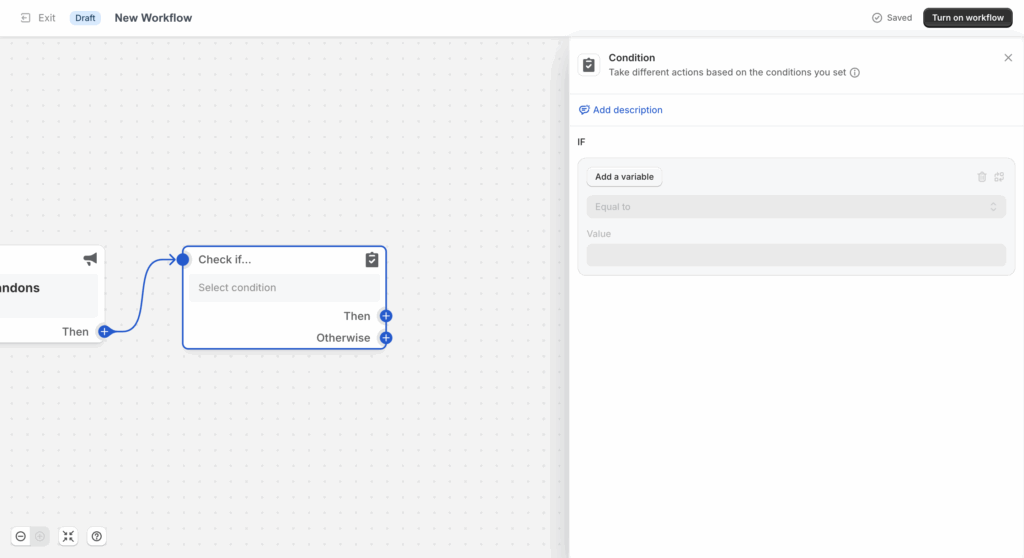
Step 4: Add an Email Opt-In Condition
Under Then, click the + → choose Condition
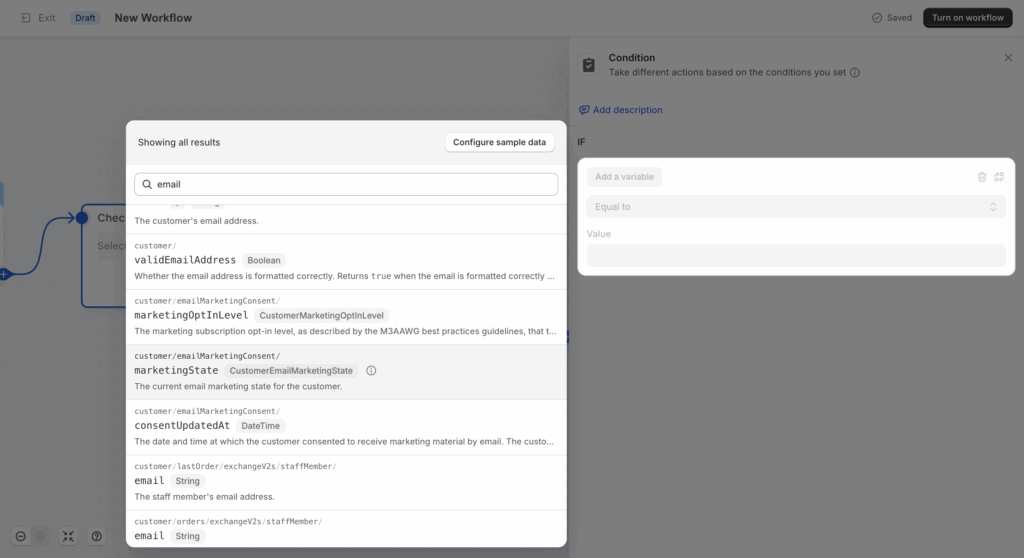
Click Add a variable
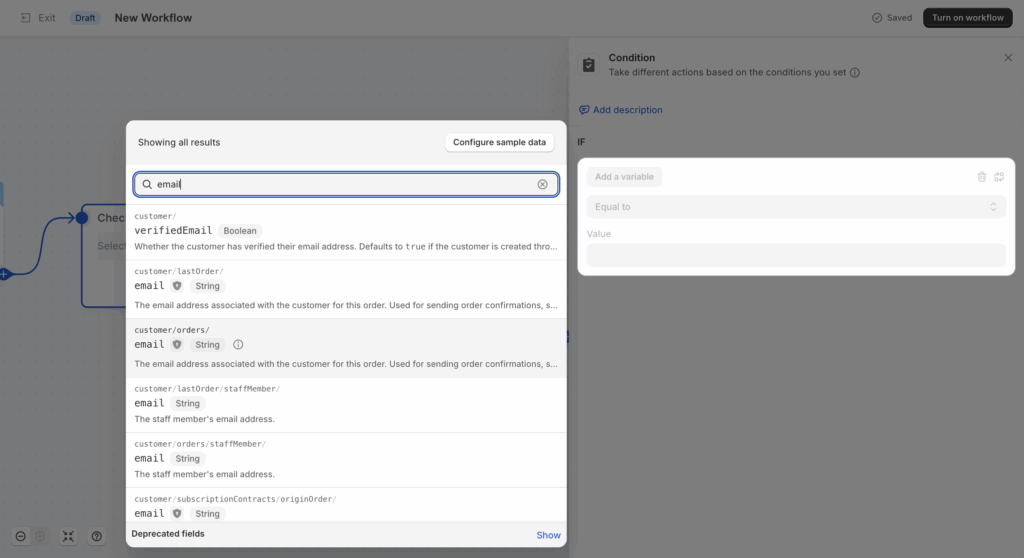
Search for email
Check Show deprecated fields
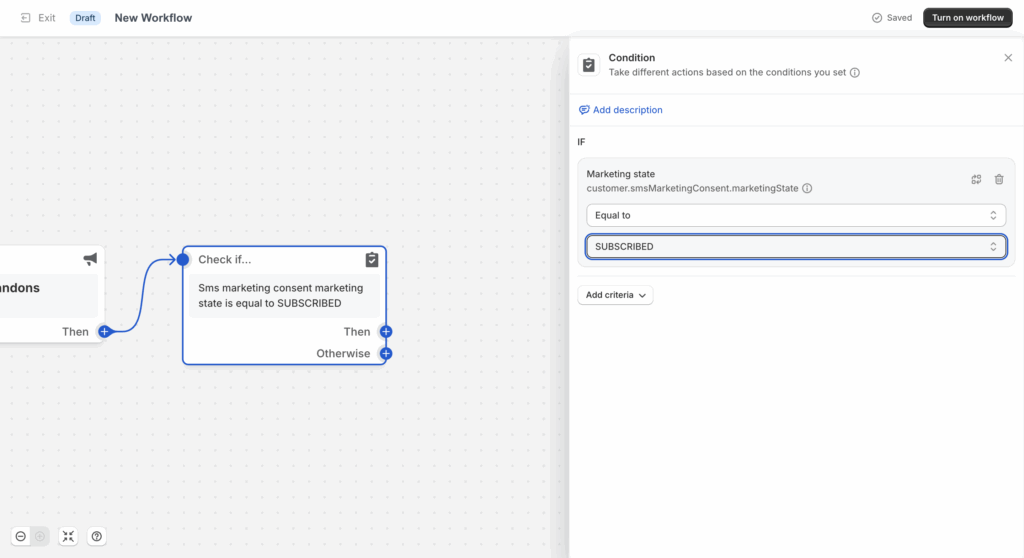
Select CustomerEmailMarketingState
Set condition: is equal to → Subscribed
Before moving on to the next step, make sure you have your email template created and ready to send from within Springbig. See that section here!
Step 5: Trigger the Springbig email Action
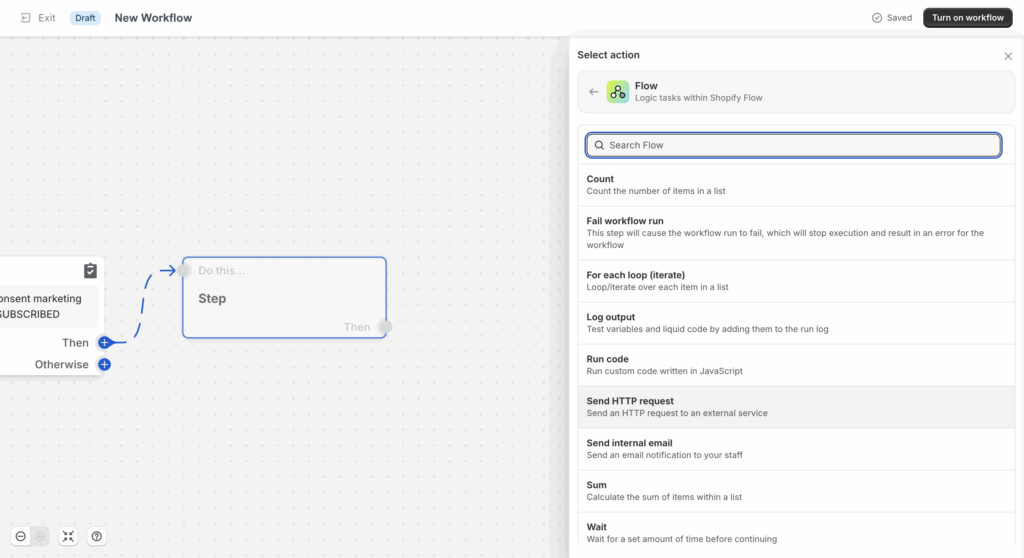
Under the next Then, click the + → select Action
Choose Flow → Send HTTP Request
If you have a cURL from your CSM, click Import cURL
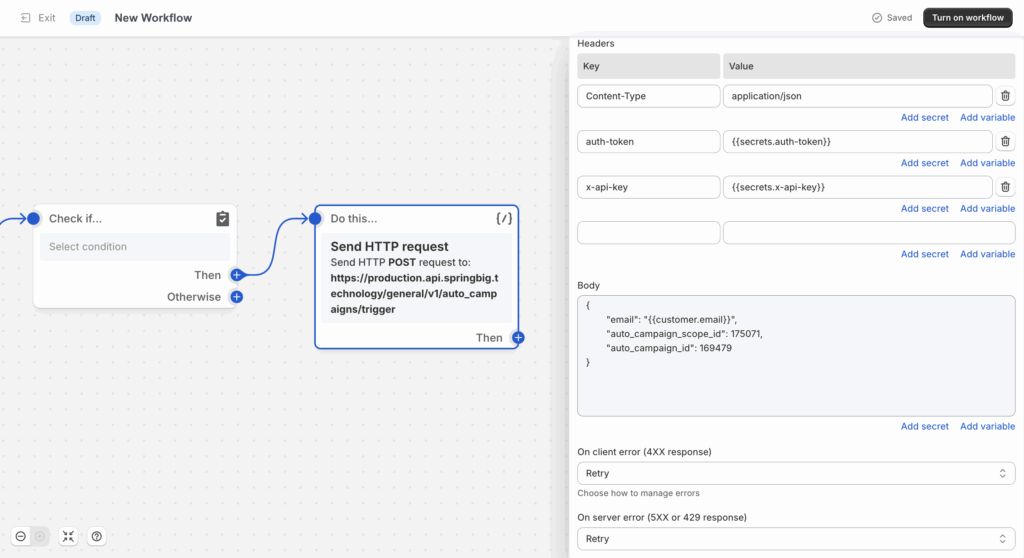
Or fill in the details manually as laid out in the next section HTTTP Request Configuration:
Description: The ID that connects to the email template message you would like to send in this flow.
Ask your CSM for this ID
auto_campaign_scope_id
Description: The ID that connects to the email template message you would like to send in this flow.
Ask your CSM for this ID
email
Description: the email you would like to send to when they come into this flow
you can select ‘add a variable ‘ and use a liquid dynamic variable like{{customer.email}}
Step 6: Finalize
Click Apply changes
Turn the workflow ON
Your Automated Workflow is now LIVE!
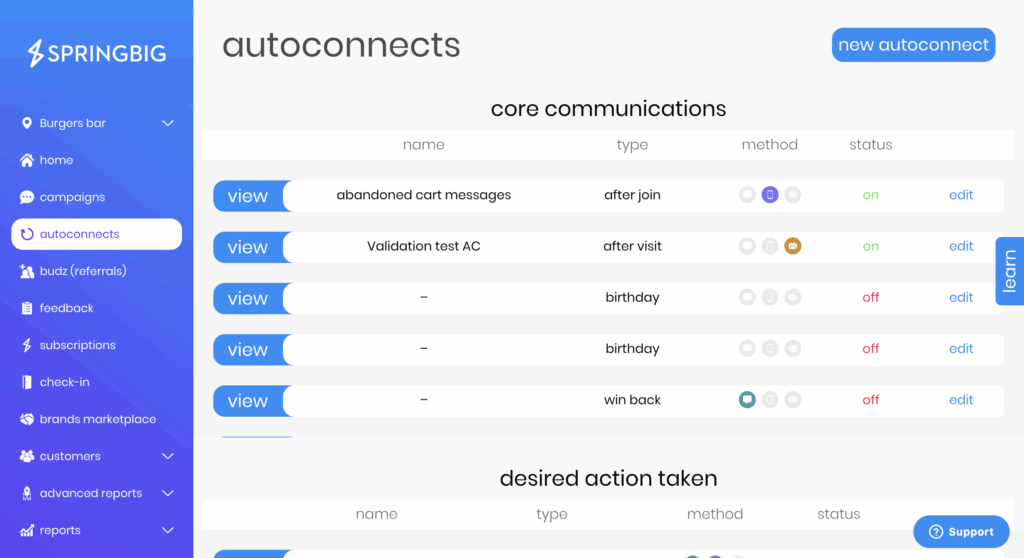
CREATE EMAIL TEMPLATES IN SPRINGBIG
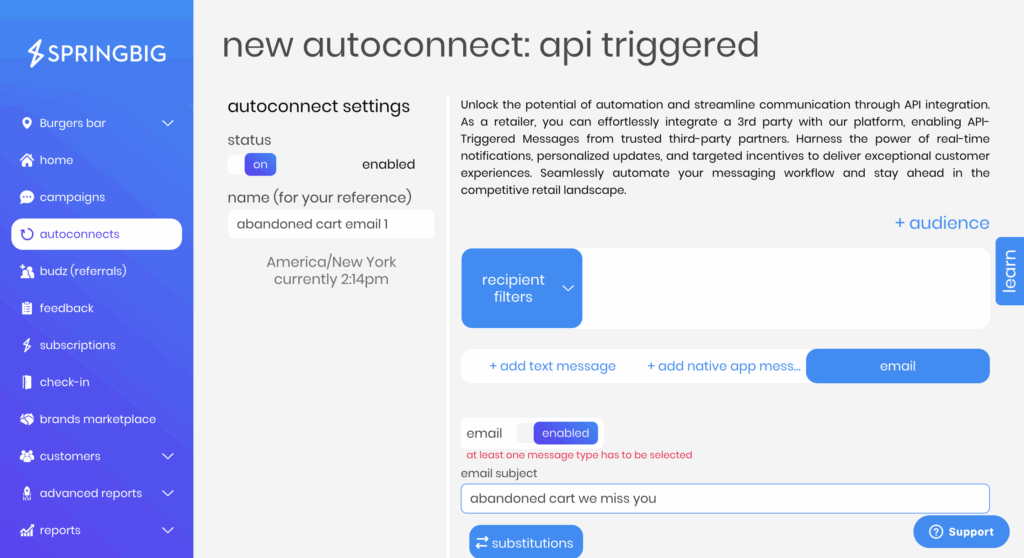
In the menu bar select autoconnects > new autoconnect
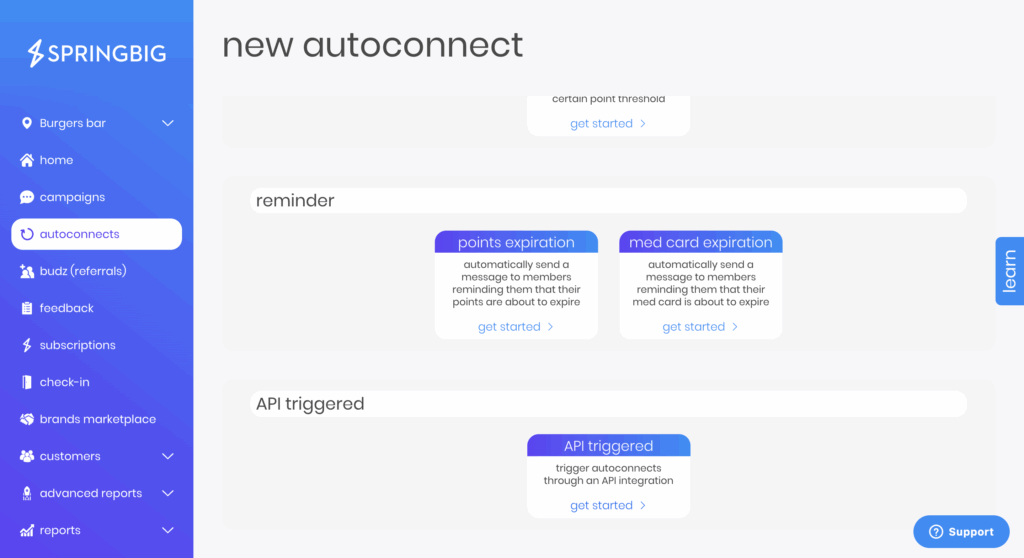
2. Scroll down to the bottom of the page and select api triggered > get started
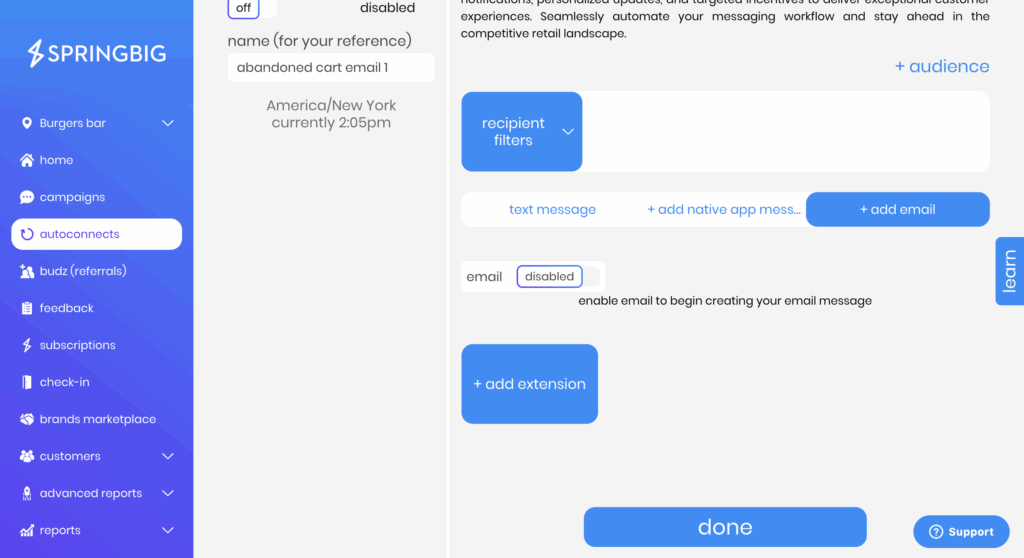
3. Name your autoconnect, then click add email to set the campaign type as an email, and enable
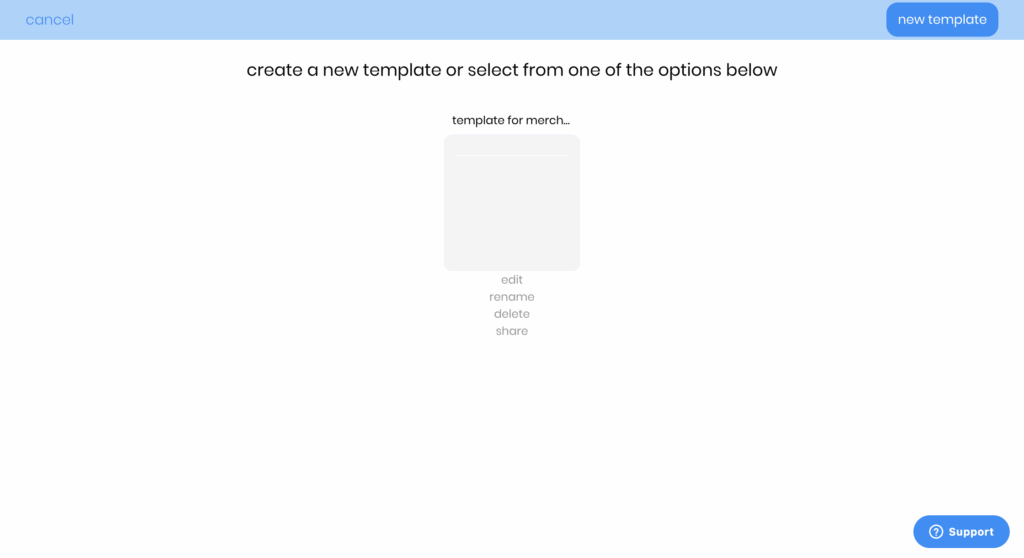
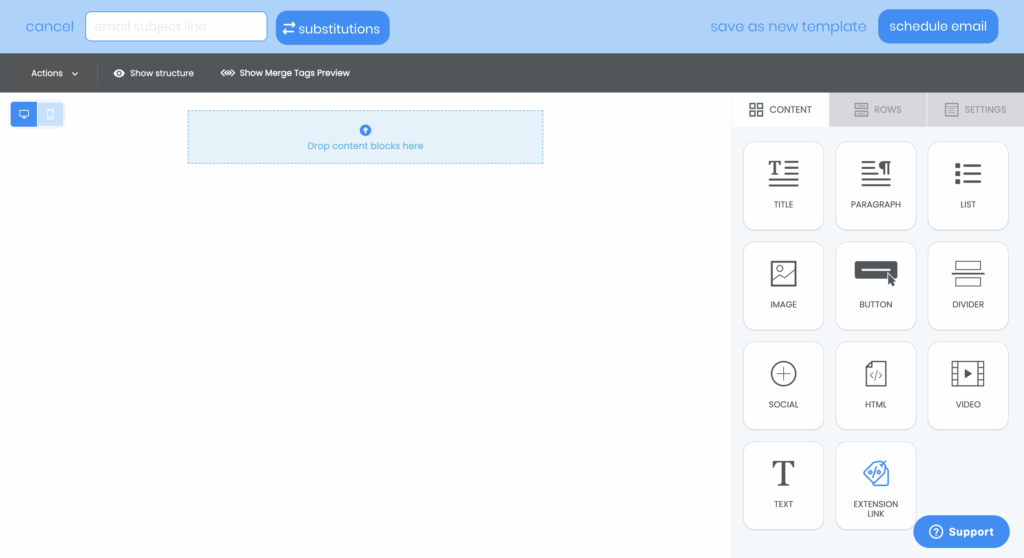
4. You will now be taken to our email builder tool. If you have any questions about the tool please ask your CSM. You can browse existing templates or create a new one
5. Here is a quick view of creating a new one. Add a subject line and select schedule email when finished building your email template
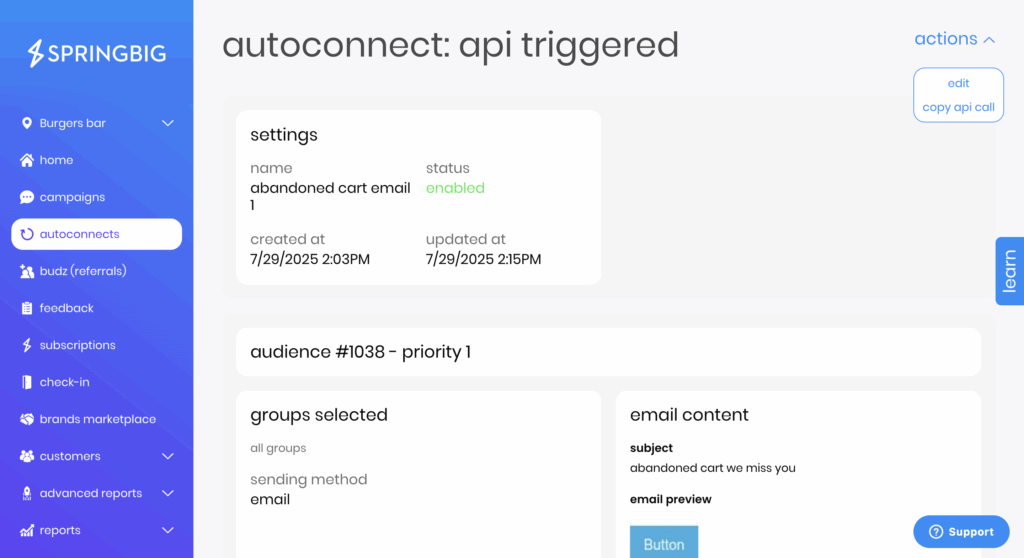
6. Enable the autoconnect and click done at the bottom
7. In the next page click actions > copy api call. This will be needed for the body JSON when setting up the flow action.
TRIGGERING FROM SEGMENTS
Using the Shopify app option in the right hand side, Set trigger as: Customer joins segment
If segment already exists, choose it and build flow from there
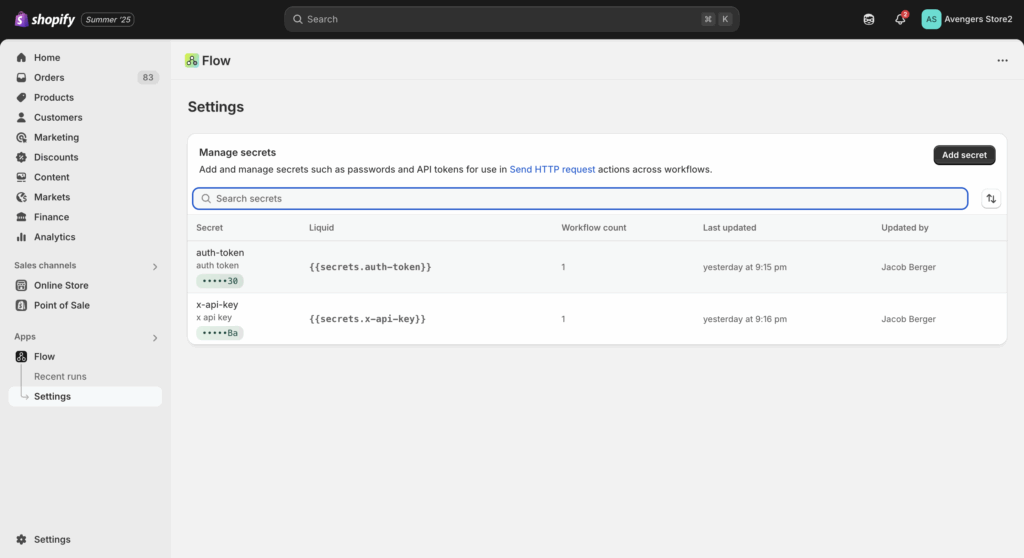
Ask your CSM for Springbig API credentials - auth token and x api key
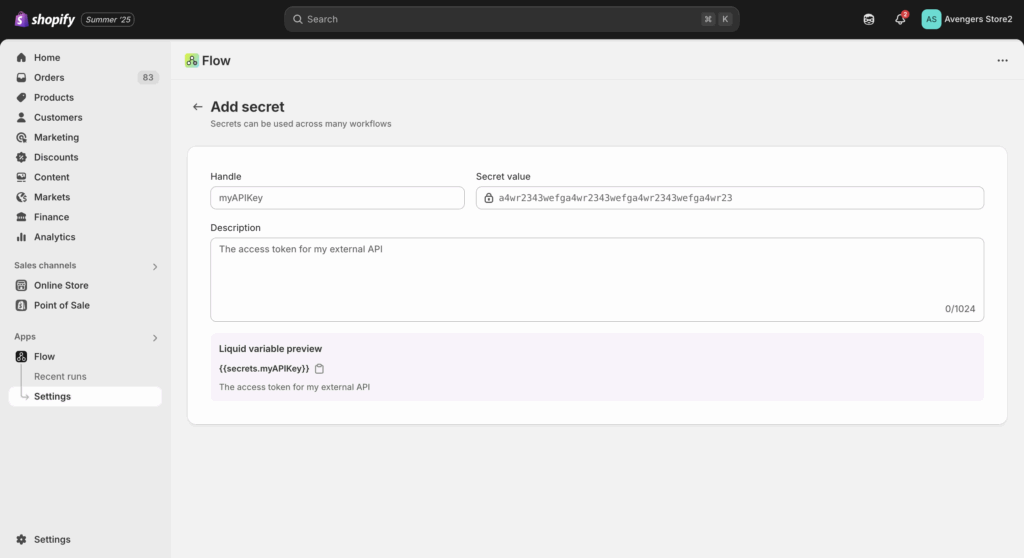
In the Send HTTP Request step, click Add secret under headers
Click Manage secrets → redirected to admin
Click Add secret
Set handle name like auth-token or x-api-key
Enter value (your token or API key)
Add description for clarity
Save and return to Flow to use the secrets
FAQ
Q: What is the purpose of this integration? A: It allows Shopify merchants to automatically trigger Springbig email campaigns using Shopify Flow events like abandoned cart, customer segmentation, or purchases—without needing to leave Shopify.
Q: What do I need before starting setup? A: You’ll need an active Shopify store, the Shopify Flow app, a Springbig account with API credentials, and at least one email template created and enabled in Springbig.
Q: How do I get the auto_campaign_id or auto_campaign_scope_id? A: These values are linked to your Springbig email template. Click Actions → Copy API Call in the Springbig dashboard, or contact your Springbig CSM.
Q: Can I use other triggers besides Abandoned Cart? A: Absolutely. Shopify Flow supports 75+ triggers including order created, refund issued, or segment joined. You can create flows based on almost any customer or order behavior.
Q: Can I use customer segments as a trigger? A: Yes. Choose “Customer joins segment” as a trigger in Shopify Flow. You can build segments like high spenders, inactive customers, or product viewers directly in Shopify.
Q: How do I ensure only opted-in users receive the email? A: Add a condition using CustomerEmailMarketingState and set it to Subscribed. This ensures compliance with marketing regulations.
Q: What if I don’t see CustomerEmailMarketingState as a variable? A: Click Add a variable, search for email, and check “Show deprecated fields” to make it appear.
Q: How do I securely store my Springbig API keys? A: Use Shopify’s Secrets tool. In the HTTP request step, click “Add secret” for each header. Never paste keys directly—this helps keep your credentials safe.
Q: Do I need developer skills to set this up? A: Nope! Everything is configured using Shopify’s point-and-click Flow builder and Springbig’s dashboard—no coding required.