Offers
Offers are different than rewards in that they expire and will only display in the wallet during their period of validity. Member offers can be created and will upload directly to your member’s wallet, regardless of their opt in status.
Rewards are based on points earned with Springbig loyalty. Before creating rewards, ensure that your program settings are setup in settings – account settings – program settings.
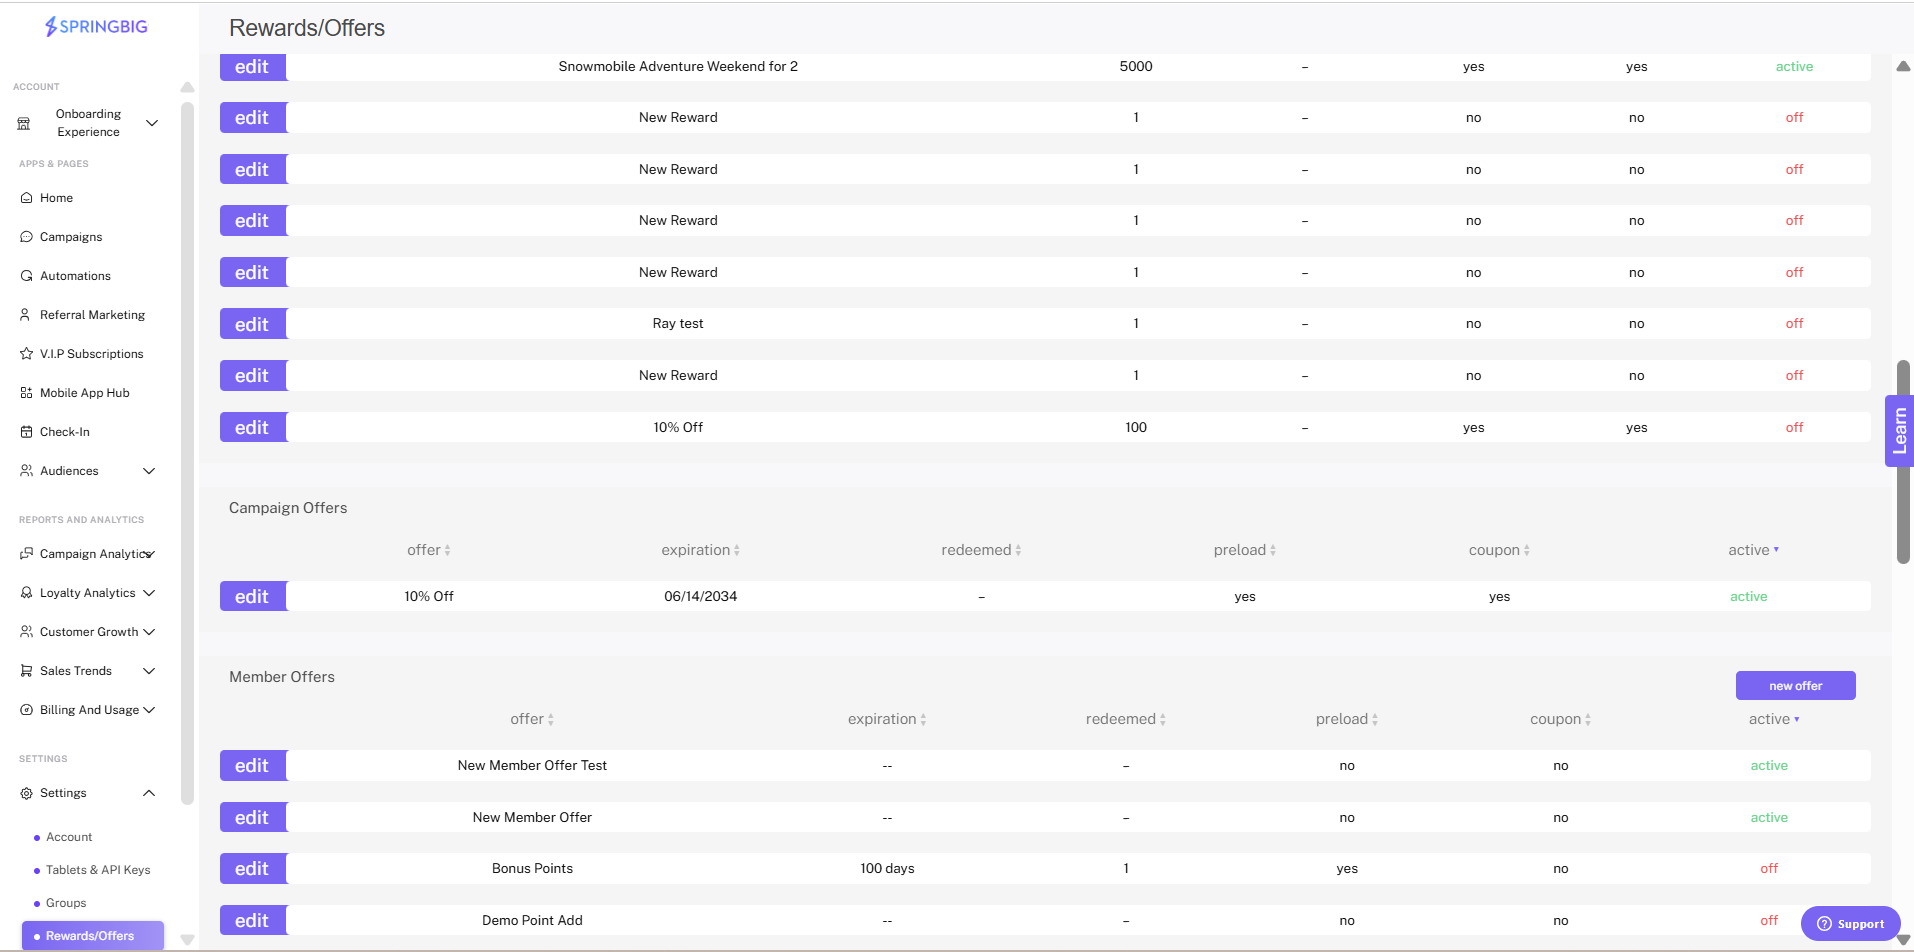
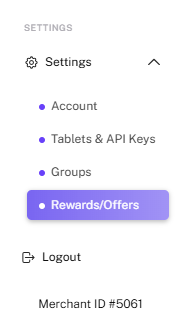
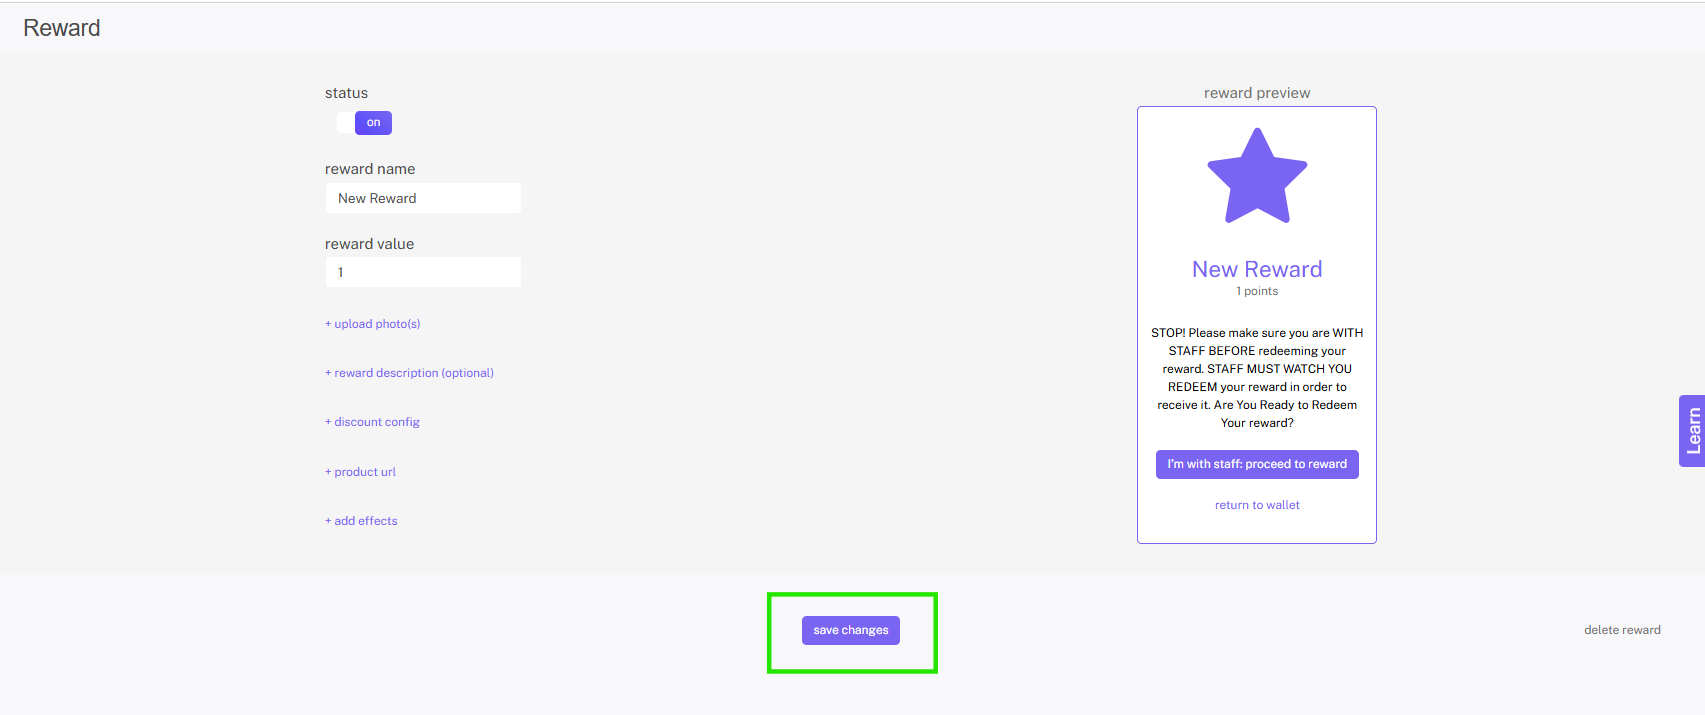
Step 1: Navigate to the Springbig main menu, click settings, and then rewards/offers.
Step 2: Click the new reward button

Step 3: Click Create Reward
Step 4: Make sure to turn the status to on when you are ready to activate reward
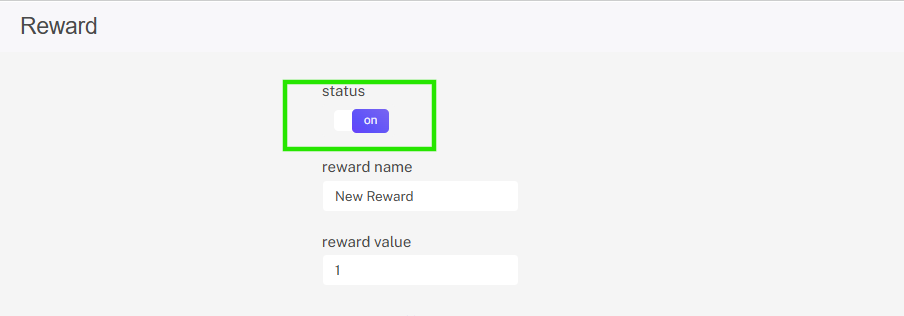
Step 5: Click save changes
Note: You can change the status of rewards to off to disable the reward. You can also delete rewards, however you will not be able to delete rewards that have been redeemed – this is to maintain your redemption reporting. If you have any questions about managing your rewards, reach out to your Springbig contact.
Step 1. Go to the main Springbig menu and select campaigns
Step 2. Click new campaign
Step 3. During the campaign creation process, click the + add extension dropdown menu and select between:
digital voucher
bonus points
instant points
Digital Voucher
A digital voucher allows you to send a voucher / coupon to your customers with anything included in the field.
Note: For help creating digital vouchers, check out the digital vouchers creation guide here.
Bonus Points
The Bonus points extension allows you to include an offer with a point incentive for customers to earn more points with their next purchase. You will be able to create a bonus points offer directly from the campaigns page by clicking add extension then bonus points or from the offer configuration page by clicking settings > rewards and offers > new offer.
To create the bonus points offer, follow the direction of creating a reward/offer below.
Note: There are three fields unique to bonus points that are not displayed in the rewards/offer creation guide below.
Those are the following:
Bonus Type: Select either + add or x multiply. + add will reward the customer with the number of points you input in the bonus value field when they meet the requirements for the bonus points reward. x multiply will multiply the number of points the customer would have gotten from the purchase by the specified number inputted in bonus value.
For example: if the customer would have received 100 points from the purchase originally, and the bonus value is 2, they would instead receive 200 points.
Bonus Value: The amount of points awarded by the bonus (if + add is selected) or the number the original amount of points will be multiplied by (if x multiply is selected).
Minimum purchase amount: The minimum transaction amount that allows the customer to receive the bonus points.
Note: Instant points offers will not show a preview because the customer will never actually see the offer, they’ll just get those points automatically deposited to their account.

Instant Points:
The instant points extension will automatically add points to anyone the offer is sent to.
Note: Instant points offers will not show a preview because the customer will never actually see the offer, they’ll just get those points automatically deposited to their account.
Direct to the left-hand Springbig menu
Click autoconnects
Click new autoconnect
Select intended autoconnect
Select track offer
Click done
Creating Rewards and Offers
Once you’ve clicked new offer or new reward you’ll be taken to the rewards/offers creation page. Our rewards and offers creator allows retailers to create unique and incentivizing rewards and offers for customers. While creating your reward/offer, you’ll be able to see a preview of the reward/offer to the right in the preview box.
Note: Instant point offers will not show a preview because the customer will never actually see the offer, they’ll just get those points automatically deposited to their account.
Step 1: Under settings click on the rewards/offers tab and click on either new reward, or new offer
Note: For this example, we’ll be showing the creation of an offer.
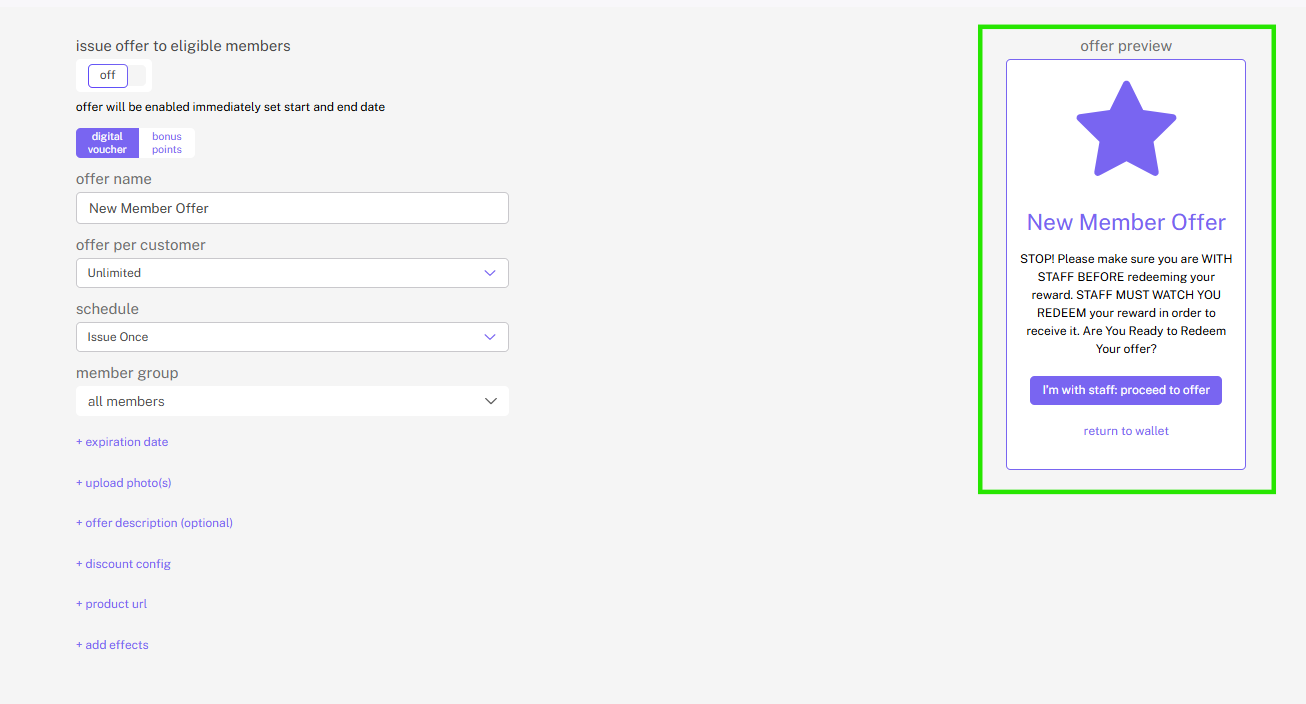
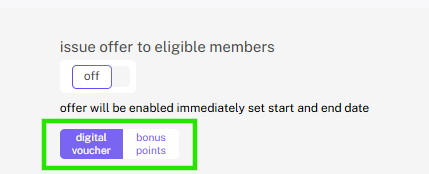
Step 2: Once here, choose whether you would like the reward or offer to be a digital voucher or bonus points.
Note: Rewards will not have the bonus points option
Step 3: Name your offer
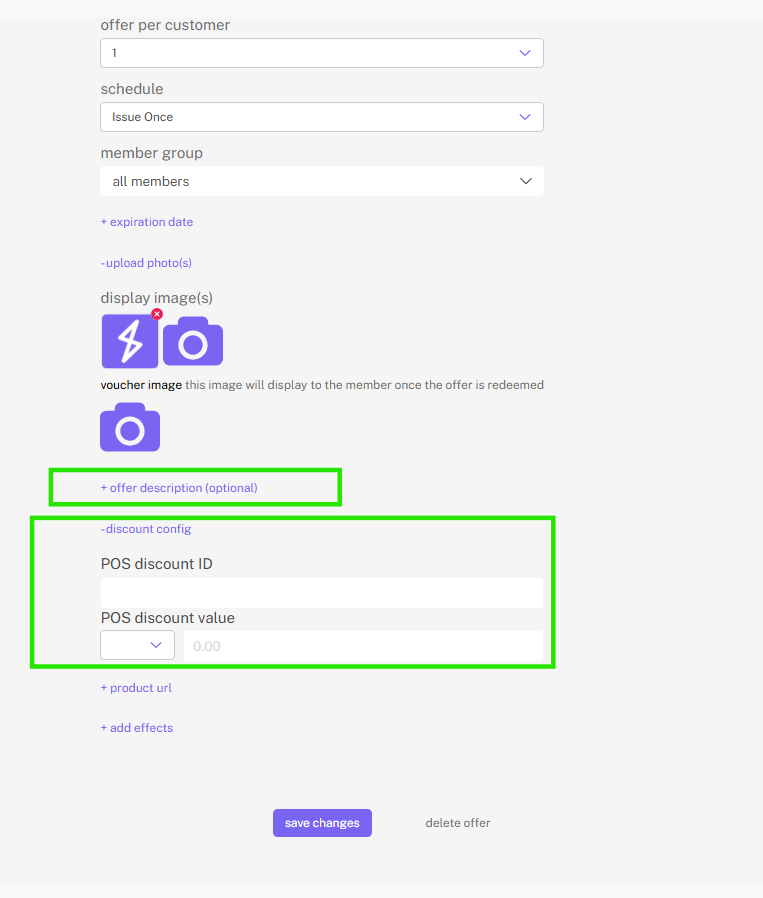
Step 4: Select how many times you want to have the offer to be redeemed for each of your members, along with the expiration date
Note: Offer per customer indicates how many times a member can redeem the reward prior to it expiring. Rewards do not have the Offer per customer field as a reward is redeemed once a customer has enough points for said reward. Instead of the offer per customer field, rewards will have a reward value field where merchants can determine how many points the reward takes to redeem. Offers do not have a cost to redeem.
Note: The days until expiration field isn’t included in rewards creation because the member will be able to redeem a reward at any time as long as they have enough points, whereas for offers, once a merchant sends out an offer they are able to define a number of days until that offer expires.
Step 5: Next you will want to upload the photos associated with the reward or offer.
Note: Similar to Stashboard images, these images will be scrollable when viewed.
Tip: When building your offer, frequently refer to the voucher preview to ensure the reward, or offer will appear the way intended.

Step 6: (Optional) Add a reward or offer description to give more detailed information on what you are offering your members.
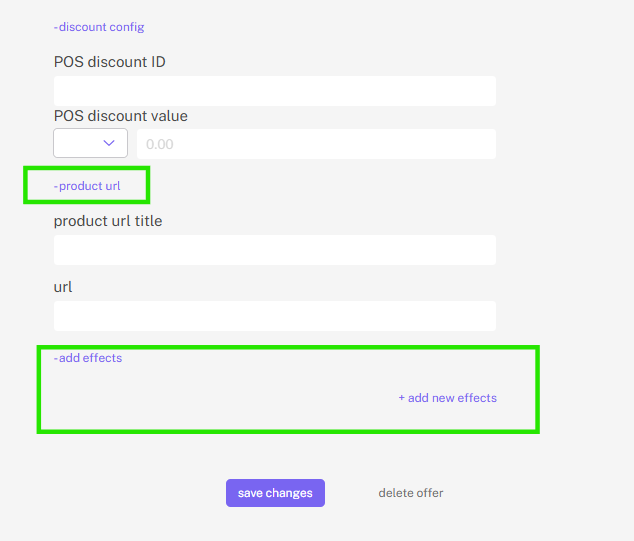
Step 7: Add the POS discount ID and determine POS discount value. If you would like to link the reward or offer to your POS, enter the POS discount ID and input the discounts value. Then, determine the discount value by selecting the dropdown and choosing either % or $ and inputting the value of the discount (a percent if you select % and a dollar amount if you select $) in the box to the right.
Note: POS discount ID was formerly known as reward POS string.
Step 8: (Optional) Add the product URL. If you would like to give your members more information, or if you want to include a link to a specific product or page, you can do that in the product URL section.
Step 9: (Optional) Add effects, if your offer is product-centric, consider adding some information about its effects in the add effects section. To do this, simply simply name the effect/effects and input their respective percentages
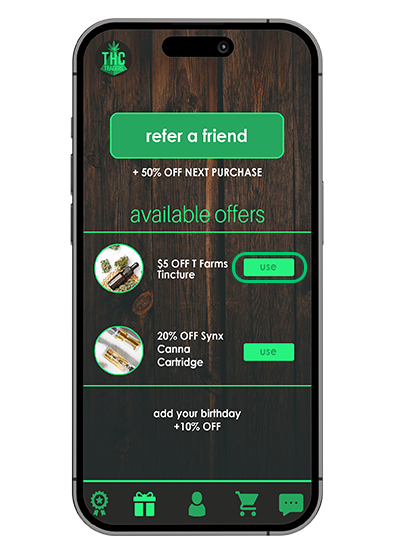
Step 10: Once you finish creating your reward/offer, it will appear in the offers section on the customers wallet. Once your member clicks get, the offer will pop up and they will see your customized message.
Step 1: Navigate to the Springbig main menu, click settings and then rewards/offers.
Step 2: Scroll down to the member offer section and click new offer

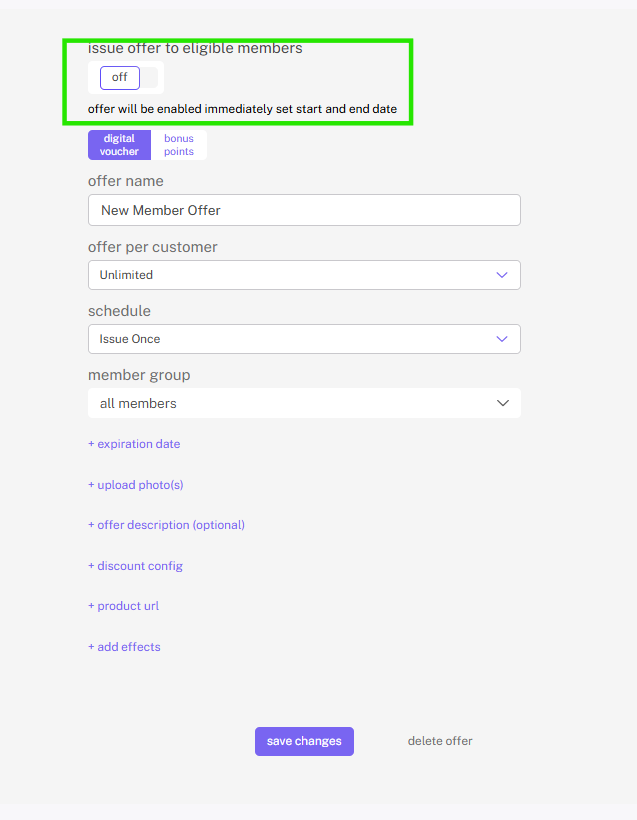
Step 3: Update the status from off to on when you are ready for this offer to be sent (you can save an offer without turning it on before you are ready)
Step 4: Select the offer type:
Digital voucher (can be a voucher for anything, make sure you have the corresponding discount set up in your POS if you use digital voucher)
Bonus points (specific to Springbig loyalty)
Step 5: Name your offer. Note: this name is customer facing
Step 6: Determine if the offer can be used once or an unlimited amount of times within the expirate time frame (offer can be unlimited, 1, 2, 3, 4, 5, or 10)
Step 7: Set days until expiration (optional)
Step 8: Add POS Discount ID (optional and specific to certain POS, check your Integration guide for instructions)
Step 9: POS Discount Value (optional and specific to certain POS, check your Integration guide for instructions)
Step 10: Select member group to determine the group or groups of members you would like to receive this offer. Groups include:
Audiences
Locations
Carrier
Brands (specific to POS integration)
Categories (specific to POS integration)
Interests (must be set up in groups to utilize)
Discounts (specific to certain POS integration, must be set up in groups to utilize)
Custom groups (must be set up in groups to utilize)
How did you hear about us (must be set up in groups to utilize)
Visit recency (specific to integrated platforms)
Spend total (specific to integrated platforms)
Campaign engagement (click to view details)
Days since last visit (specific to integrated platforms)
Visiting total (specific to integrated platforms)
Average spend (specific to integrated platforms)
Point balance (specific to Springbig loyalty)
Join date
Birthday (only applicable for members with birthday)
Next visit time (calculated based on average time for members with 4+ visits)
Order type (specific to certain integrated platforms)
Area code (must be set up in groups to utilize)
Zip code
Gender
Med / Rec (specific to certain integrated platforms)
Did not click on campaign (click to view options)
Misc.
no birthday
no email
no interests
Pin code status
Email activity
Step 11: Add display image add coupon image (optional, without uploading image, Springbig’s default star images will display)
Display image will pop up in the customer wallet
Coupon Image will appear when the offer is redeemed
Step 12: Click save changes to save your member offer
Step 1: Set an active date for the offer new offer
Below the status toggle, you will see a note that the offer will be enabled immediately. To configure the offer to start on a specific date, click the edit option.
Step 2: Configure the Start Date and End Date
When you’ve selected the edit option, a new modal window will appear with the options to set a start date and an end date for the offer.

Use the calendar dropdown tool to select the dates, and set the specific time of day. When you’re done click the save button

Once this is complete, you will see the new Start and End dates for this offer under the status toggle.

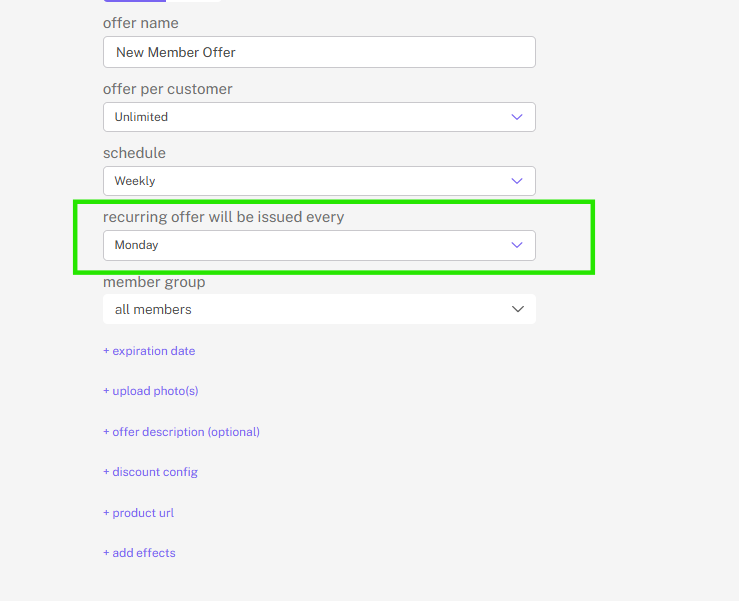
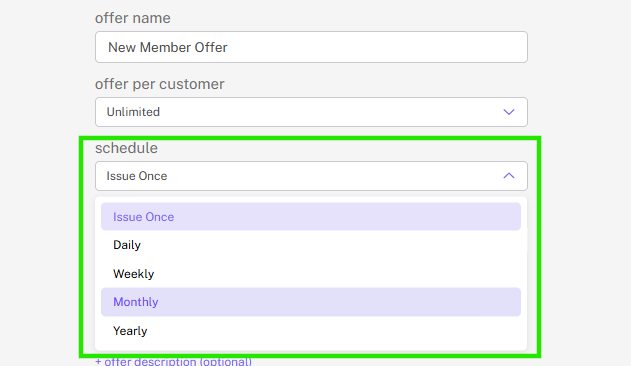
Step 1: Determine offer schedule during configuration
While creating the new offer, open the schedule drop down to configure a recurring offer. You’ll be able to choose between the following schedules:
1-time use
Daily
Weekly
Monthly
Yearly
Step 2. Configure details based on the type of recurring schedule
Depending on what kind of schedule you select, additional drop downs will appear allowing you to further configure the schedule details.
Note: For example, if you schedule the offer to be available weekly, you’ll see new tabs open for selecting the day of the week.