SEE THE CUSTOMER'S SIDE OF THE SUBSCRIPTION PROGRAM
Welcome to the Subscriptions by Springbig- Customer Experience guide!
Table of Contents
Subscriptions Customer Experience- Enrollment
For any new members that are not already a part of your Springbig loyalty/texting program, please have them first start by signing up to join your program through the join form link/QR code (settings –> account –> sharing links)
Step 1. Have your member navigate to their customer wallet, scan the subscriptions sharing link QR code, or navigate to your subscriptions join link embedded in your website/socials.
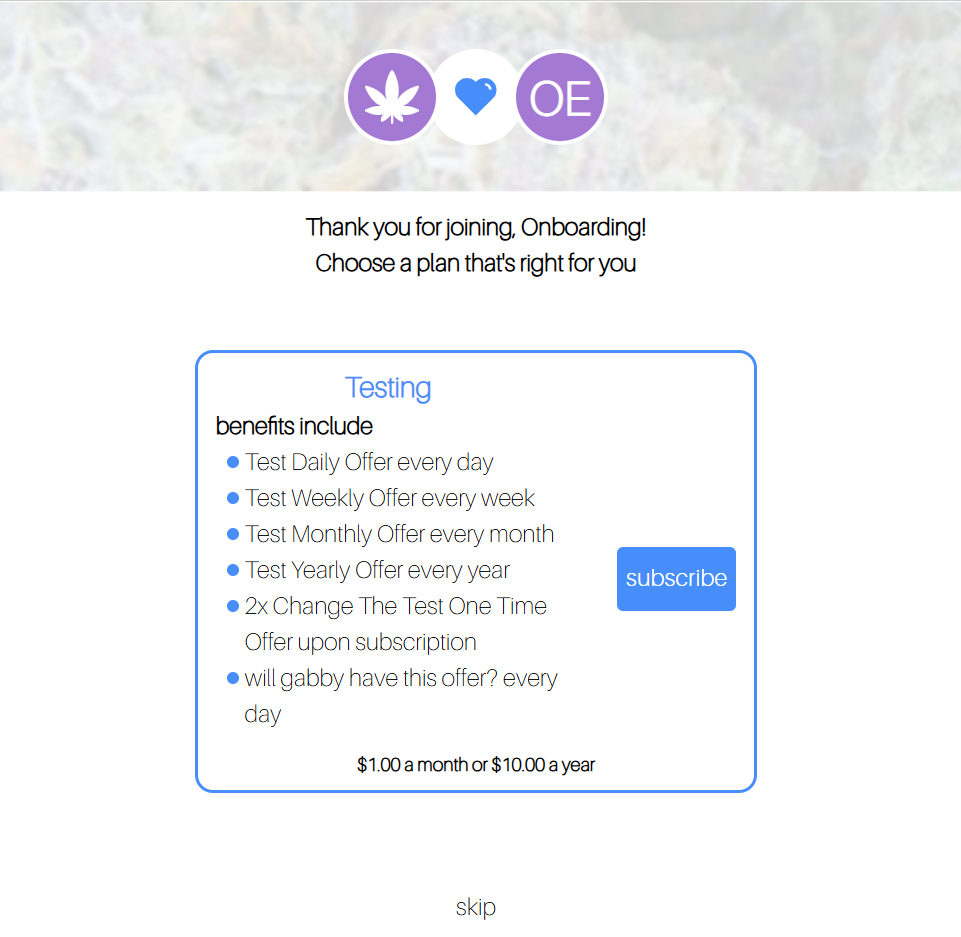
Step 2. Once brought to the customer wallet, the member is prompted to join the subscriptions program.
Step 3. Once selected, the member is then prompted to enter in their first and last name, phone number and email address if they are a new customer, or just their email address if they are an existing customer.
Step 4. Once entered, a verification code that is sent to the member’s email. This ensures that the email address on file is real and accurate.
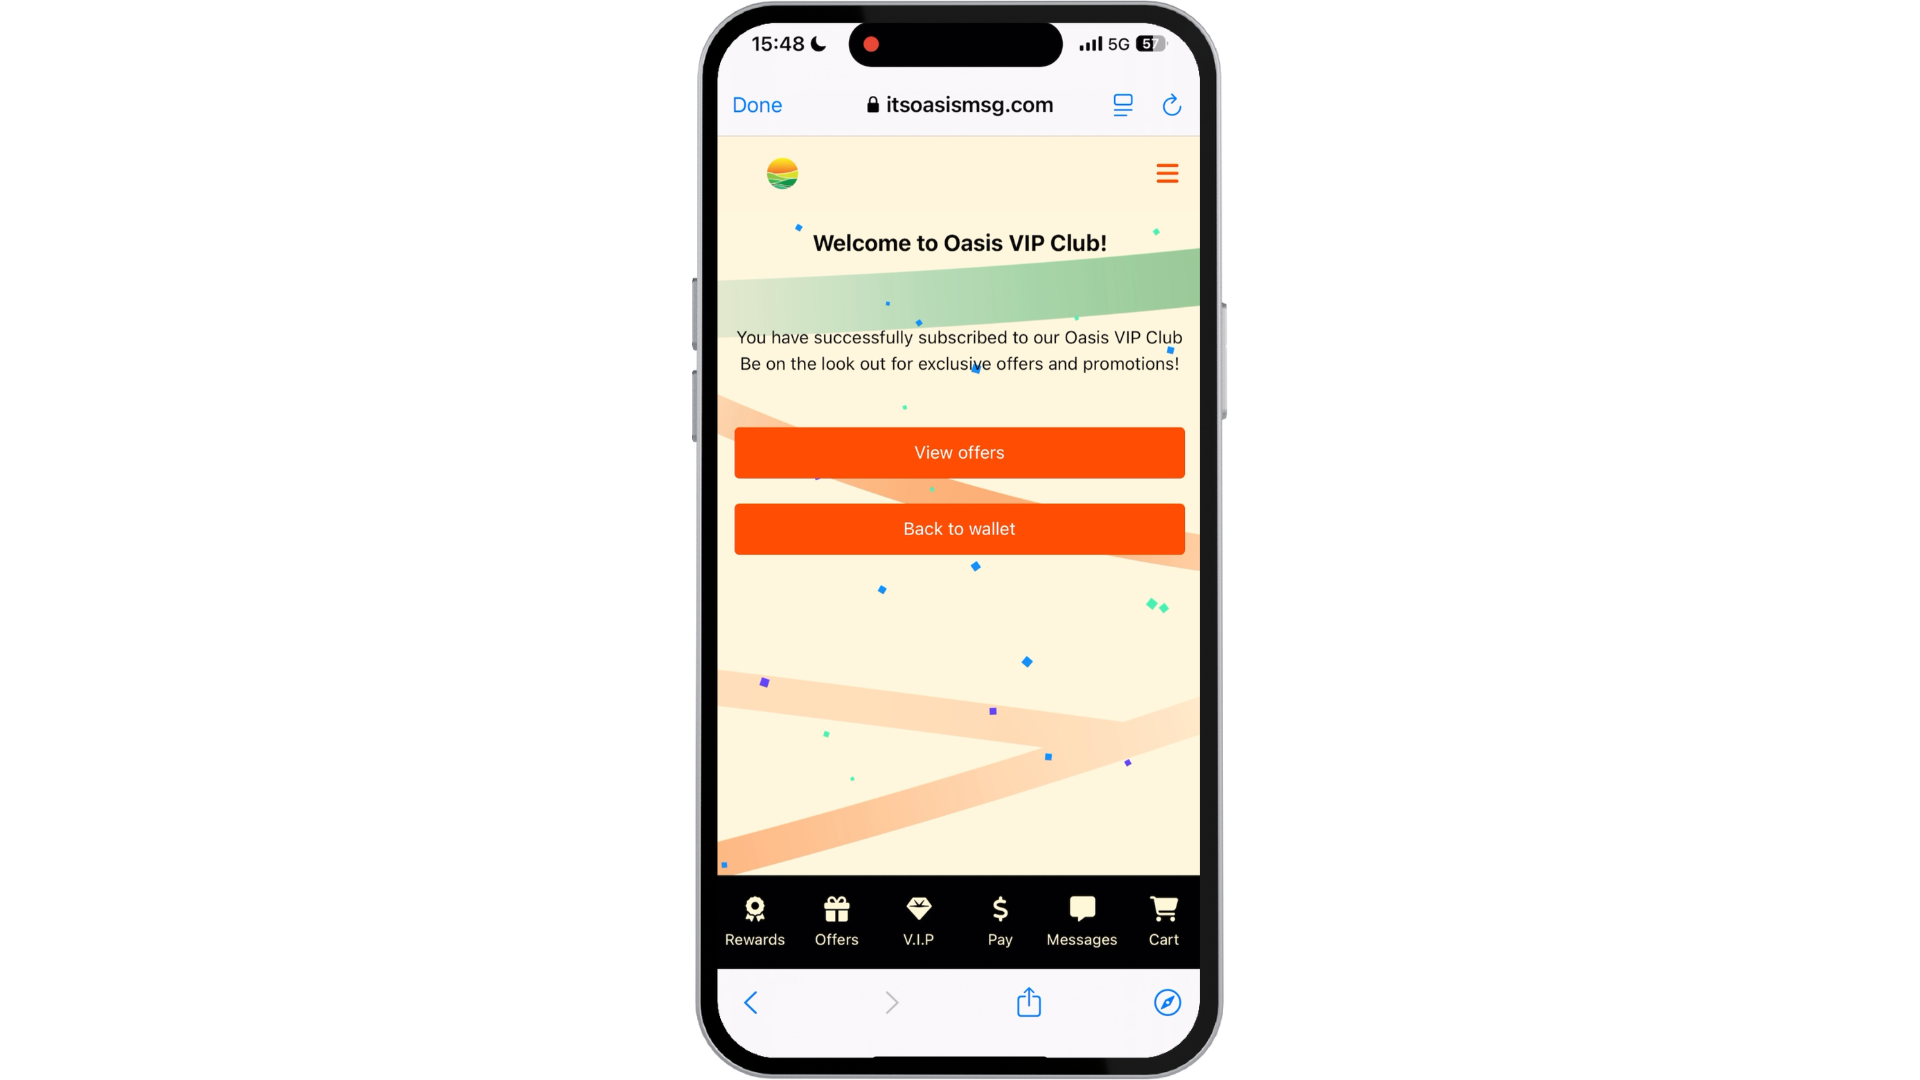
Step 5. Once the member’s email is verified, they are brought to the subscriptions selection page, where the member can select their subscription tier (if applicable), enter in their credit card information and subscribe.
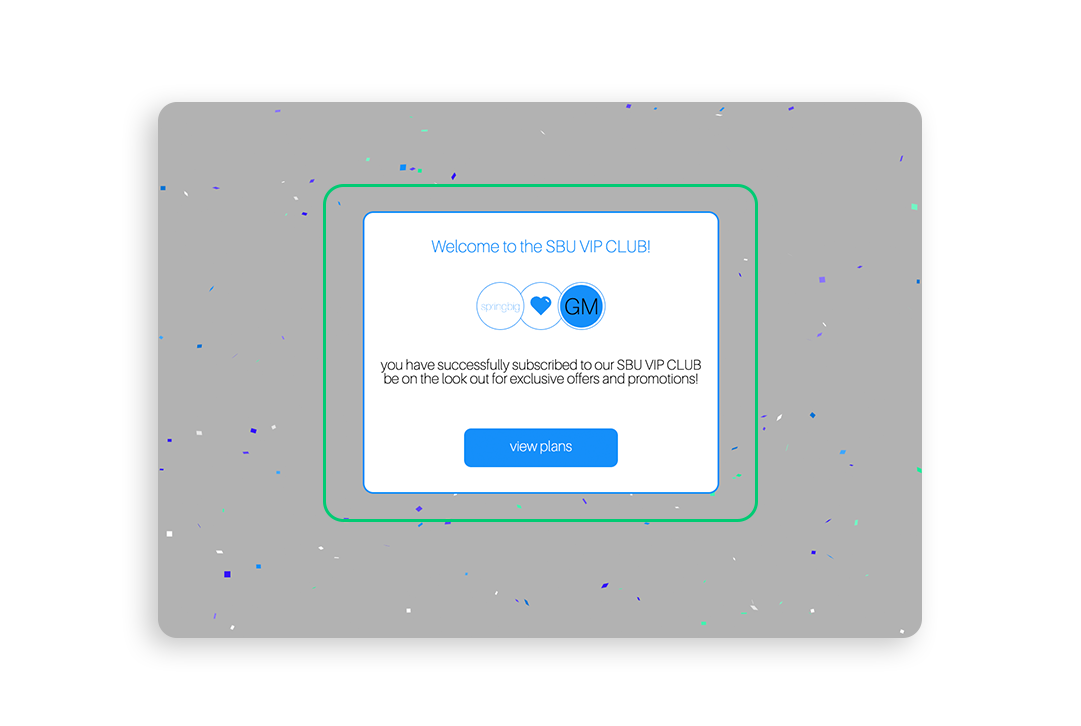
Step 6. Once the member hits add card and the credit card is successfully charged, they are now a part of the subscriptions program.
Subscriptions Customer Experience- Plan Management
Members will be able to update or cancel their subscription at any time!
To update the member’s email or credit card, or cancel the subscription, members must first access their member wallet and navigate to the subscriptions page.
The member’s wallet can be accessed via the login link, if saved on their home screen, or via a campaign.
Editing the Subscribers Email Address
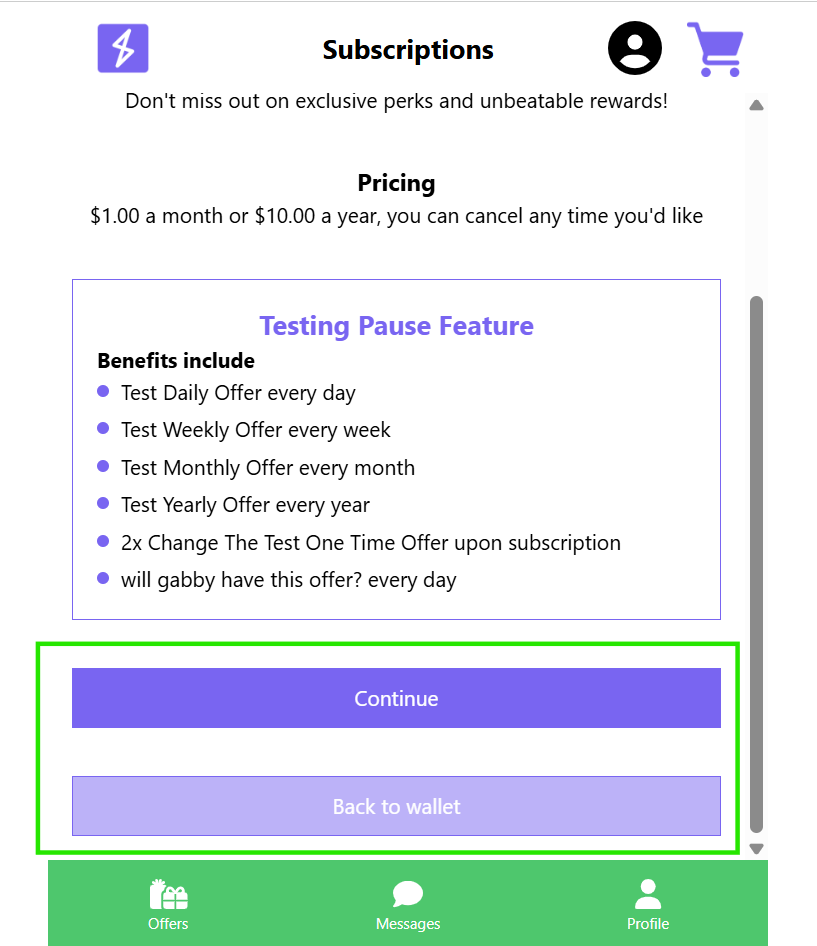
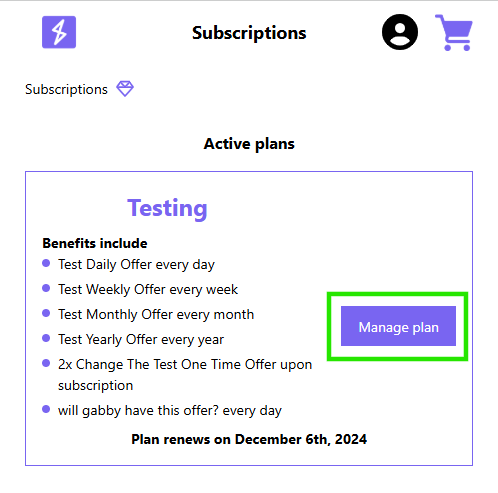
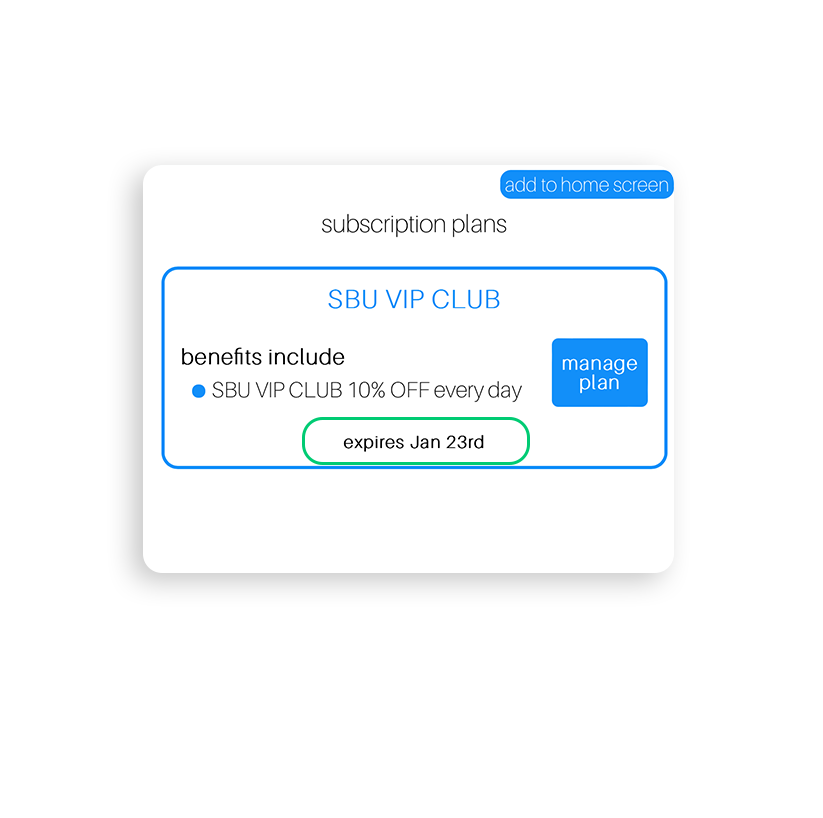
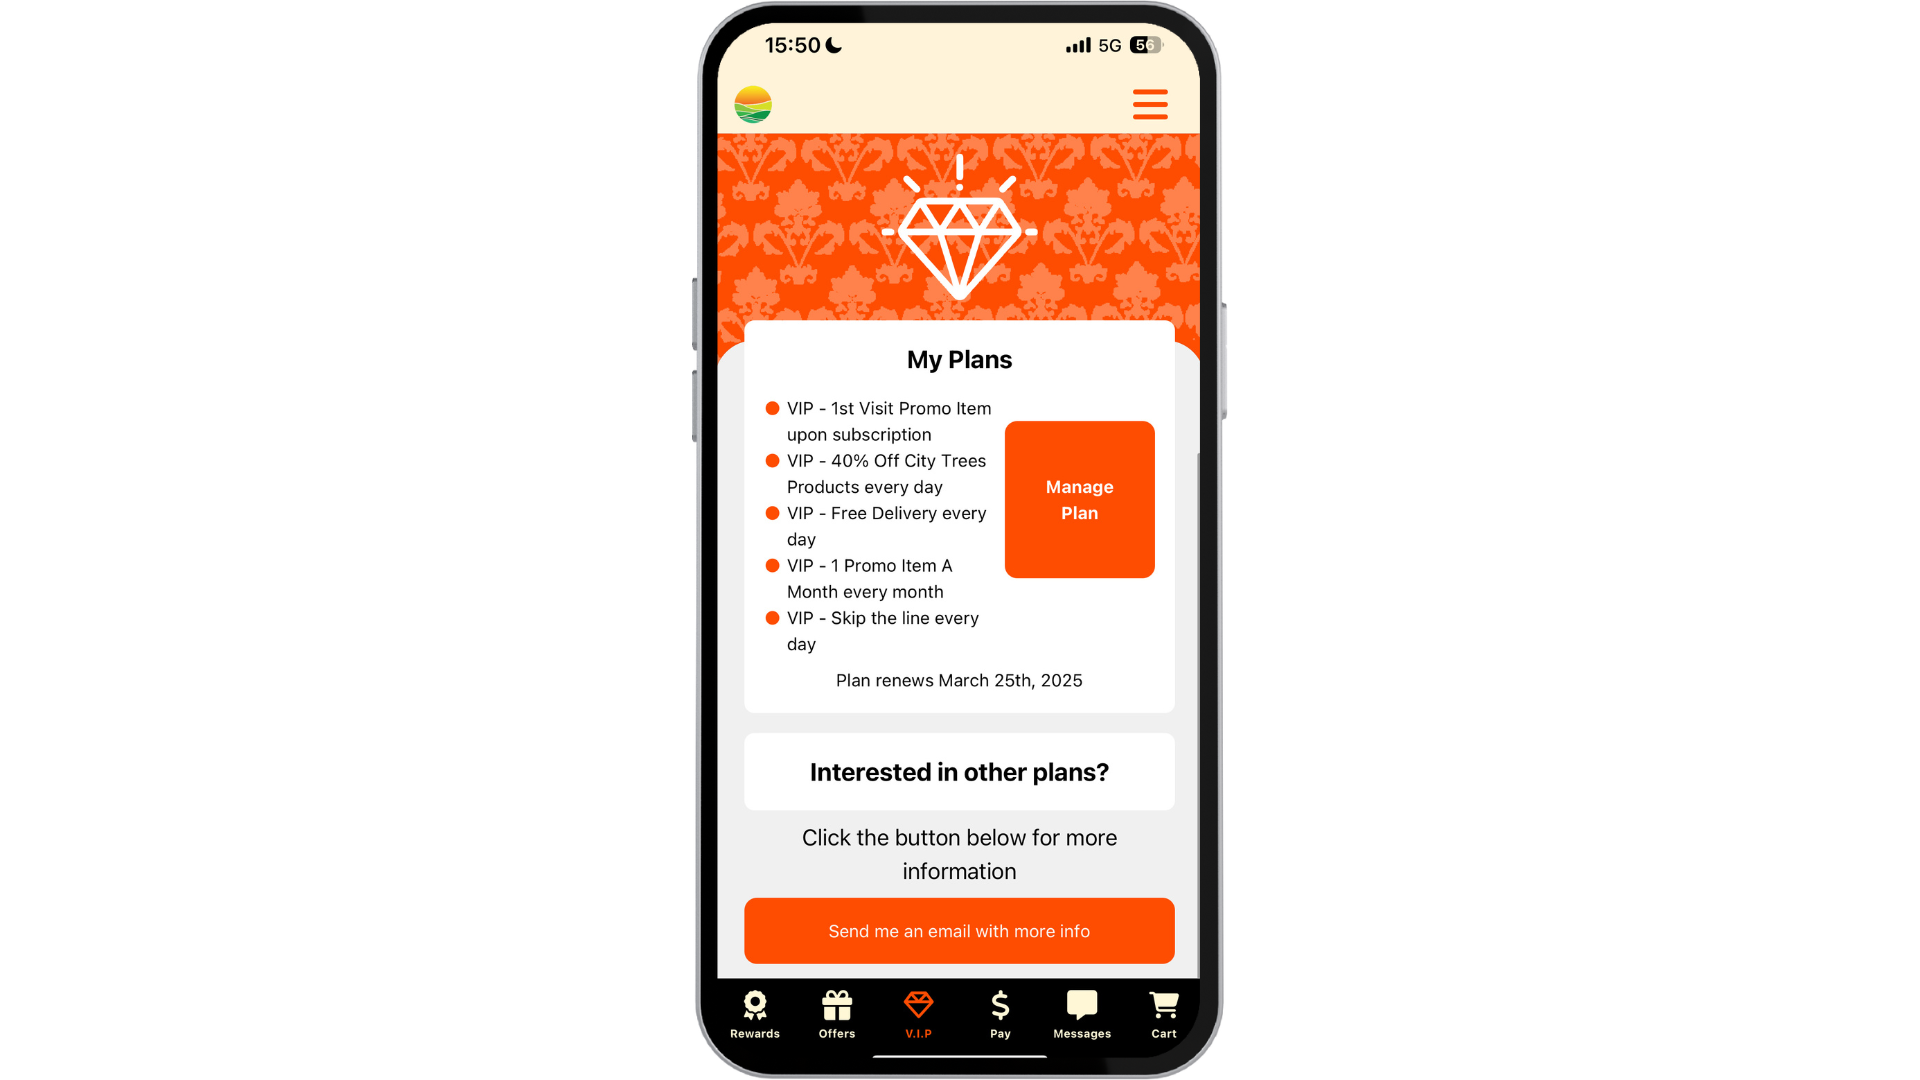
Step 1. Once on the subscriptions page in the wallet, select manage plan.
Step 2. Select update email to edit/update the member’s email.
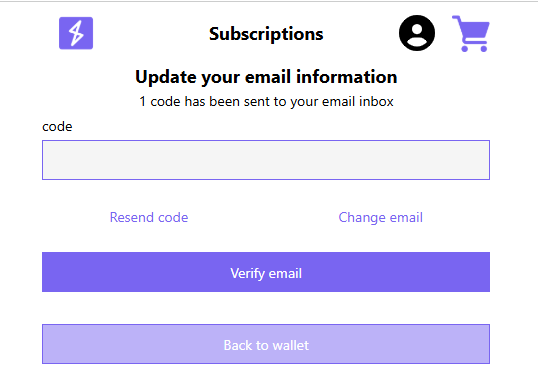
Step 3. Enter in the new/updated email address, agree to the terms and conditions, and select next.
Step 4. Go to the email’s inbox to find the email verification code and enter it in to verify the new email.
Step 5. Once verified, the new email is then saved.
Changing the Credit Card on File
Step 1. Once on the subscriptions page in the wallet, select manage plan.
Step 2. Select change card to edit/update the member’s credit card information.
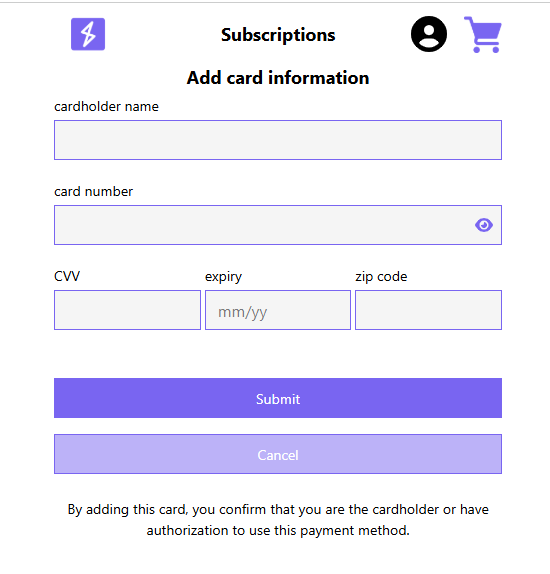
Step 3. Enter in the new/updated credit card number, name, CVV, expiration date and postal code.
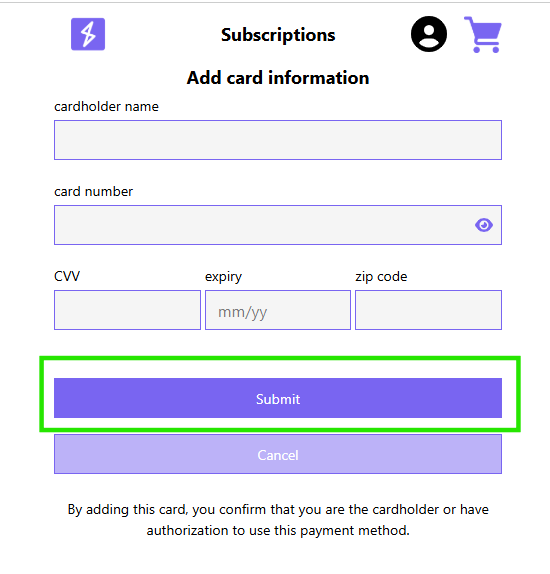
Step 4. Once the new credit card information is entered, select submit for the credit card change to take place.
Cancelling a Subscription Plan
Step 1. Once on the subscriptions page in the wallet, select manage plan.
Step 2. Select cancel subscription to cancel the member’s current subscription plan.
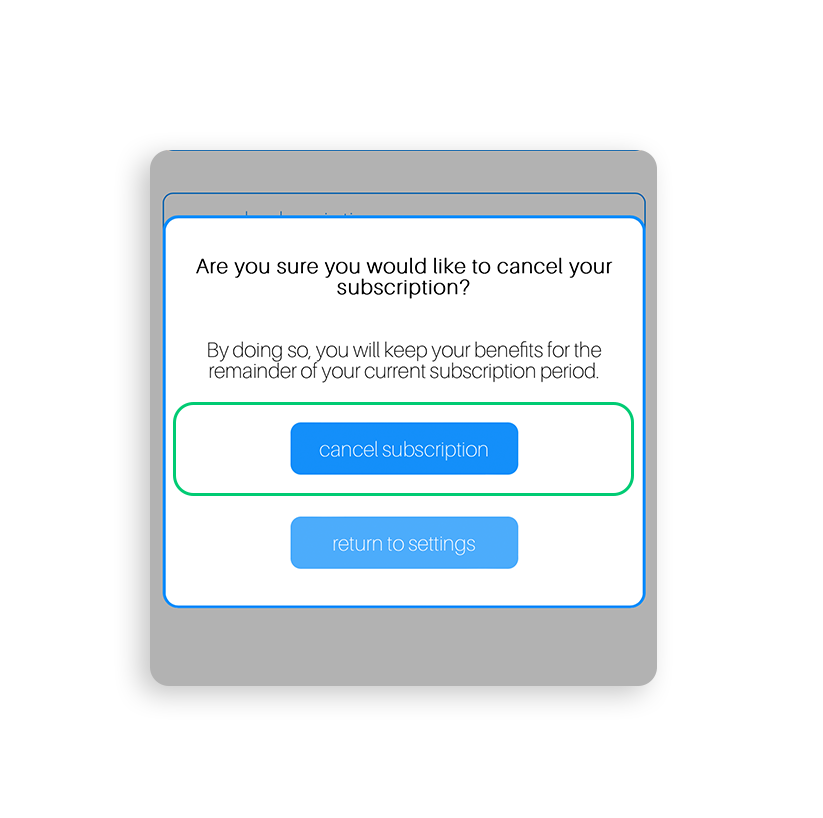
Step 3. A popup will appear, confirming the cancellation. If the member wants to move forward with the cancellation, they will select cancel subscription from the popup.
Step 4. The member’s subscription will then be canceled, and an expiration date will appear under their current plan to show them when their subscription plan expires.
Having trouble? If this is an issue related to customer billing, please direct the customer to submit the details to subscriptionsbilling@springbig.com for assistance. Please ensure that the customer provides first name, last name, email and phone number in their email. For any other issues, please reach out to support@springbig.com and provide as much information as possible.
Subscriptions Customer Experience- Native App
Enrollment
For any members that have your app downloaded, the customer experience may slightly differ. The steps to enroll via the native app are below.
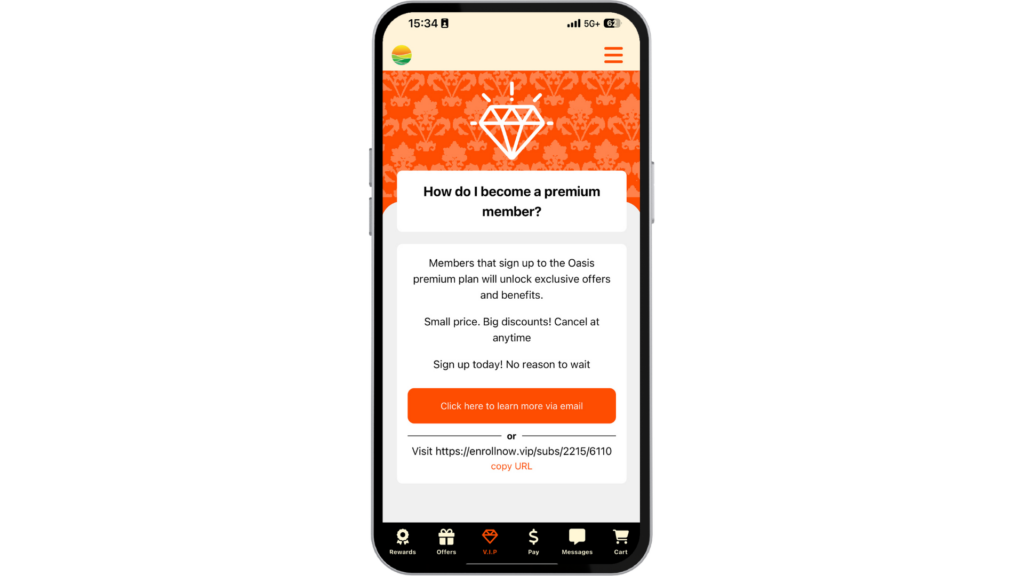
Step 1. Have your member navigate to their native app, and select the diamond icon or subscriptions page in the hamburger menu to bring them to the subscriptions page.
Step 2. After selecting the subscription icon, the subscriptions page will open, prompting the customer to click for more details- either via email or through the provided link.
Please note: To avoid Apple’s 30% service fee, any monthly subscription payment must be completed in a browser, instead of within the native app.
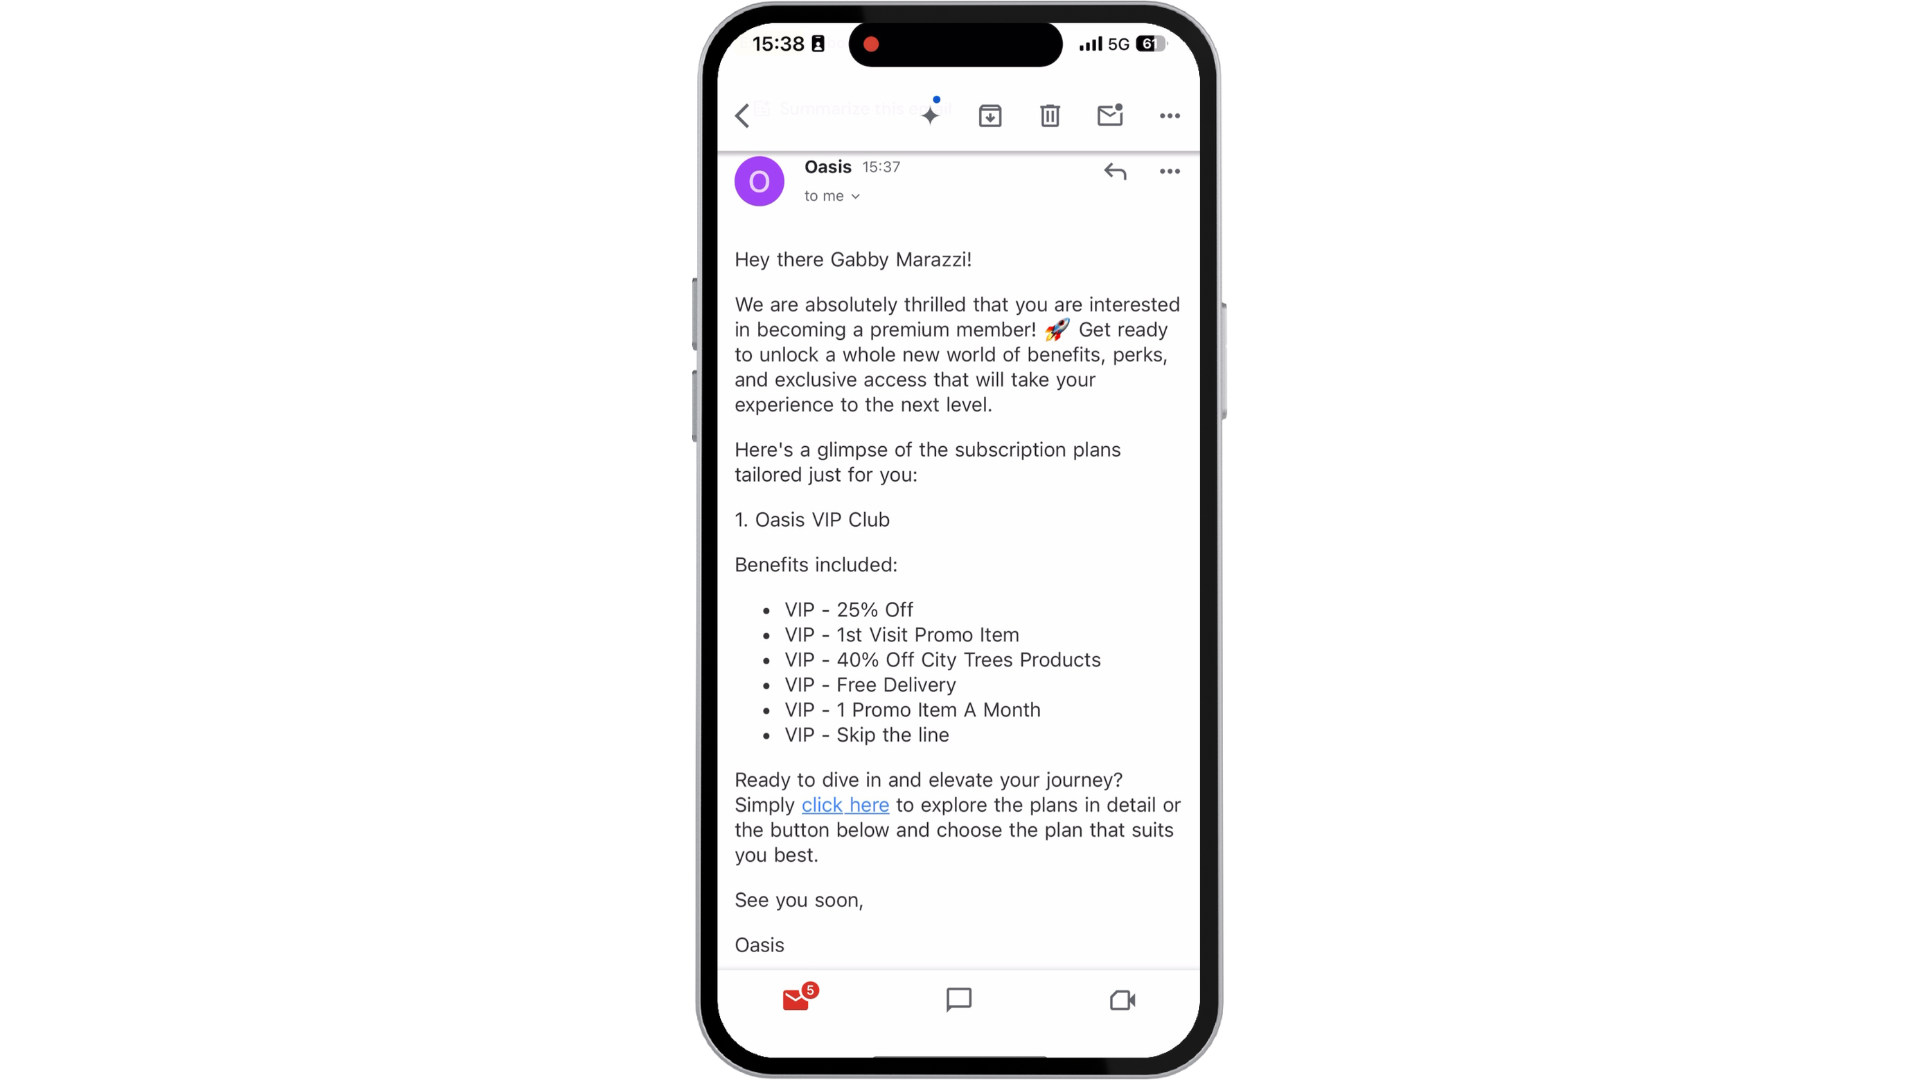
Step 3. When the link is clicked or the email is opened, the subscriptions overview page will appear, displaying the available subscription options.
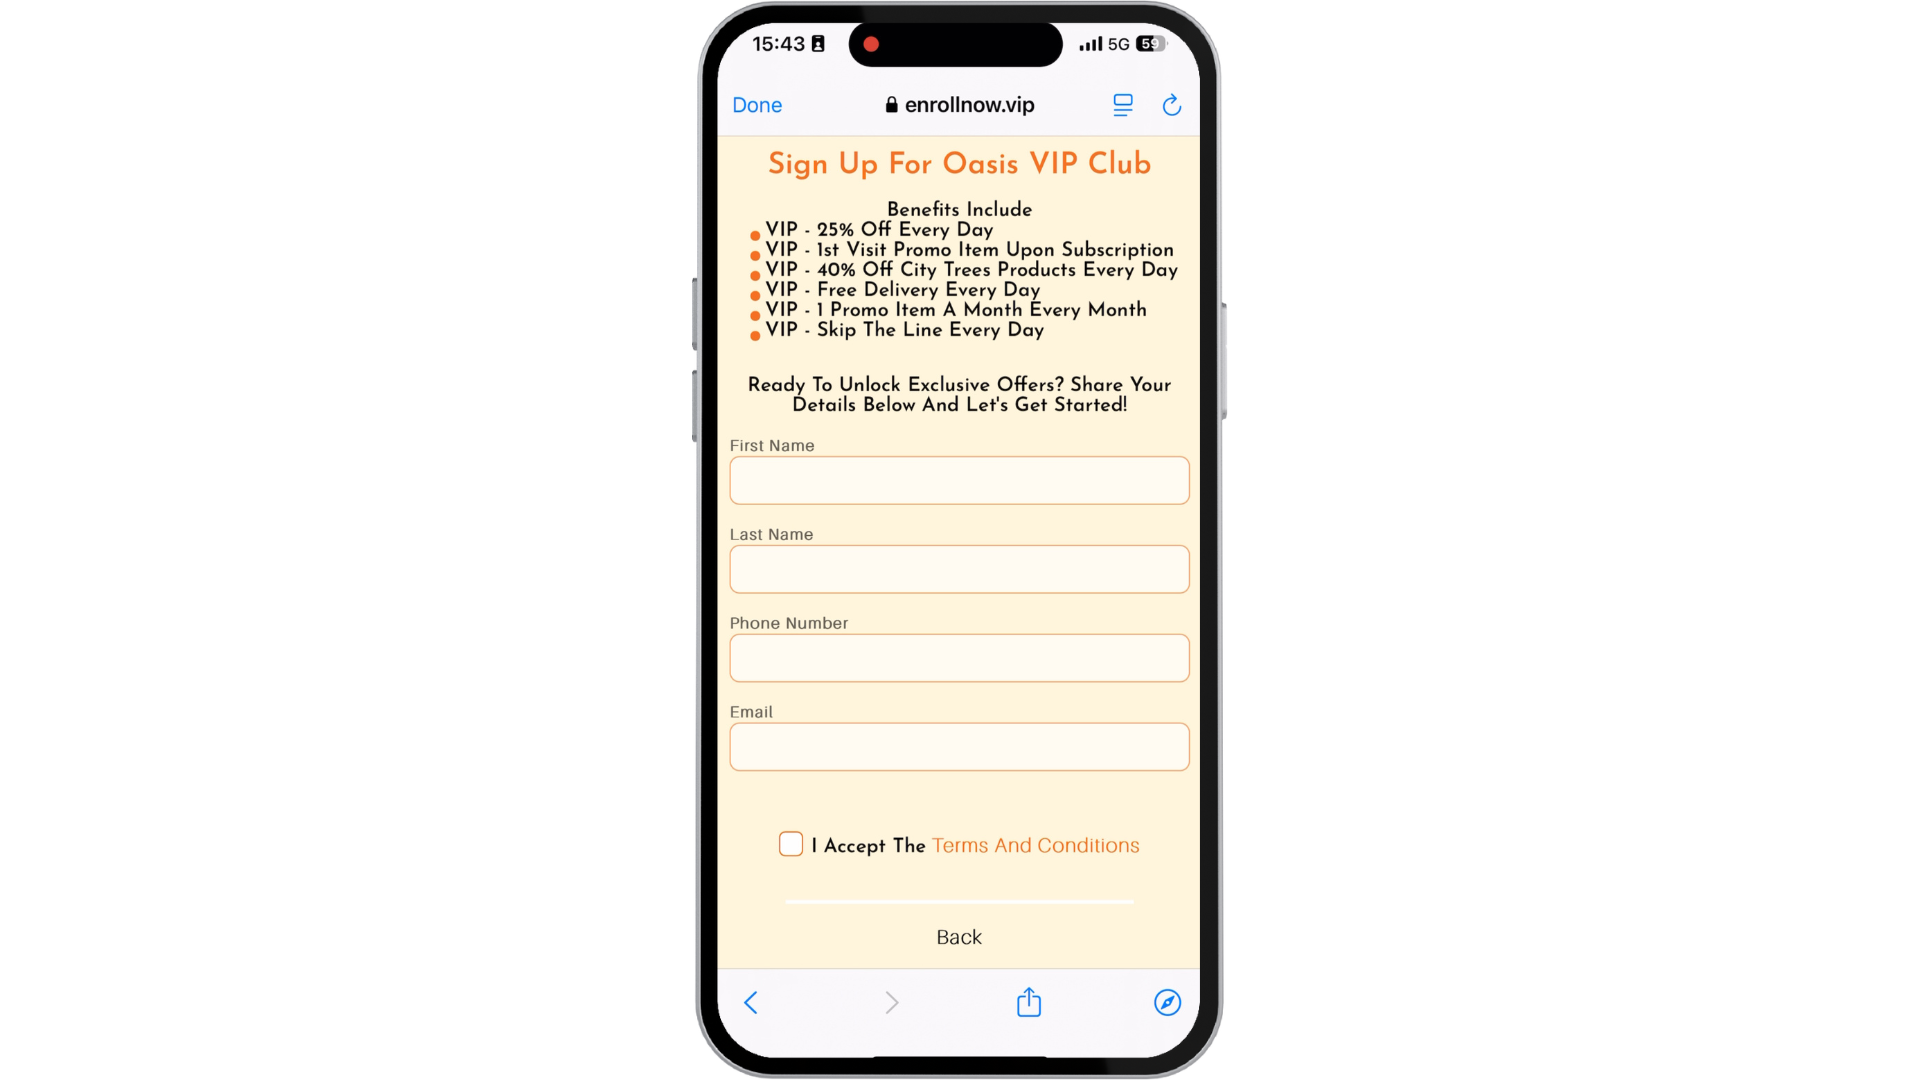
Step 4. When a customer clicks the subscribe button, they are directed to a sign-up page for their chosen subscription tier. They will enter their first name, last name, phone number and email address, then check a box to accept the program’s terms and conditions.
Step 5. After providing their payment information, they will complete the process and become a subscribed member.
Plan Management
For any members that have your app downloaded, the customer experience may slightly differ. The steps to manage plans via the native app are below.
Step 1. Have your member navigate to their native app, and select the diamond icon or subscriptions page in the hamburger menu to bring them to the subscriptions page.
Step 2. After selecting the subscription icon, the subscriptions page will open, highlighting key plan details and allowing the customer to manage their plan.
Step 3. When the Manage plan button is selected, the customer is able to change their card, update their billing email address or cancel their subscription.
For more information around creating a subscription program, please visit the Creating a Subscriptions Program page.