Welcome to the Springbig + Meadow Integration Guide!
In this guide, you’ll learn how to seamlessly connect your Meadow POS with Springbig to unlock customer insights, automate engagement, and drive loyalty.
We’ll walk you through:
Retrieving your API Key from Meadow POS
Configuring your Springbig Admin Settings to establish a secure connection
Understanding the Meadow User Flow, including:
Creating a customer profile in Meadow
Recording a transaction in Meadow
Completing an order and syncing data to Springbig
By the end of this guide, you’ll have your Meadow integration set up and ready to deliver powerful, data-driven results with Springbig.
Let’s get started!
Springbig + Meadow Integration Guide
User interface is subject to change at the discretion of your POS provider. For the most accurate and up-to-date information, please consult your POS provider directly.
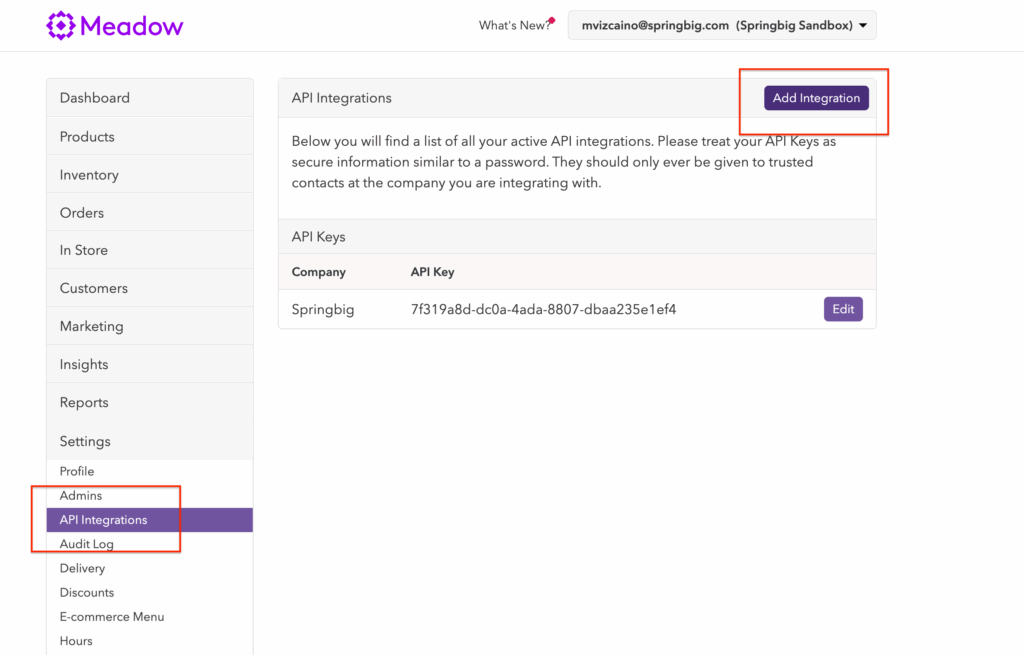
Retrieve API Key from Meadow POS
1. Settings > API Integration > Add Integration
2. Select Springbig
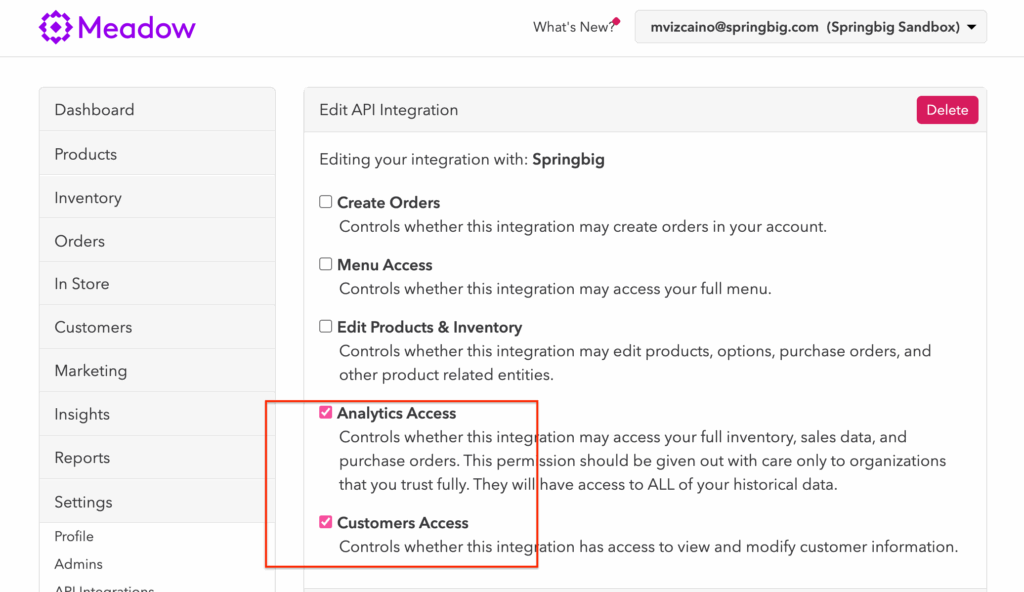
3. Select Analytics and Customer Access
4. Select Create
5. Copy API Key
Meadow User Flow
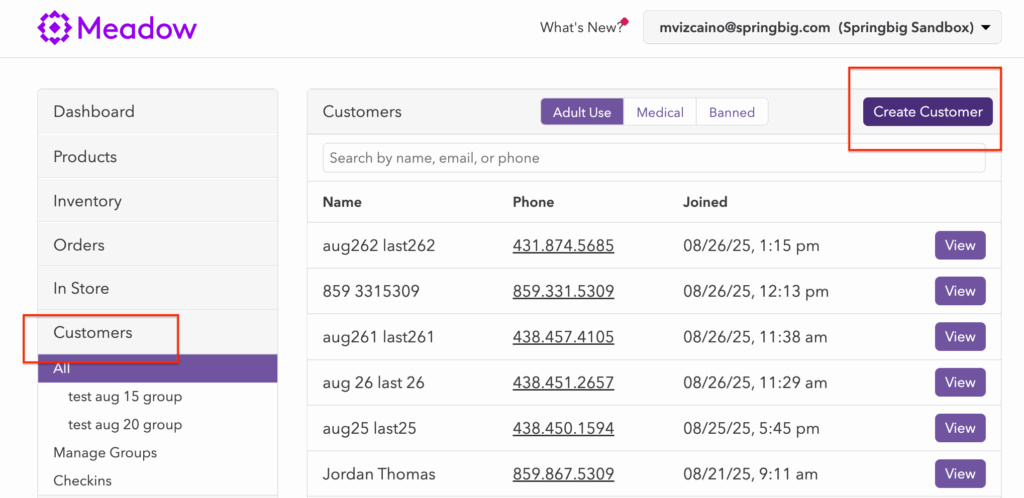
Create Customer
Toggle the Customers section on the side panel
Select Create Customer
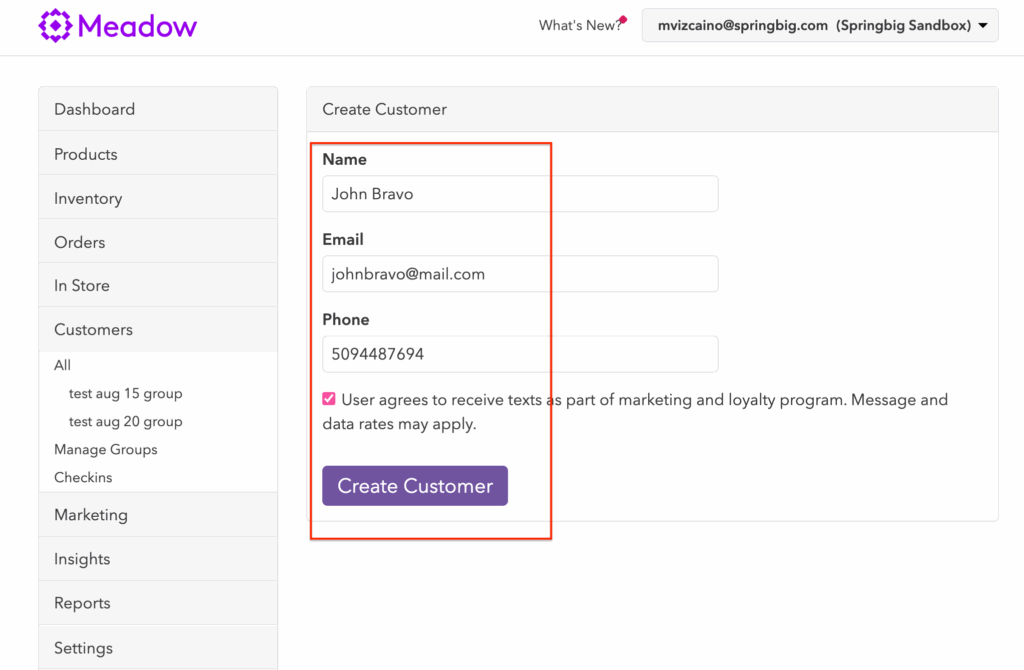
3. Enter customer Name, Email and Phone Number
4. Check the checkbox if the Customer wants to receive messaging
5. Select Create Customer
Note: Springbig will ONLY accept the consent value at the time of profile creation. This means that if the setting changes on Meadow, Springbig will not retrieve it. This is because Meadow is no longer the source of truth for Messaging Enrollment; that source now resides on Springbig. Future enrollment changes will only be accepted on Springbig.
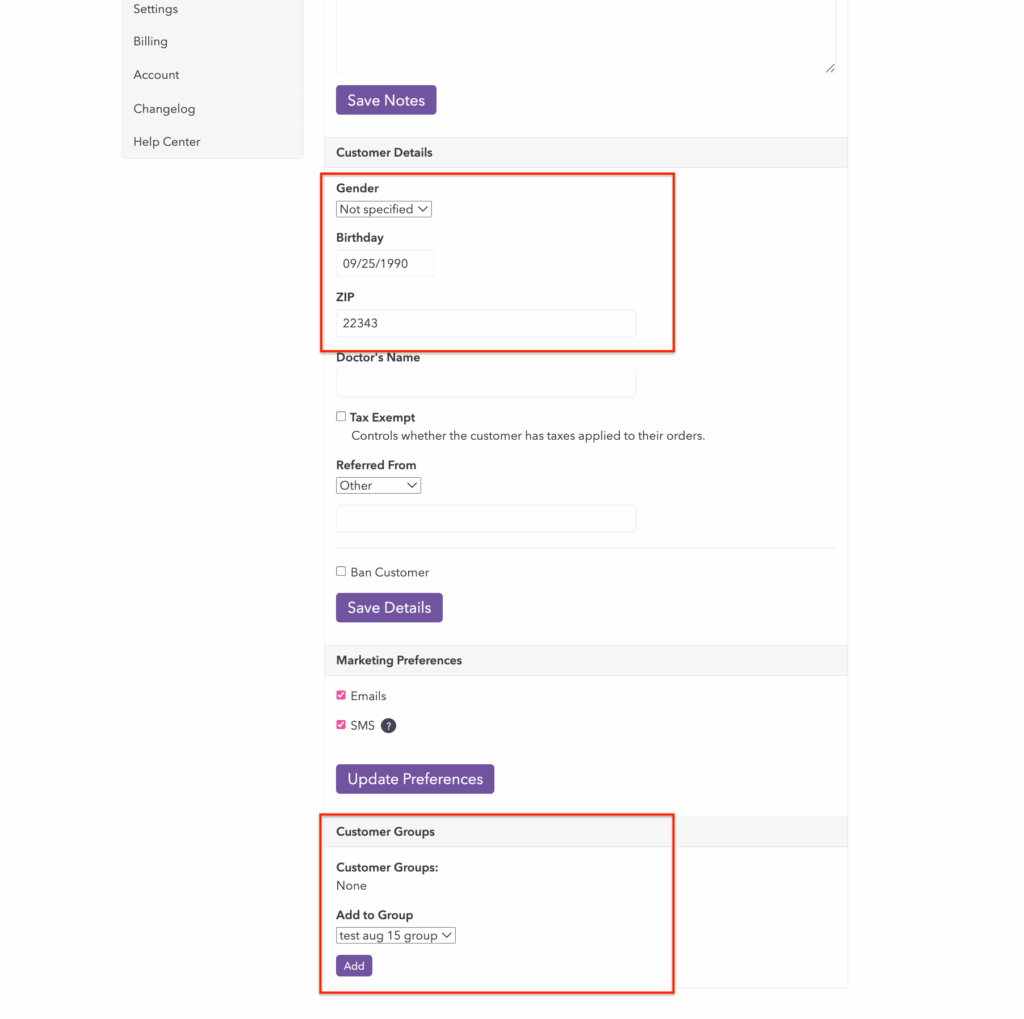
Once the Customer is created, Meadow will expand the customer’s profile to include additional details. Springbig will intake the following data:
Gender
Birthday
Zip
Customer Group → This will be stored on springbig as a ‘Discount List Tagging’
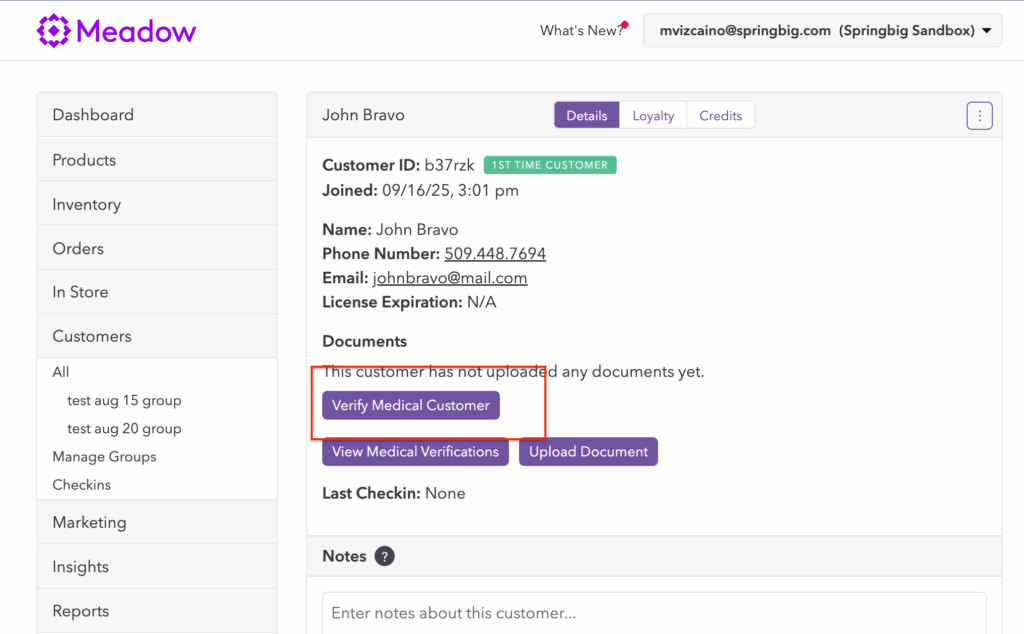
Note: If the Customer is a Medical customer, select Verify Medical Customer from the profile page
Enter Medical Verification Information and include the card Expiration On date
Select Verify
Create a Transaction on Meadow
Toggle the Order section on the side panel
Select Create
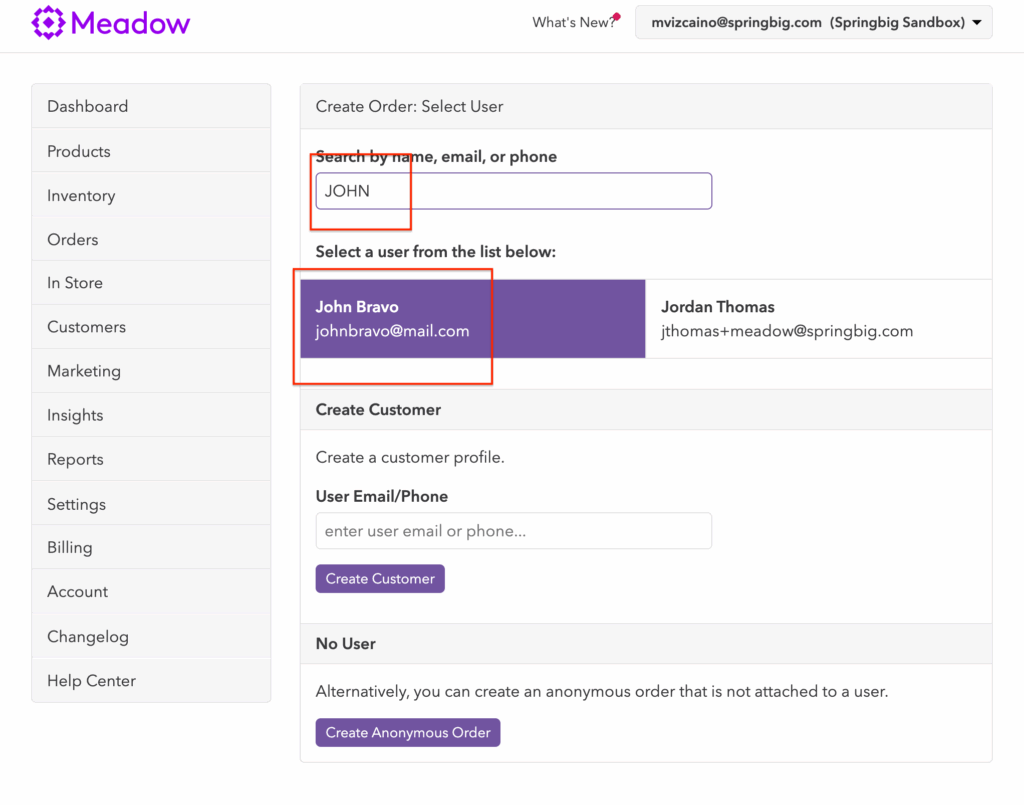
3. Search for an existing Customer or Create a New one or Create anonymous order (sample below shows a look up by name “JOHN”
4. Select the Customer
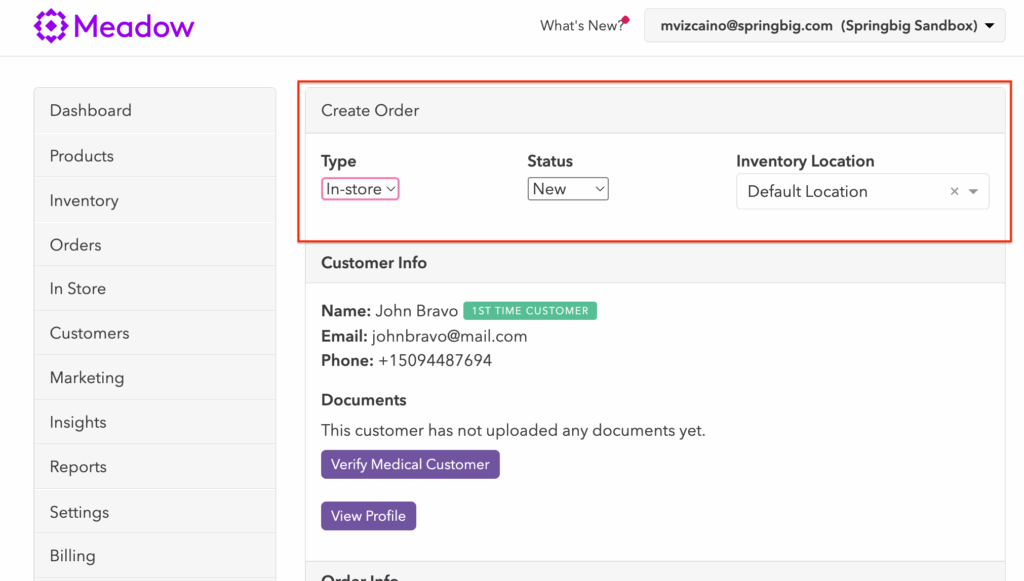
Complete Order
Select Order Type, Status, Inventory Location
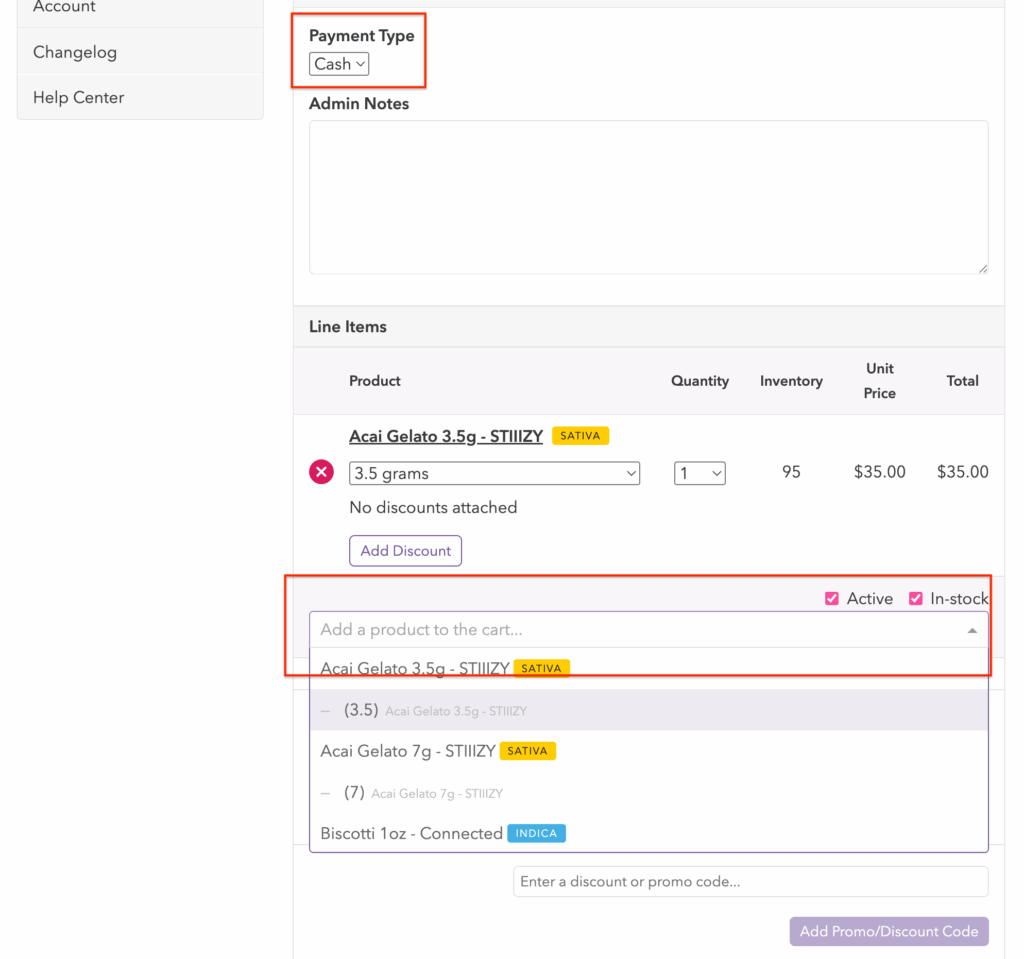
2. Select Payment Type, and add Products in the Line Items section
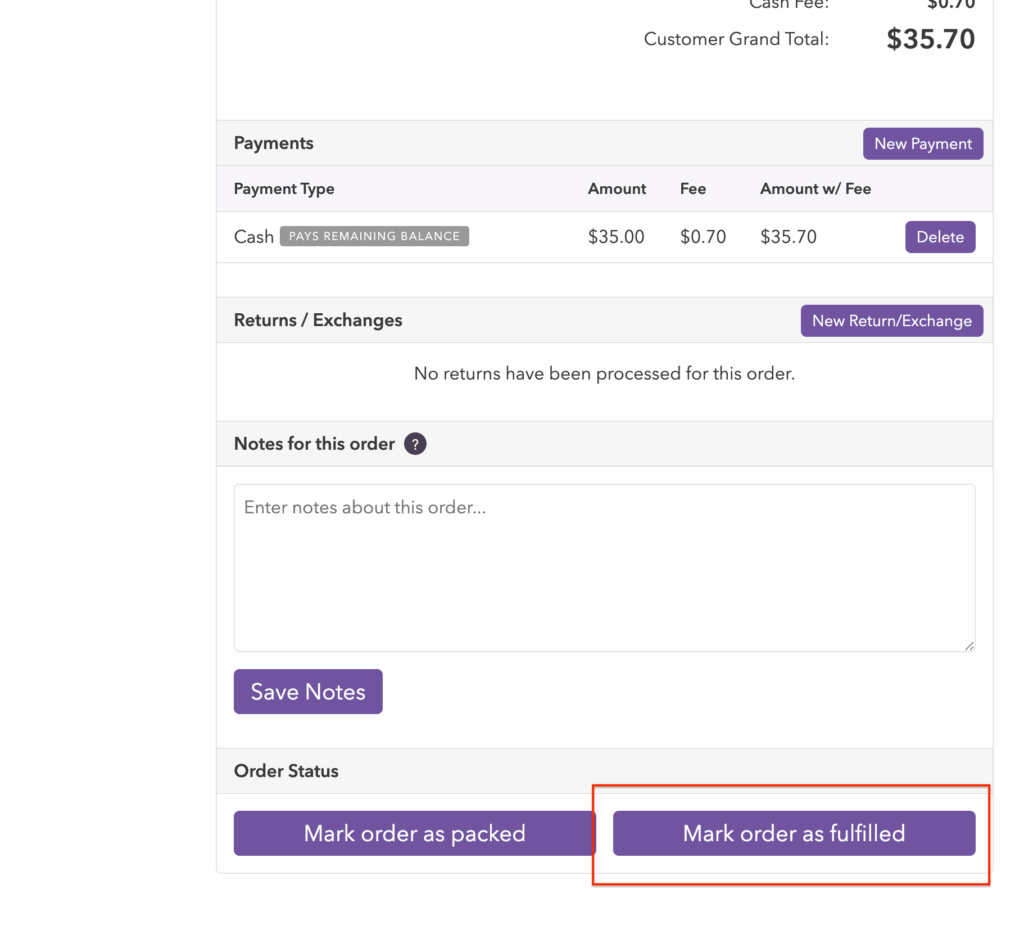
4. When the Order is ready and payment is received, select Mark Order as fulfilled
Springbig will process the Order and store the following attributes: