BRANDS BY SPRINGBIG

FOR BRANDS

With over 50 million users on our platform, Brands by Springbig gives cannabis brands unprecedented, direct access to the smartphone screens of the highest-spending, most loyal consumers in the industry.

Through the Springbig Brands platform, you have the ability to provide branded images to Springbig dispensary partners that are selling your products, so they can utilize that content in their direct-to-consumer marketing campaigns.

Table of Contents

CO-MARKETING CAMPAIGN CREATION

Retailers can request sponsorship from the cannabis brands that they carry! The brands will be able to see retailer sponsorship requests and the details of those requests in the request tab. Brands will also be able to instantly accept and begin working on those ads by clicking create ad next to the sponsorship request.

Visit brands.springbig.com to log into the Brands by Springbig platform.

Setting up Your Sponsored Ad

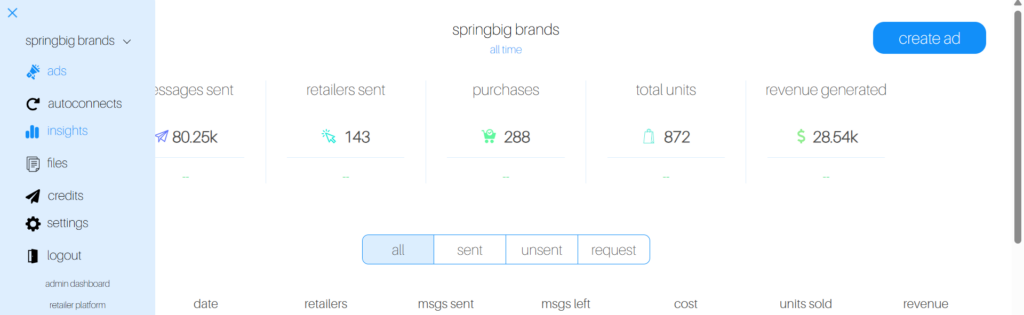
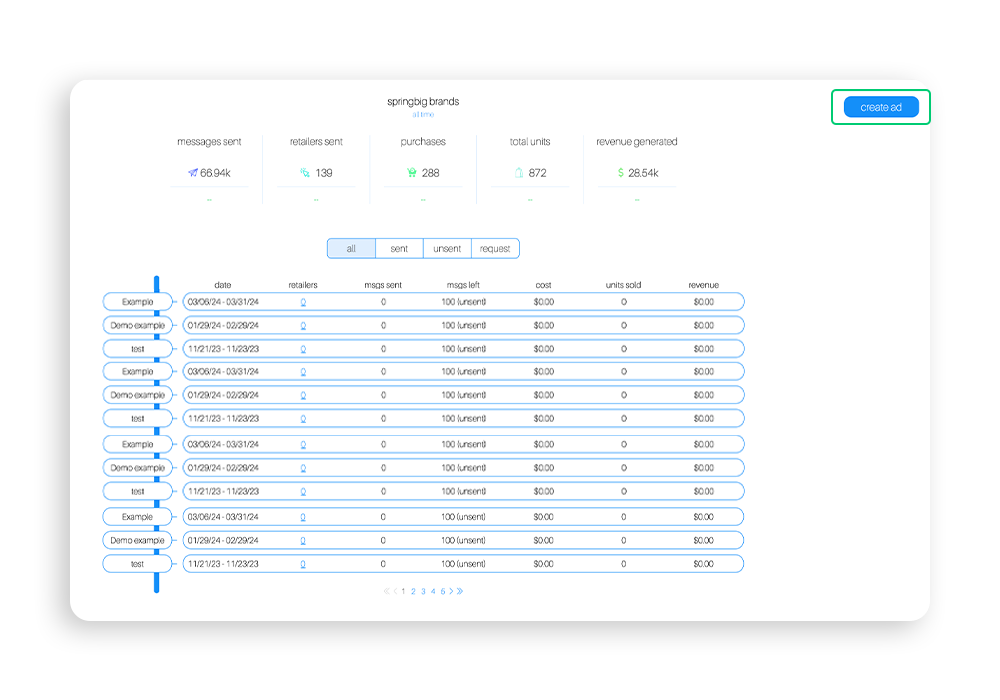
Step 1. From the Springbig dashboard, click create ad on the top right of the page to get started

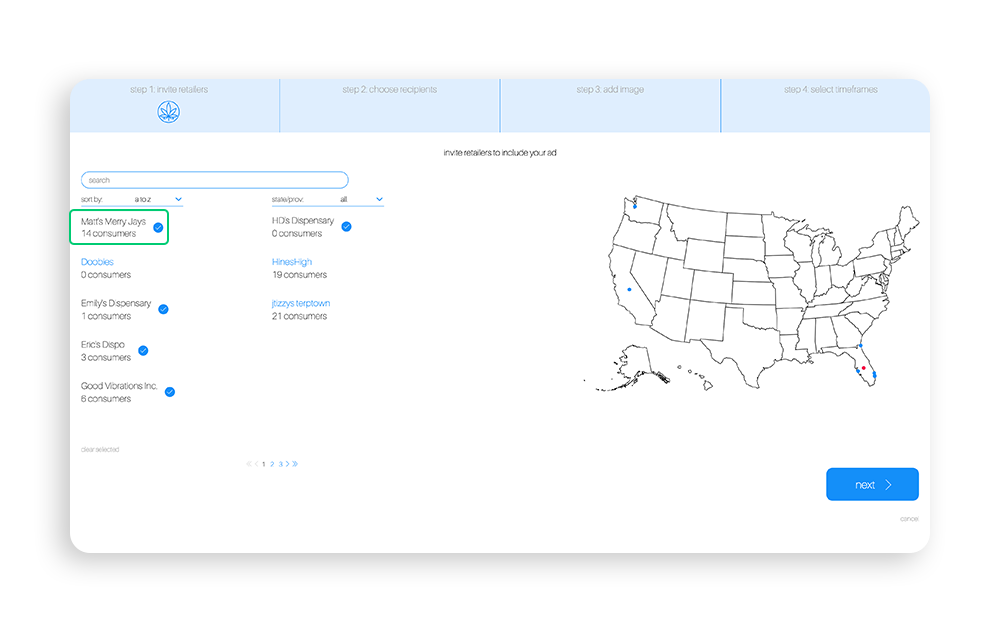
Step 2. Before creating a sponsored ad campaign, choose the retailers you would like your sponsored ad to be available to. The map on the right side of the page will indicate where the location of the retailers you’ve selected are located.

To select the audience, simply click on the name of the retail store you would like to make your ad available to. Each selected store will then show a check mark next to their name.

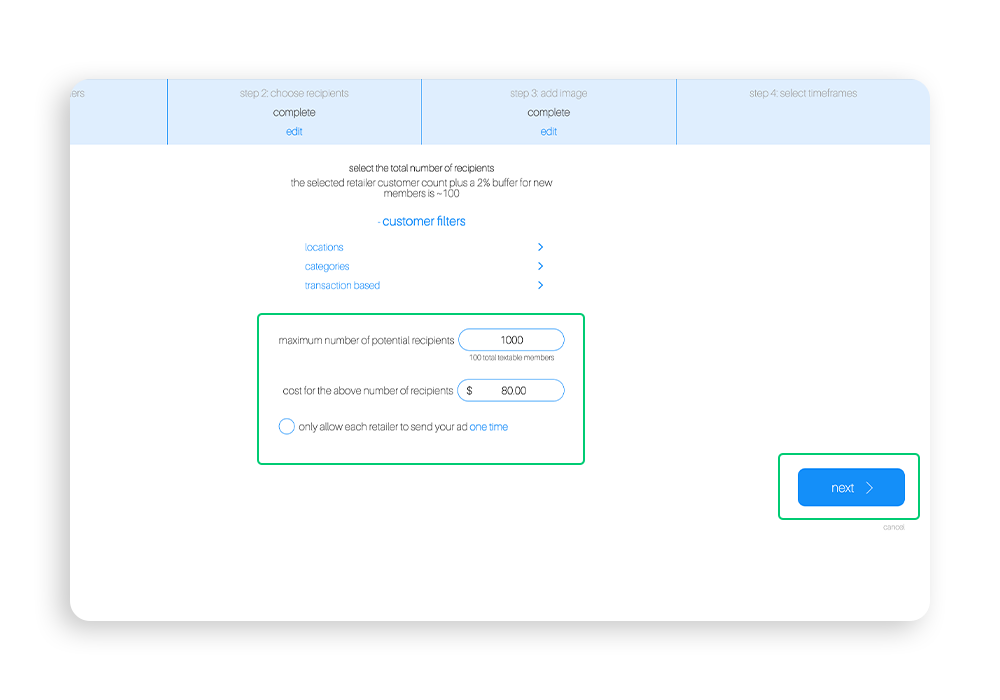
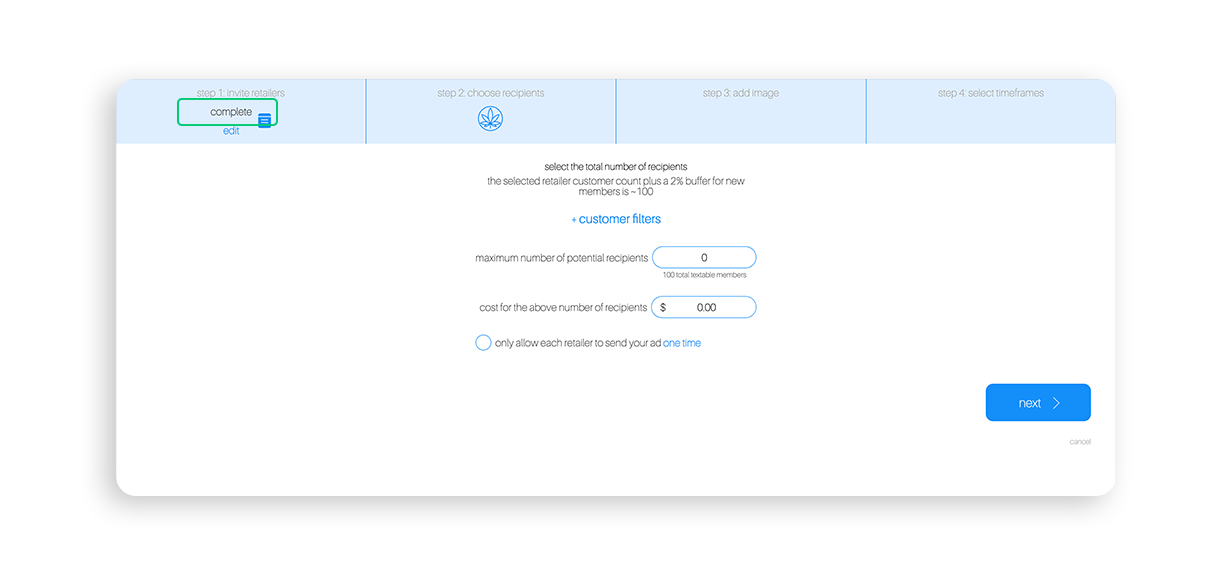
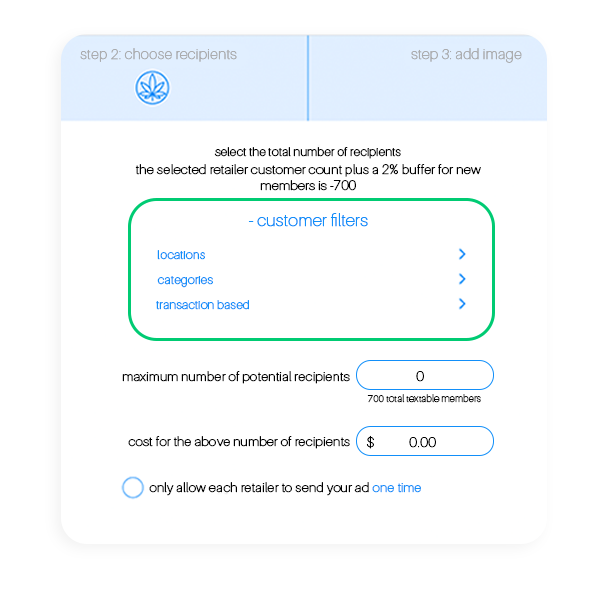
Step 3. Set the maximum number of recipients you would like to receive your ad. If you would like to have the ad campaign sent to a specific group of customers, utilize the customer filters drop down to select the groups. Once set, you will need to indicate the total number to reach the total recipients. 

Note: We recommend leaving the option labelled only allow retailers to send your ad one time unchecked, this way retailers can segment their campaign to reach multiple audiences.

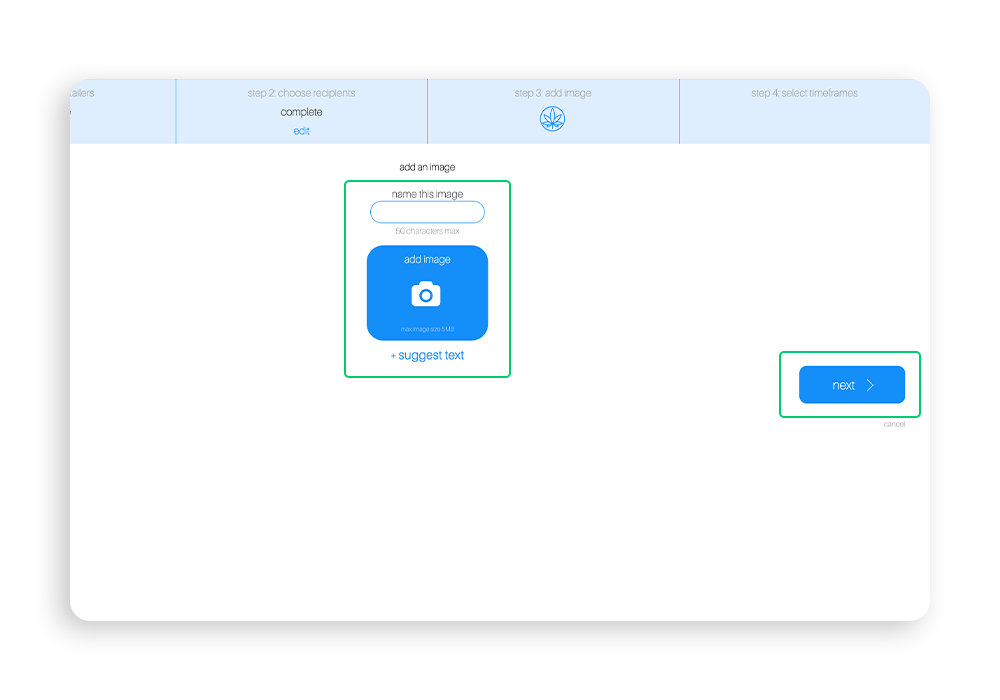
Step 4. Next, you will get to upload your own customized image for the ad campaign. Name your image, and then click the add image button to upload your image.

Note: There is also a box where you can view tips and suggestions from your retail partners about the kinds of images they would like to see.

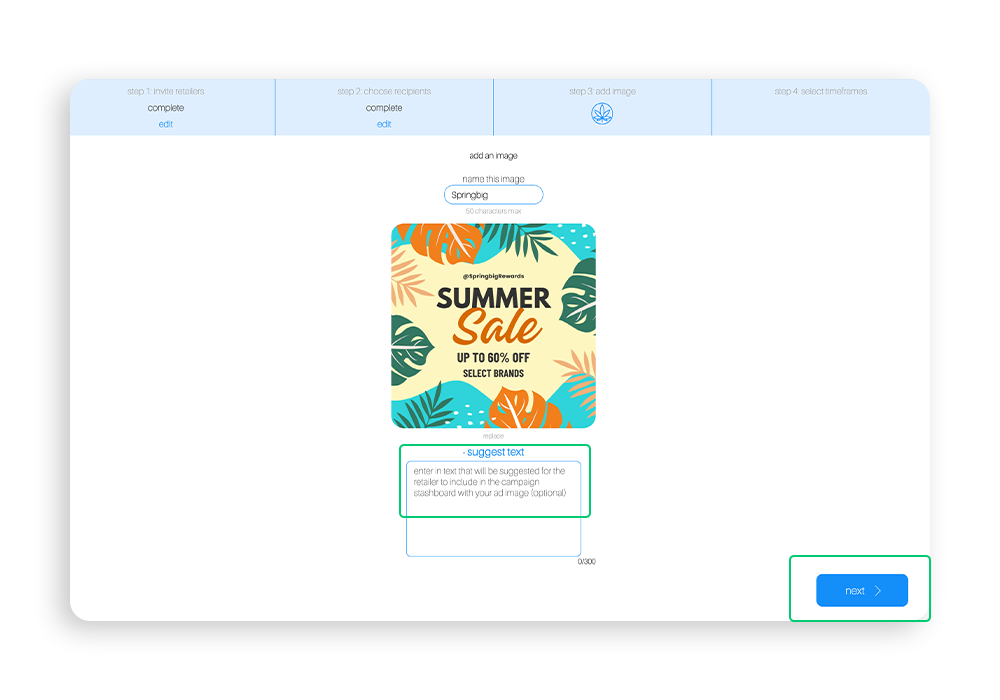
Note: You also have the suggest text option, where you can offer your retail partners your suggestions for what kind of text copy to include with the image you’ve uploaded on their promotional content. Keep in mind the retailer does have the option to choose their own content. 

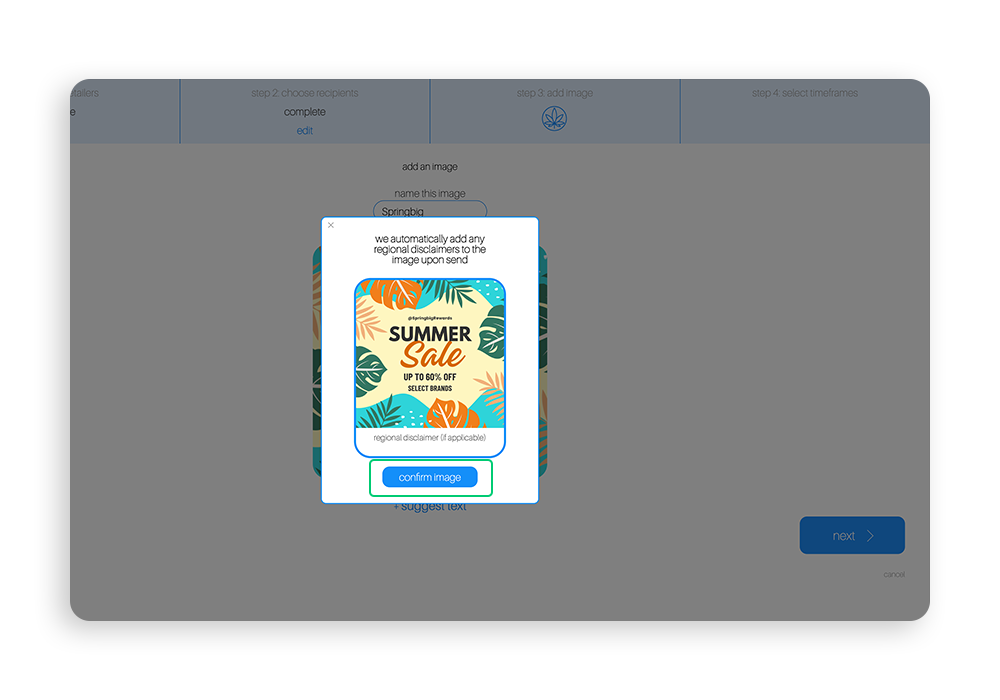
Step 5. When you’ve uploaded your image, a preview will populate. Click confirm image to proceed. Once you have confirmed your image, you will click on next from the upload image page.

Note: The best specs for an image are 1080 x 1080 and no more than 5 mb.

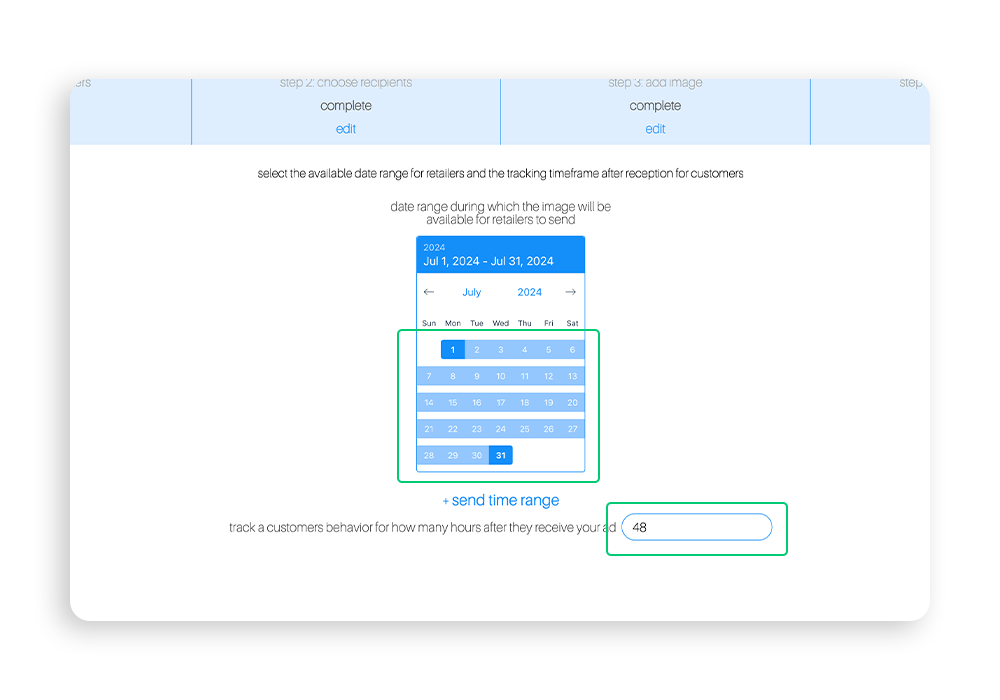
Step 6. Finally, select the date range that you would like your ad to be available for your retailers to send. Then, select time frame to track the recipients spending.

Note: You can also indicate how many hours after being sent you want to track your customers behaviors after they have received your ad.

Step 7. Once you have finished selecting your date range, click complete.

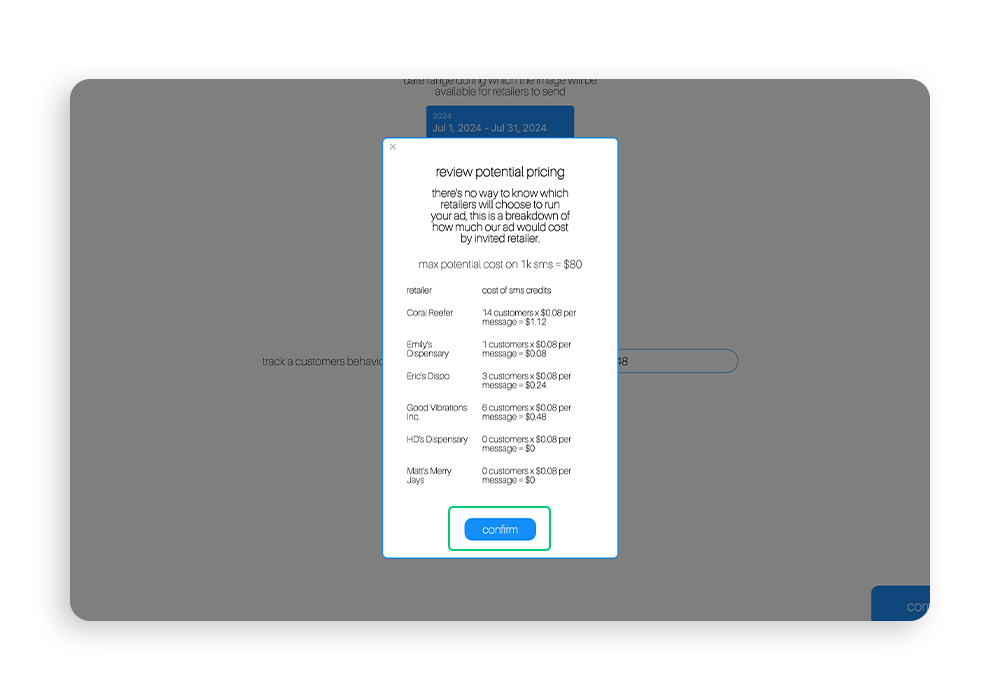
Step 8. Lastly, you will be prompted to review the potential pricing and give final confirmation for your ad. 

Note: There is no way to know which retailers will choose to run your ad, we provide a breakdown of how much your sponsored ad would cost by initiated retailers.

ACCEPTING SPONSORSHIP REQUESTS

Step 1. In the main page of the brands platform, brands will see a request tab. Click request to view the sponsorship request that merchants have sent you.

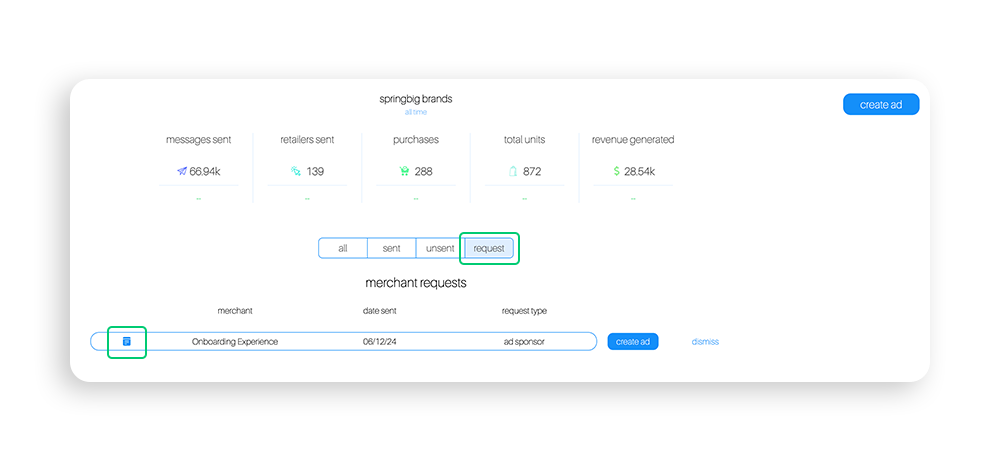
Step 2. To view the details of the request, click the small blue notepad icon on the left side of the request. Once clicked, you will see a form similar to this.

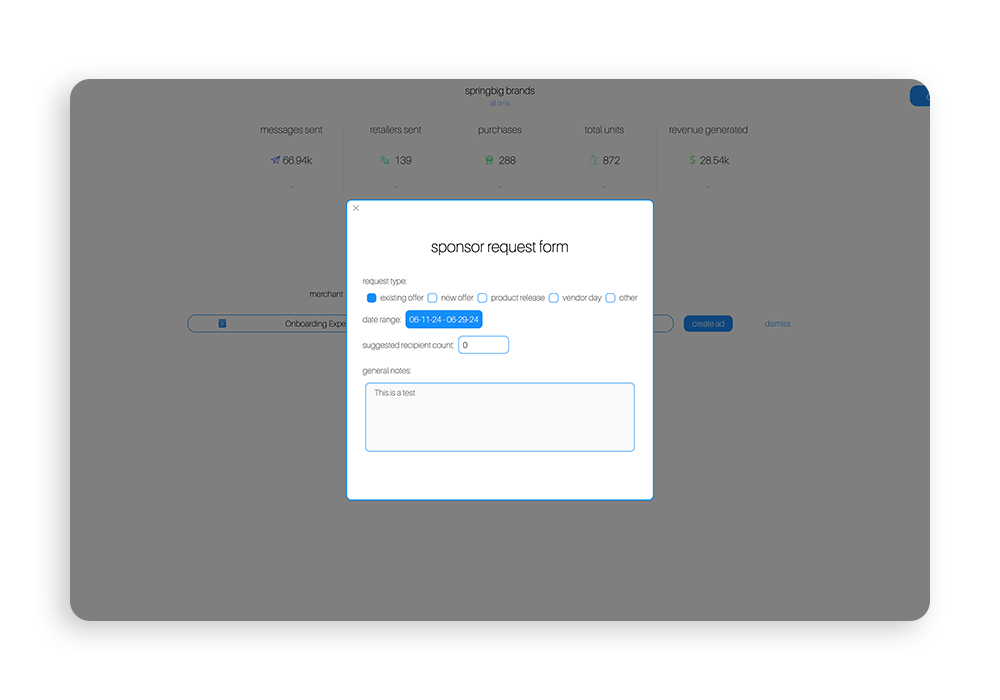
Note: Depending on the retailer, you may have all the information you need to begin creating the campaign, or you may need to reach out to the retailer or your contact at Springbig for additional information.

Step 3. Once you have reviewed the request information, if you would like to move forward you can begin instantly creating the ad by clicking create ad to the right of the request. To create your ad, follow the steps described in the previous section.

Note: Because the retailer reached out to you, you will have already completed step 1, which will be marked as complete.

Tip: If you need to reference the request form while creating the ad, click the small blue note icon shown in step 1.

CREATIVE MEDIA SPECS

Use the following specifications for your creative content:

Optimal Dimensions

Springbig recommends using the optimal dimensions for your brand’s creative media for co-marketing campaigns, which is 1080 x 1080 pixels.

Accepted File Types

The Springbig platform accepts:

  • PNG
  • JPEG
  • JPG

Maximum File Size

The Maximum file size accepted is 5MB

Creative Best Practices

  • Use bright and colorful images to draw the customers attention
  • Highlight brand identity and product packaging
  • Try not to crowd your visuals with too much text
  • Include promotional details for any offers included, such as $ off or % off

    Use the following specifications for your creative content:

    Optimal Dimensions

    Springbig recommends using the optimal dimensions for your brand’s creative media for co-marketing campaigns, which is 1080 x 1080 pixels.

    Accepted File Types

    The Springbig platform accepts:

    • PNG
    • JPEG
    • JPG
    • GIF

    Maximum File Size

    The Maximum file size accepted is 5MB

    Creative Best Practices

    • Use bright and colorful images to draw the customers attention
    • Highlight brand identity and product packaging
    • Try not to crowd your visuals with too much text
    • Include promotional details for any offers included, such as $ off or % off

BRANDS FILTERING OPTIONS

Customer filters will help you target your message to customers most likely to identify with and purchase your brand. To set up customer filters for your brand ad, click customer filters and a drop-down will appear where you can select locationscategories, and transaction-based filters.

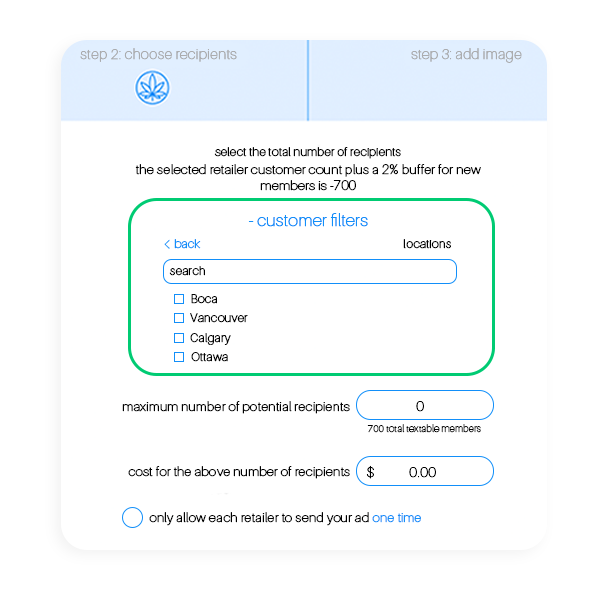
  • Locations customer filter:
    • With the location-based customer filter, you can segment the audience so that your ad only targets those in specific locations.

  • Categories customer filter:
    • With the categories customer filter, you’ll be able to segment the audience to only those that are interested in specific categories of products, for example, Flower

      • Transaction-based customer filter:
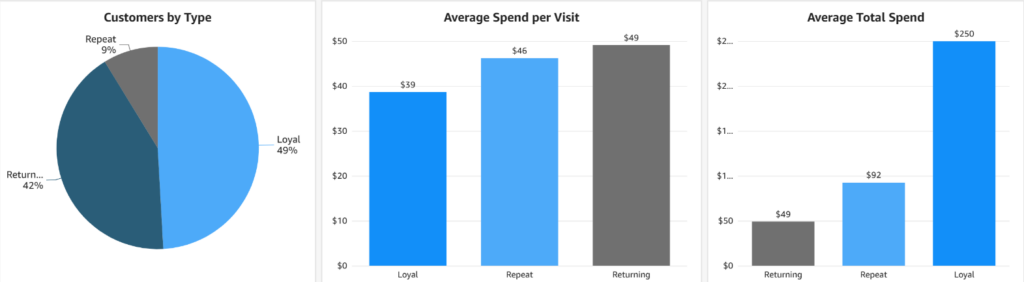
        • Within the transaction-based customer filter, you’ll be able to select between visit recency, spending total, visit total, and average spend

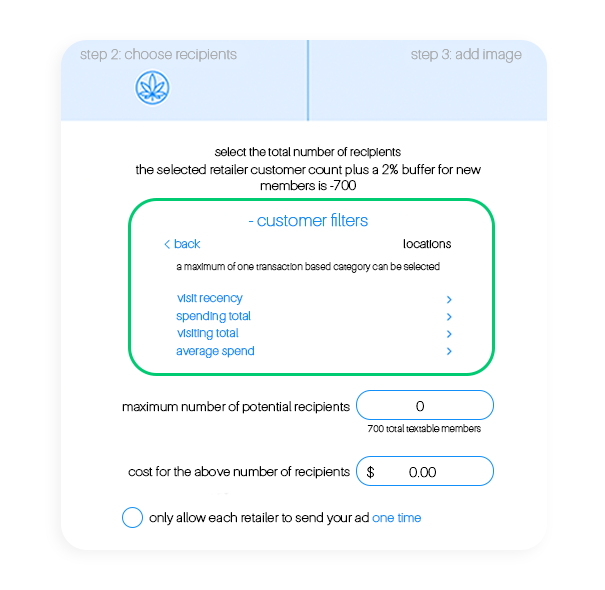
          • Within each of these, you’ll be able to get even more granular.
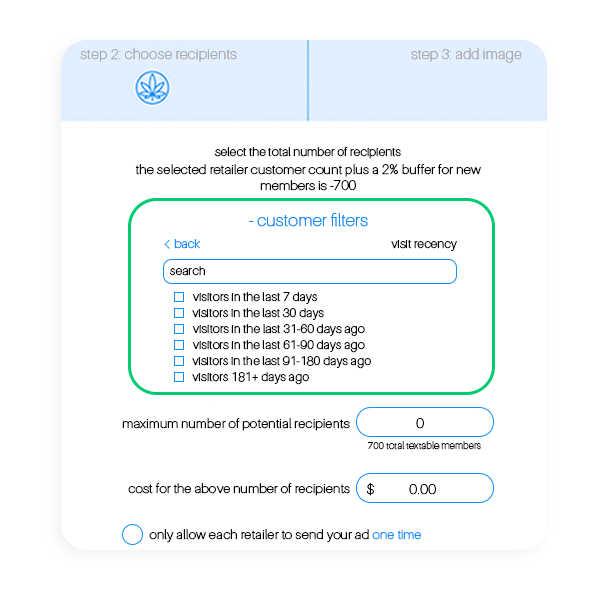
            For example: Within the visit recency drop-down, you can choose between a range of visitors that ranges from visitors within the last 7 days, to visitors within the last 181+ days.

INSIGHTS & CAMPAIGN ANALYSIS

Once you’ve run your first campaign, you’ll want to navigate to the “Insights” tab under the main menu (top left corner)

Once you are in the Insights tab, you will notice that the Campaign Analysis tab on this dashboard is showing a cumulative report of ALL campaigns ran. If you would like to look at one specific campaign, follow the directions below:

  1. Select “Controls” drop down
  2. Click on the “Campaign Name” drop down
  3. Search value in this format: first 3 letters of month / 4 digit year & enter

Now that you are looking at one campaign’s results, let’s dive into how to read them. First you’ll notice how many messages sent and campaign cost in the top right hand corner boxes.

  • Total sales = How many units of your brand sold during the campaign period
    • Campaign period is automatically set to 3 days, you’ll want to change this to one day if the campaign only applied to one day (2 days is an option as well)
    • If you’d like to see how many of these units came from recipients of the campaign, you’ll find that info in the middle graph on the bottom half of the dashboard under “Recipient Breakdown Sales”
  • Units = Total number of units sold during campaign period (recipients + non-recipients)
  • New customers = # of people who bought your brand for the first time in at least 6 months, if ever
  • Total customers = # of people who bought your brand during the campaign period
  • Actual vs. Expected units
    • Actual = # of units your brand sold during campaign period
    • Expected = average brand sales from the previous 21 days
  • Location breakdown = shows you how many units moved at each location (only applies to multi-location)
  • Sales by product = shows you how many units sold of each SKU (Most sold SKU)
  • Average Basket Size
    • Of those who buy your brand
    • Of those who do not buy your brand

Now let’s explore the second tab, “Returning Customer Analysis”.. First you’ll want to make sure you are looking at just one campaign by using the same method outlined above to search by date. 

Once you’ve selected the right campaign, you’ll want to remember that this dashboard is measuring all of the new customers you earned (in the top left box) & tracking their purchases to see how many times they are returning to buy your brand.

  • Returning Customers= # of new customers that are returning to buy your brand
    • All of the boxes along the top row pertain to these returning customers
  • Sales by Customer Type
    • Shows how many units each customer type has come back to purchase of your brand since the campaign was ran

CUSTOMER TYPE DEFINITIONS

Return Customer = Member has made 1 post campaign visit to purchase brand

Repeat Customer = Member has made 2 post campaign visits to purchase brand

Loyal Customer = Member has made 3+ post campaign visits to purchase brand

  • Location breakdown = shows you how many units moved at each location since the campaign was ran (only applies to multi-location)
  • Sales by Product = # of units of each sold SKU since the campaign was ran
  • Customers by Type = Pie chart of the “Sales by Customer Type” data
  • Average spend per visit = shows you the average spend of each customer type
  • Average total spend = shows you the average total spend of each customer type
  • Post Campaign Sales Details = ledger of units moved that includes dates, SKUs, units, location, and brand/product tags