Springbig’s powerful Audience Builder empowers you to reach your customers like never before. With the flexibility to create audiences as broad or specific as you need, you can tailor marketing efforts to meet unique customer interests and behaviors. Choose from a vast library of attributes to create highly personalized audiences—with over 3 million combinations available, the possibilities are virtually limitless. Use your custom audiences to monitor essential KPIs, review member-specific data, and send targeted offers that resonate. Discover how Springbig’s Audience Builder can elevate your engagement strategy and connect with your customers in meaningful ways.
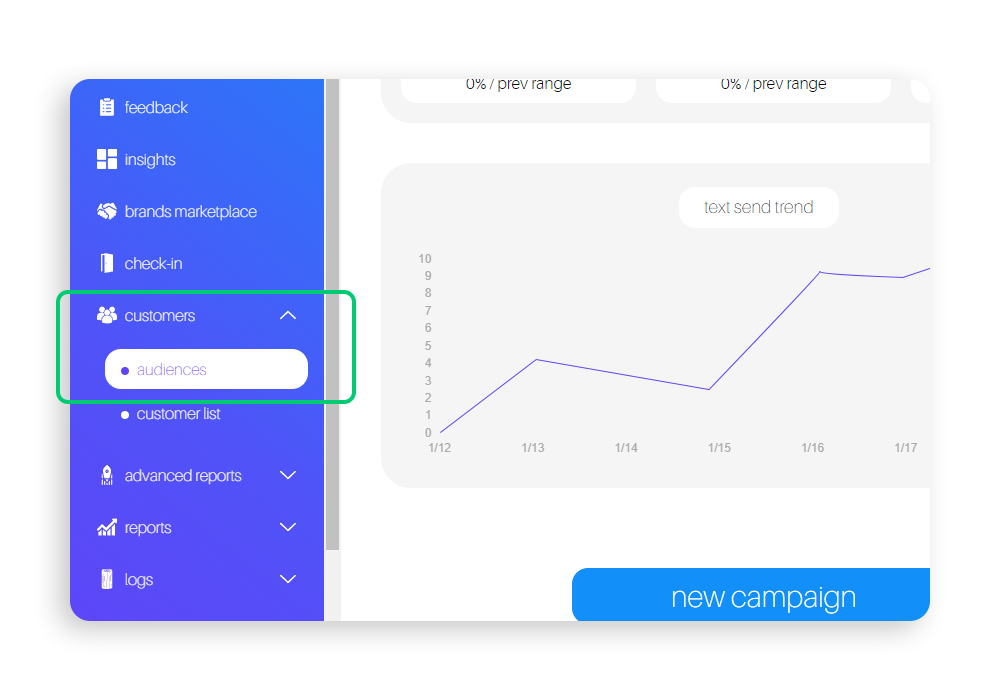
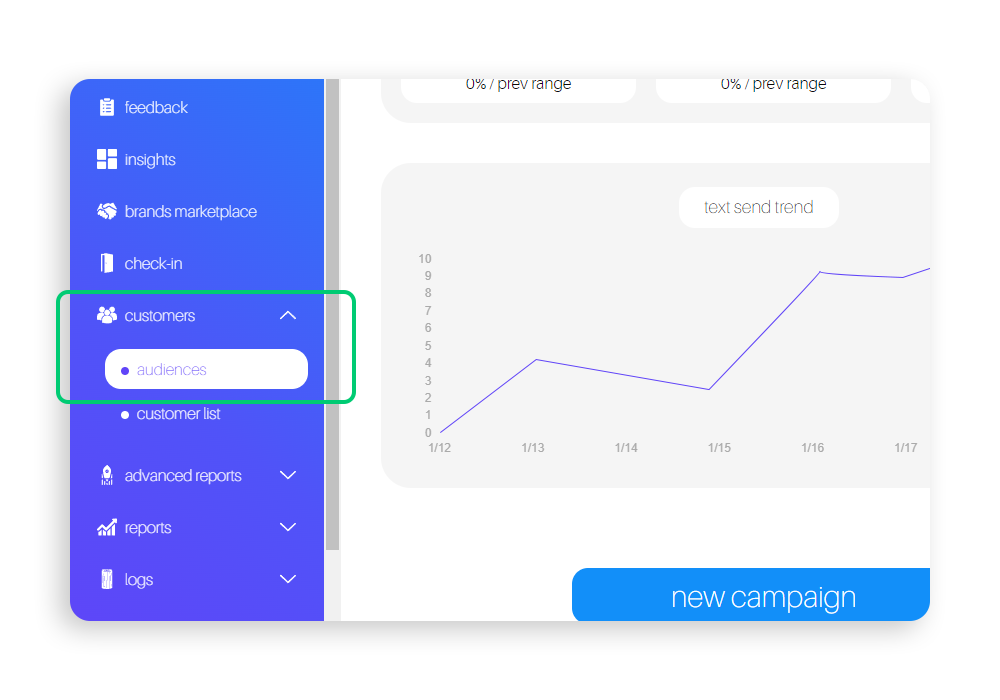
From the main menu, navigate to the Customersdropdown, and select Audiences
Step 2.
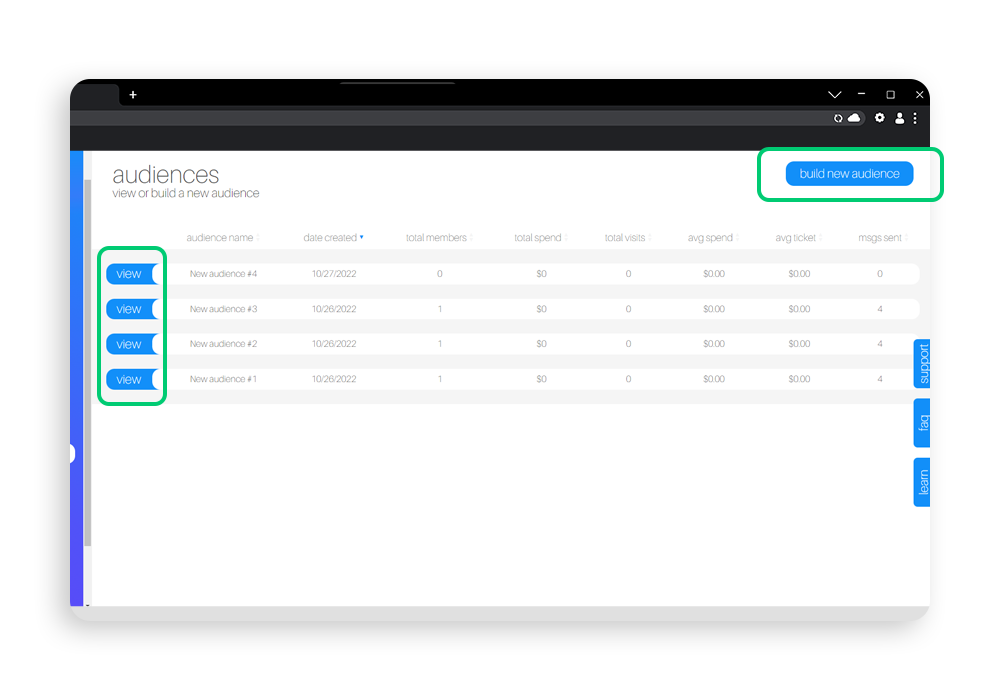
In the Audiences page, you can view any previously created audiences, or create a new audience by selecting build new audience.
Step 3.
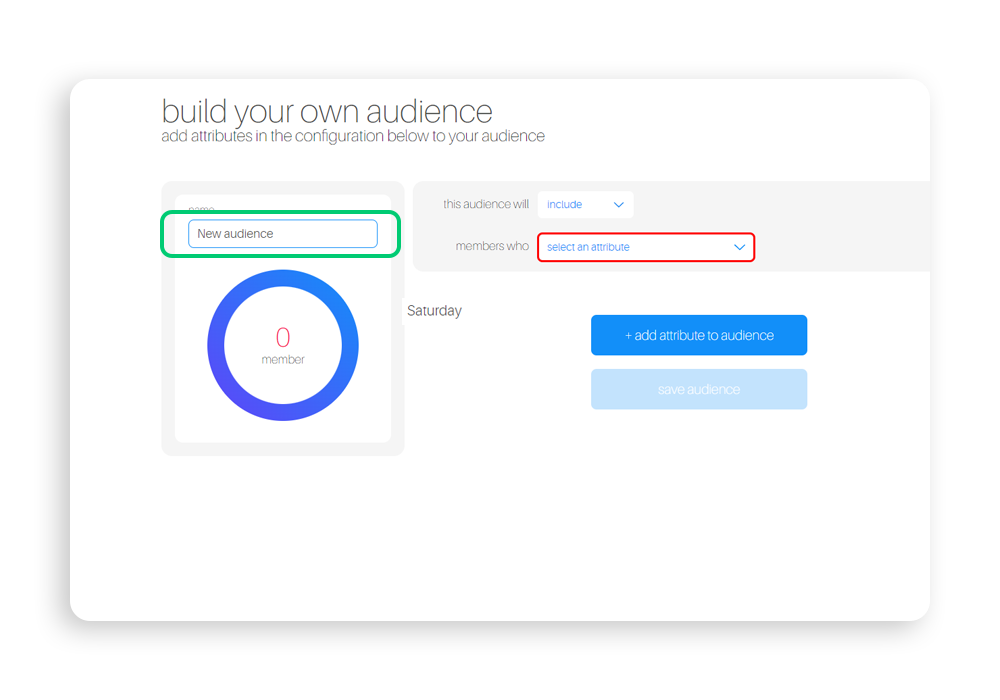
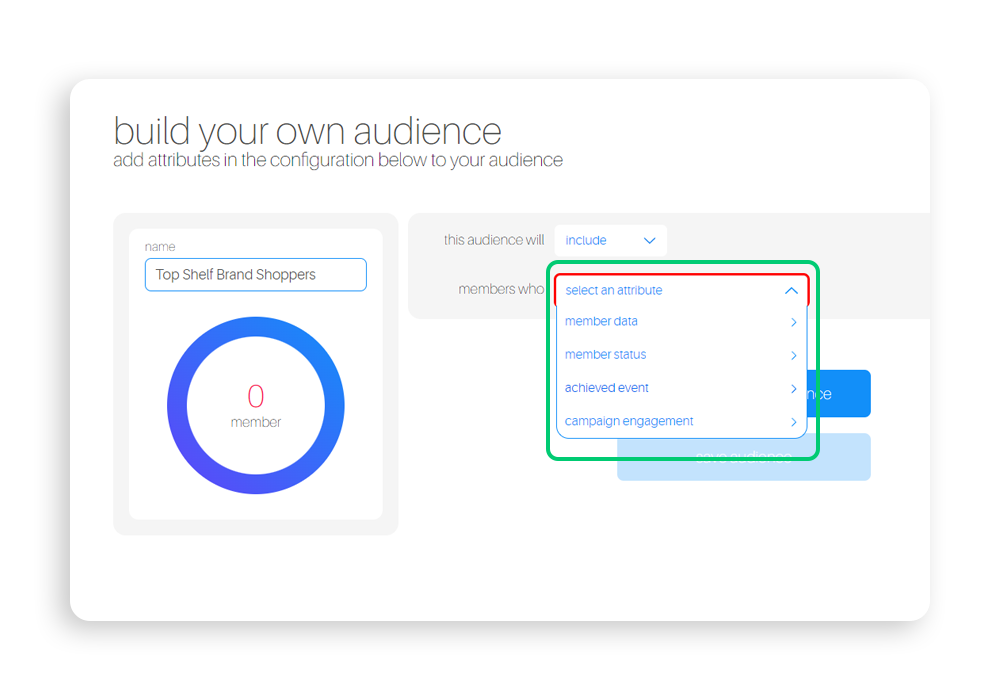
When you select build new audience, you are brought to the build your own audience page where you are able to start configuring your audience. Please make sure to name your audience.
Step 4.
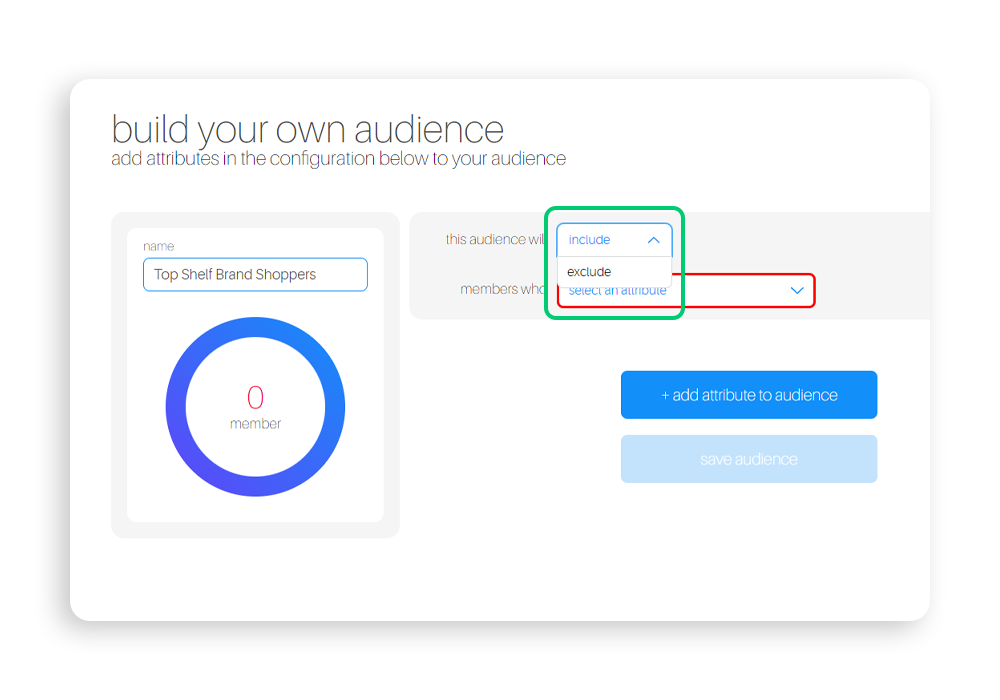
You will first be prompted to either includeor exclude the specific audience which you are creating. Selecting include will populate the members who did complete the attribute selected from the second dropdown. Selecting exclude will populate all the members who did not complete the attribute selected from the second dropdown.
Step 5.
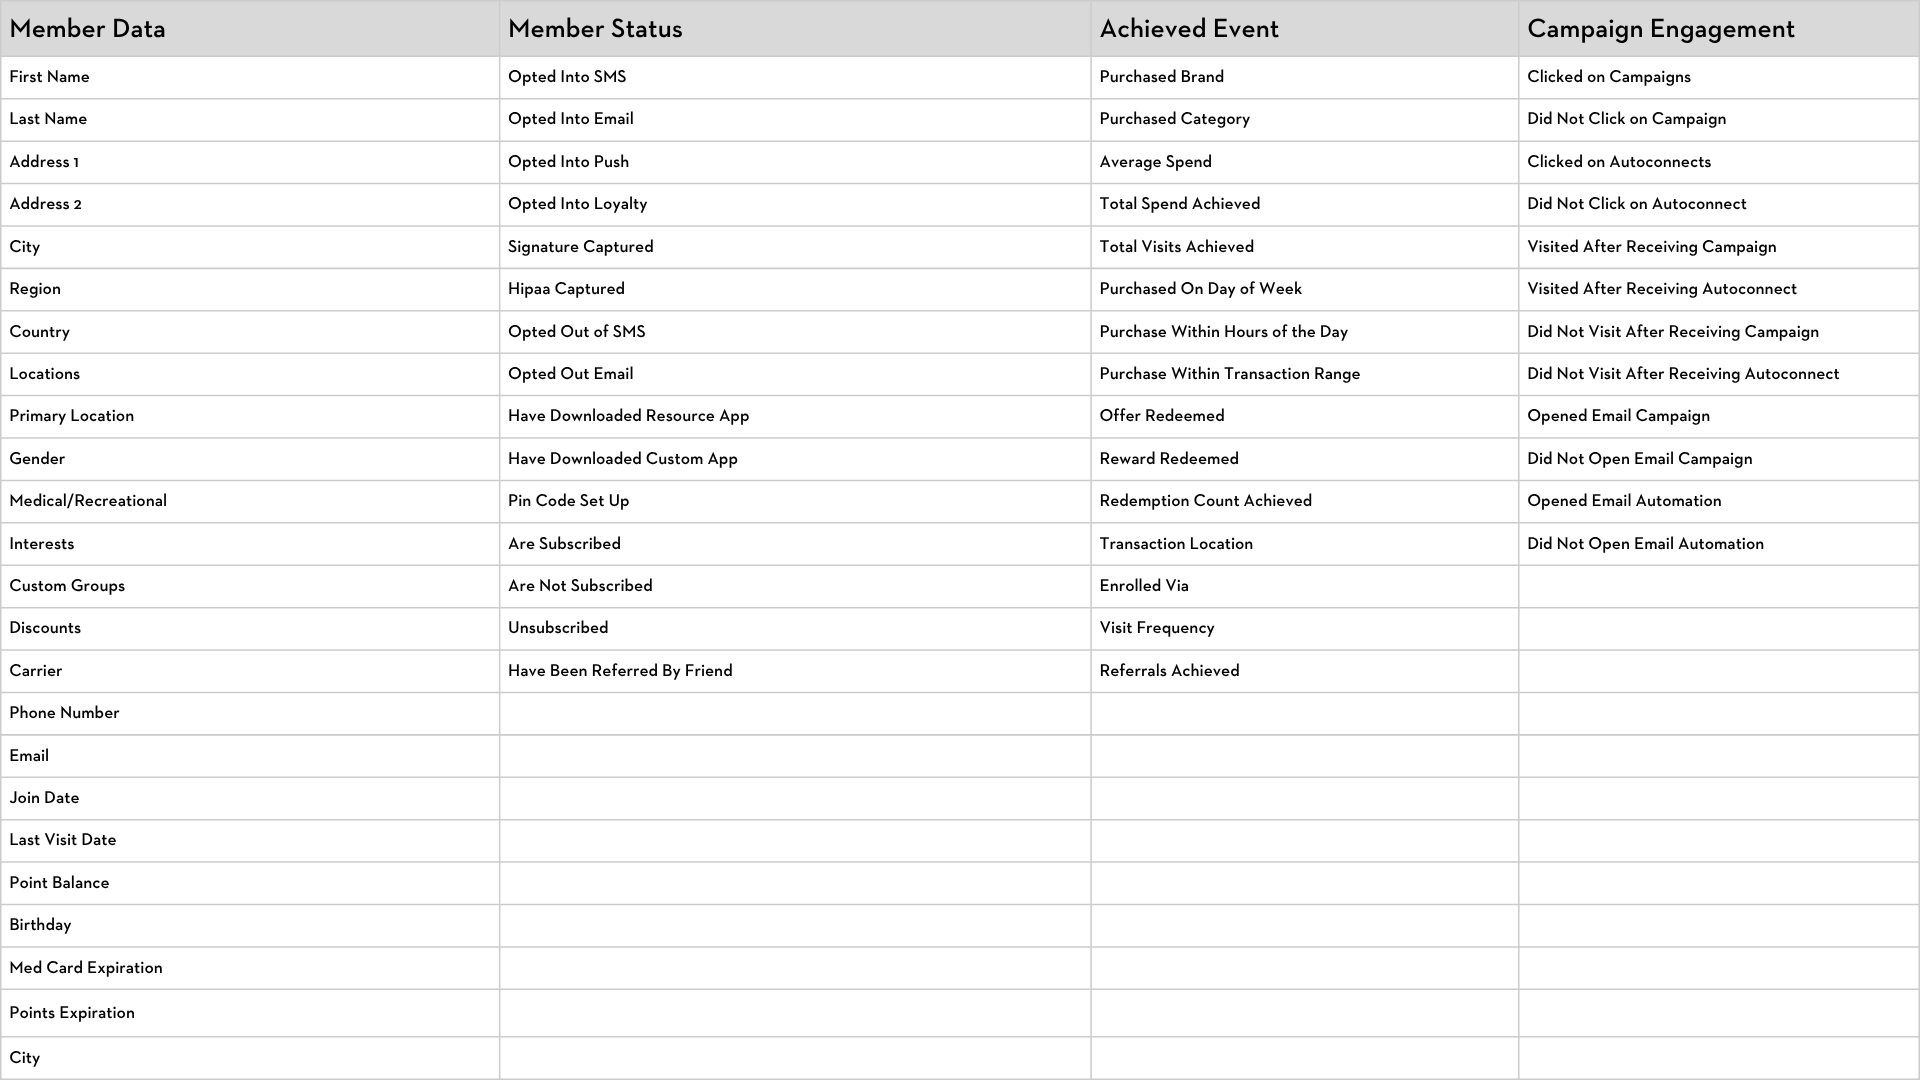
You are then prompted to select the attribute from the second dropdown. The attribute categories available are: member data, member status, achieved event, and campaign engagement.
Step 6.
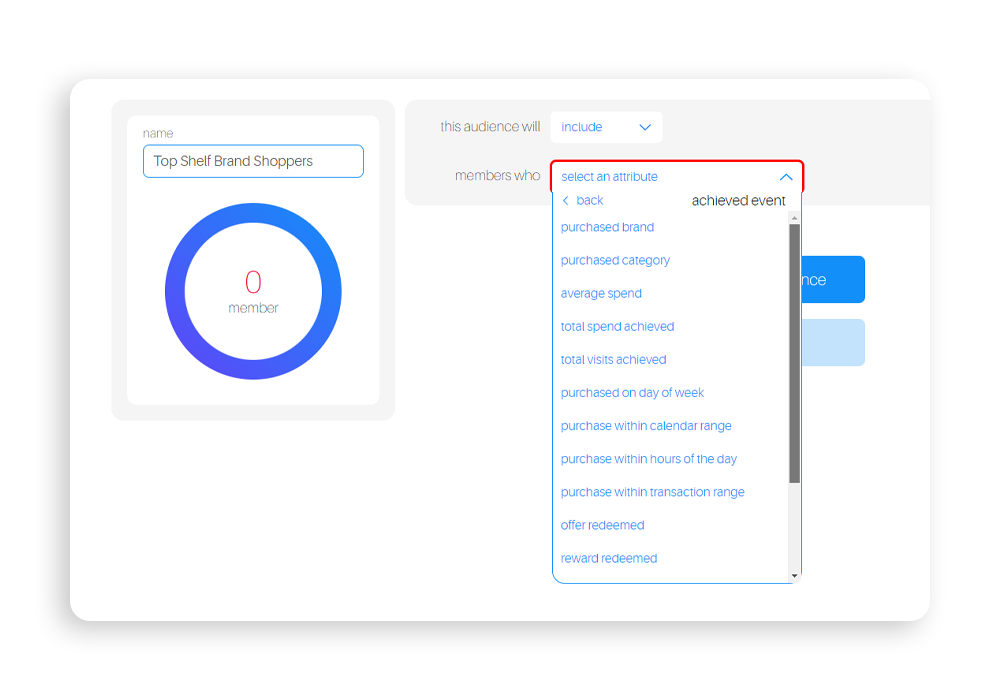
Once you select the attribute category, you must select the attribute itself.
Step 7.
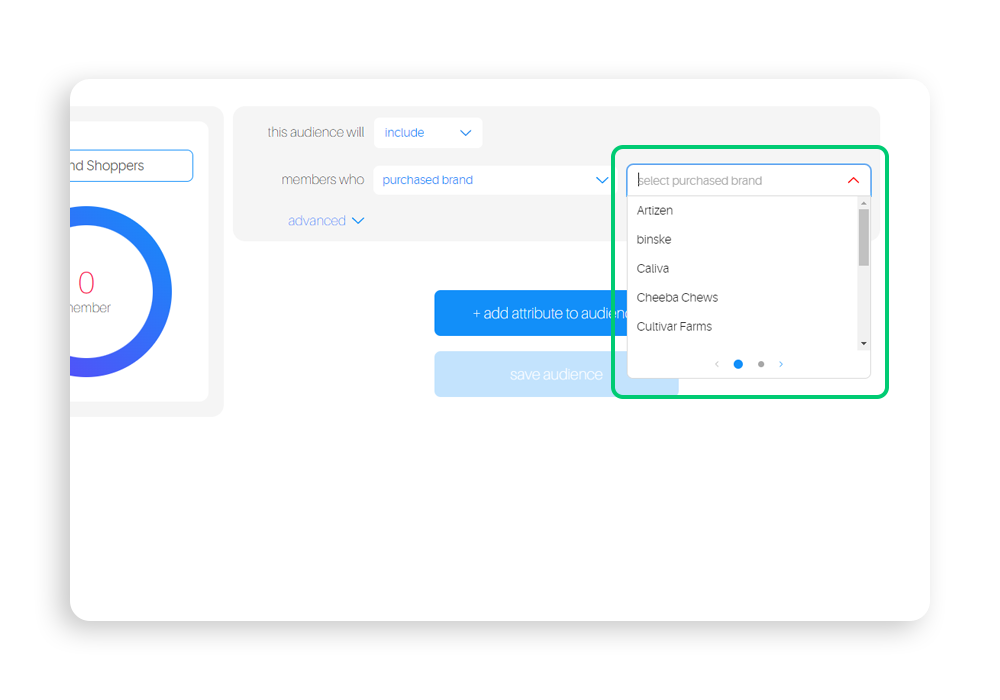
Once an attribute is selected, a subsequent dropdown will appear. Based on your initial selection, this new dropdown will contain additional options to select from to identify your group.
In the example above, purchased brand was selected and the additional dropdown contained the brands associated with the retailer’s point of sale.
NOTE
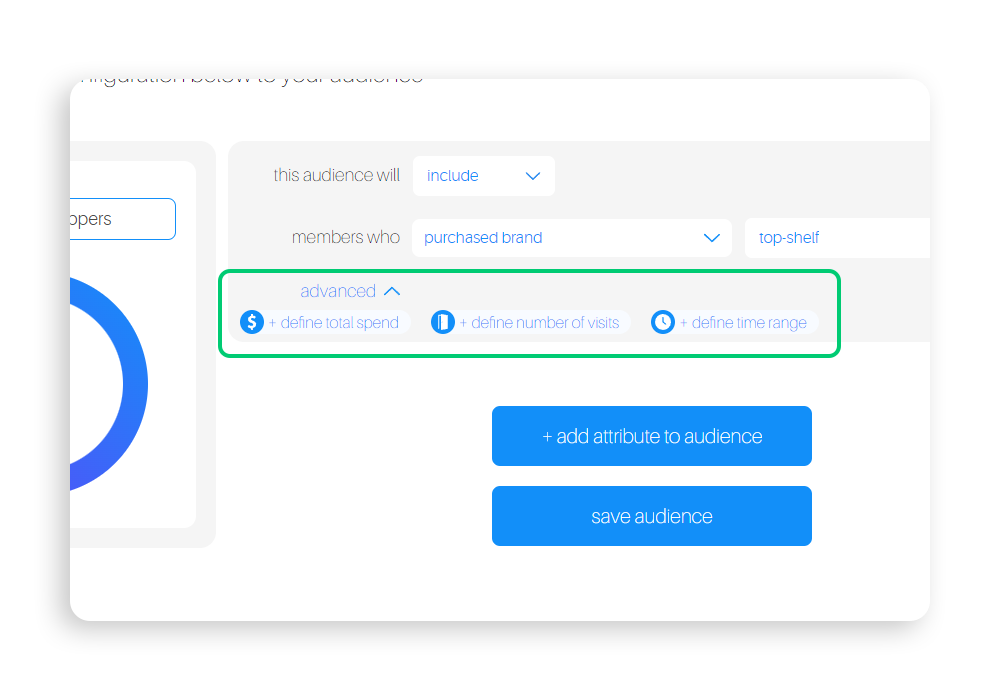
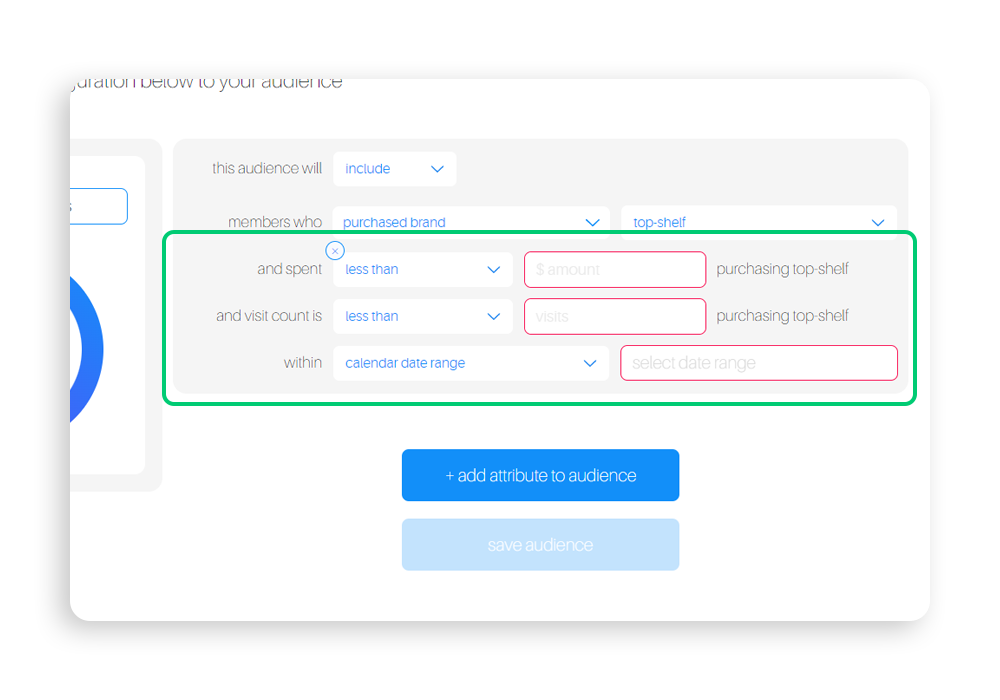
Depending on the attribute selected, there are additional advanced attributes to select as well.
Including: define total spend, define number of visits, define time range (within a calendar range or day range).
Step 8.
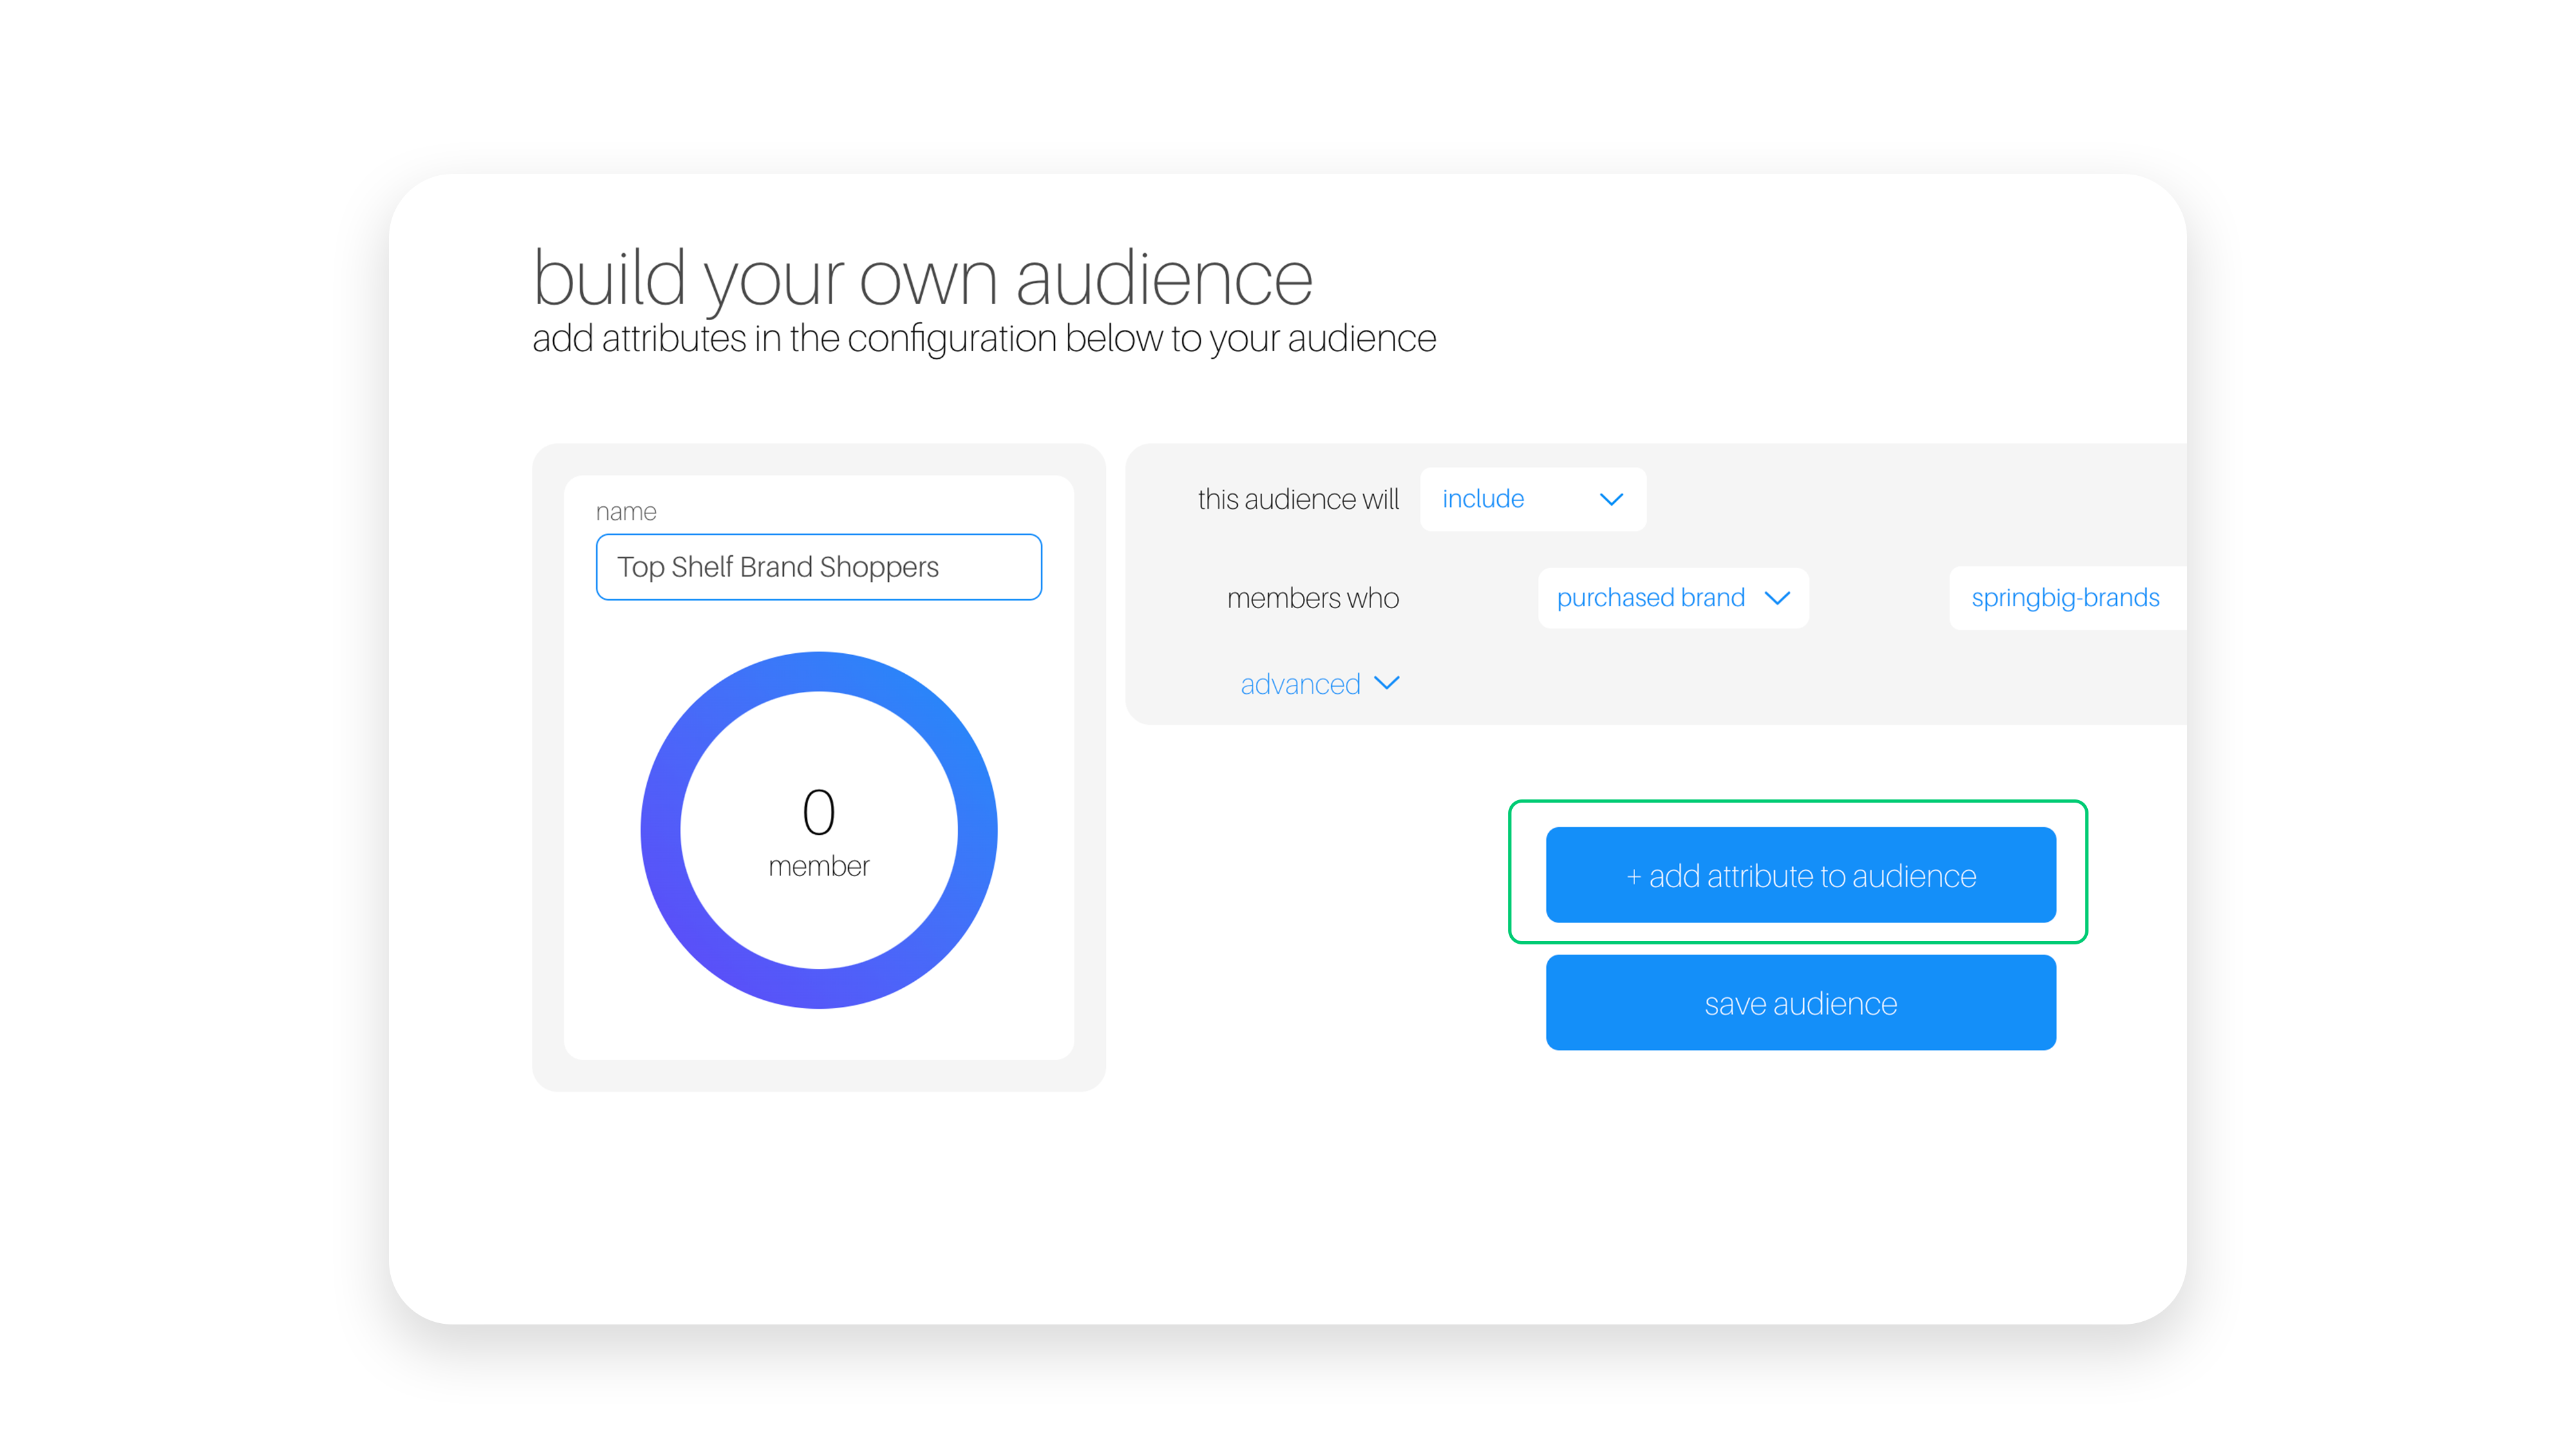
Once selected, you will see the member count populate on the left side of the audience builder. You can choose to save the audience from there, or add in additional attributes.
Step 9.
To add an additional attribute, select the +add attribute to audience button. This will populate and/or logic and a new attribute area.
Step 10.
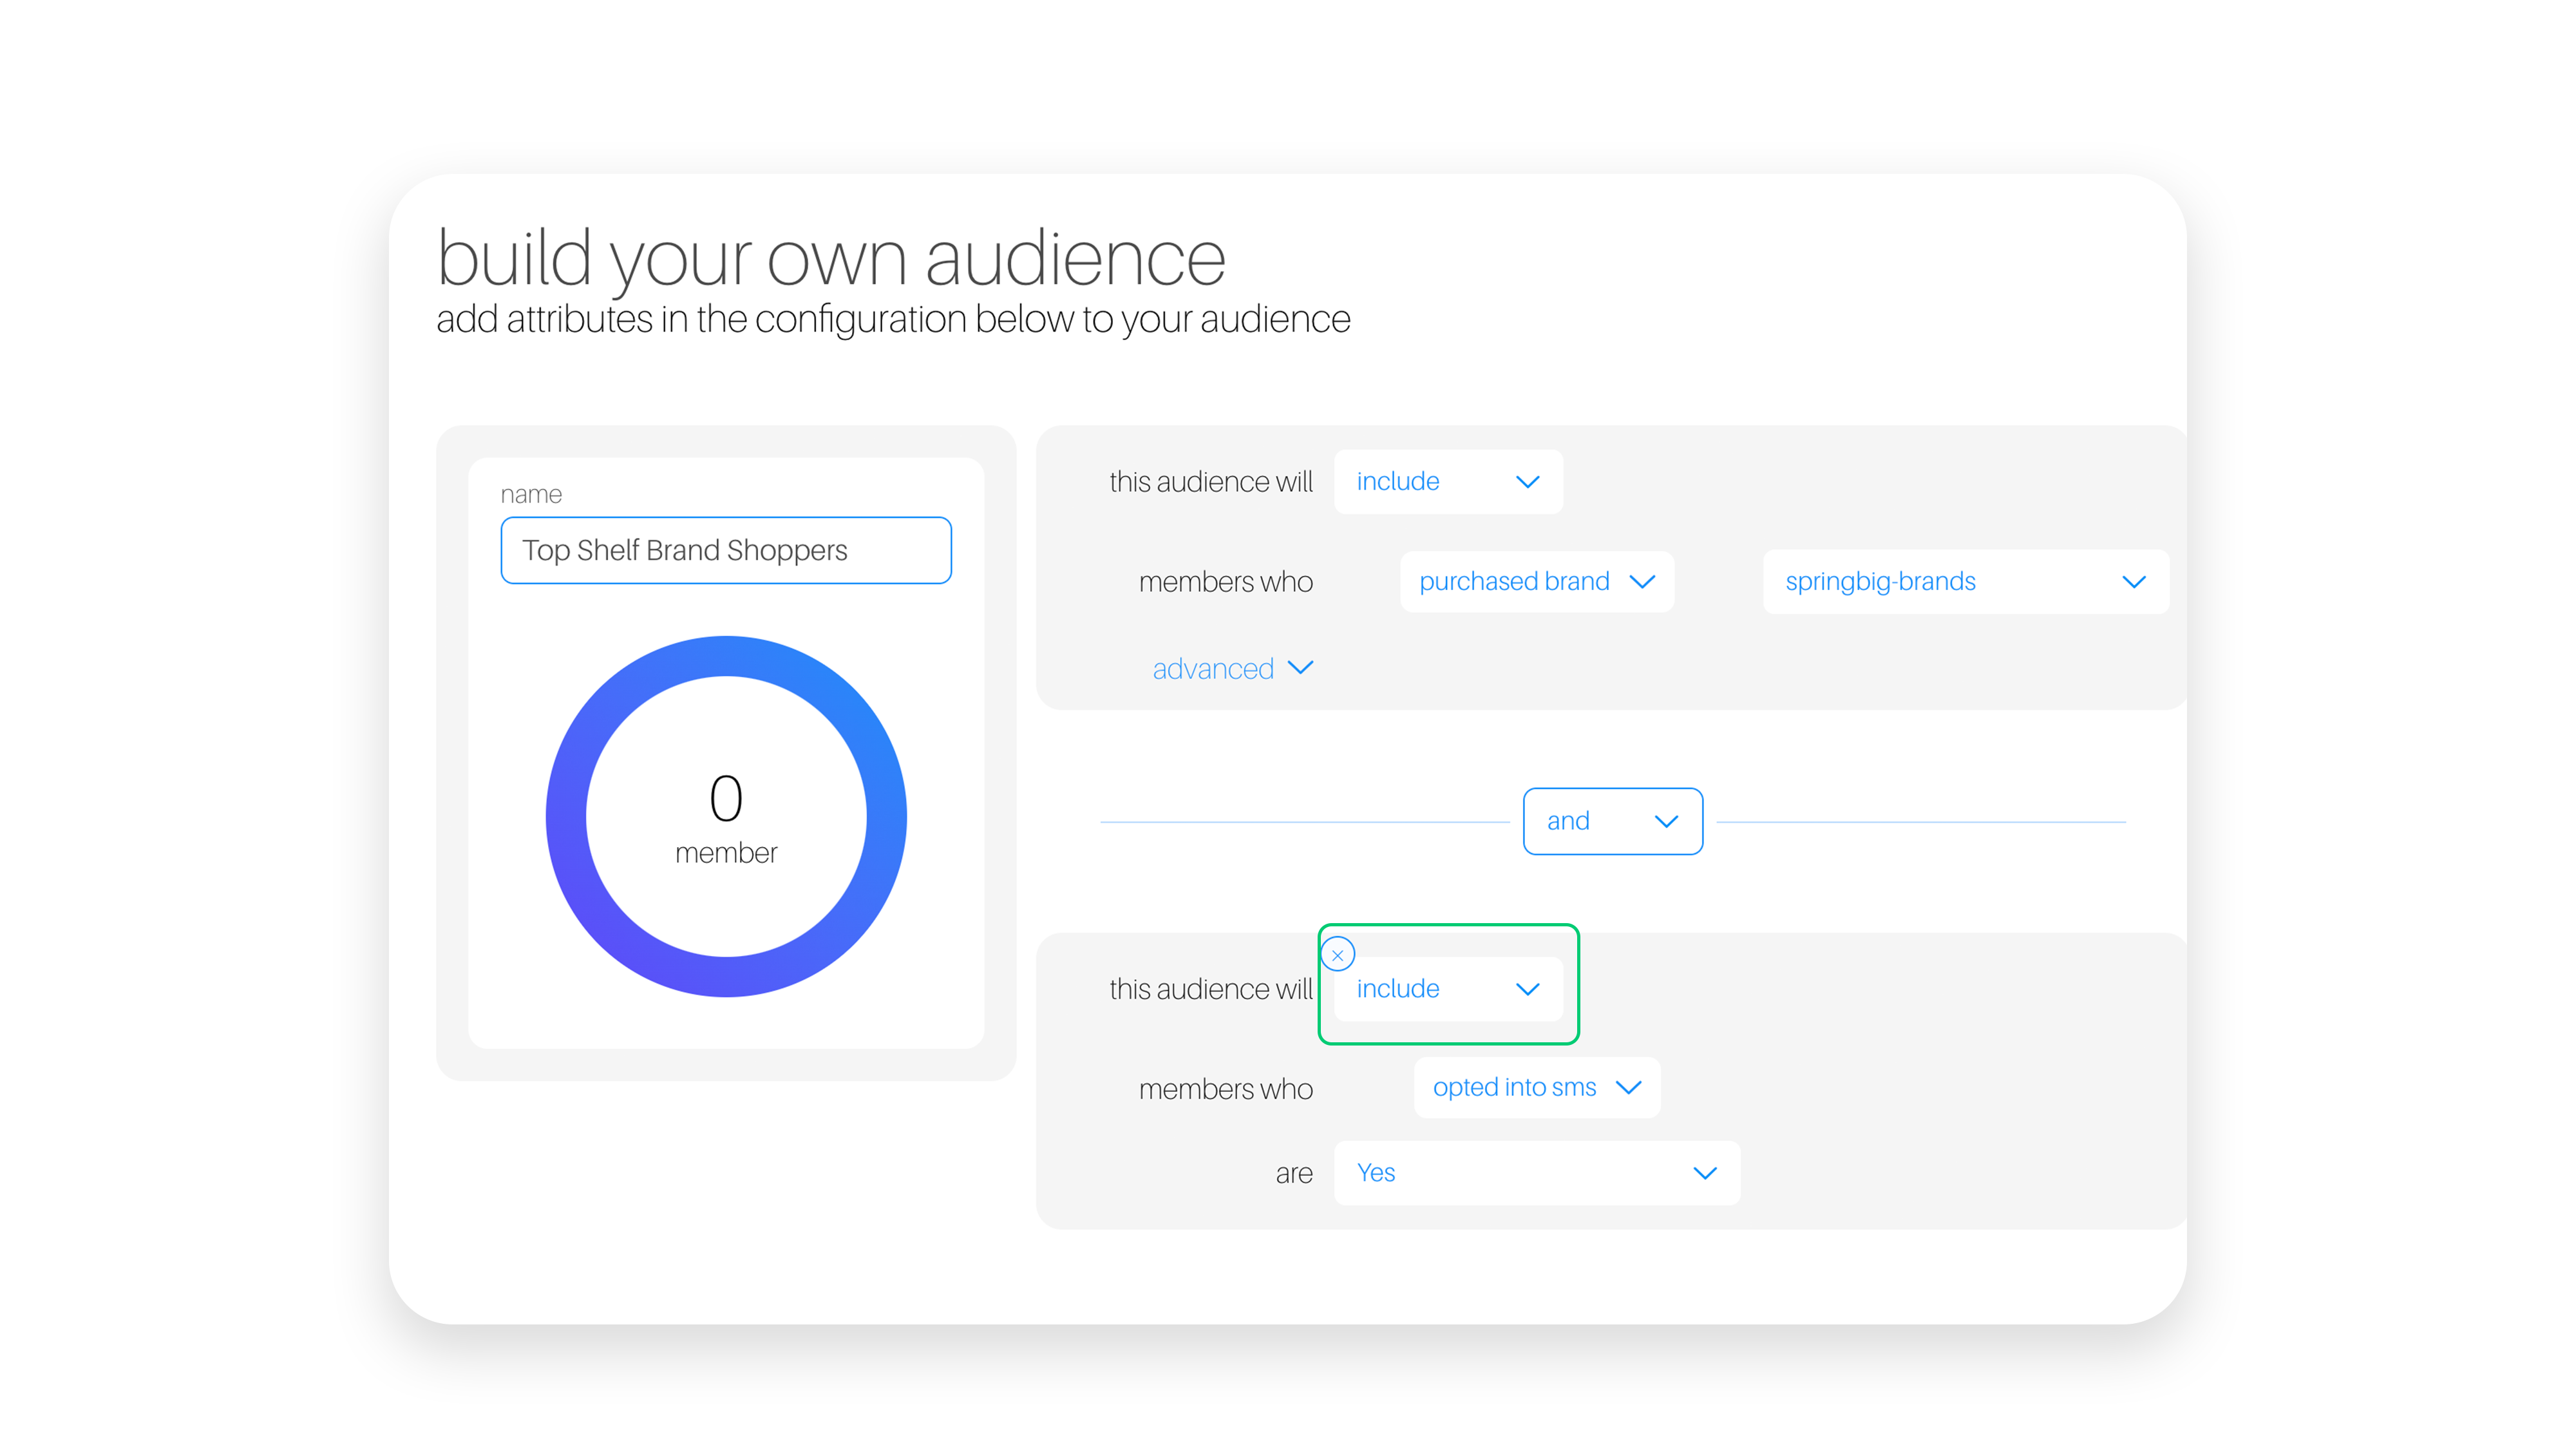
You must decide to use and logic or or logic. And logic requires members to fulfill both attributes selected. Or logic requires members to fulfill only one attribute to be added into the audience.
Step 11.
Once the and/or logic is selected, you must go through the steps to either include or exclude the additional audience, and select a specific attribute from the 4 attribute categories available.
Step 12.
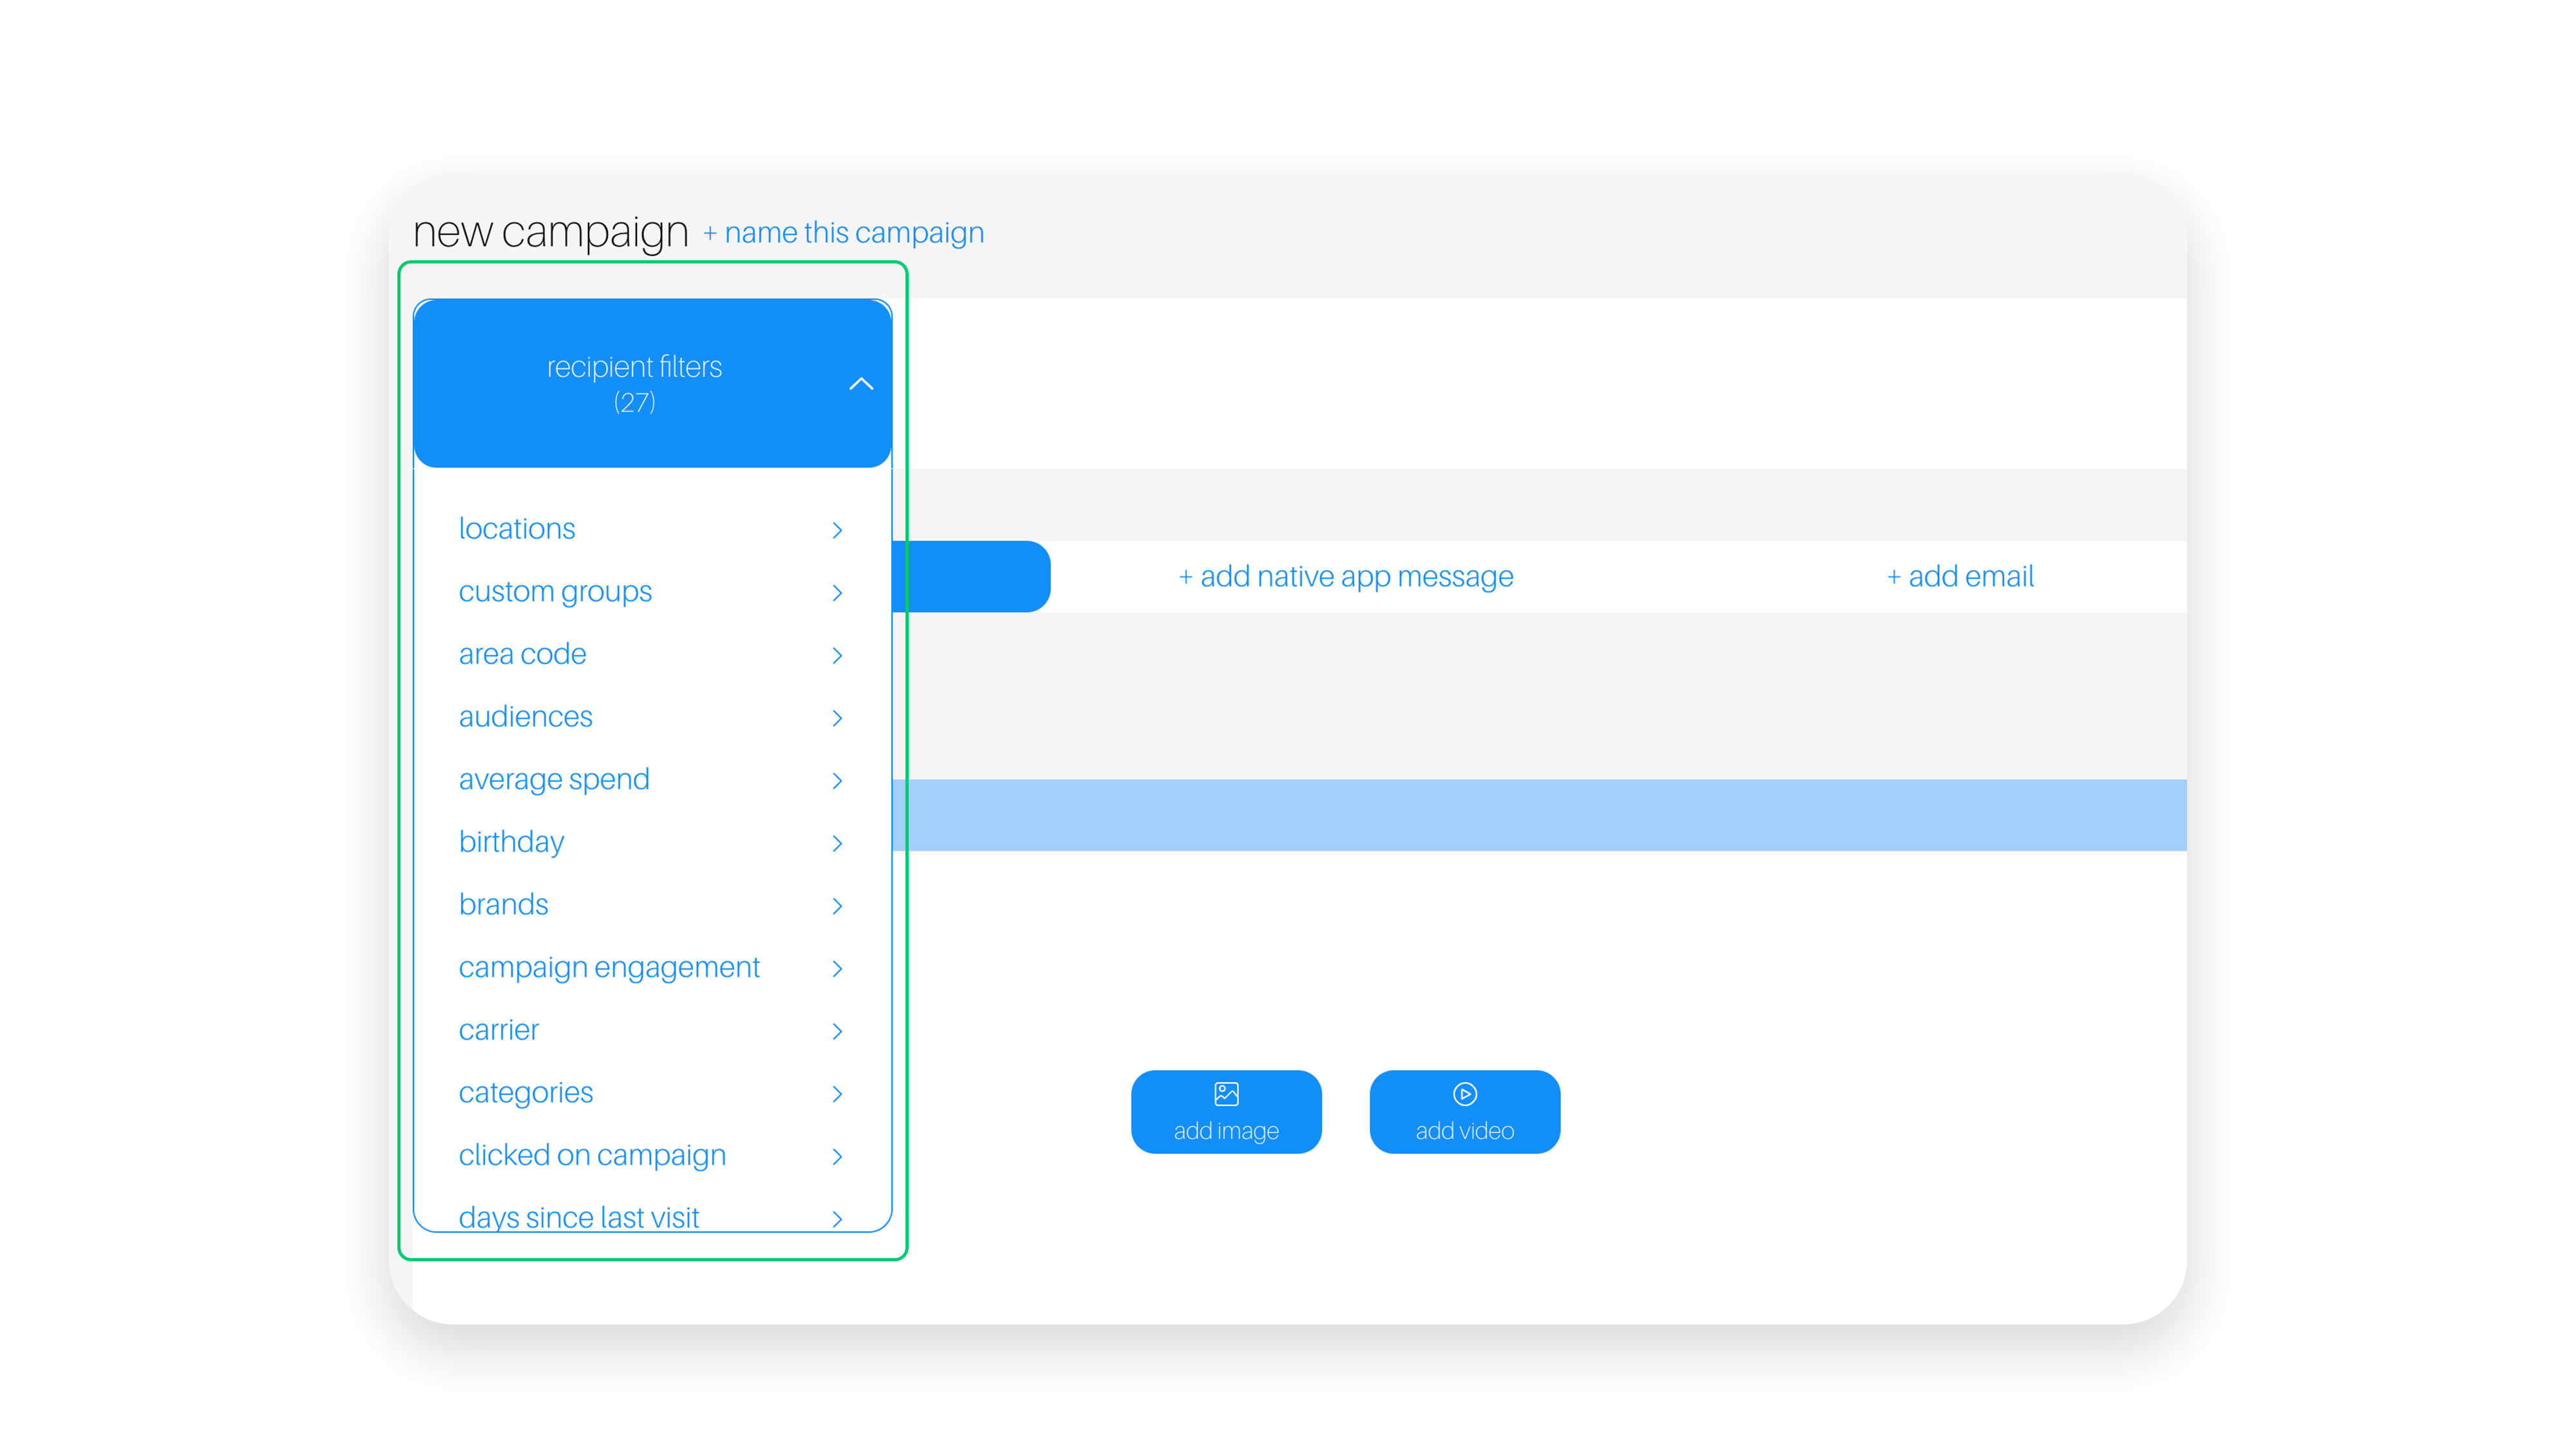
Once you are content with the audience created, select save audience. Once saved, the audience will build in your platform. You are then able to filter any campaigns, autoconnects or member offers by selecting the named audience from the recipient list dropdown, under audiences.
NOTE:
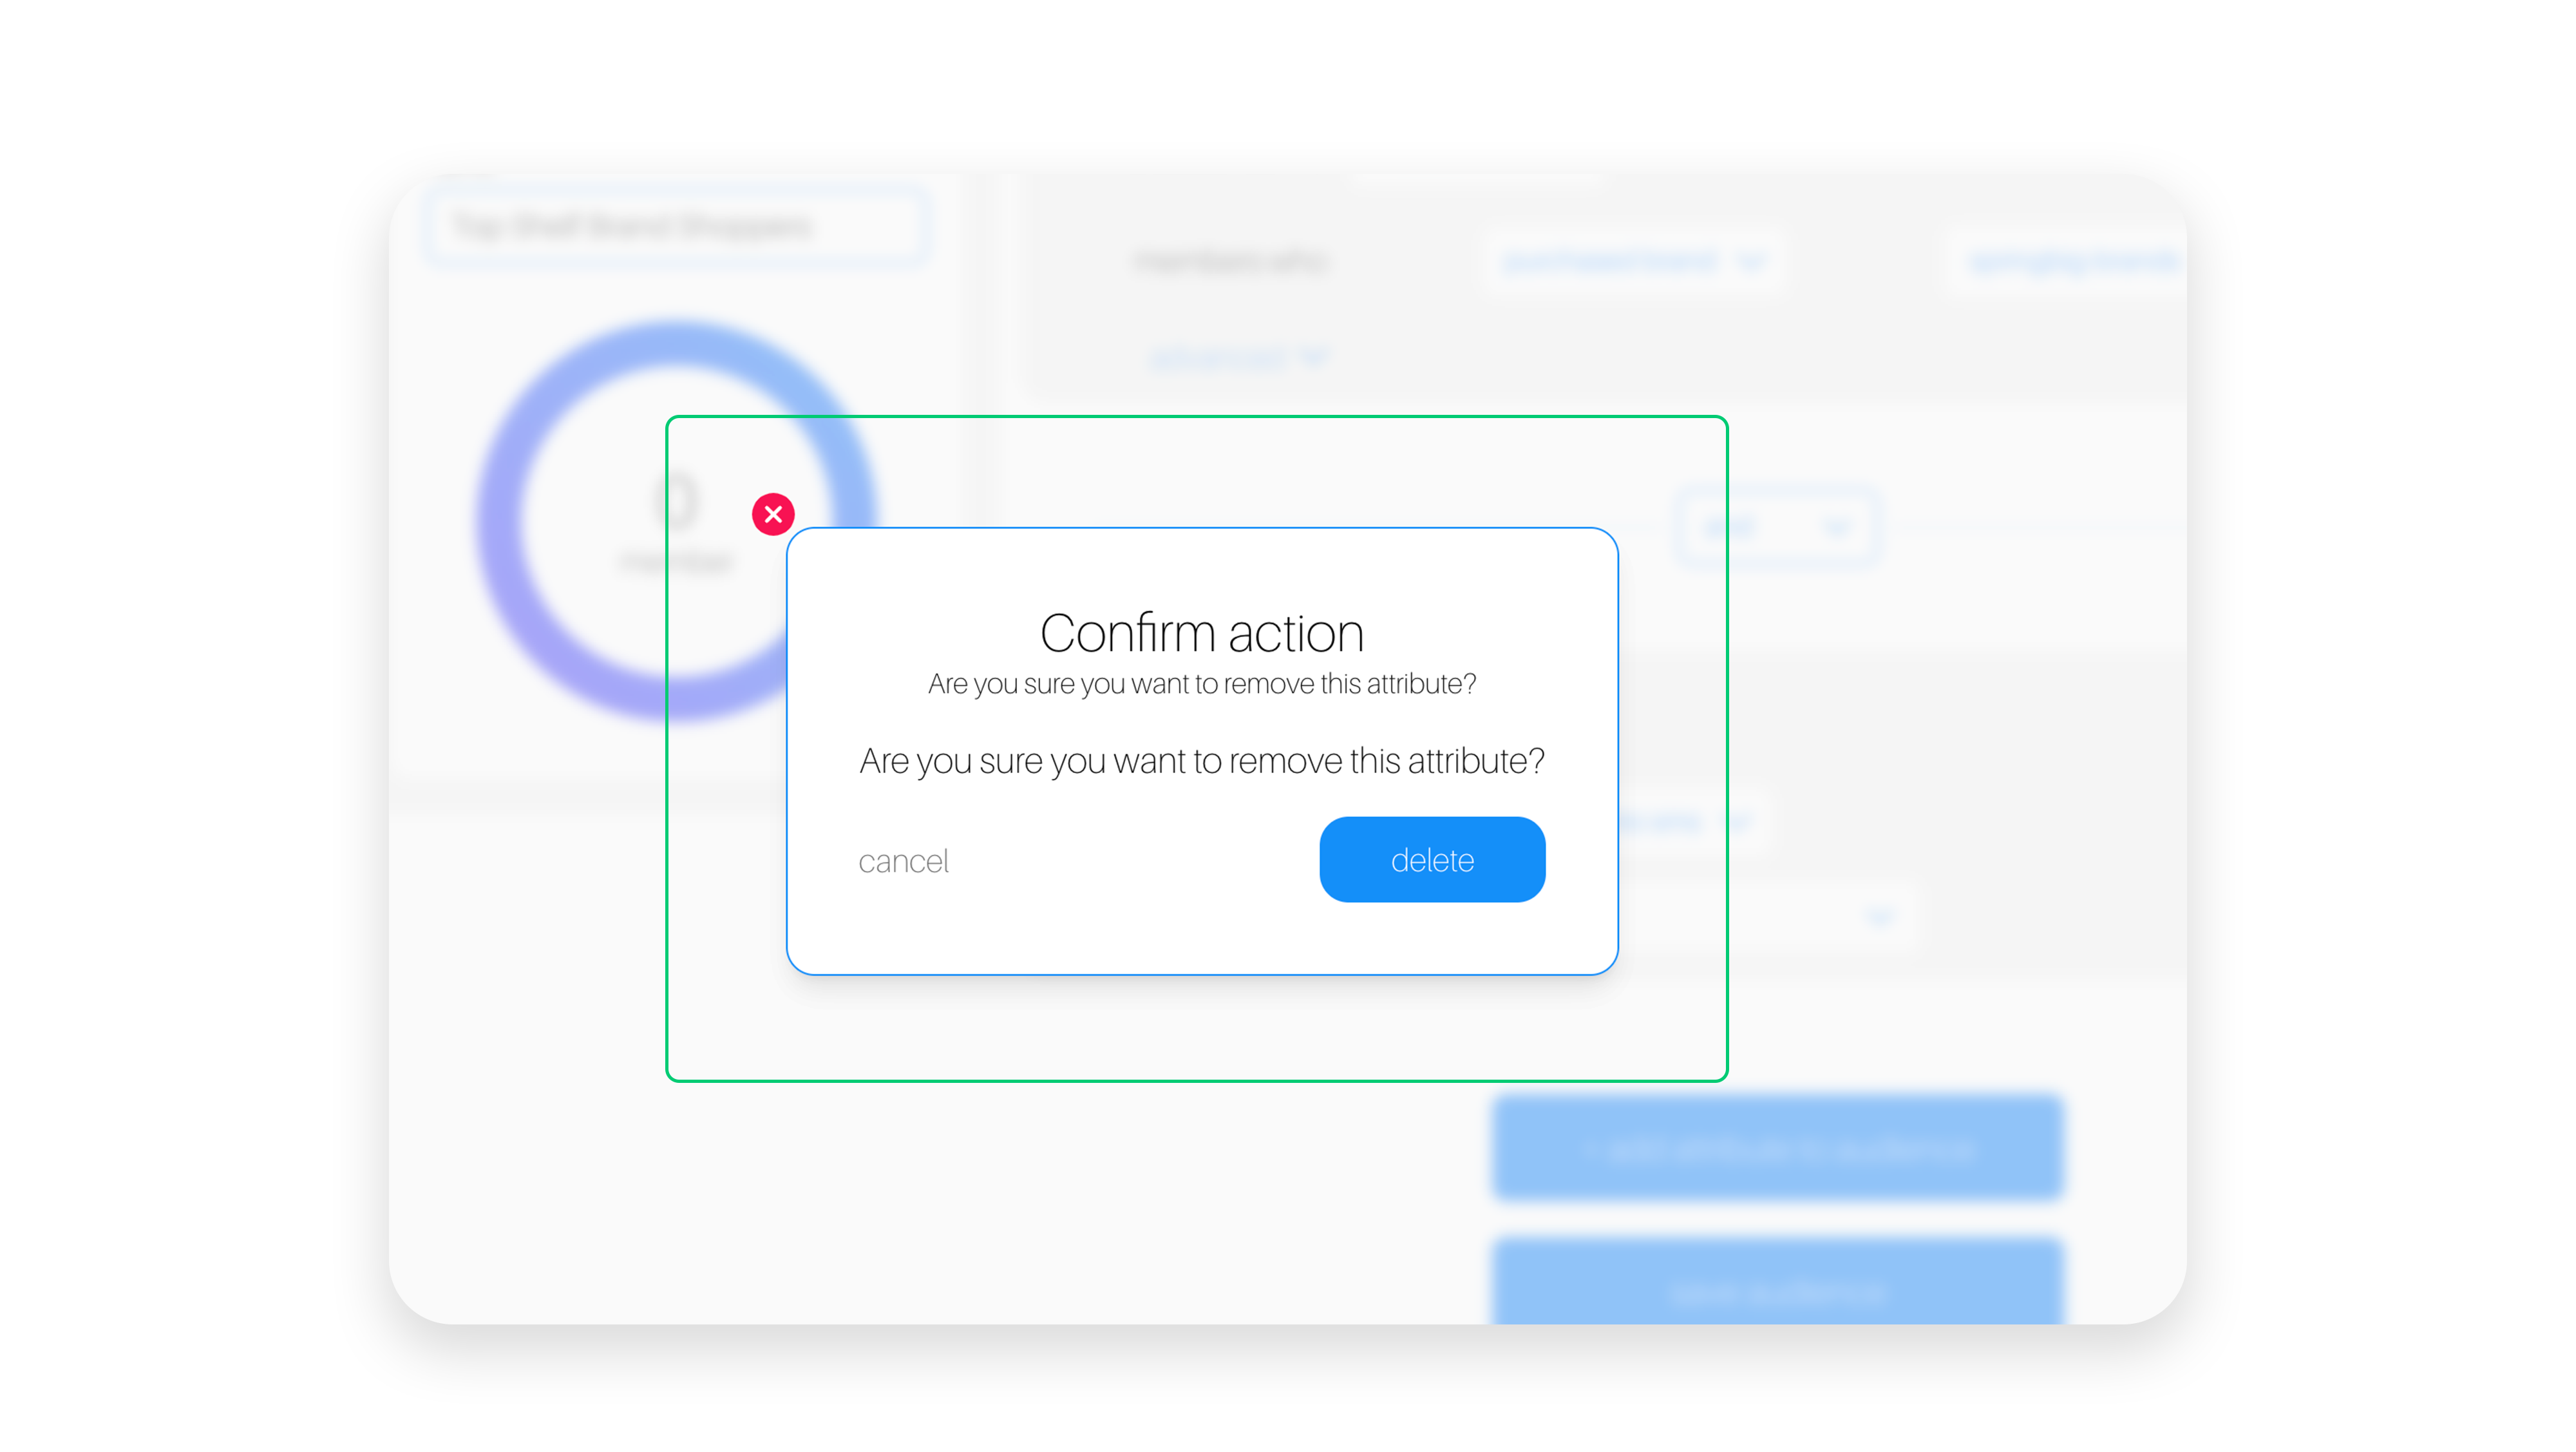
To delete any attributes in your audience, hover over the include/exclude dropdown and select the X.
You will receive a pop up notification asking you to confirm your deletion. Select delete to remove that attribute.
VIEWING, EDITING, DELETING OR DOWNLOADING AUDIENCES
Step 1.
From the main menu, navigate to the customers dropdown, and select Audiences
Step 2.
Select view on the specific audience you would like to learn more about.
Step 3.
At the bottom of the view audience page, there are 2 buttons that allow you to either send the audience a campaign or send the audience a member offer. When selected, you are brought to either the campaign creation page, or the member offers page with the audience already selected.
For help with creating a campaign, check out the SMS, Email and Push Notification creation guides!
For help with creating member offers, check out the Reward and Offers guide!
Step 4.
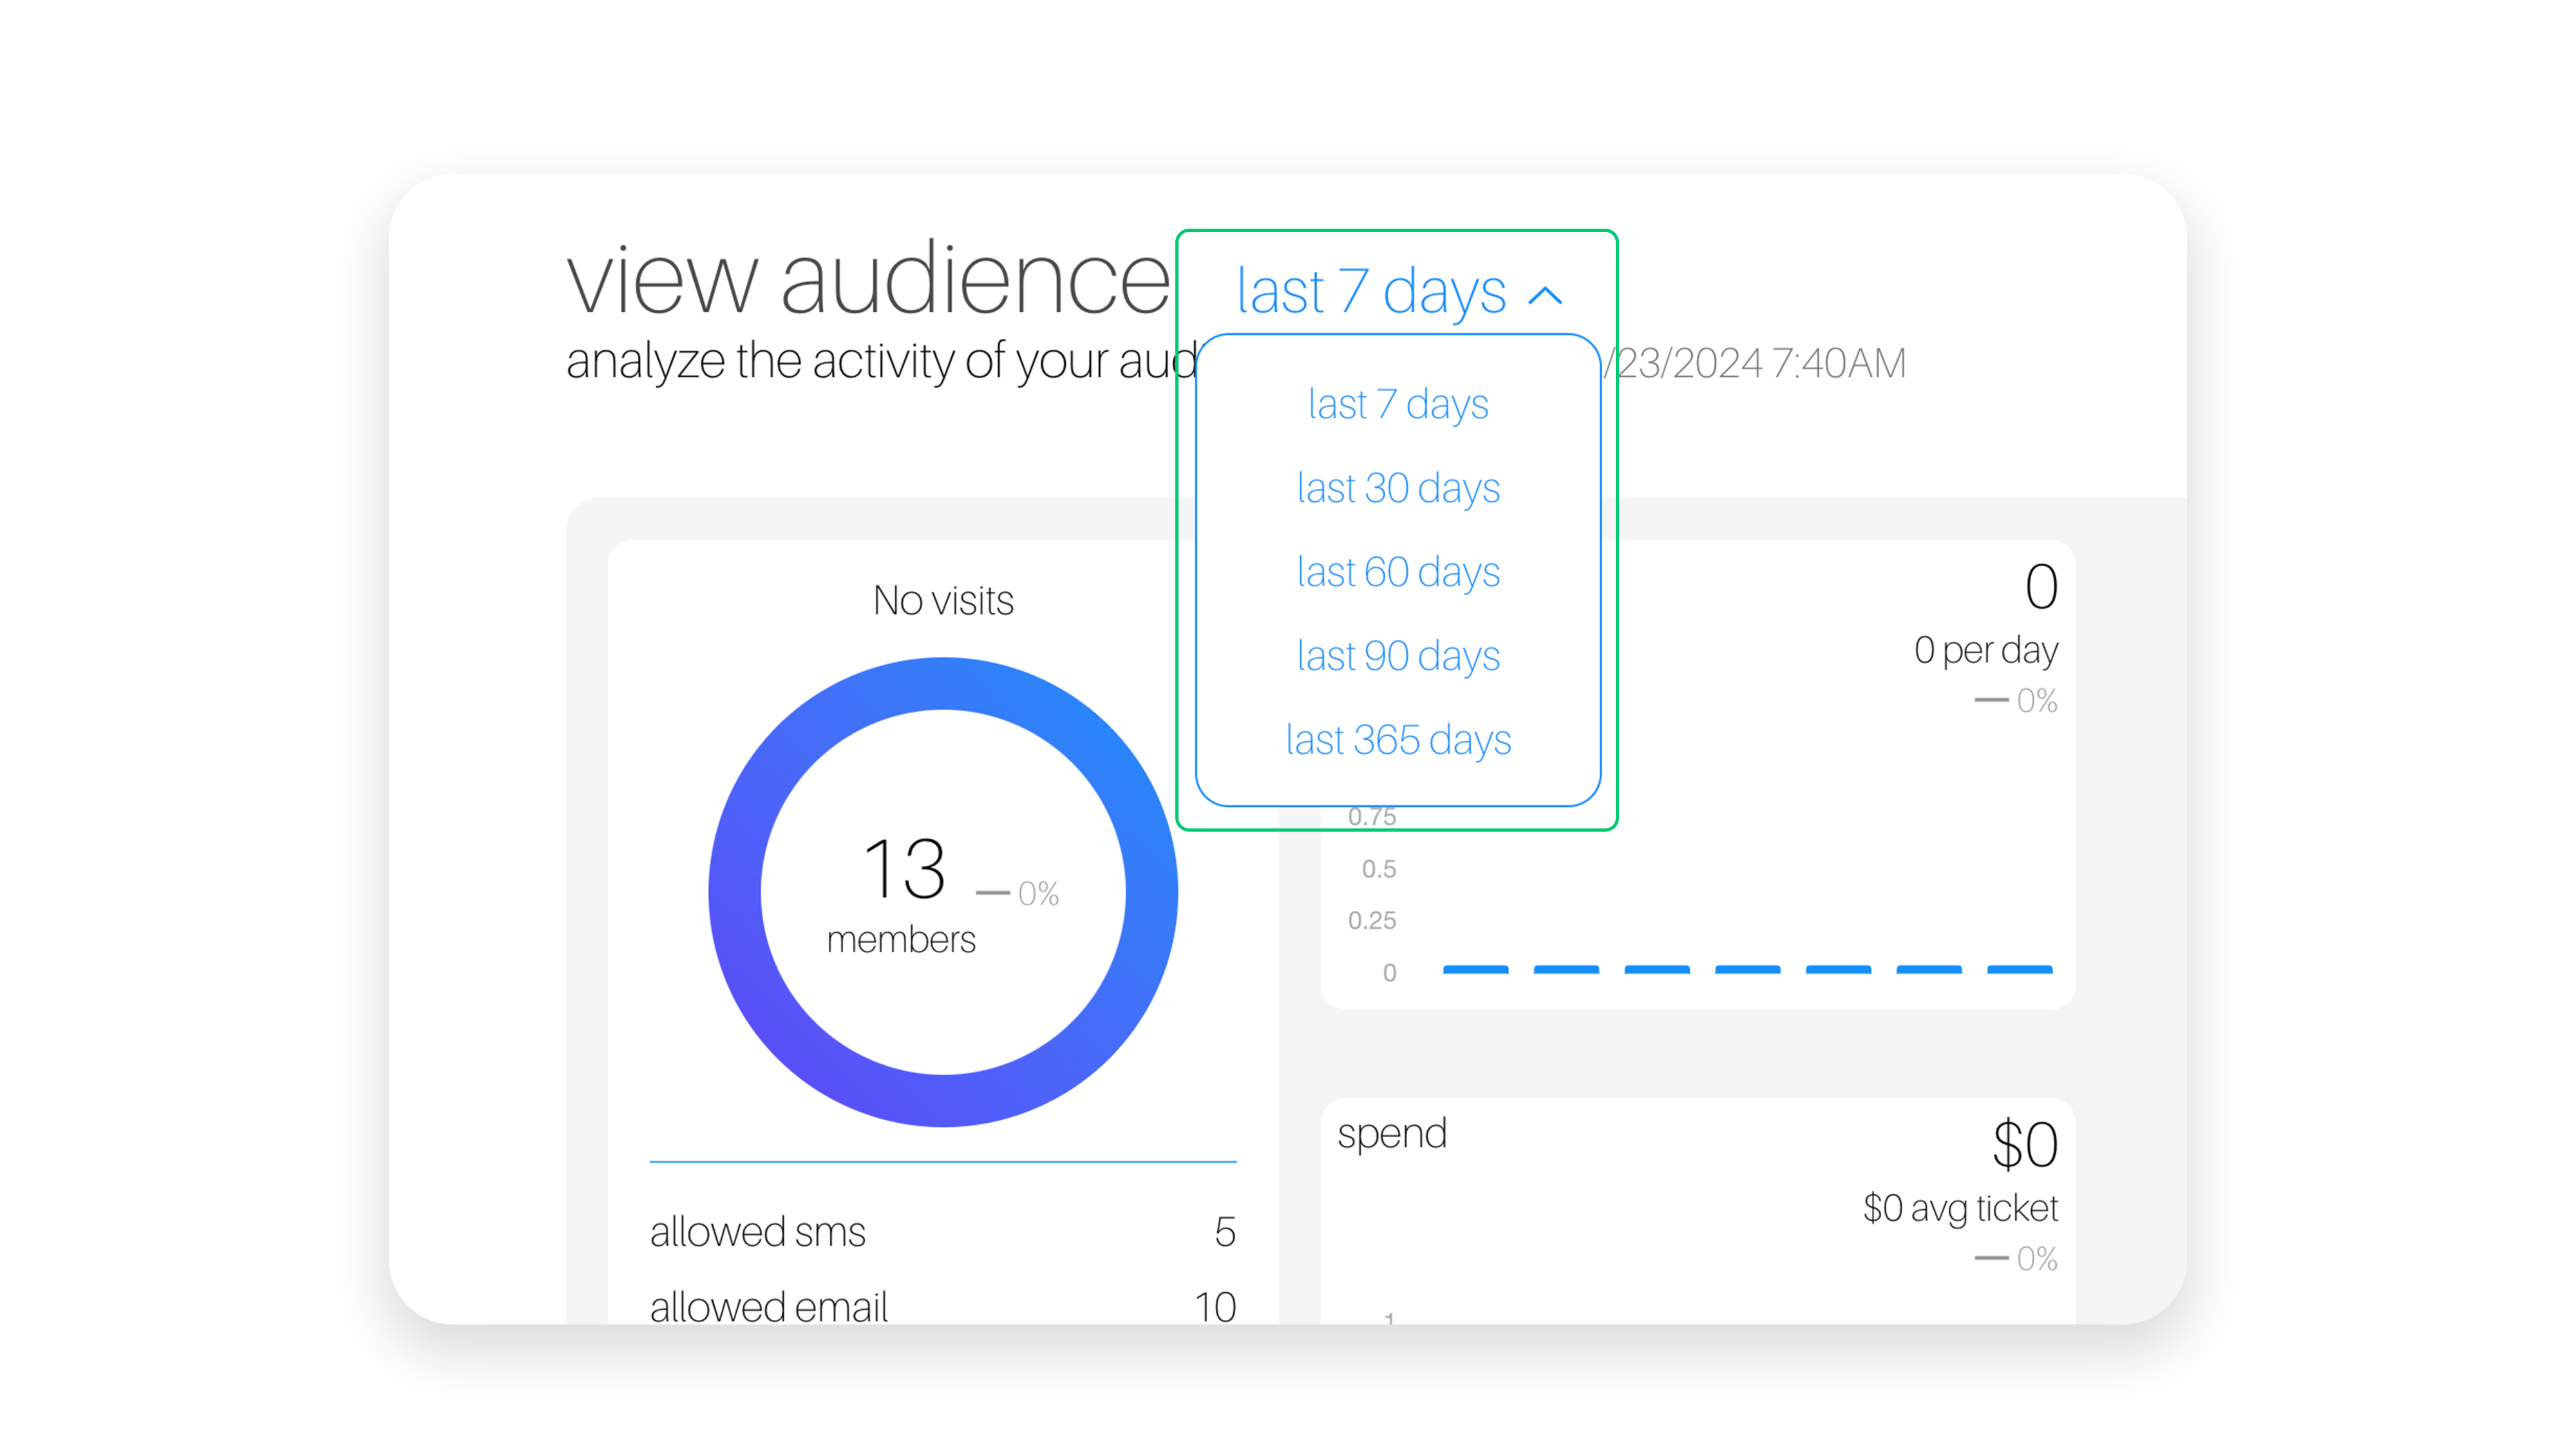
From there, you are able to analyze the activity of your selected audience. You can select a time frame to analyze for these customers. Your options include: last 7 days, last 30 days, last 60 days, last 90 days, last 365 days.
You are also able to export the audience information by clicking the actions button in the top right corner of the page.
When exporting audiences, you are able to select the date range and columns you’d like included in the report.
NOTE
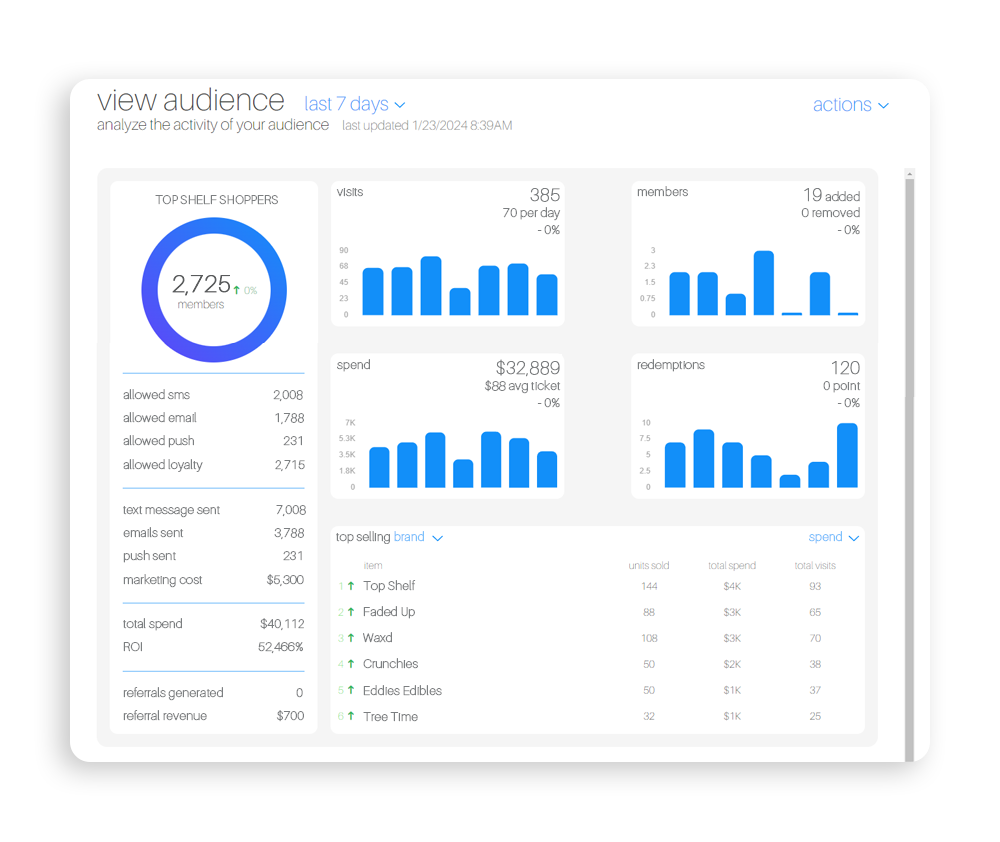
In the audience view page you are able to see more information around the audience you created. Below is an overview of the information displayed in the Audience view page.