
Step 1: To get started, your account manager will retrieve your auth token and provide it to Techpos, who will set it up internally and ensure other settings are enabled for the Springbig integration to work.
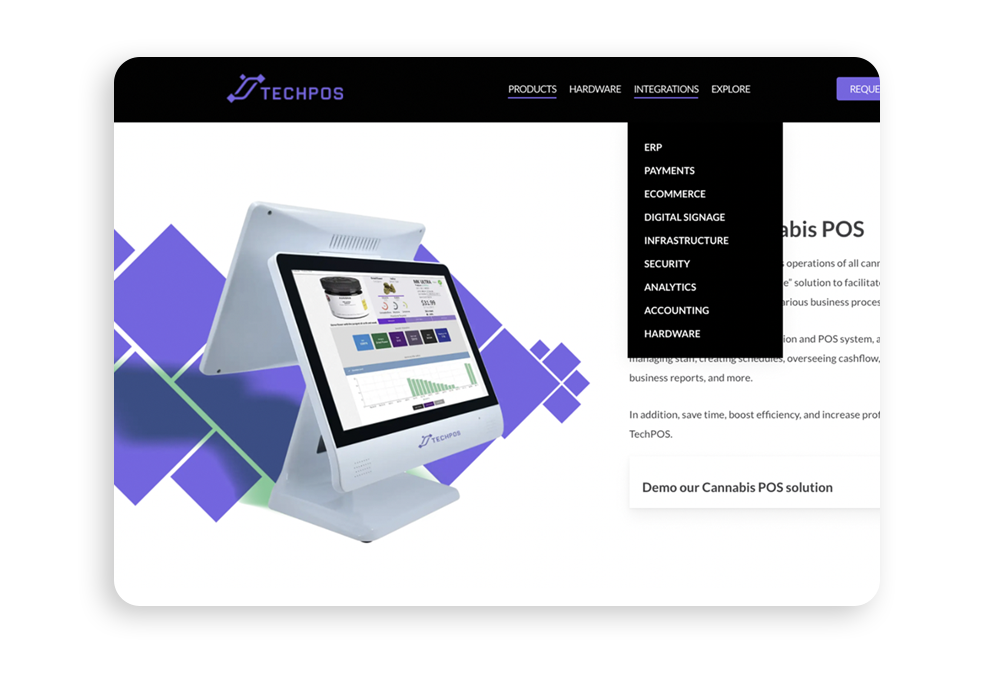
Step 1: log in to your Springbig account and open the Settings dropdown from the main menu, then click on rewards/offers
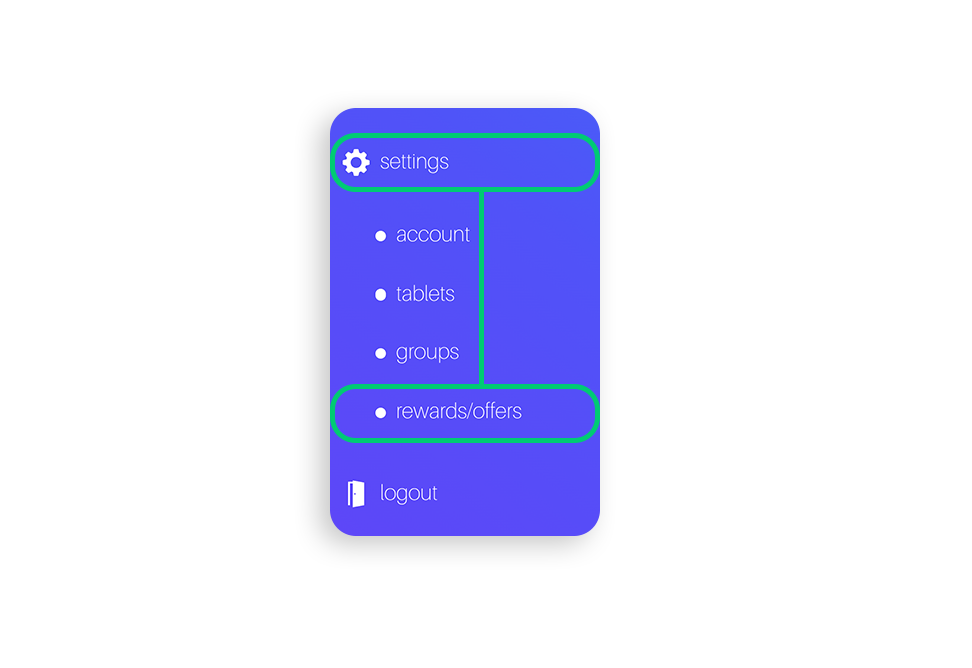
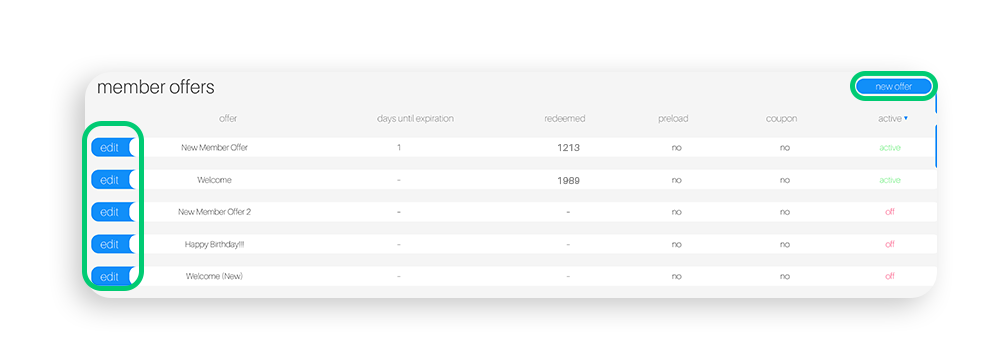
Step 2: Create a new reward or choose an existing reward by selecting edit.
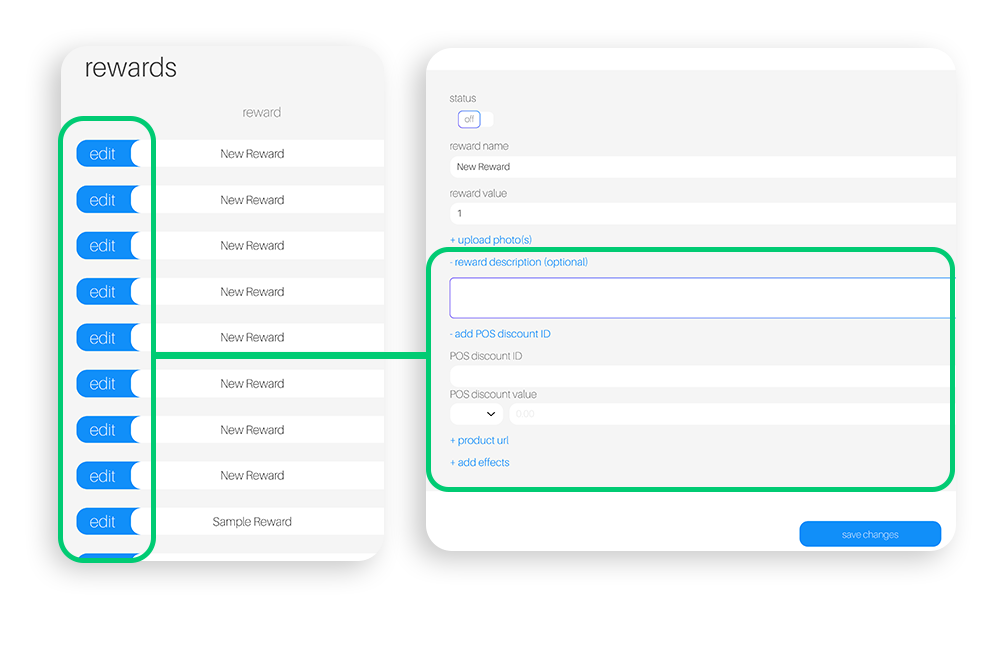
Step 3: You are able to configure your new reward, or make changes to an existing Springbig reward and Techpos will retrieve the following attributes from Springbig.
Reward Name
Reward Value
POS Reward Type
POS Reward Value
Note: Rewards are not setup in Techpos, only Springbig, for autoconnect offers please reach out to your account manager, autoconnects are set up internally.
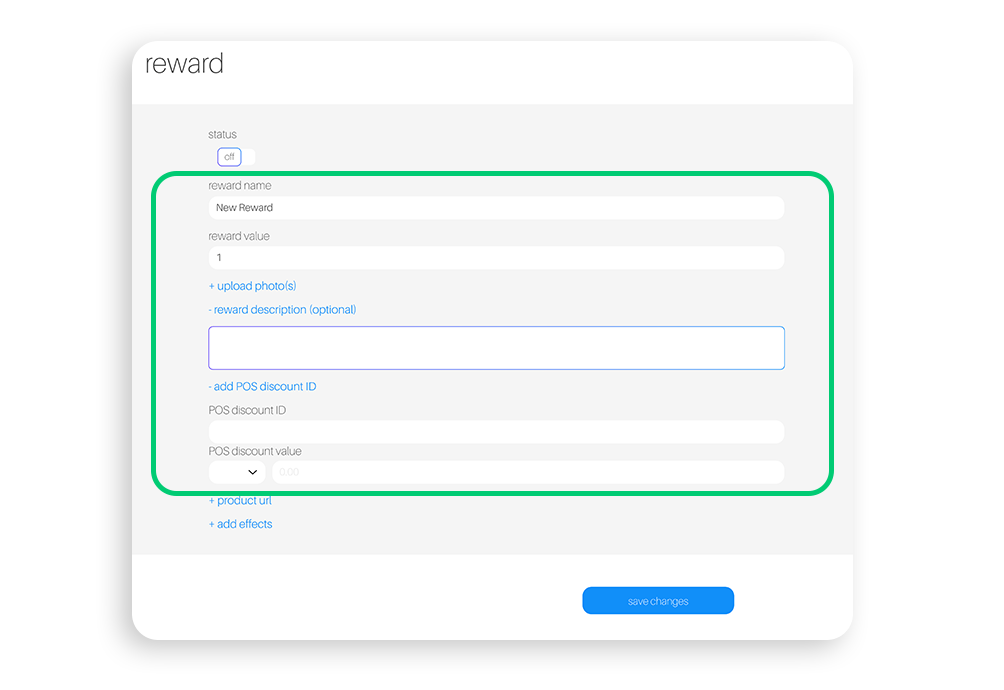
Offer Setup
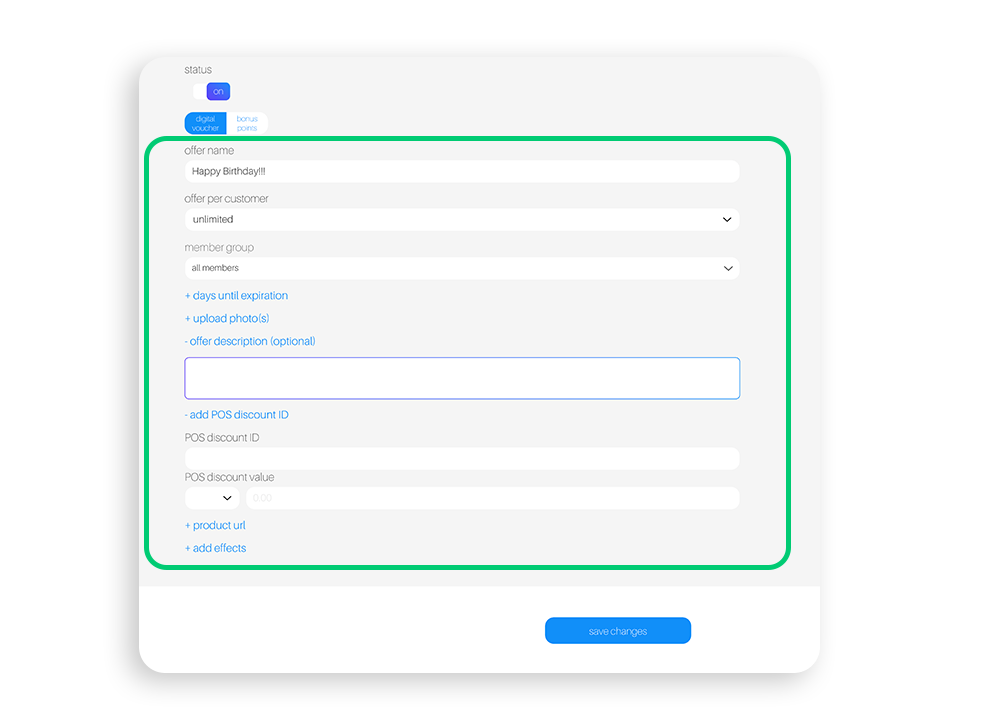
Step 1: Navigate to the rewards/offers page under settings to modify the digital voucher and include the required discount values.
Step 2: Required discount value include:
Offer Name
Offer Value
POS Reward Type
POS Reward Value
Note: Digital voucher is the only offer type that can be redeemed in Techpos.
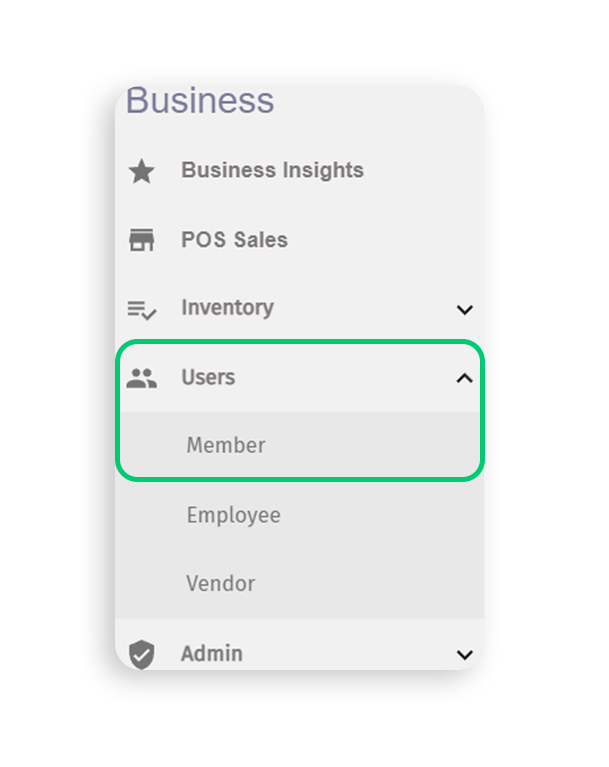
Step 1: To begin the member creation process, login to Techpos and navigate to the menus on the left side of the screen.select users and click on members.
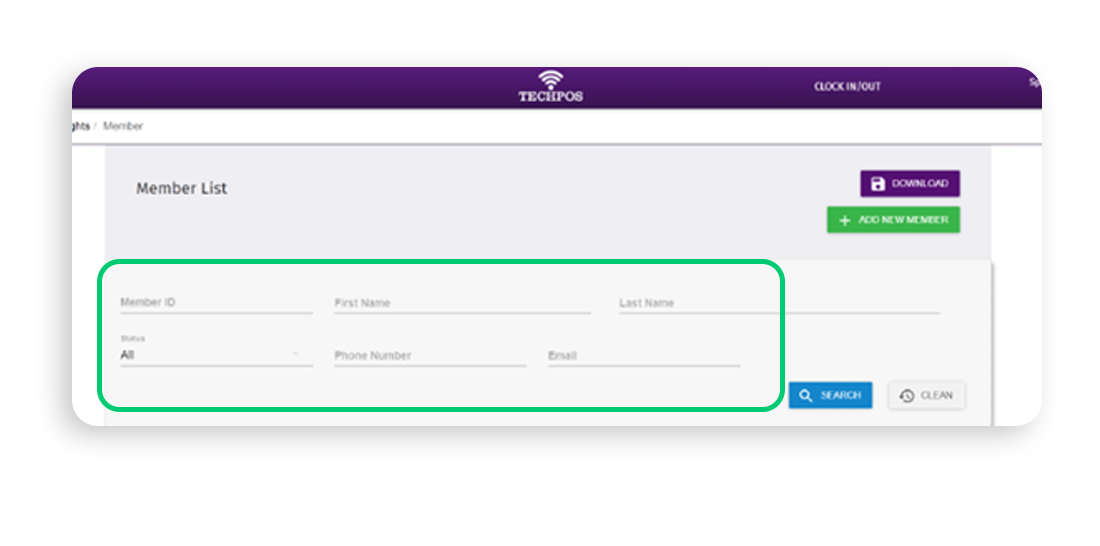
Step 2: Select add new member and fill in the required fields:
First Name
Last Name
Phone Number
Email Address
Note: SMS/Email opt-ins are not yet respected by Springbig but they will be soon.
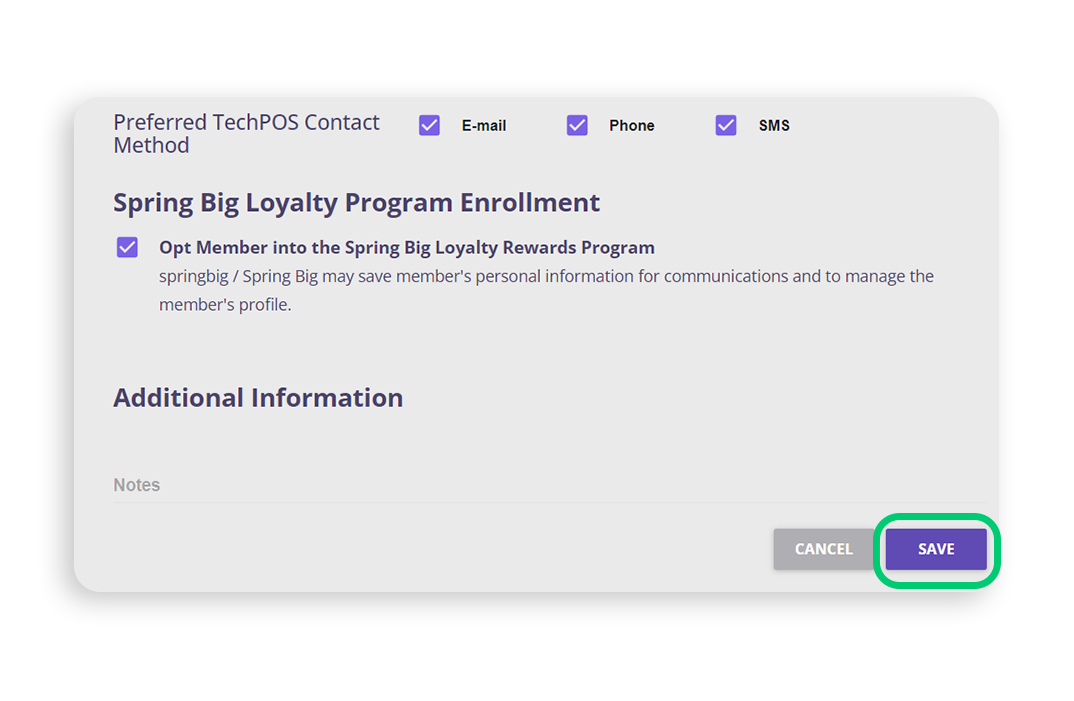
Step 3: Once finished filling out the required fields, click save on the bottom right which will then send the profile immediately.
Notes:
The opt-in box is required to send a member and visit data. Unchecking the box does not opt out of any Springbig enrollment.
The Techpos enrollment boxes have no interaction with Springbig enrollment.
Profile edits send upon clicking Save.
Unchecking the Techpos loyalty box will not show Springbig loyalty at the POS Sales page.
If opted out of loyalty via Springbig, the Techpos loyalty box will also be unchecked and not send member and visit data until opted back into loyalty via Springbig.
Member attributes sent:
First Name
Last Name
Phone Number
Email
Address1
City
Birthday
Gender
POS User
POS Type
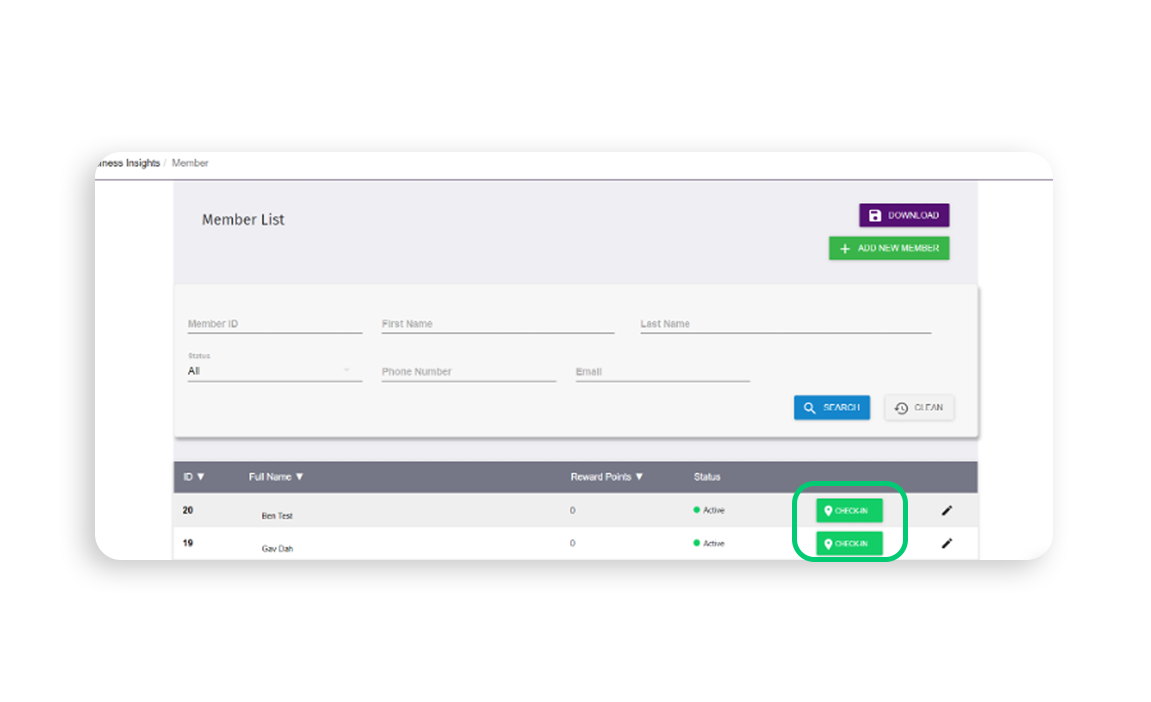
Step 1: Navigate to the menu and click on users. From there click on member and select check-in for the intended member.
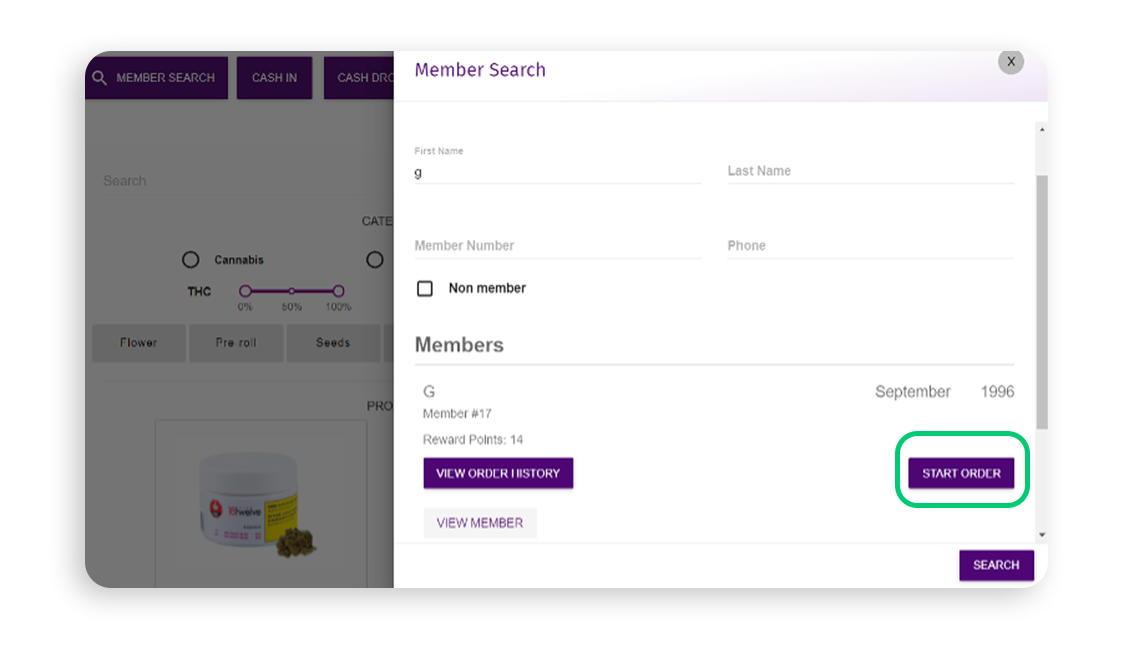
Step 2: You can also check in a member by navigating to the POS sales tab and click on member search, located on the top right. Click on search using the intended method then click start order.
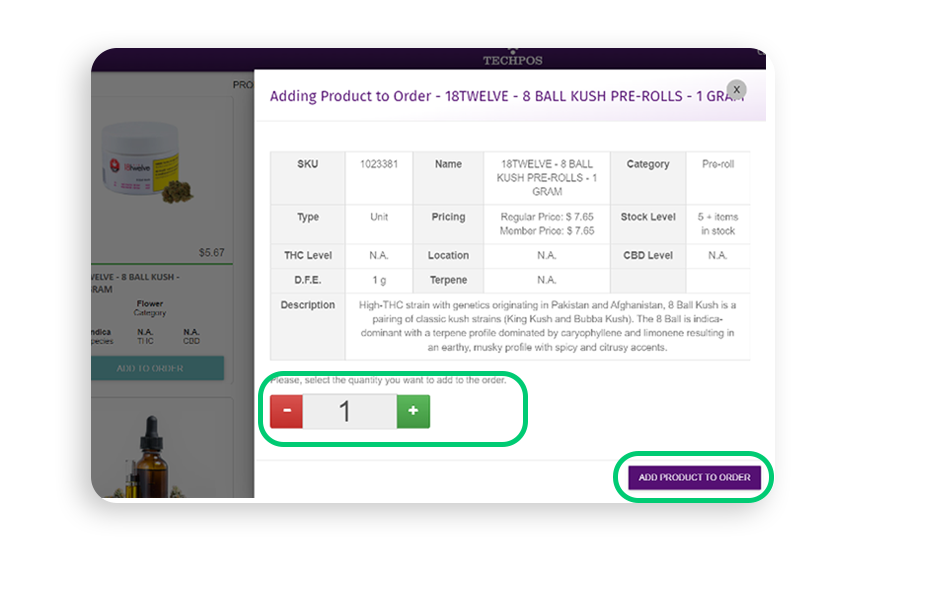
Step 3: Add products to your order by clicking add to order on intended product(s), select quantity and then click add products to order.
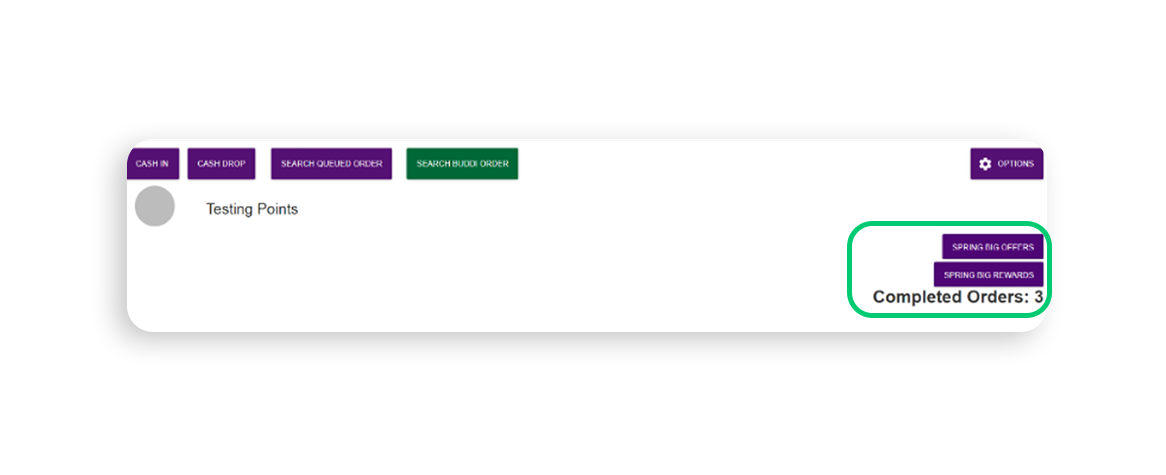
Step 4: For redemptions upon checking out, click springbig offers/rewards. You are able to view the members point balance when clicked.
Note: Only ONE redemption allowed at a time.
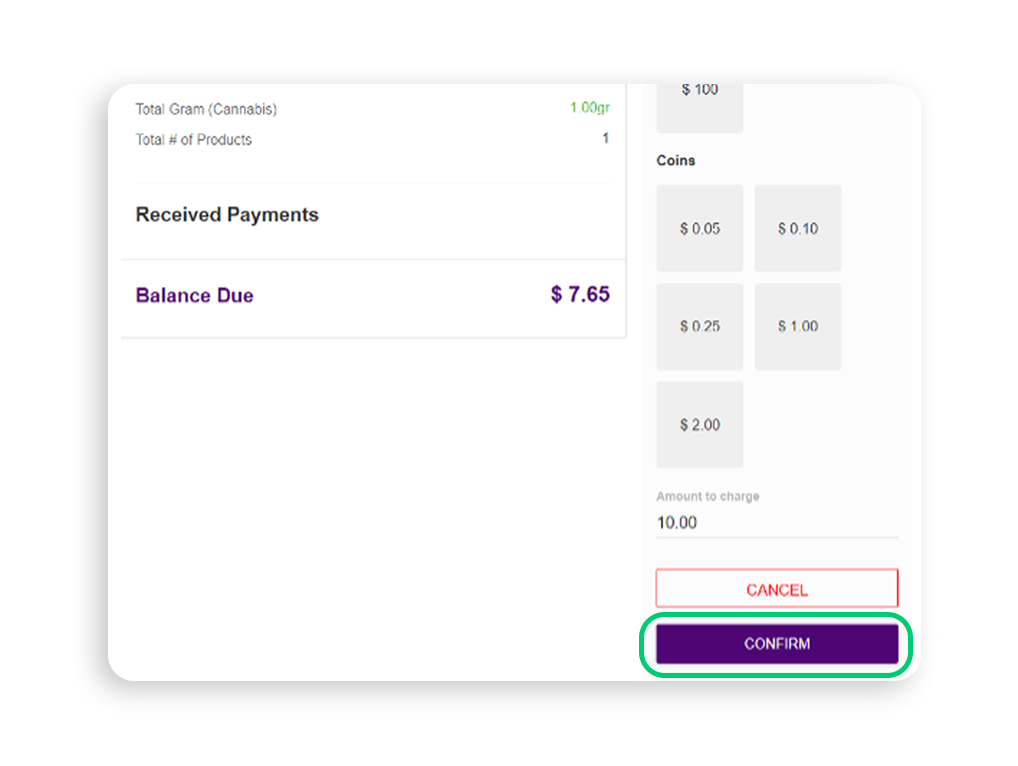
Step 5: When ready, choose the payment method and then click confirm.
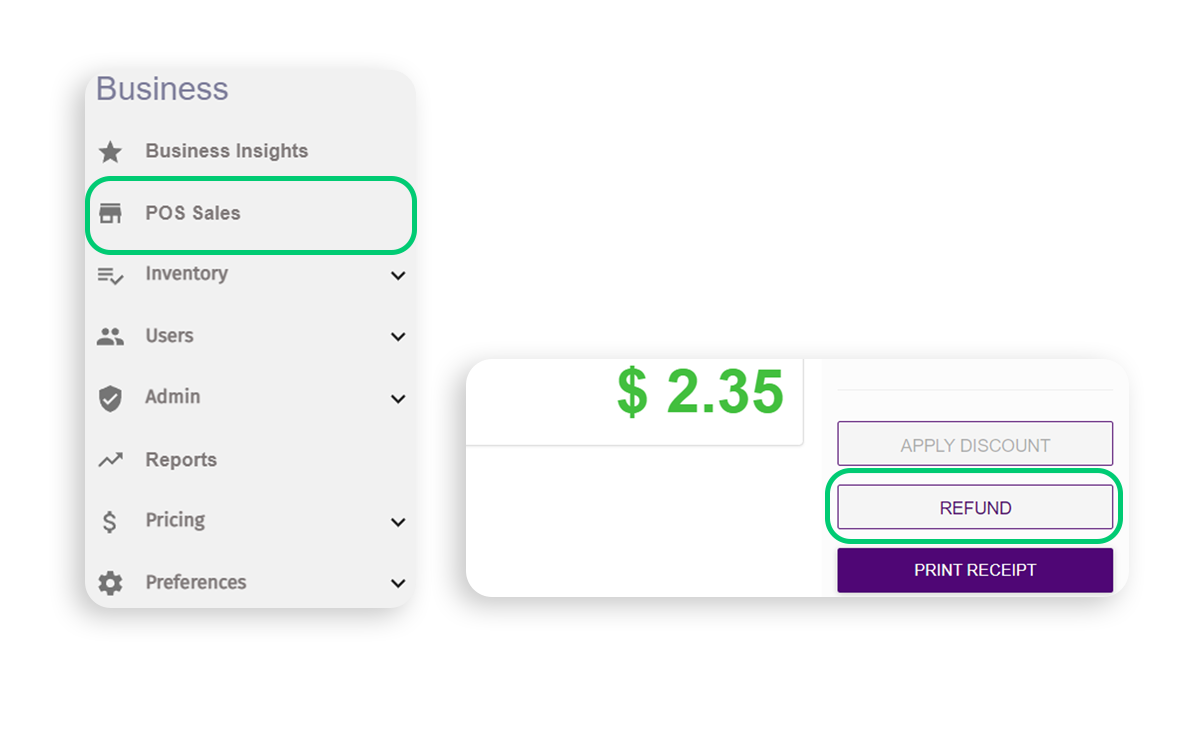
Step 1: Navigate to the POS sales tab.
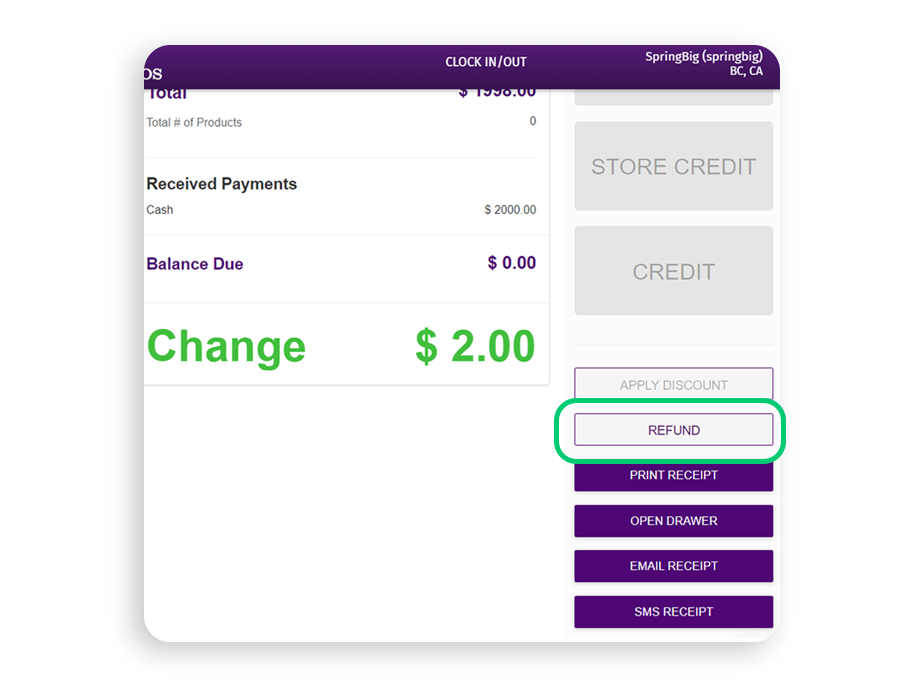
Note: You can refund right after processing a visit by scrolling down to the bottom right of the visit completion page and click refund.
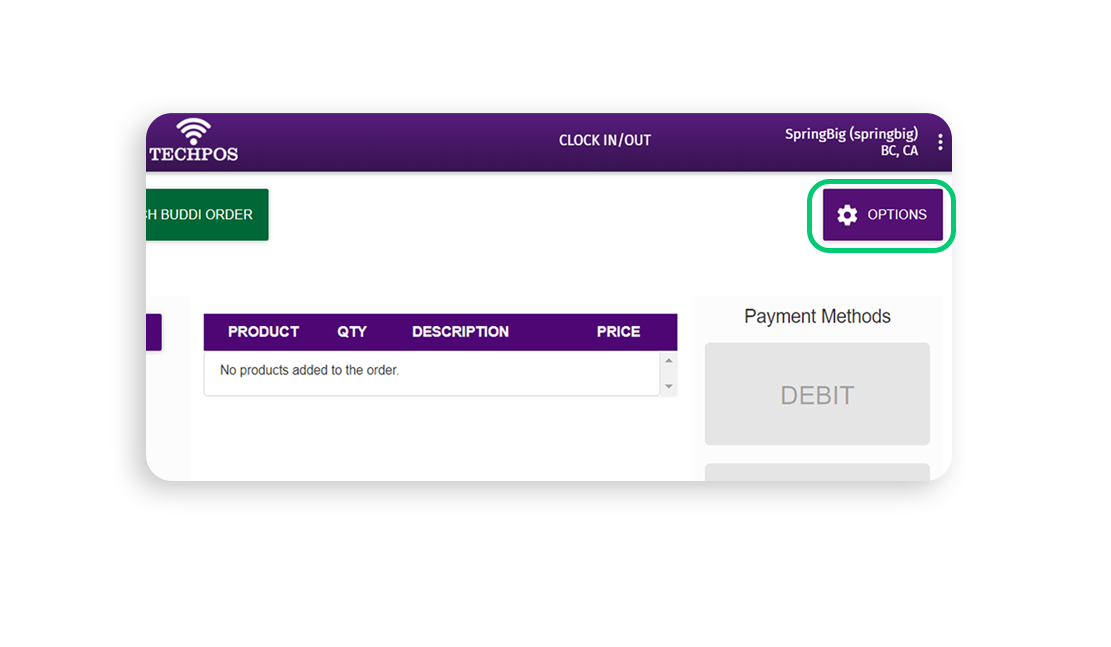
Step 2: On the top right, click on Options.
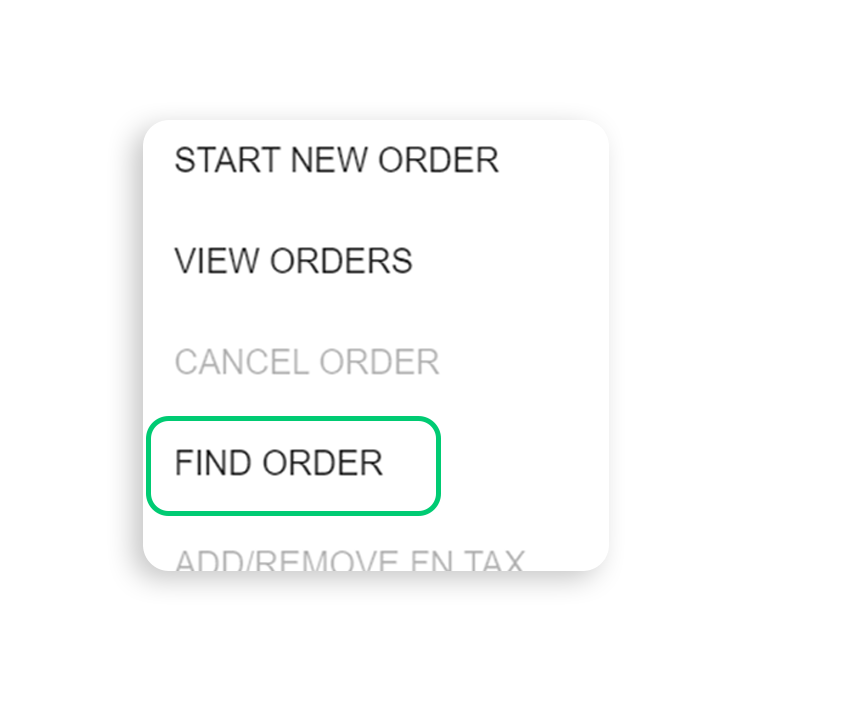
Step 3: Click on find order, and input the order ID.
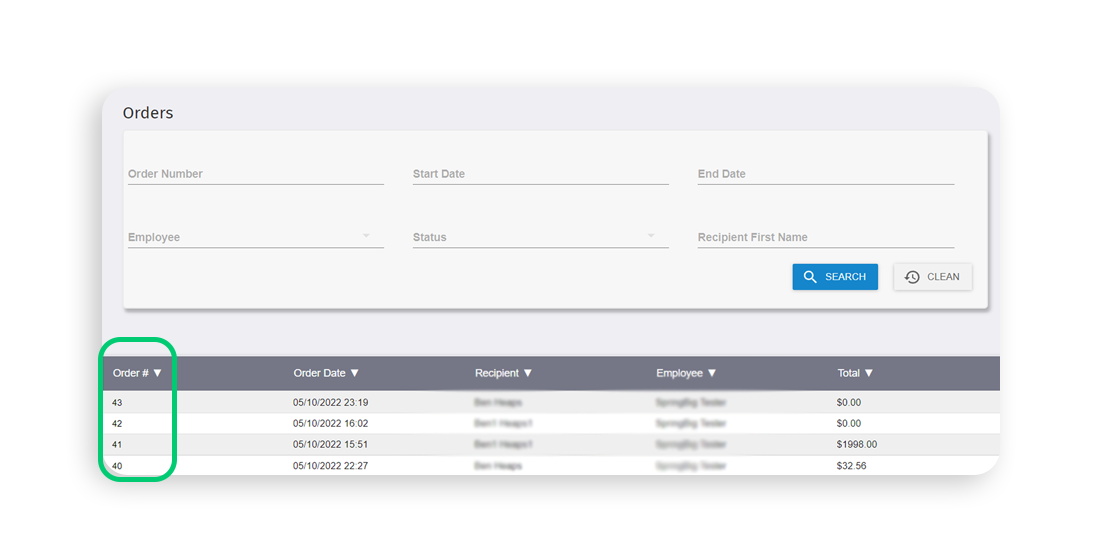
Step 4: The order id can be found by navigating to the admin tab and clicking on orders. You will see the order id on the left side of your screen.
Step 5: Scroll to the bottom right and click refund.
Step 6: Management permission will be required by either inputting username and password or pin code.
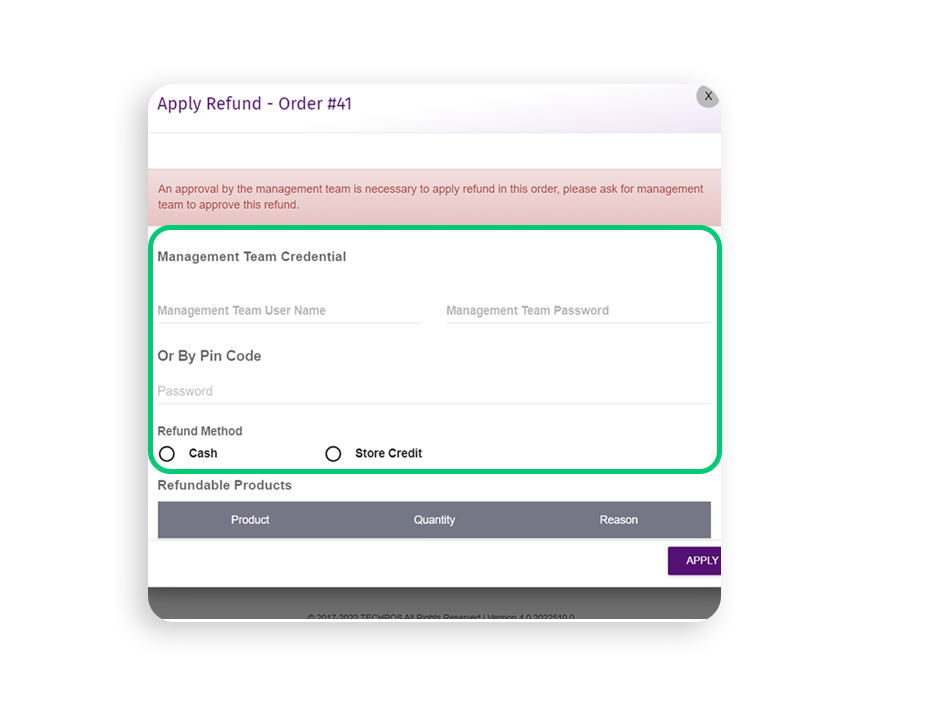
Step 7: Fill in the required information, and click apply followed by confirm.
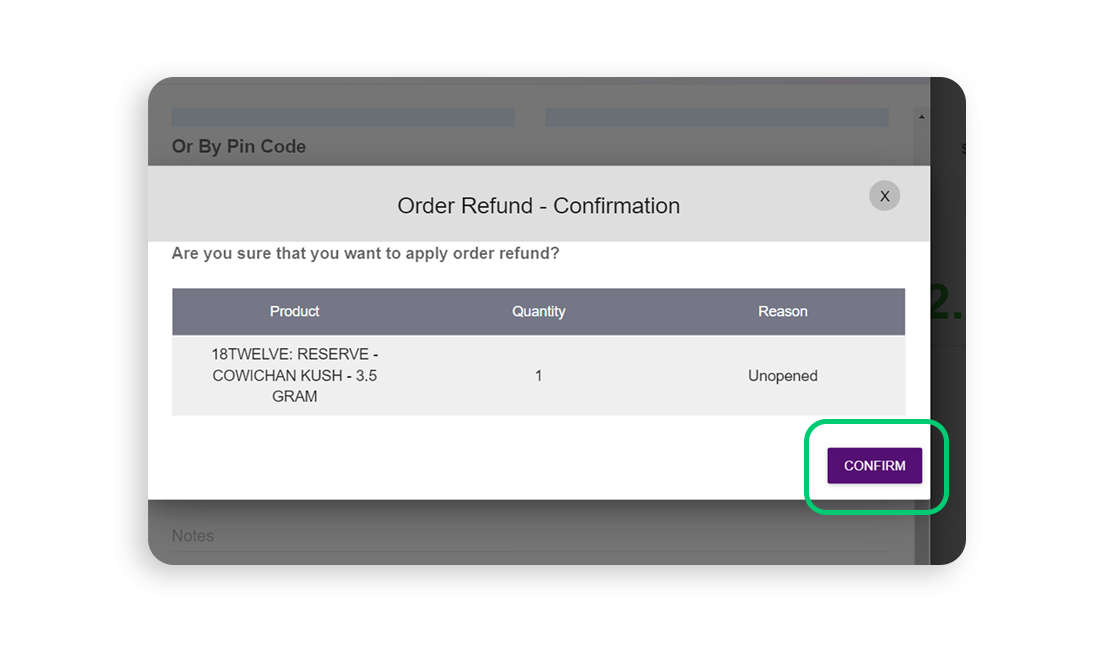
Step 8: the order is marked as refunded on the visit completed page and will have a total of $0 on the admin/orders page.