
Springbig + OneSignal
Springbig + OneSignal Integration Guide
Springbig is integrated with OneSignal allowing to seamlessly send template messages when an event is triggered to targeted audiences.
By leveraging OneSignal’s intuitive journey flow and webhook capabilities and Springbig’s messaging engine, retailers can enhance their communication strategies with minimal setup and maximal results.
Springbig + OneSignal Integration Guide
User interface is subject to change at the discretion of your POS provider. For the most accurate and up-to-date information, please consult your POS provider directly.
Part 1: OneSignal Onboarding & Requirements
Requirements
Paid plan that supports both Journeys and Webhooks (via OneSignal)
Enrolled members with phone numbers (via Springbig)
Configured messaging templates (via Springbig)
Springbig messaging credits (via Springbig)
Onboarding
Please reach out to your Springbig onboarding specialist/account manager to receive an auth token, x api key and template id(s).
Part 2: Send Customer Profile to Springbig Workflow
Webhook Setup
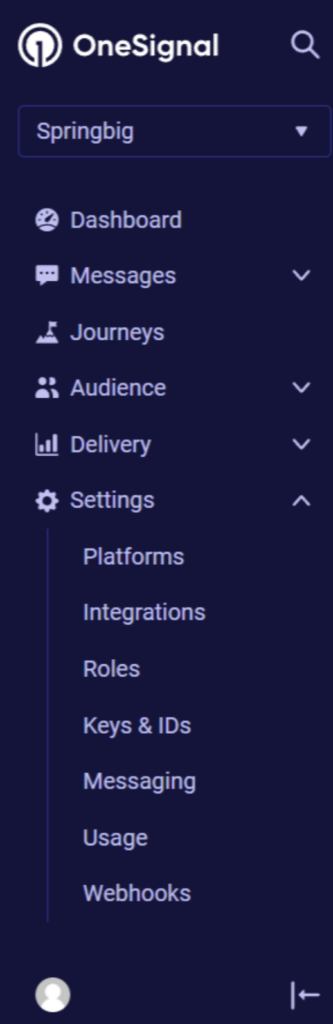
Direct to the menu on the left-hand side and click Settings->Webhooks
2. Click New Webhook on the top-right
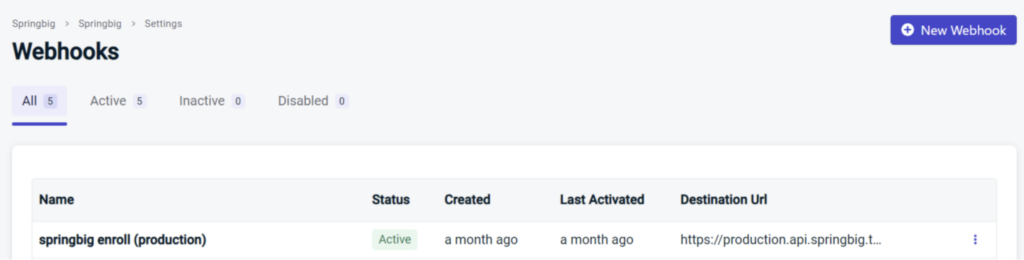
3. Enter webhook name such as ‘enrollments’, ‘customer creations’ etc.
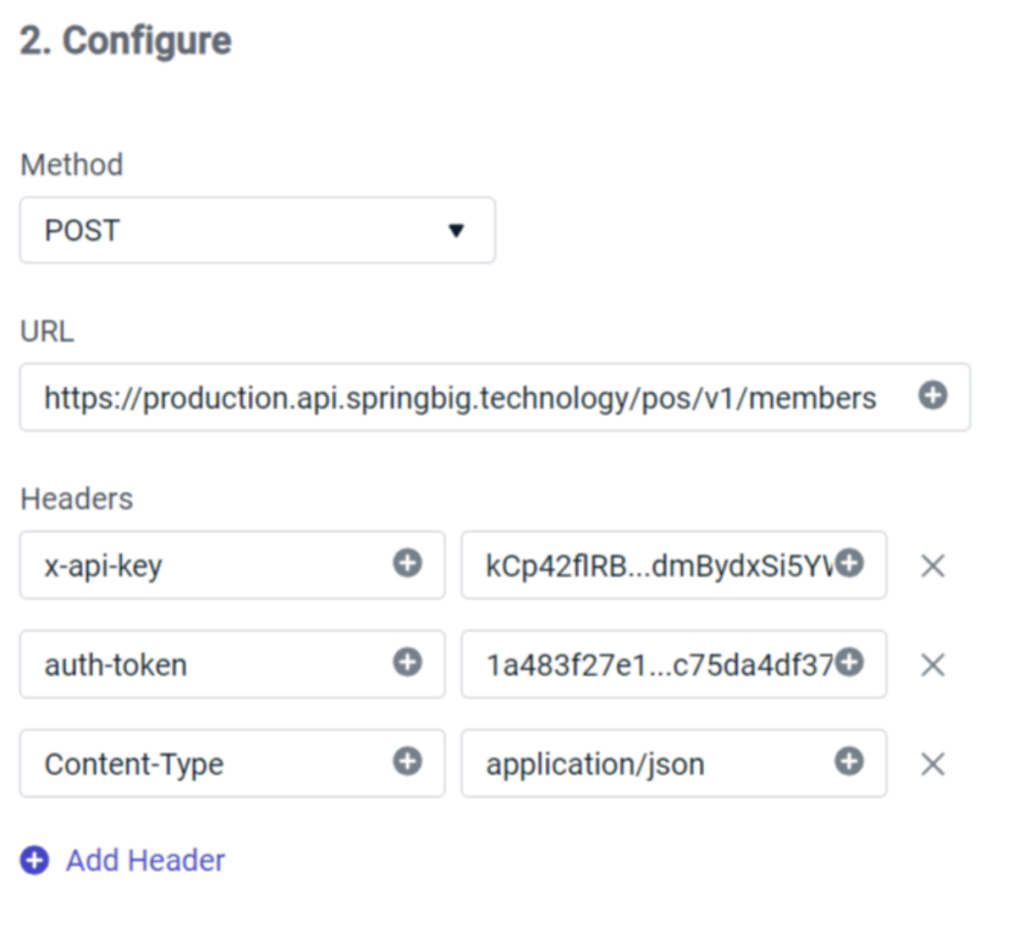
4. Configure:
Select method as POST
Enter URL:
Add and enter headers exactly as the following:
x-api-key (retrieve from account manager)
auth-token (retrieve from account manger)
Content-Type (enter ‘application/json’ in the second field)
5. Body–
Select Custom Body
Enter the following body: {
“member”: {
“pos_user”: “{{user.onesignal_id}}”,
“pos_type”: “onesignal”,
“first_name”: “{{user.tags.first_name}}”,
“last_name”: “{{user.tags.last_name}}”,
“phone_number”: “{{user.tags.springbig_phone}}”,
“allowed_sms”: true,
}
}
NOTE: Please ensure to include the same phone number field as stored for profiles in case it’s not ‘phone_number’- Click Save
Journey Setup
Direct to the menu on the left-hand side and click Journeys
Click on the top-right New Journey
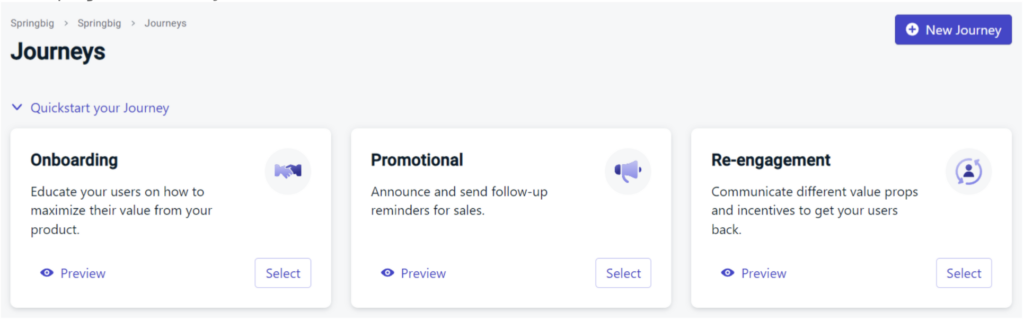
3. Select Entrance
4. Enter journey name (required) such as ‘enrollments’, ‘profile creations’ etc. and select segment(s) (required) to send profiles meeting the desired condition(s).
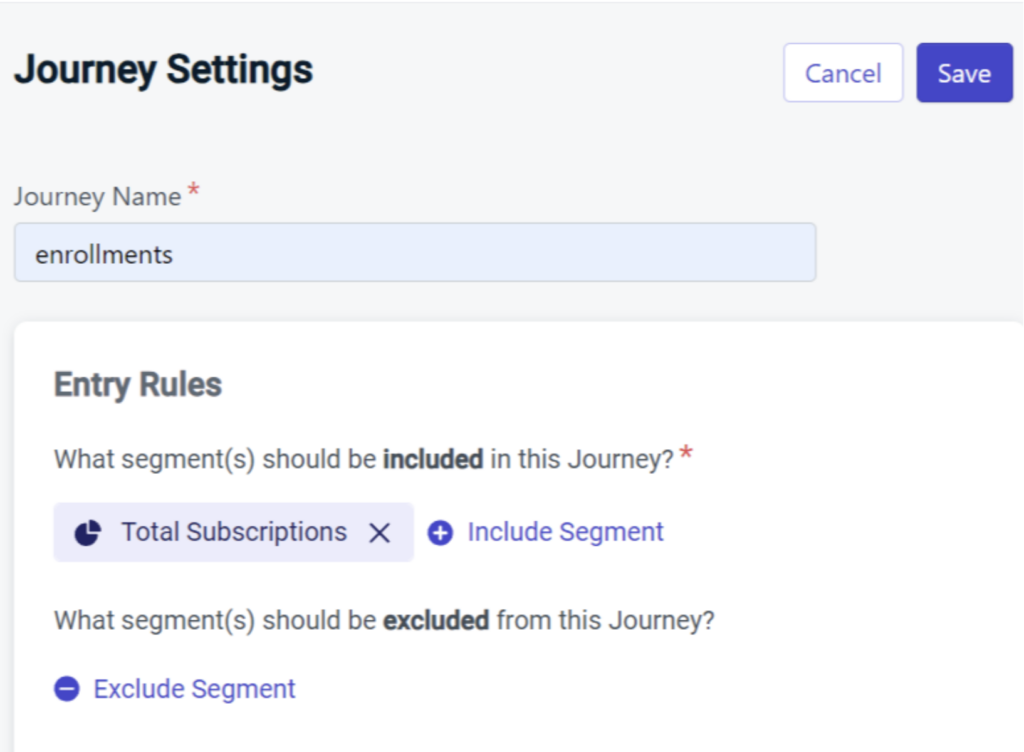
5. Configure other journey settings if desired.
6. Once completed click Save
7. Click the plus sign and select Webhook to add a webhook
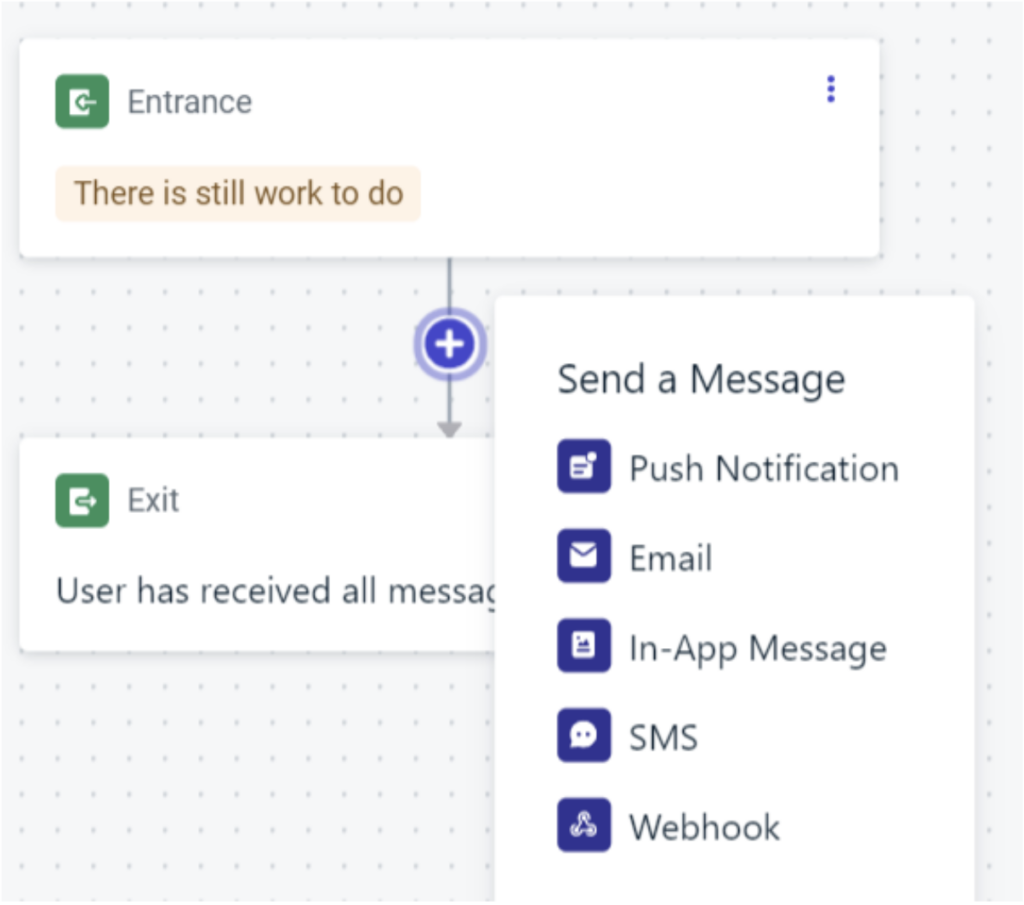
8. Select webhook
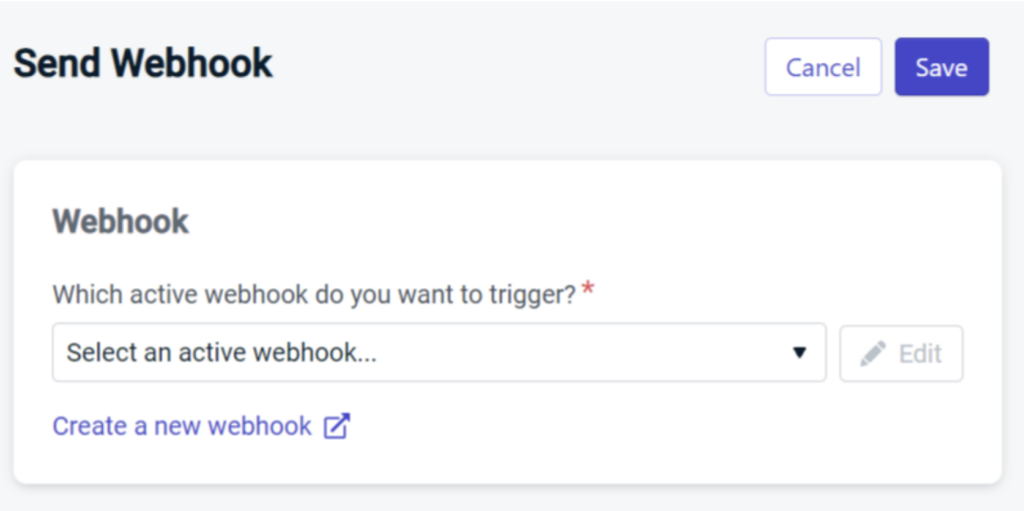
9. Click Save
10. Enter desired exit rules
11. Once completed click Save & Close
Part 3: Send SMS Workflow
Webhook Setup
Direct to the menu on the left-hand side and click Journeys
Click New Webhook on the top-right
Enter webhook name such as ‘send sms’, ‘sms’ etc.
Configure–
Select method as POST
Enter URL:
Add and enter headers exactly as the following:
x-api-key (retrieve from account manager)
auth-token (retrieve from account manager)
Content-Type (enter ‘application/json’ in the second field)
Body:
Select Custom Body
Enter the following values:
{
“message_template_id”: 123,
“phone_number”: “{{user.tags.phone_number}}”,
“redirect_url”: “abc.com”,
“webhook_url”: “abc.com”,
“label”: “abc”,
“merchant_location_id”: 123,
“template_image_id”: 123
}Message_template_id- required (account manager will provide the id)
Phone_number- required (Enter {{user.tags.phone_number}} in the second field. Please ensure to include the same phone number field as stored for profiles in case it’s not phone_number.)
Redirect_url- not required
NOTE: A link which allows customers to be directed to a landing page, such as an app or a specified webpage when the link is clicked in the message. If interested in this feature, please discuss it with a Springbig account manager.
Webhook_url- not required
Label- not required
Merchant_location_id- not required (account manager will provide the id)
Template_image_id- only required if including an image (account manager will provide the id)
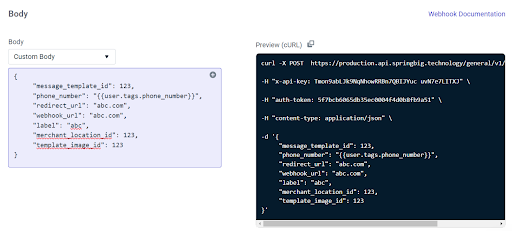
6. Click Save
NOTE: For every unique campaign/template created in Springbig, it is preferable to create another SMS webhook along with a different journey created.
Journey Setup
Direct to the menu on the left-hand side and click Journeys
Click on the top-right New Journey
Select Entrance
Enter journey name (required) such as ‘sms’, ‘send sms’ etc. and select segment(s) (required) to send SMS to the intended audience
Configure other journey settings if desired
Once completed click Save
Click the plus sign and select Webhook to add a webhook
Select webhook
Click Save
Enter desired exit rules
Once completed click Save & Close
NOTE: For every unique campaign/template created in Springbig, it is preferable to create a different journey.