Welcome to the Springbig + Lightspeed Integration Guide!
Springbig has partnered with Lightspeed offering a 360 integration in which customer data is seamlessly synced between both systems along with receiving transaction and redemption data powering all of your marketing and loyalty needs.
In this course you will learn about:
The Lightspeed Installation process
Configuring loyalty
The member process in Lightspeed
The visit process in Lightspeed
Processing refunds in Lightspeed
Let’s get started!
Springbig + Lightspeed X Series Integration Guide
User interface is subject to change at the discretion of your POS provider. For the most accurate and up-to-date information, please consult your POS provider directly.
Part 1: Installation
Please reach out to your onboarding specialist/customer success manager regarding integration as we need to complete the set-up for you.
Step 1. Log in to your Springbig Platform
Click on Settings
Click Account
Click Basic Settings
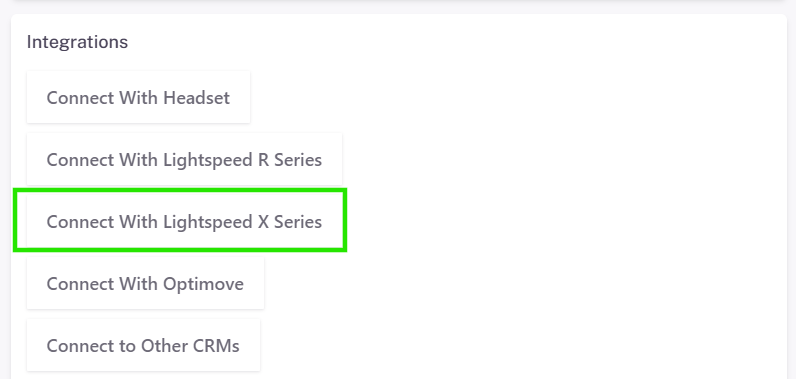
Click “Connect with Lightspeed X”
Step 2. Follow the onscreen prompts to login to your Lightspeed Account
Note: Currently, only one Lightspeed Domain can be supported per Springbig plaform via OAuth connection.
Step 3. Springbig will complete the setup and enable your integration. You will receive automated email updates along the way
Part 2: Loyalty
Please coordinate with your account manager/onboarding specialist when creating rewards/offers
Rewards Setup
Note: Rewards are only created in Springbig
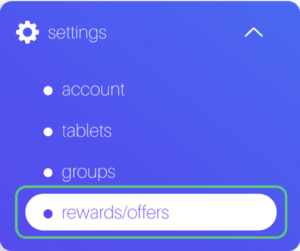
Step 1. Navigate to the Springbig main menu, click settings, and then rewards/offers
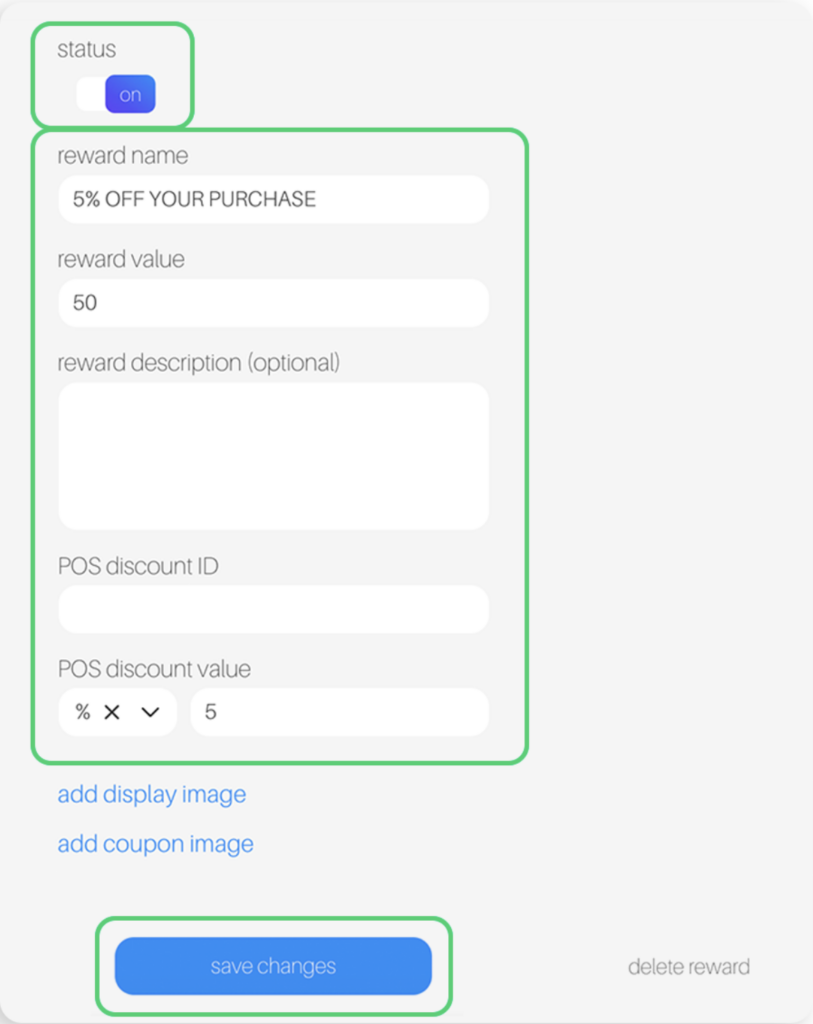
Step 2. Fill in these required fields on the reward setup:
Reward name
POS reward value
POS discount value (% or $).
Note: Cannot be blank, otherwise reward won’t show
POS discount amount
Note: Do not fill in the discount ID / POS string field
Step 3. Toggle the status at the top to on
Step 4. Click save changes
Offers Setup
*Offers are only created in Springbig
These are 3 types of Springbig offers:
Member offers:
Direct to the left-hand Springbig menu
Click settings
Click rewards/offers
Scroll down
Click + new offer
Campaign offers:
Direct to the left-hand Springbig menu
Click campaigns
Click new campaign
Scroll down
Click add extension
Select digital voucher
Autoconnect offers:
Direct to the left-hand Springbig menu
Click autoconnects
Click new autoconnect
Select intended autoconnect
Select track offer
Offers Setup Continued:
Step 1. Navigate to the Springbig main menu, click settings, and then rewards/offers
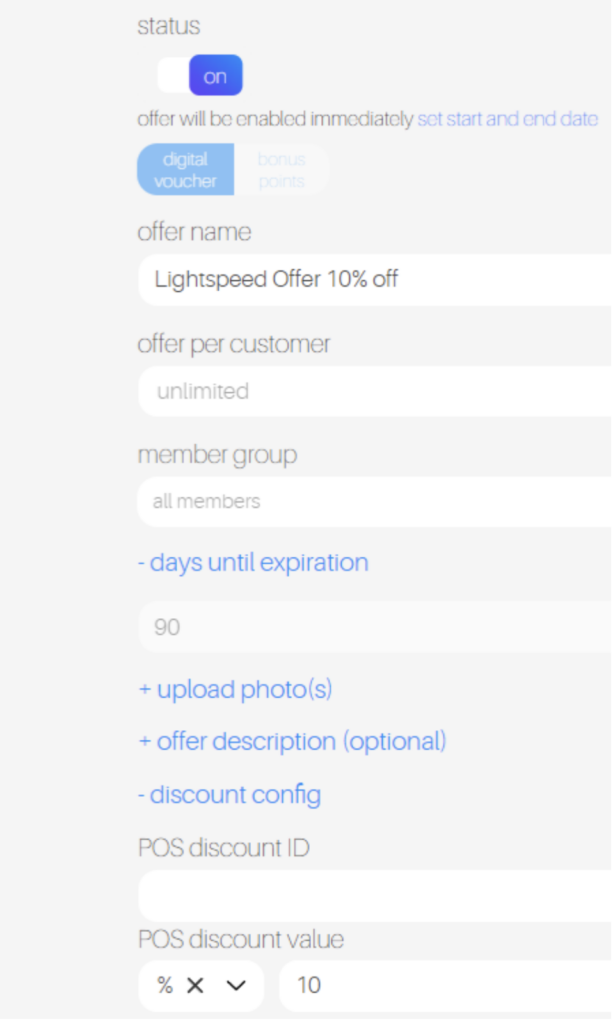
Step 2. Fill in these required fields on the offer setup:
Offer for customer
Discount type (% or $)
(Note: Cannot be blank, otherwise the offer won’t show)
Discount value
Expiration date
(Note: Only member and autoconnect offers can be left as zero/omitted)
Offers per customer
(Note: Do not fill in the discount ID / POS string field)
Step 3. Ensure the offer is saved/completed:
Member offer:
Toggle the status at the top to on
Click save changes
Campaign offer:
Click done
Autoconnect offer:
Click done on the bottom
Lightspeed Promotions
Rewards and offers will automatically send to Lightspeed
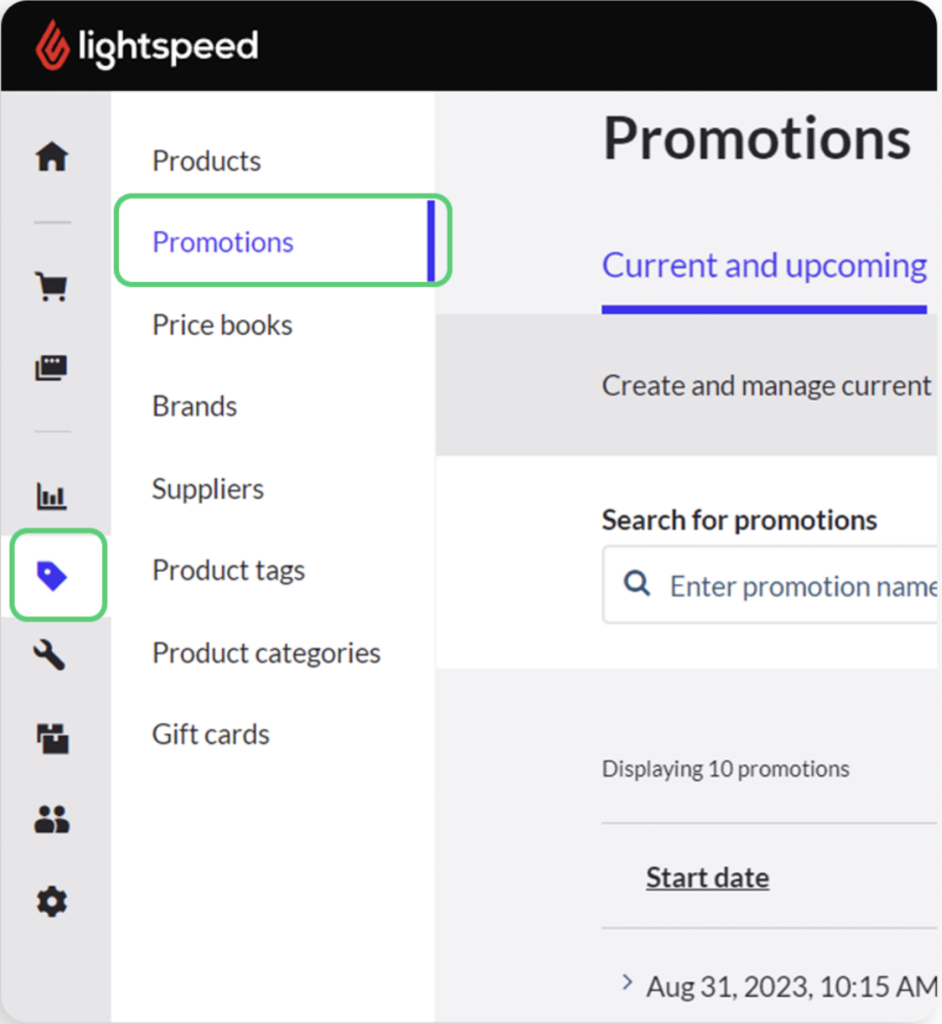
Step 1. Direct to the Lightspeed left-hand menu
Click on the Catalog tab (the tag icon)
Click the Promotions subtab
Note: The Lightspeed Loyalty page has no interaction with Springbig loyalty
Part 3: Members
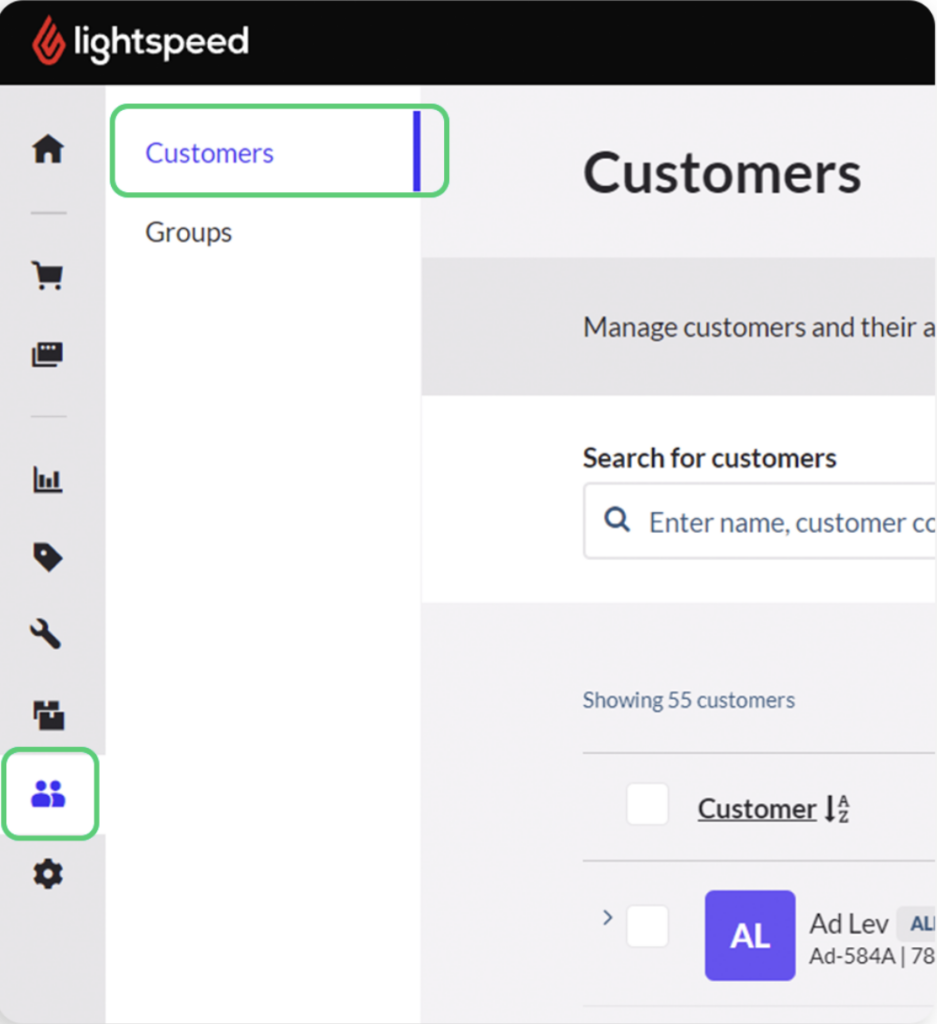
Step 1. Direct to the Lightspeed left-hand menu
Click on the Member tab (the people icon)
Click the Customers subtab
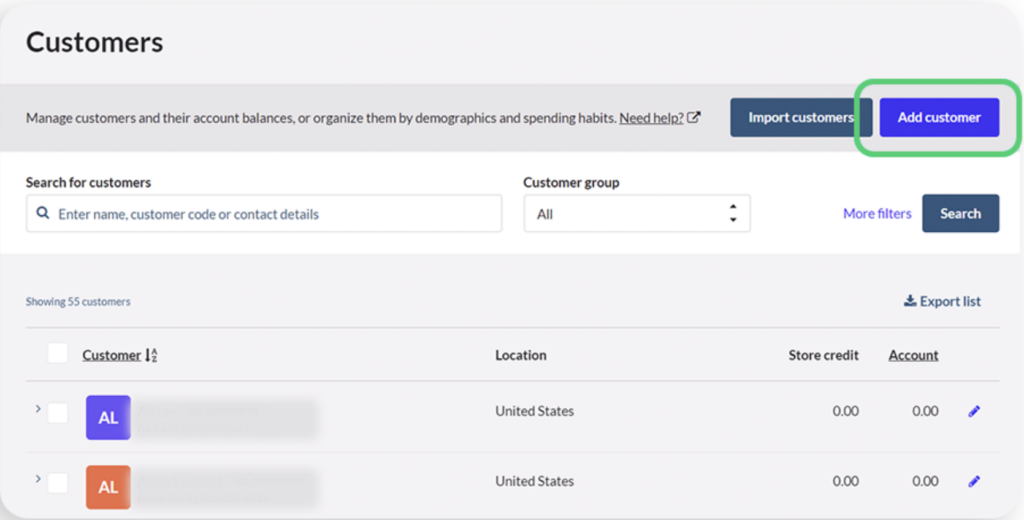
Step 2. Click Add Customer
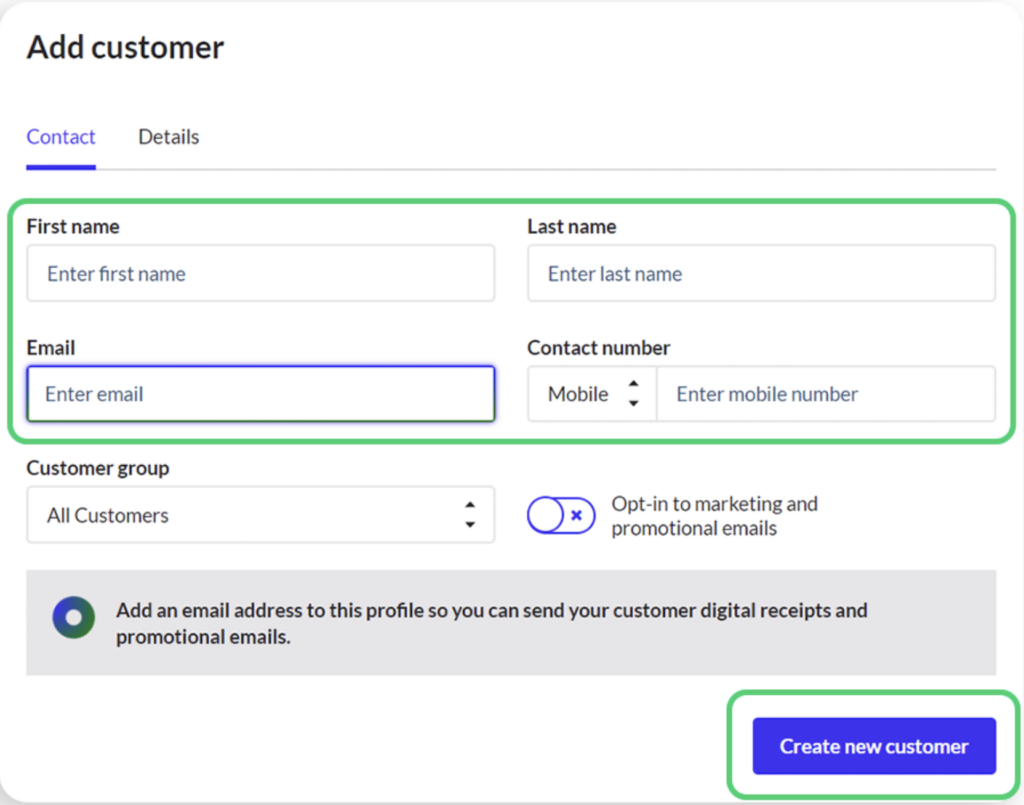
Step 3. Fill in the member information:
Fill in first name, last name, and phone number/email.
The phone number/email acts as the main customer identifier in regard to Springbig’s merge logic, otherwise, not providing either will create duplicates and separate customer point balances.
Lightspeed allows duplicate profiles with the same phone number, but not email.
Fill in other desired fields
Step 4. Once complete, click Create new customer
Step 5. Upon completion, Springbig will receive the customer
Step 6. Springbig also receives member updates upon save
Step 7.Member attributes Springbig receives:
First name
Last name
Phone number
Email
Email enrollment
Address1
Address2
City
Region
Zip code
Birthday
Gender
Location
Customer group
Note: Lightspeed does not provide SMS enrollments to Springbig.
Customer Groups
Create a customer group and tag customers to send catered Springbig offers/vouchers
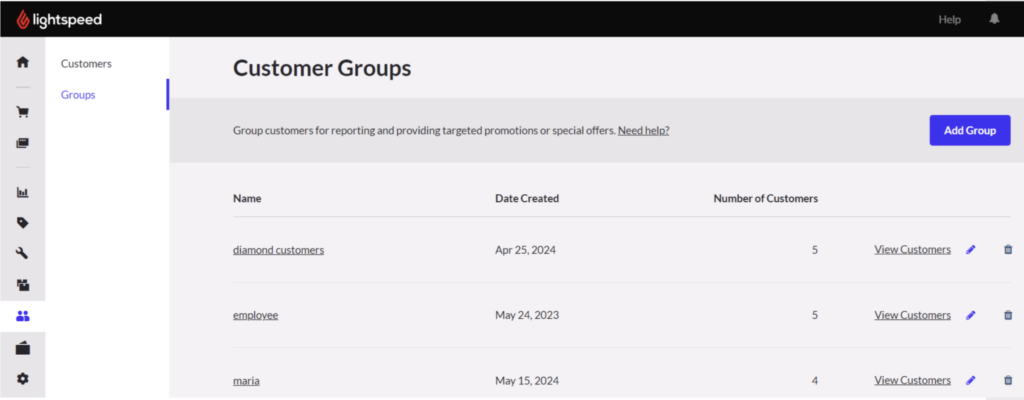
Step 1. Navigate to the Customers tab on the left-hand menu and then click the Groups sub tab.
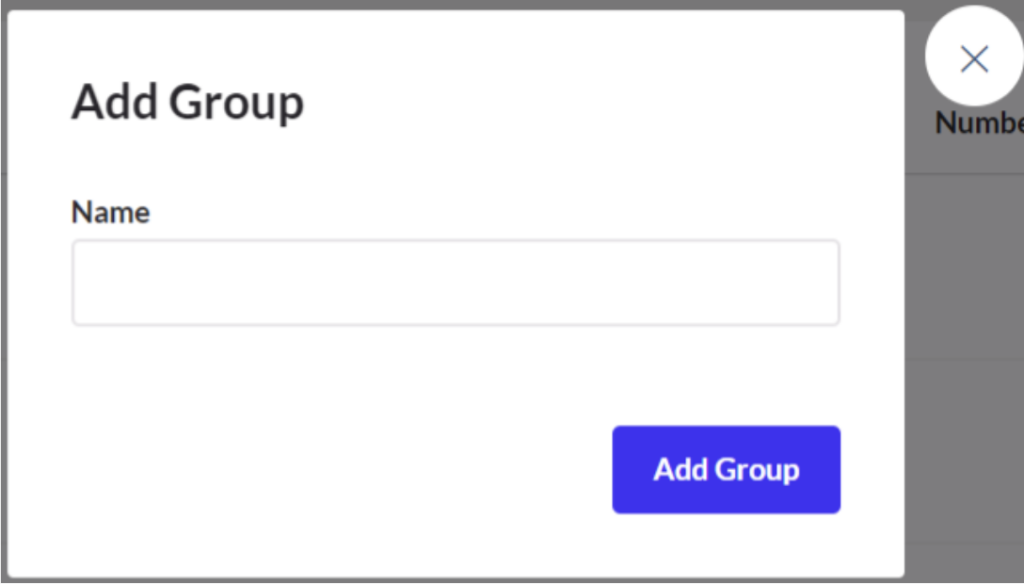
Step 2. Click Add Group, enter name and click Add Group to finish.
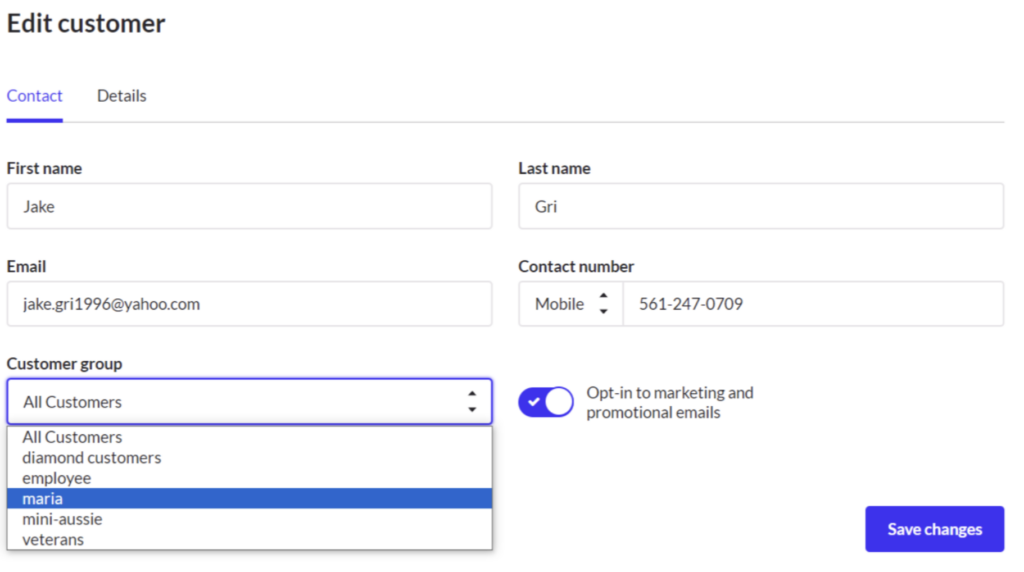
Step 3. Direct to the Customers sub tab, edit/create a customer, select Customer group and click Save changes.
Note: If a customer group is already selected and the customer group is changed to a different one, the customer group that was already selected is still saved/tagged in Springbig.
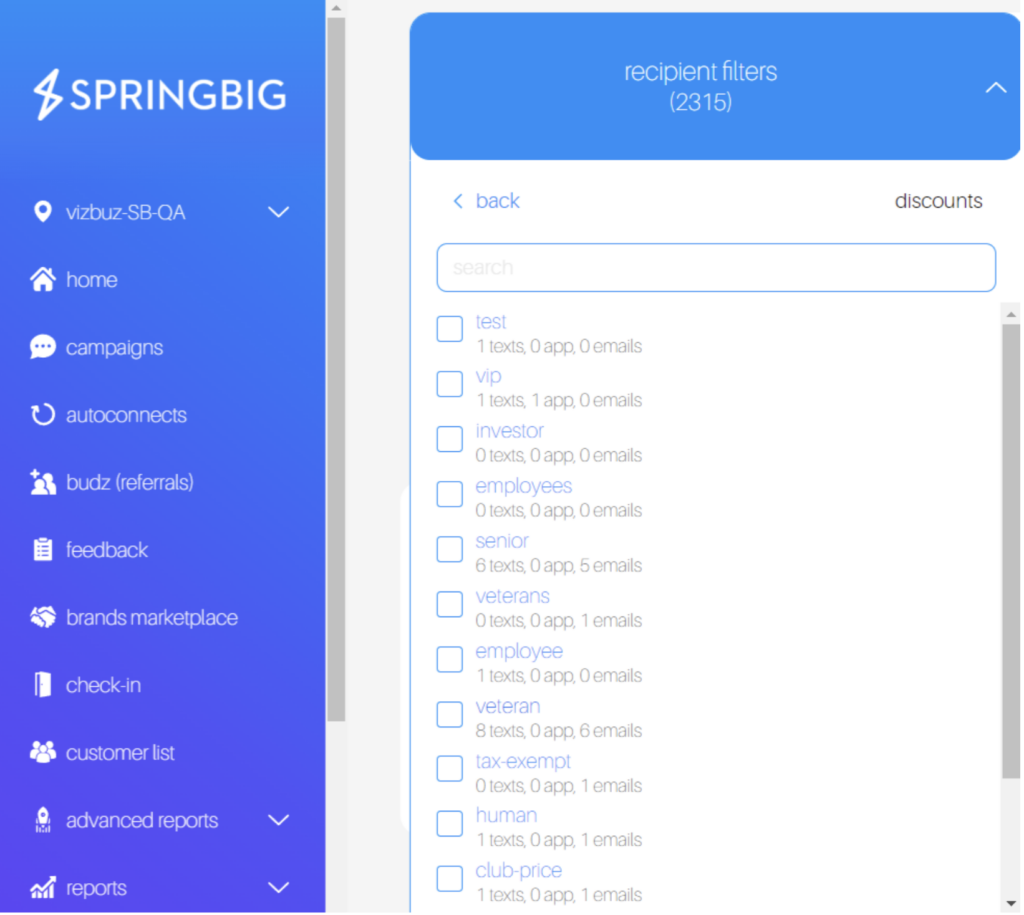
Step 4. Customer groups in Springbig will be tagged under the Discounts segment.
Member 2-Way
Please reach out to your Onboarding Specialist / Client Success Manager to enable the member 2-way which Springbig pushes member creations and updates to Lightspeed
For the Springbig member to send to Lightspeed, the first and last names need to be filled
Lightspeed receives the following attributes from Springbig:
First name
Last name
Phone number
Email
Email enrollment
Address1
Address2
City
Region
Zip code
Birthday
Gender
Part 4: Visits
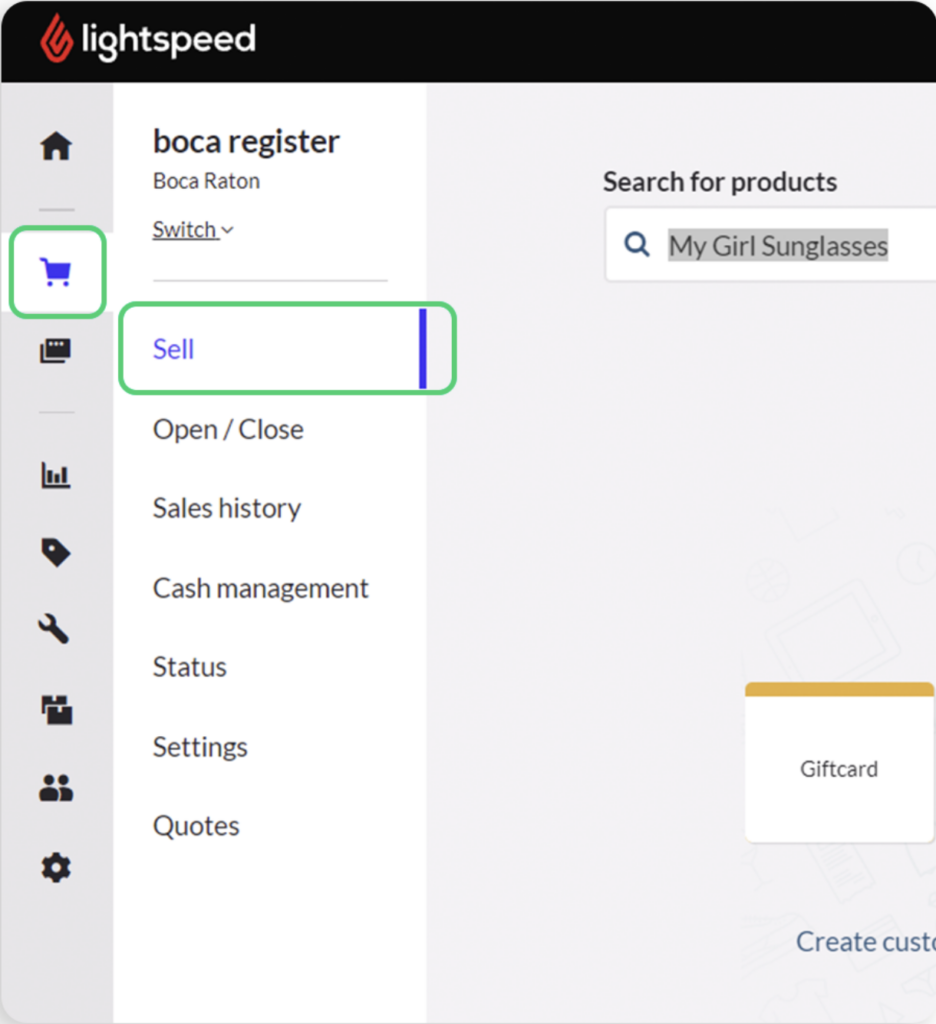
Step 1. Direct to the Lightspeed online portal:
Click on the Sell tab (the cart icon)
Click the Sell subtab
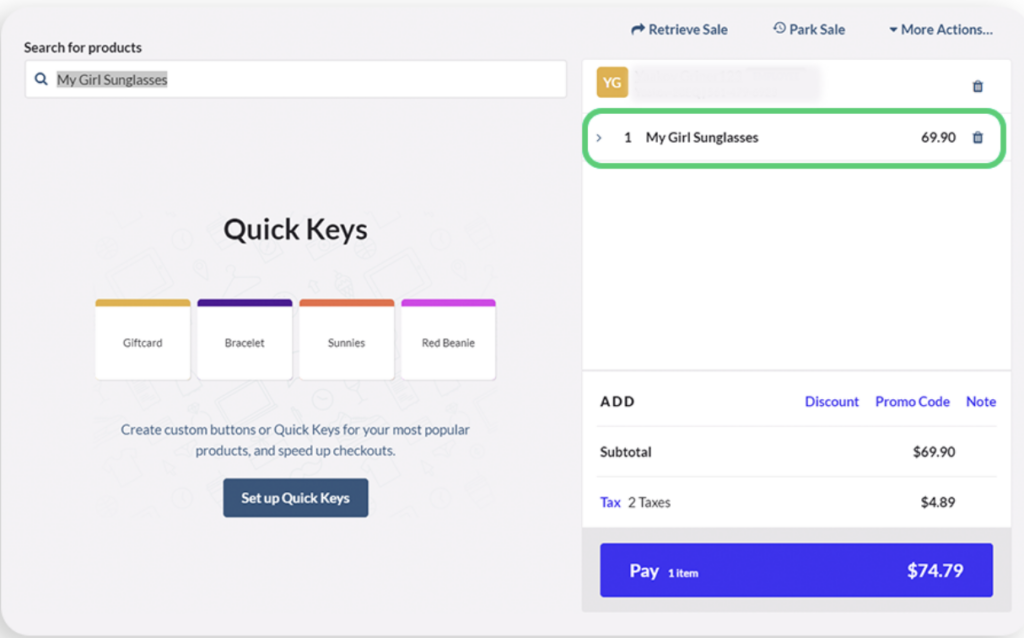
Step 2. Add item(s) to cart
Step 3. To use Springbig loyalty, click Promo Code
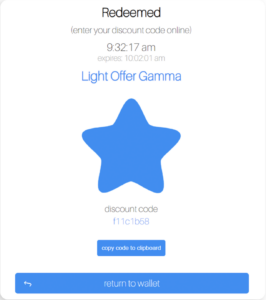
Step 4. Direct to the Springbig wallet
Step 5. Redeem offer/reward
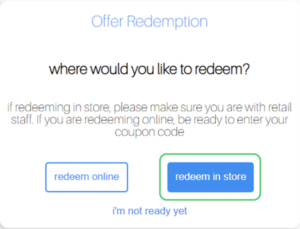
Step 6. Click redeem in store
Note: Do NOT click redeem online
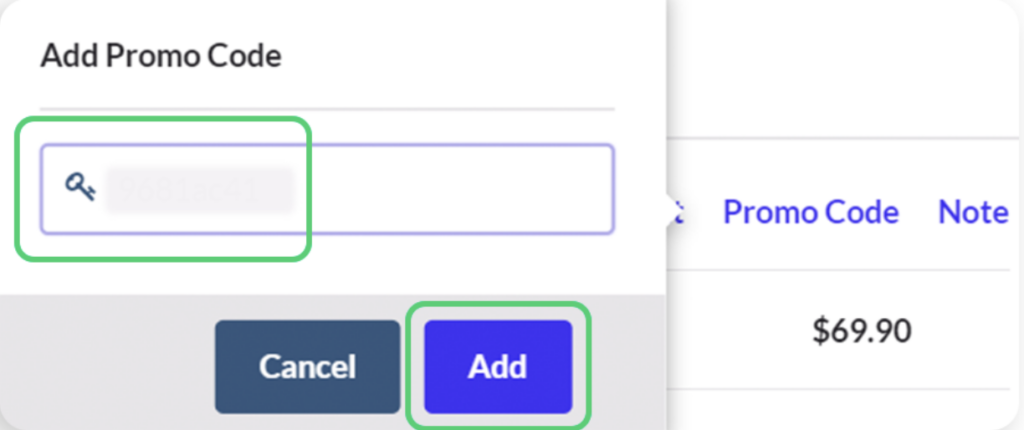
Step 7. Copy and paste code into the Promo Code field and click Add
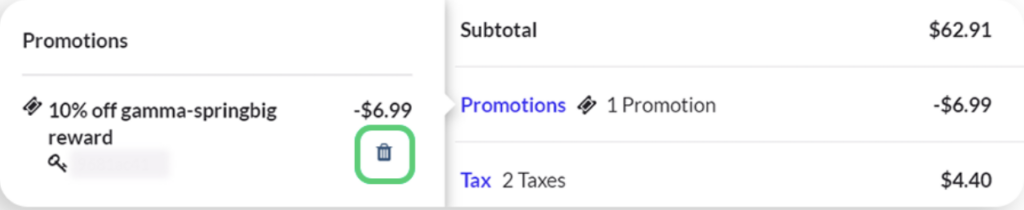
Step 8. To remove the Springbig discount, click Promotions and then click the trash icon
Note: Springbig discounts are non-stackable i.e., only one discount per sale. Discount applies to the subtotal
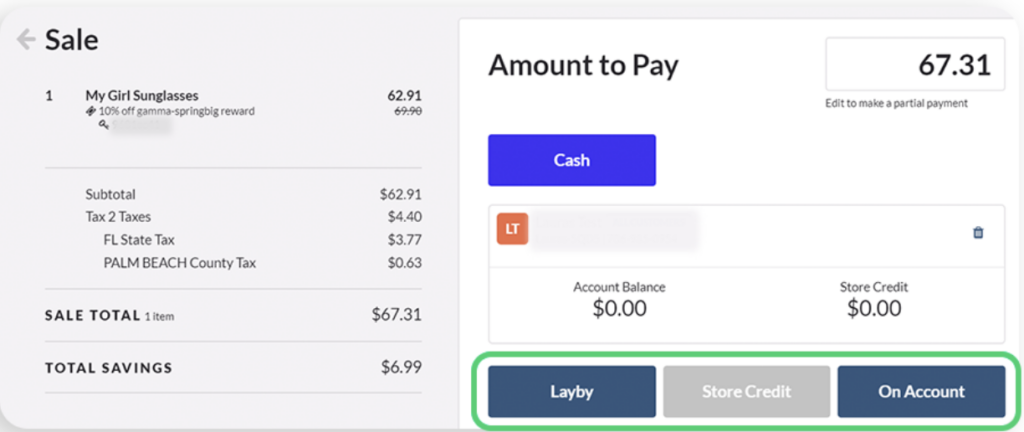
Step 9. When ready, click Pay
Step 10. Select payment method
Step 11. Enter payment amount
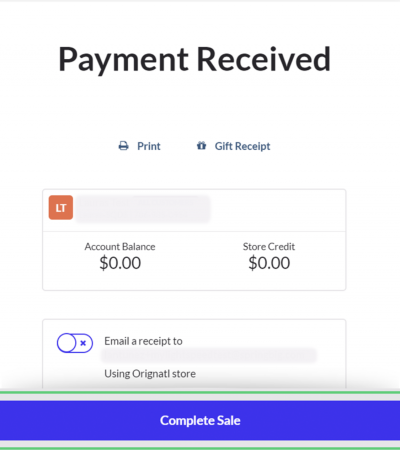
Step 12. Click Complete Sale
Part 4: Refunds
Step 1. Direct to the Lightspeed online portal:
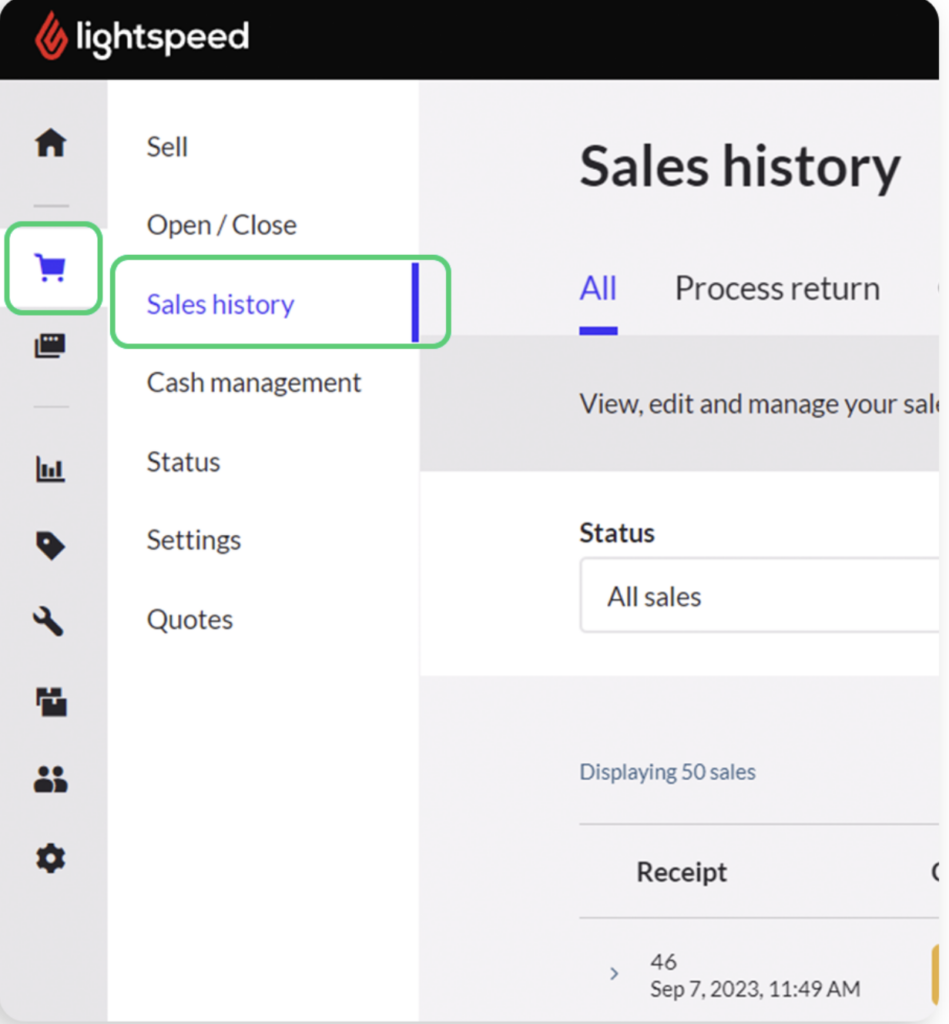
Click on the Sell tab (the cart icon)
Click Sales History subtab
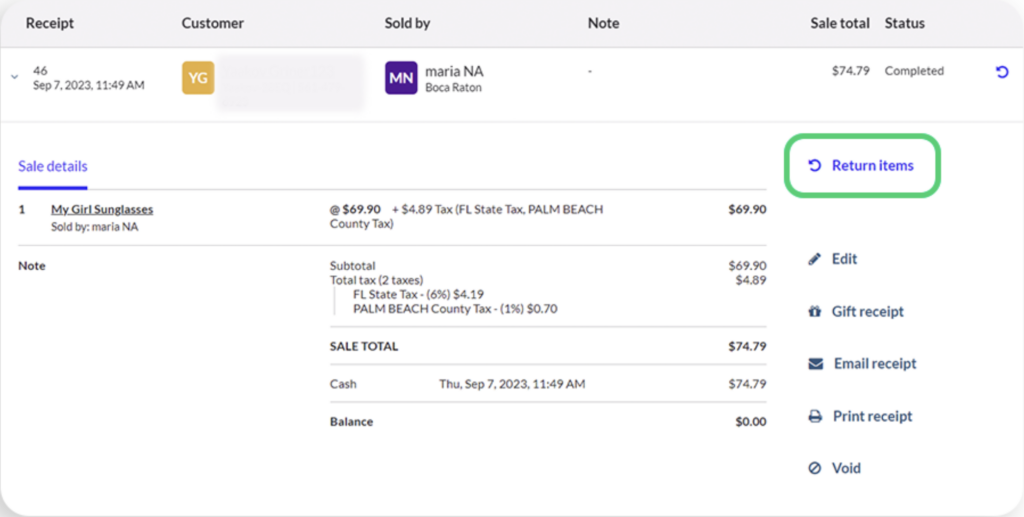
Step 2. Select the intended process transaction to refund
Step 3. Click Return items
Step 4. Follow the same steps similarly to completing a sale