Welcome to the Springbig + Klaviyo Integration Guide!
In this course you will learn more about:
Creating an API key for Klaviyo
The Klaviyo cycle steps
How to share a list ID
How to create flows in Klaviyo
Let’s get started!
Springbig + Klaviyo Integration Guide
User interface is subject to change at the discretion of your POS provider. For the most accurate and up-to-date information, please consult your POS provider directly.
Part 1: Creating an API Key
The purpose of the API key is for Springbig to use to share members who were created or updated in Springbig
Step 1. Login to your Klaviyo account and navigate to the dashboard
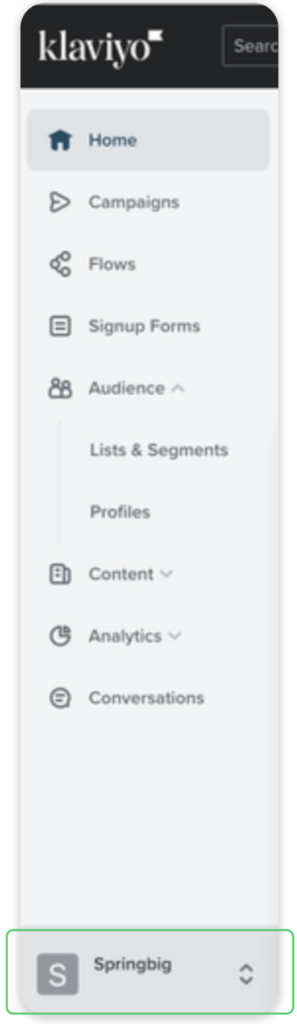
Step 2. From there select your account name and icon at the bottom left of the page
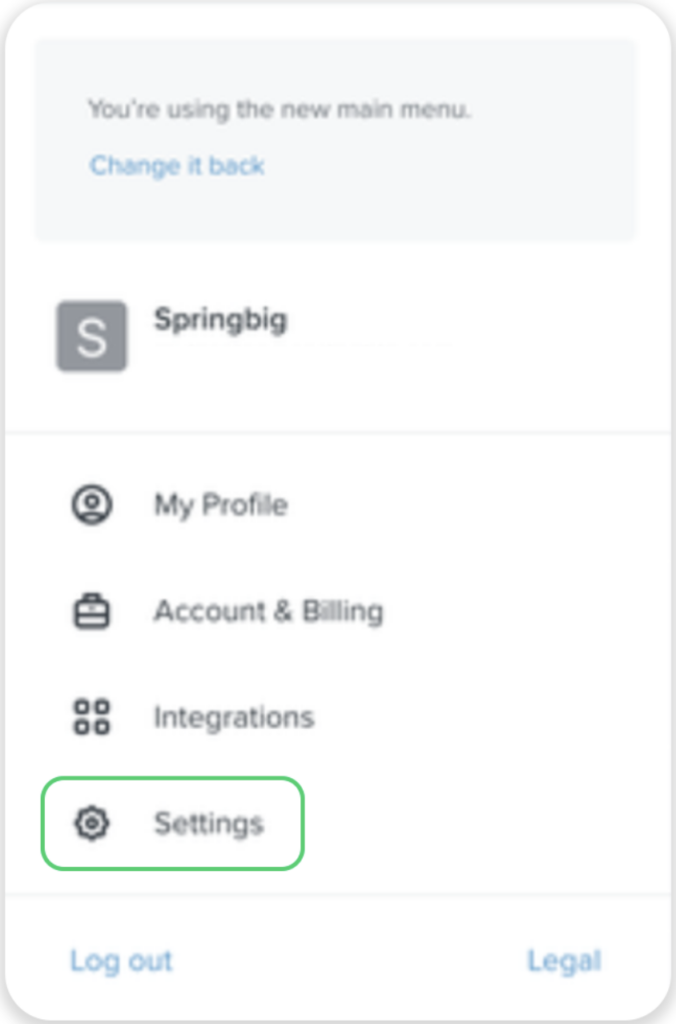
Step 3. Click on Settings from the popup menu that appears
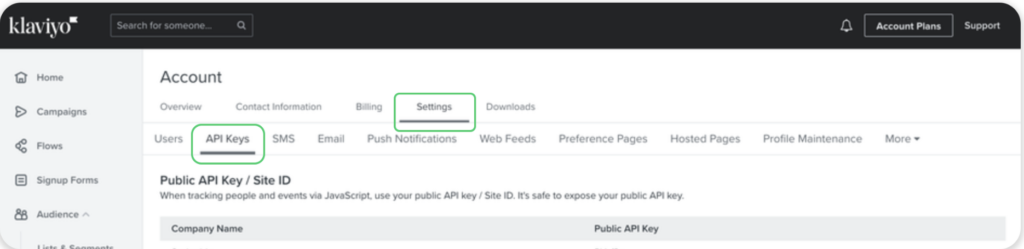
Step 4. On the Account page, locate the Settings menu bar and select API Keys
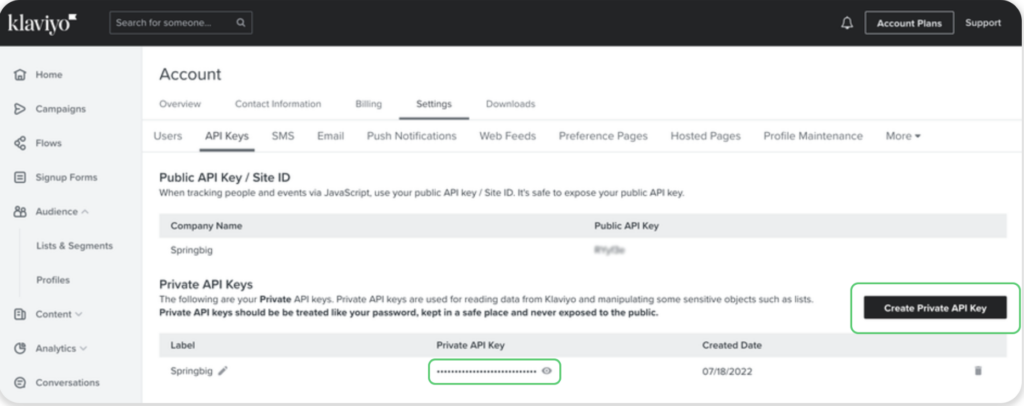
Step 5. Next, click on the Create Private API Key button
Step 6. Select the eye icon to display the private API key.
Copy and share this key with your Springbig CSM
Part 2: Sharing a List ID
This section is only required if you would like to have Springbig members subscribed to a specific list in your Klaviyo account. If this section is skipped, we will create a new list in your Klaviyo account called Springbig and share your Springbig members there.
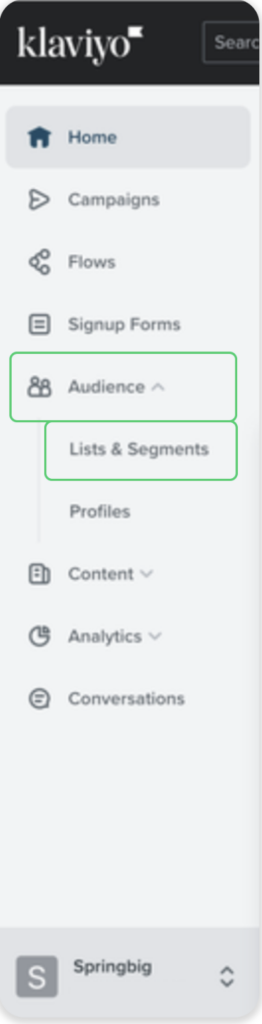
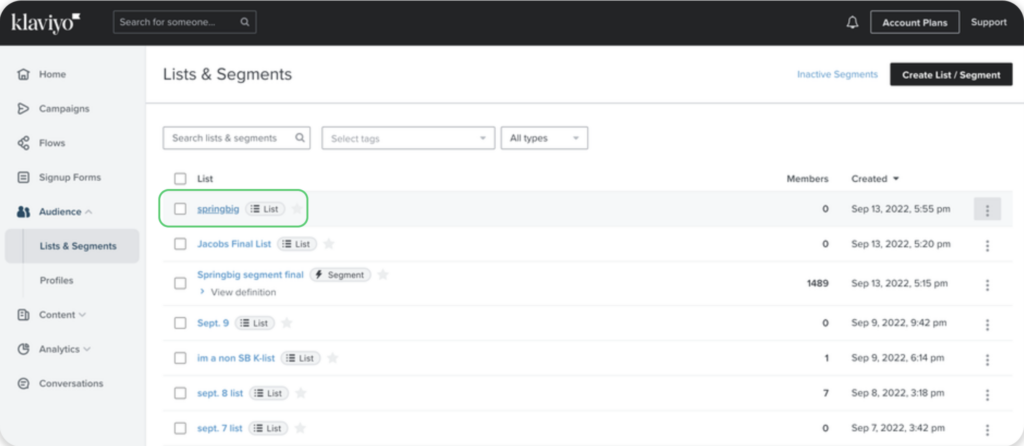
Step 1. In your Klaviyo dashboard, select Audience and then click on Lists & Segments
Step 2. Select the list you would like Springbig to share members to by checking the box to the left of the list name
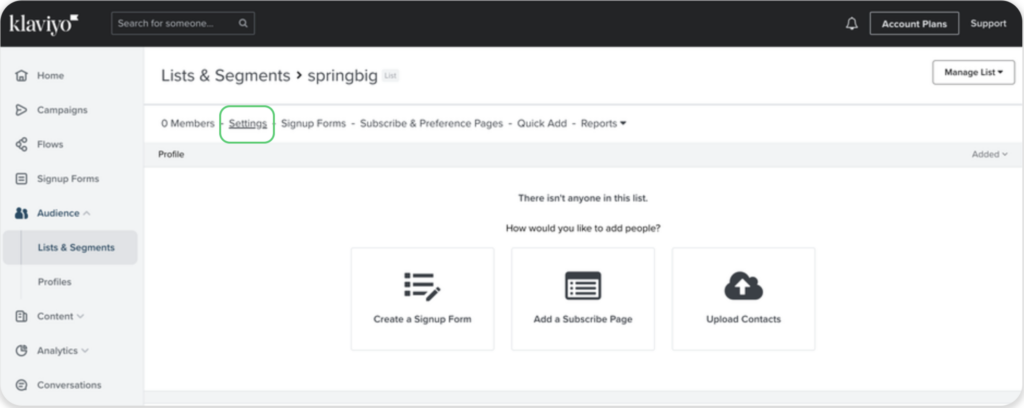
Step 3. Select Settings
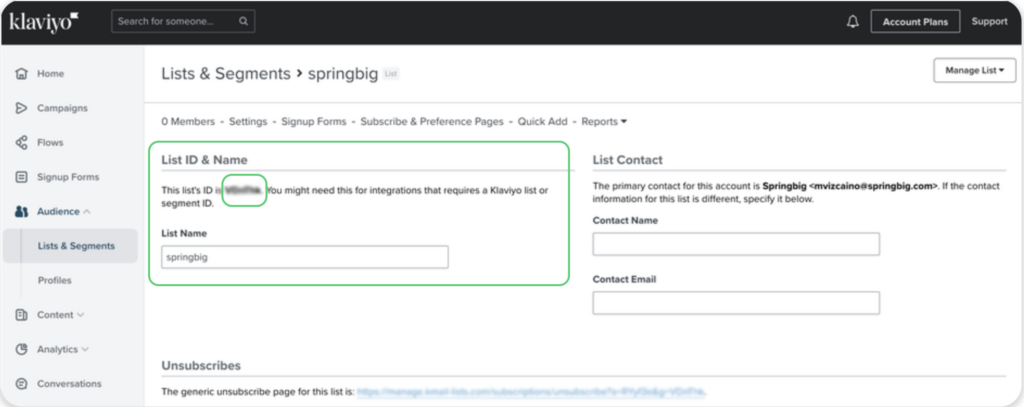
Step 4. Copy the list ID value under the List ID & Name section
Note: you will need to share the list ID with your CSM
Part 3: Creating Flows
In this section, you will create flows that share customers who subscribed to a Klaviyo list to your Springbig account. It is important to remember that you will need to do this for each list of customers you would like to share.
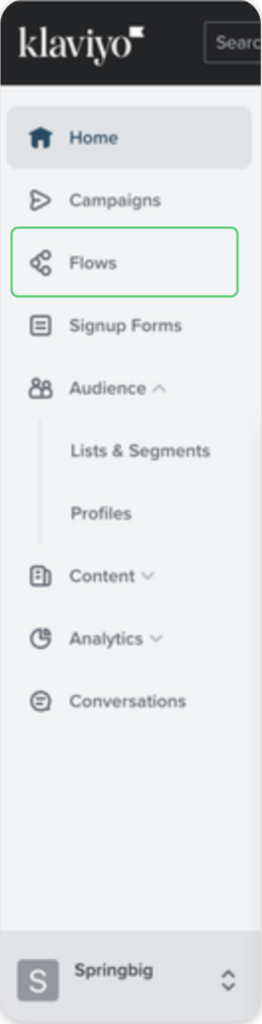
Step 1. From the Klaviyo dashboard, select Flows
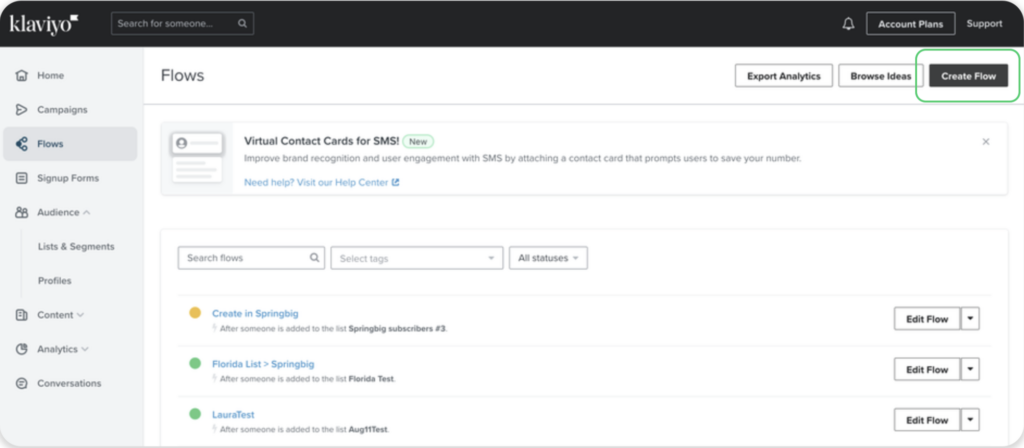
Step 2. On the top right of the page, select Create Flow
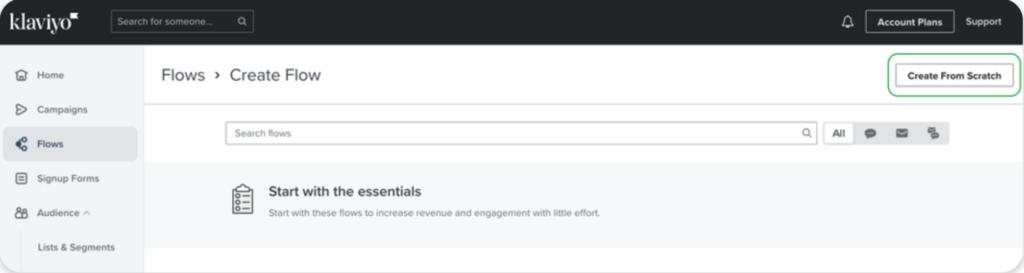
Step 3. Next, select Create From Scratch on the top right of the page
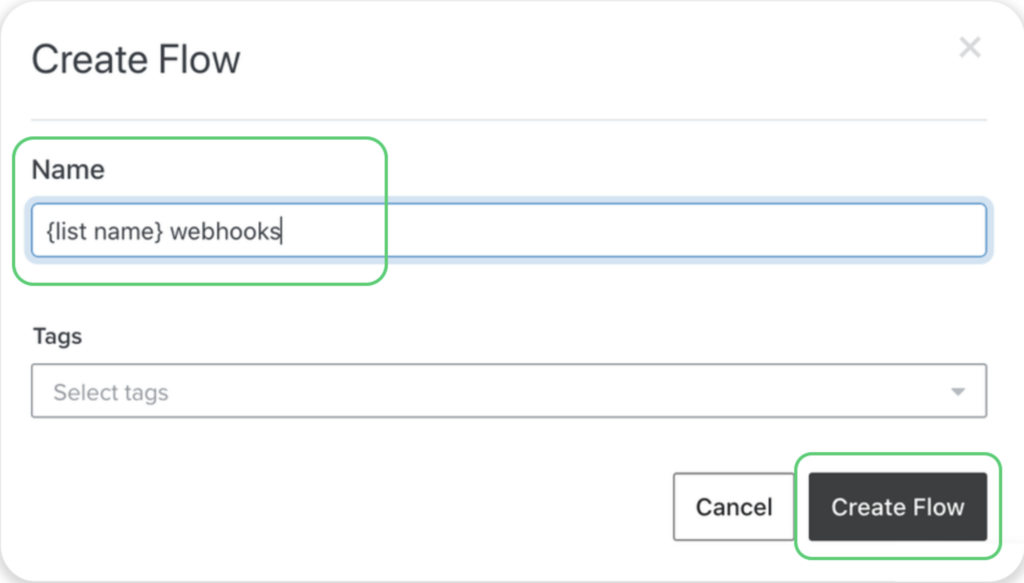
Step 4. When prompted, create a Name for the flow
Note: a suggested name is the name of the list plus the name of the webhooks
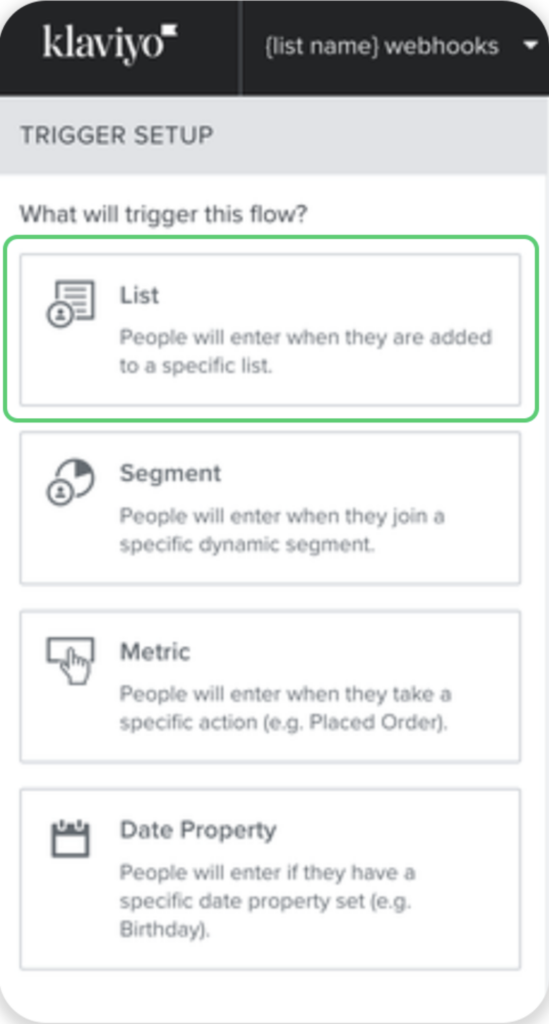
Step 5. From the Trigger Setup menu, select List
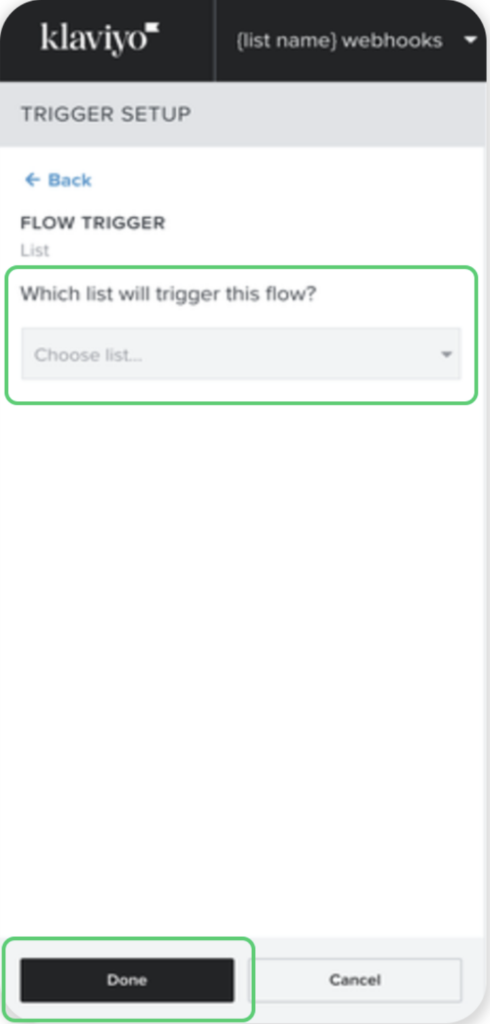
Step 6. Next, choose the list of members that you would like to share, and then click the Done button
Note: this process will be repeated for each list you want to set up
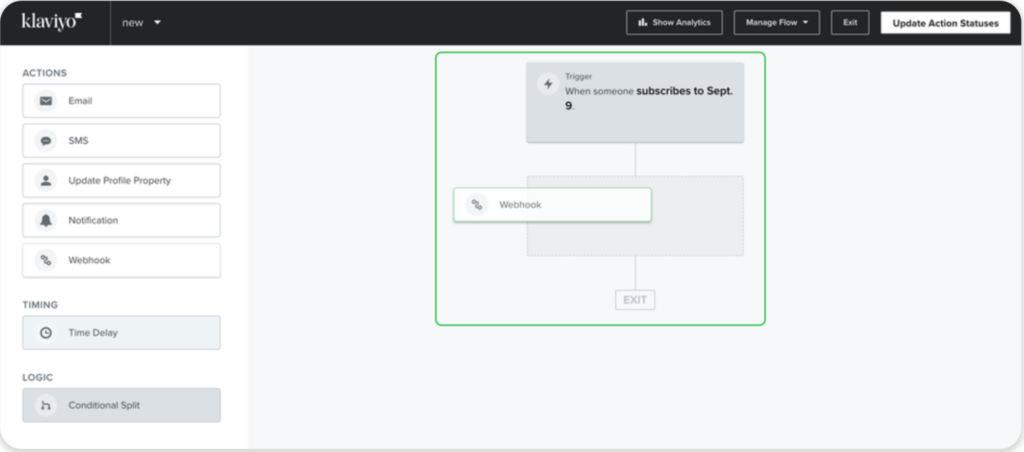
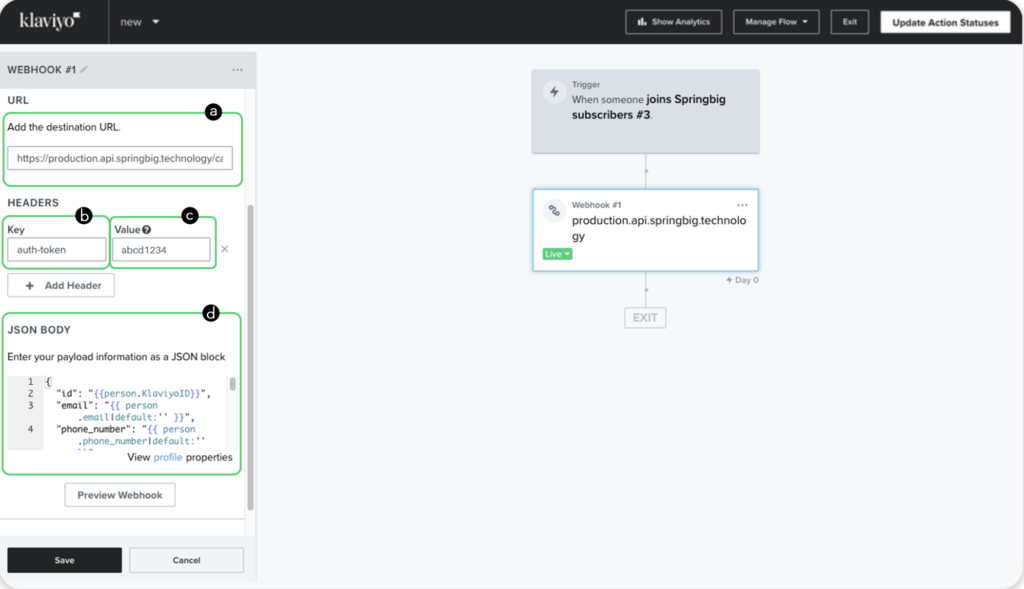
Step 7. On the next page, drag and drop the Webhook into the flow
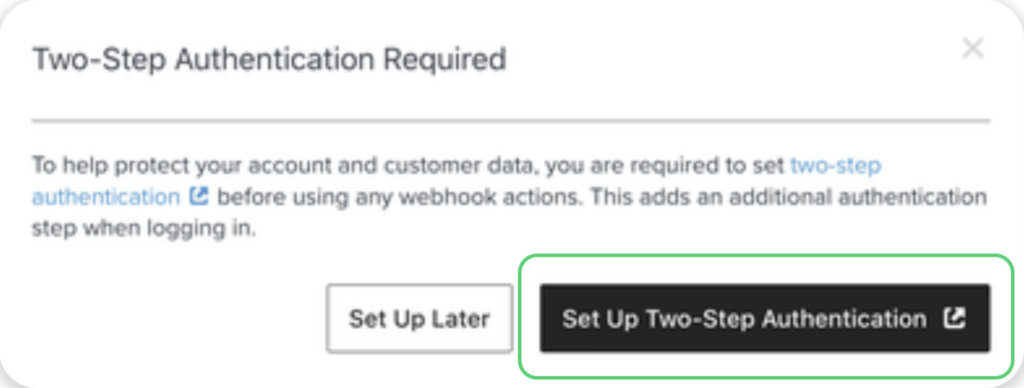
Note: if you get this error message, you will need to go Set up Two-Step Authentication in your settings
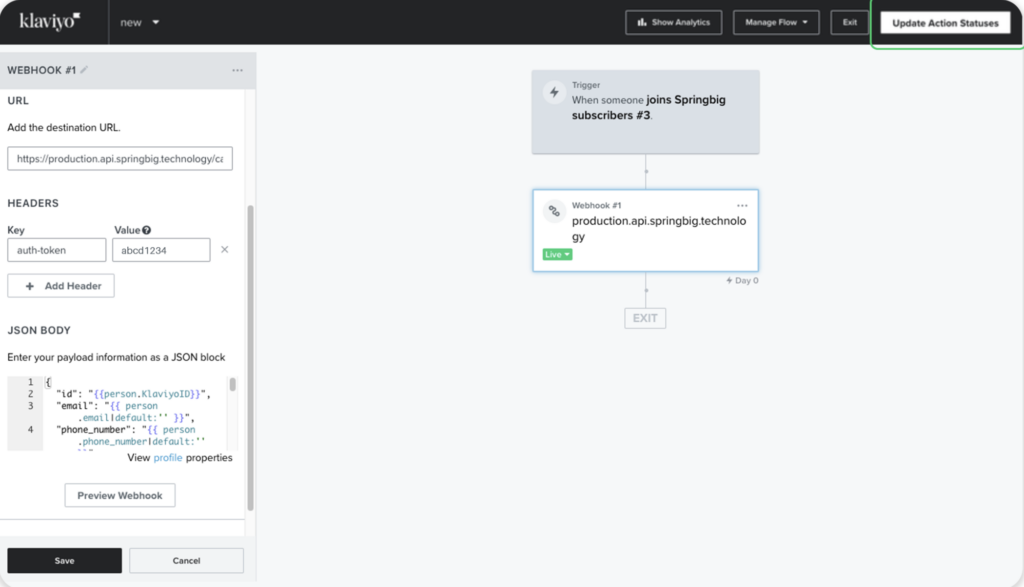
Step 9. Next, click on the Update Action Statuses button on the top right of the page
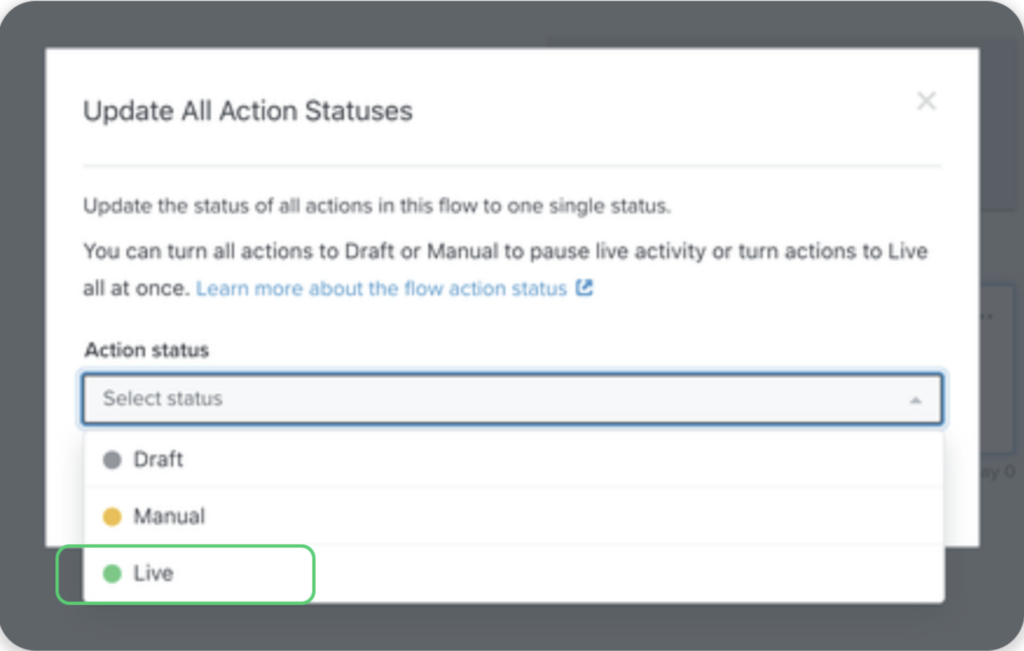
Step 10. From the popup menu, open up the Action Status drop-down and select Live
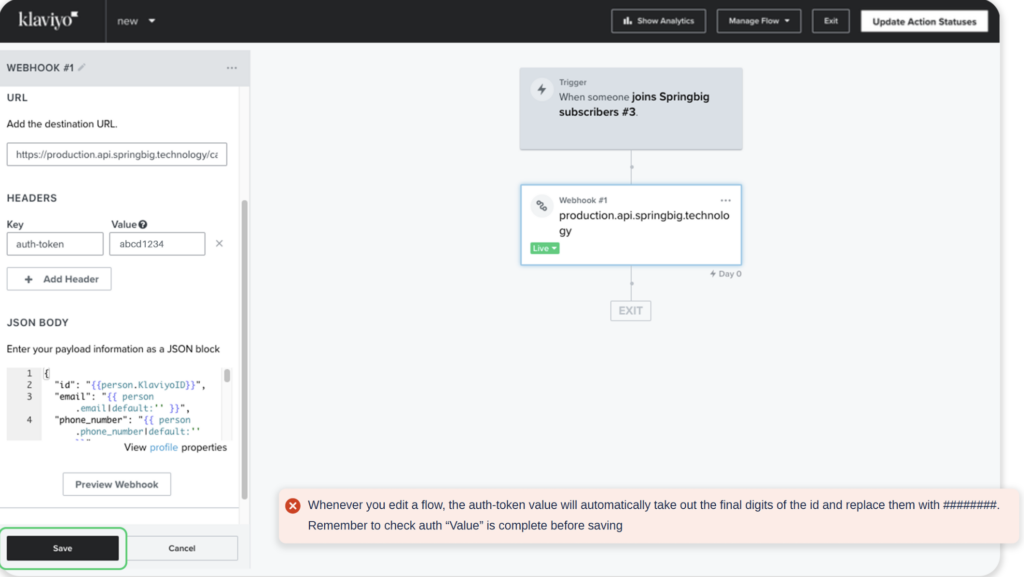
Step 11. Click the Save button on the bottom left of the page and you have successfully completed the setup for sharing this list’s members to your Springbig account
Klaviyo SMS Guide
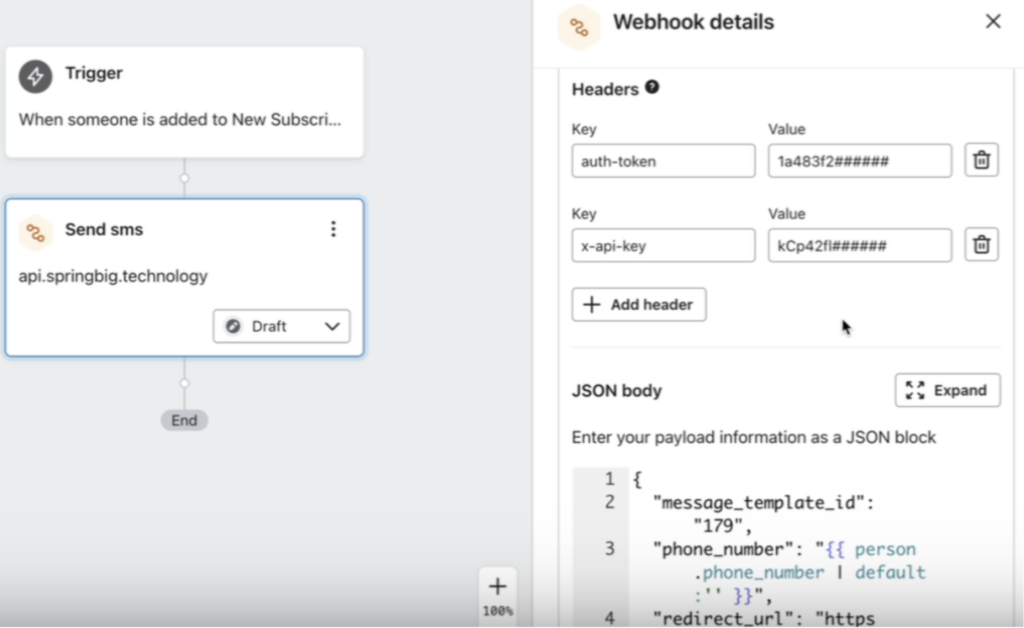
Our enhanced Klaviyo integration allows you to effortlessly trigger personalized messages through Klaviyo’s “Flow” feature. With this integration, you can deliver tailored communication that includes approved images, message templates, and web links, all while tracking customer interactions with a webhook trigger.
Key Features
Message Triggering via Klaviyo’s Flow
Easily trigger messages through Klaviyo’s Flow automation. Set up custom workflows that automatically send messages based on customer behaviors or milestones.
Incorporate Approved Content
Images: Include pre-approved images in your messages to visually engage your audience.
Message Templates: Use customized, pre-approved message templates to streamline your messaging process.
Your Account Manager (AM) will provide the necessary Image ID and Template ID to connect your approved content.
Clickable Links & Webhook Triggers
Link Tracking: Add a clickable link that redirects your customers to a specific destination, such as a landing page or offer.
Webhook URL: Capture customer interactions with a webhook that triggers when the link is clicked, enabling real-time engagement tracking or follow-up actions.
Instructions
Direct to Klaviyo’s main page, click Flows via the left-hand menu and then click Create flow.