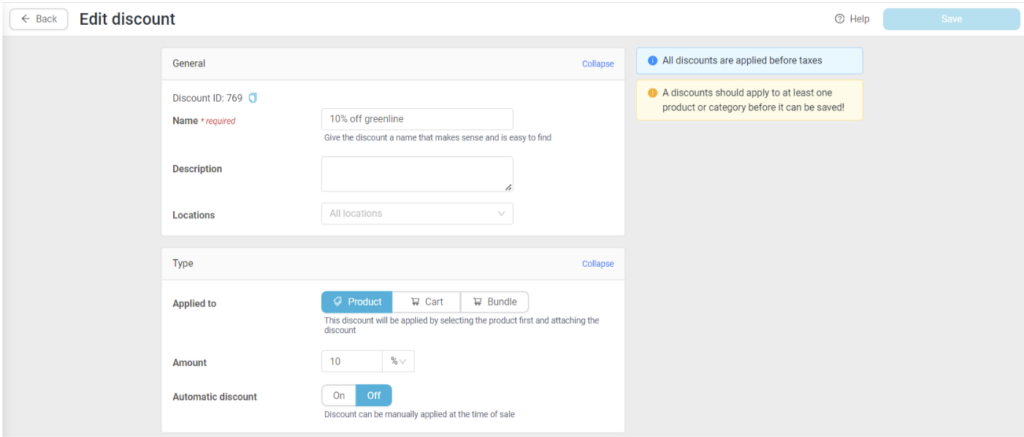
Springbig + Greenline
Springbig + Greenline Integration Guide
Welcome to the Springbig + Greenline POS Integration Guide!
Thanks to this exciting integration, your Greenline account can be directly integrated with Springbig to share your customer and transaction data.
In this course you will learn about:
- The Greenline installation process
- Member creation in Greenline
- Completing transactions and adding rewards/offers
- Processing refunds and cancellations
- Enabling the 2-way integration
Let’s get started!
Springbig + Greenline Integration Guide
User interface is subject to change at the discretion of your POS provider. For the most accurate and up-to-date information, please consult your POS provider directly.
Part 1: Installation
Pre-launch steps:
The company id and location id(s) are needed for the 2-way integration which can be found by directing to the menu> click integrations- overview
Select API Keys and copy the entire raw data to share with your SpringBig AM.
Add Your Heading Text HereIntegration Setup
When the pre-launch steps have been completed, Greenline will enable a new integration type for “Springbig”.
1. Direct to the menu on your left-hand side >click integrations > overview > enable Springbig by switching the ‘Activate Integration’ toggle
Part 2: Rewards & Offers
The Springbig integration must be enabled beforehand to enable Springbig loyalty. Also, only one loyalty program can be ran at once.
1. Direct to the Greenline left-hand menu and click Settings
2. Click Loyalty
3. Click the gear icon
4. Enter the auth token provided by your Springbig onboarding specialist/account manager.
NOTE: Ensure there are no edits such as spaces before or after inputting the auth token.
5. Click TEST CONNECTION
6. Click SAVE
7. Click the Springbig toggle to enable Springbig loyalty.
8. Direct to the Greenline left-hand menu and click Products
9. Click Discounts
10. On the top-right of the page, click Add discount
11. Fill in these required fields:
Name (Must be identical to the name in Springbig)
Discount amount
Discount type (% or $)
12. General:
a. Description
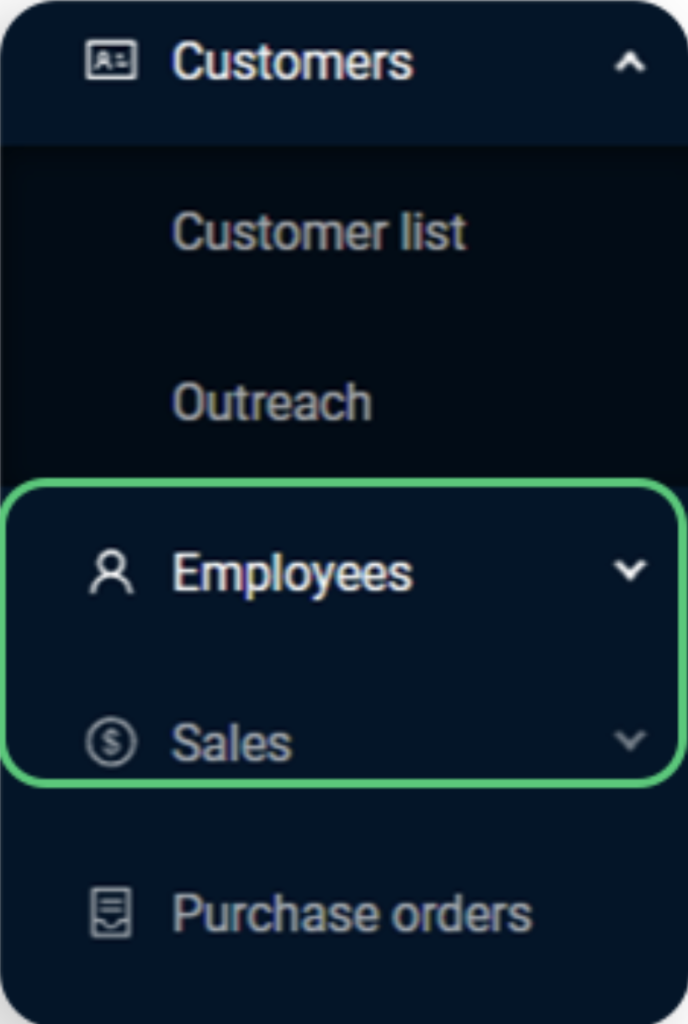
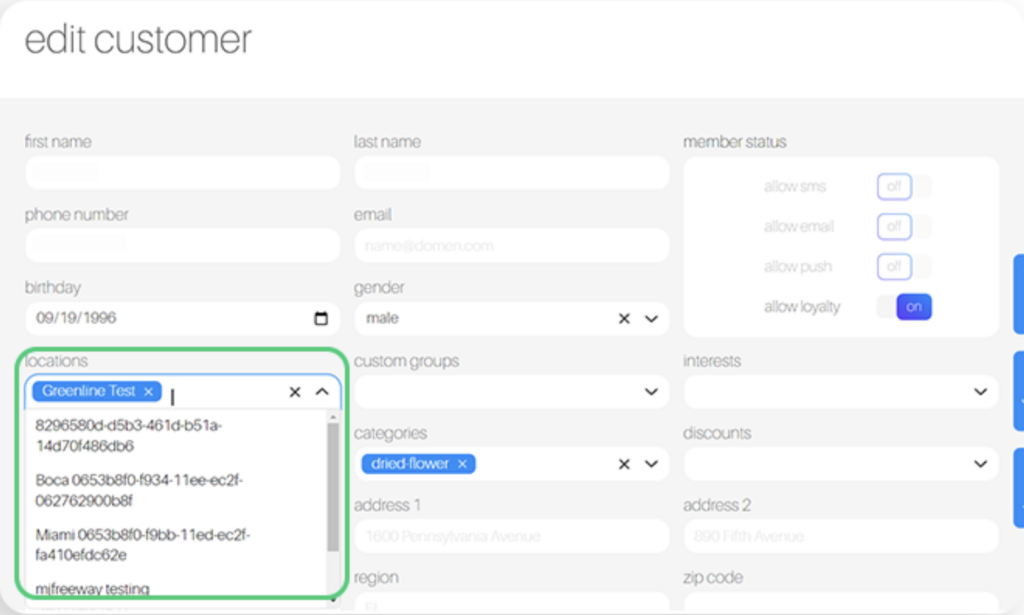
b. Locations– Can select which locations are allowed to apply the discount.
13. Type:
a. Applied to
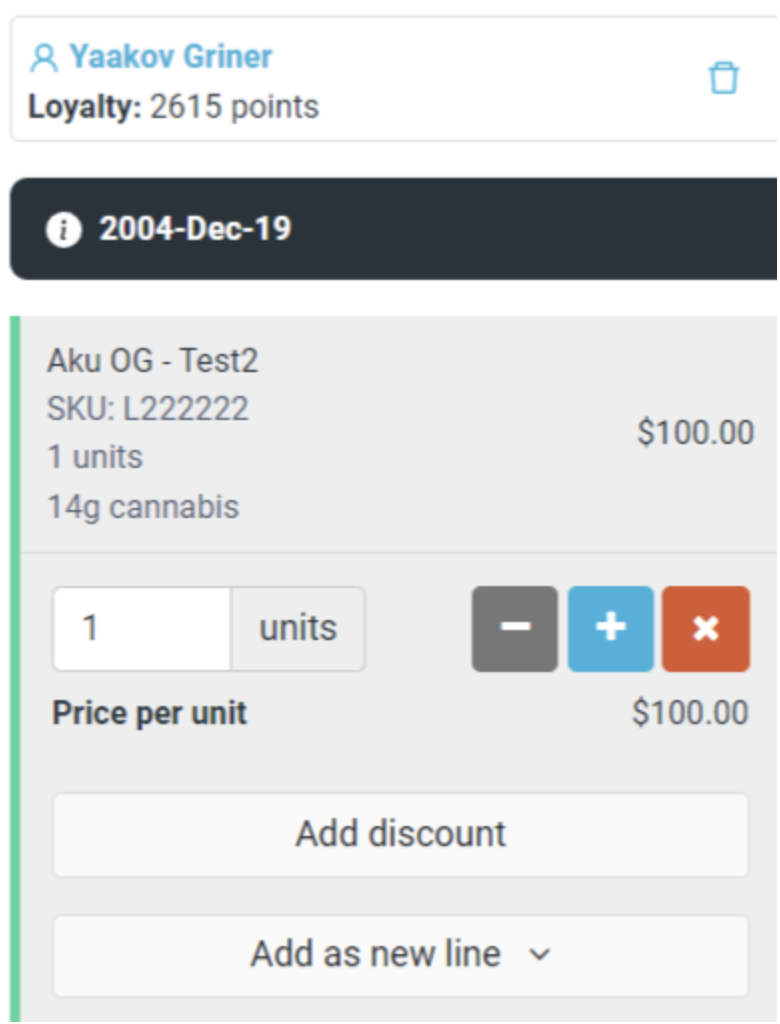
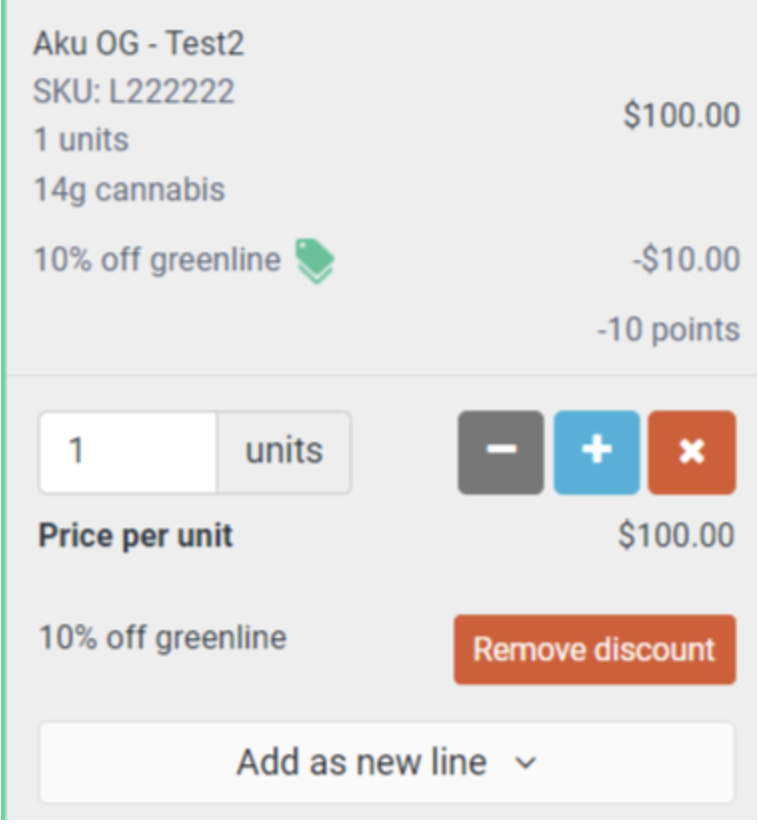
i. Product– Can discount specific products. This would discount the line item i.e. the individual selected product that’s eligible.
NOTE: For example, if the same discount that costs 10 points is redeemed on 3 different items, it will deduct 30 from the customer’s point balance. Also, for example, if the discount redeemed costs 10 points and the quantity is 2 for the same item/product, then it will only subtract 10 points, not 20.
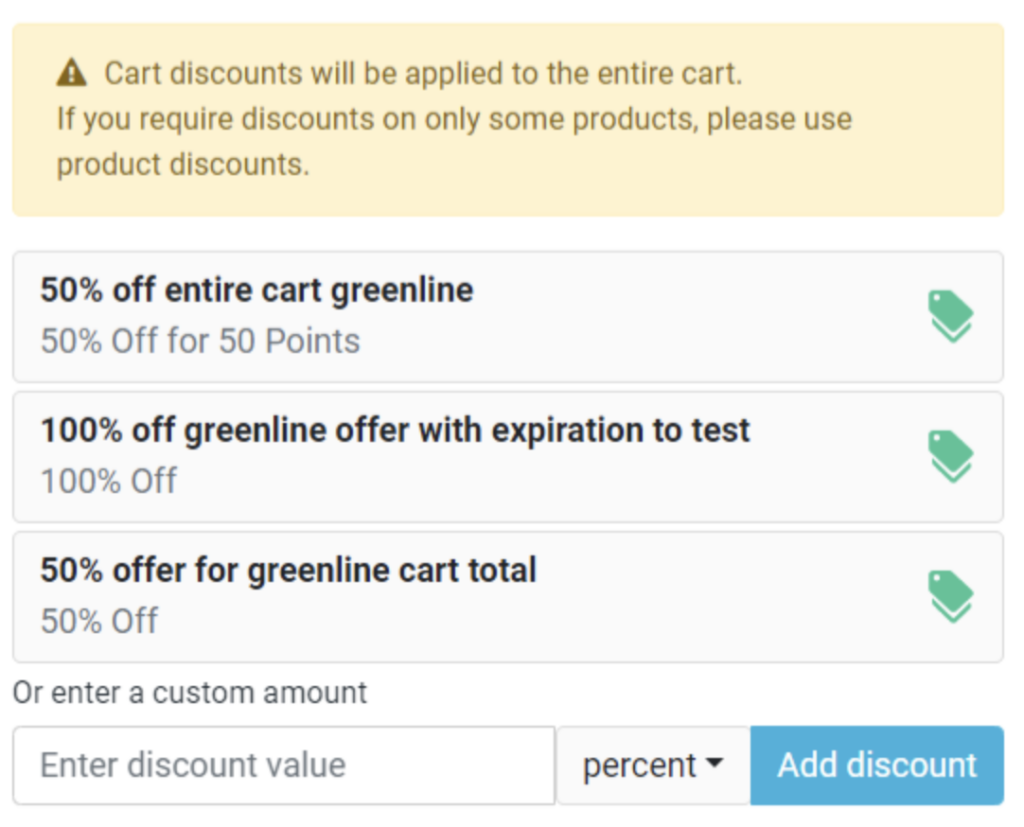
ii. Cart– This would discount the entire cart i.e. all of the products at once without having to manually discount every individual product.
NOTE: For example, if one cart discount that costs 10 points is redeemed once, it will only deduct 10 points from the customer’s point balance., although, if there are multiple items in the cart.
iii. Bundle– This discount will be applied to the specific products selected in the products section. All products should be added to the cart in order for the discounts to show up.
iv. Discount amount (REQUIRED)
v. Discount type % or $ (REQUIRED)
b. Automatic discount– The discount is automatically applied to the specified product(s) that are allowed to have discounts.
NOTE: Can only apply this setting for product based discounts.
14. Products:
a. Applied to:
i. Specific products– Choose products to include.
ii. Specific categories
iii. All products and categories
15. Type:
a. All– Select this option if it’s a reward with no intended expiration date or other set rules when a discount can be applied. Or choose this option if it’s an offer intending to only use the Springbig discount logic dictating the expiration date.
b. Range– Can select a date range and also has the option to add a time range. This can be added for a reward in which Springbig does not have an expiration for rewards since they are static. Please keep in mind that if it is applied to offers, then the expiration date must match between Greenline and Springbig.
c. Recurring– Can select which days of the week a discount can only be applied to. This also has the option to add a specific time range.
16. Once the setup is completed, click Save on the top-right of the page.
17. Direct to the name field of the discount setup, which above it has the Discount ID to copy and paste it into the Springbig discount setup (REQUIRED).
Springbig Rewards & Offers Setup
Rewards Setup
1. Navigate to the Springbig main menu, click settings, and then rewards/offers
2. Fill in these required fields on the reward setup:
a. Reward name
b. POS reward value
c. POS discount ID
Please note: The Greenline POS discount ID is shown inside of the edit discount page on Greenline, highlighted in the image below for reference.
3. Toggle the status at the top to on.
4. Click save changes
Offers Setup
These are 3 types of Springbig offers:
Member offers:
Direct to the left-hand Springbig menu
Click settings
Click rewards/offers
Scroll down
Click + new offer
Campaign offers:
Direct to the left-hand Springbig menu
Click campaigns
Click new campaign
Scroll down
Click add extension
Select digital voucher
3. Autoconnect offers:
Direct to the left-hand Springbig menu
Click autoconnects
Click new autoconnect
Select intended autoconnect
Select track offer
Offers Setup Continued:
Navigate to the Springbig main menu, click settings, and then rewards/offers
Fill in these required fields on the offer setup:
Offer name
Offer per customer
Expiration date
(Note: Only member and autoconnect offers can be left as zero/omitted)
POS discount ID
Ensure the offer is saved/completed:
Member offer:
Toggle the status at the top to on
Click save changes
Campaign offer:
Click done
Autoconnect Offer:
Click done on the bottom
Adding Rewards/Offers in the Cart
Once a customer and items have been added, choose either a product/line item discount or a cart discount.
Product/Line item discount:
Select item(s) to discount
Click Add discount
3. Select discount(s).
4. Ensure to only select discounts with the green tag next to it.
5. To cancel a discount, click Remove discount by the discounted line item.
3. Cart discount:
On the bottom-right of the page, click Cart discount
Ensure to only select discounts with the green tag next to it.
3. To cancel:
i. Scroll to the bottom of the cart details
ii. Click the cart discount
iii. Click the X button
NOTE:
Ensure the customer has a sufficient amount of points for the intended reward.
Can select as many rewards for as long as there are enough points. Can also select as many offers as desired. Please keep in mind only one discount per line item.
Discounts are applied before taxes i.e. the subtotal.
If a product/line item discount and cart discount are applied within the same transaction, it first uses the discount for the line item and whatever is the quotient, i.e. the remaining value after the product/line item discount, it will then apply the cart discount.
Part 3: Member Creation
Member Creation via Greenline (from Dashboard):
1. Choose Dashboard on the main login link, and log in.
2. Navigate to the Customer > Customer list page.
3. Click on Add customer and fill out the member’s details.
(Only the Name field is required for Greenline to create a customer. Enter the customer’s full name in this field.)
4. Click Save
Member Creation (from POS)
1. Choose POS via the WebPOS or login via tablet pos app.
2. Select Add in the top right to create a new member. Fill out the member’s details.
(Only the Name field is required for Greenline to create a customer. Enter the customer’s full name in this field.)
3. Click Save
4. Member attributes sent to SB:
first name
last name
address1
city
country
region (province)
zip
birthday
email
phone number
pos user
pos type
gender
Part 4: Adjusting Loyalty Points
Points can only be adjusted via the dashboard.
Select intended customer
On the right-hand side of the profile under Loyalty balance, click edit to adjust the point balance.
3. Upon finishing editing the point balance, click Save.
NOTE:
a. Keep in mind that a Greenline profile must exist in Springbig already to edit points. Please request Springbig to perform a historical customer pull or Springbig will receive the profile upon a processed transaction with a customer profile attached or via the customer 2 way in Springbig.
b. There are no logs in the Greenline UI pointing to which user made a point adjustment.
c. There are no logs in the Greenline UI for point adjustments. You can view the point adjustments in Springbig but they don’t specifically show they were point adjustments. If requested, Springbig can create a custom report to show logs for the point adjustments. Greenline does also have in their backend the logs for the point adjustments.
Part 5: Transaction Process
Visit Creation:
1. Login via the POS portal
2. Select an existing member by clicking Select customer or create a new one by clicking Add (as shown in the steps above).
3. Select products from the different product categories shown on the POS
4. Process the transaction by clicking Charge and selecting the payment method.
5. Transaction details attributes sent to SB:
Price
Quantity
Name
Location
Part 6: Refunds and Cancellations
Refunds/Cancels (voids):
1. Login via the POS portal
2. Select the Sales tab located on top, then choose the sale you’d like to refund/cancel.
3. Click Refund/Cancel
4. Then select the refund amount and click Refund at the bottom of the new window.
5. Refunds will display as completed but with a negative value and cancels/voids are marked ‘canceled’.
NOTE: Canceled sales will not show up on reports and the inventory will be returned. Refunds are added as negative sales.
7. We receive these refund/void fields from Greenline:
Transaction
Date
Negative subtotal
Order source
Products: Price, Quantity, Name, Discount
Part 7: Enabling 2-Way Integration
1. Please reach out to your client success manager to have the 2-way enabled.
2. Member creations to send successfully from Springbig to Greenline must have a Greenline location tagged. Only customers with either a phone number or email will be shared with Greenline
3. Member updates from Springbig to Greenline will only trigger if the member has a Greenline location tagging. If a member has multiple Greenline location tagging, we will share the updates to the corresponding locations.
NOTE: Generally, members will be tagged to a location organically based on the visits we receive, among other ways that customers can be tagged to locations (i.e join form by location, text to join by location, etc…)
5. Springbig member creation attributes sent to Greenline:
a. Name
b. Phone Number
c. Email
d. Birthday
e. Address1
f. Zip/postal
g. City
h. Province/region
i. Gender
6. Springbig member update attributes sent to Greenline:
a. Name
b. Phone Number
c. Email