Springbig + Barnet
Barnet Integration Guide
Welcome to the Springbig + Barnet Integration Guide!
In this course you will learn about:
- The Barnet installation process
- Configuring loyalty
- Creating members
- Processing visits and refunds
Let’s get started!
User interface is subject to change at the discretion of your POS provider. For the most accurate and up-to-date information, please consult your POS provider directly.
Please reach out to your onboarding specialist/customer success manager regarding issuing auth token(s).
Barnet Integration Guide
part 1: Installation
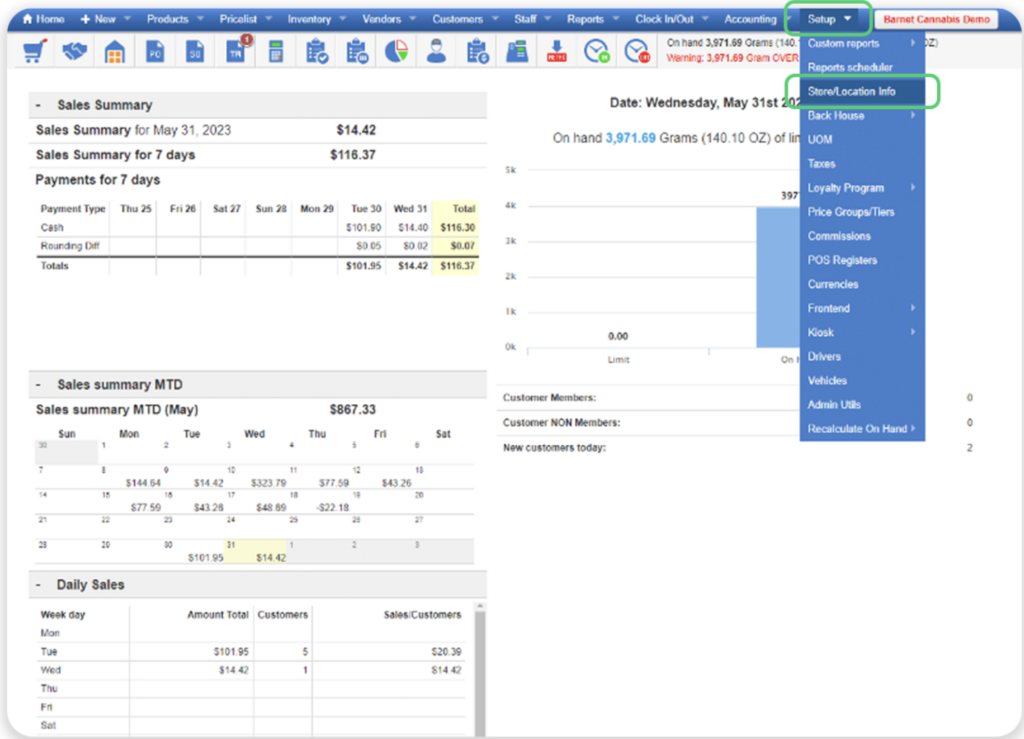
Step 1. Direct to the Barnet admin
Step 2. Click the Setup tab to open the dropdown list and then click Store/Location Info
Step 3. On the left-hand side of the page, fill in the store location name via the City field
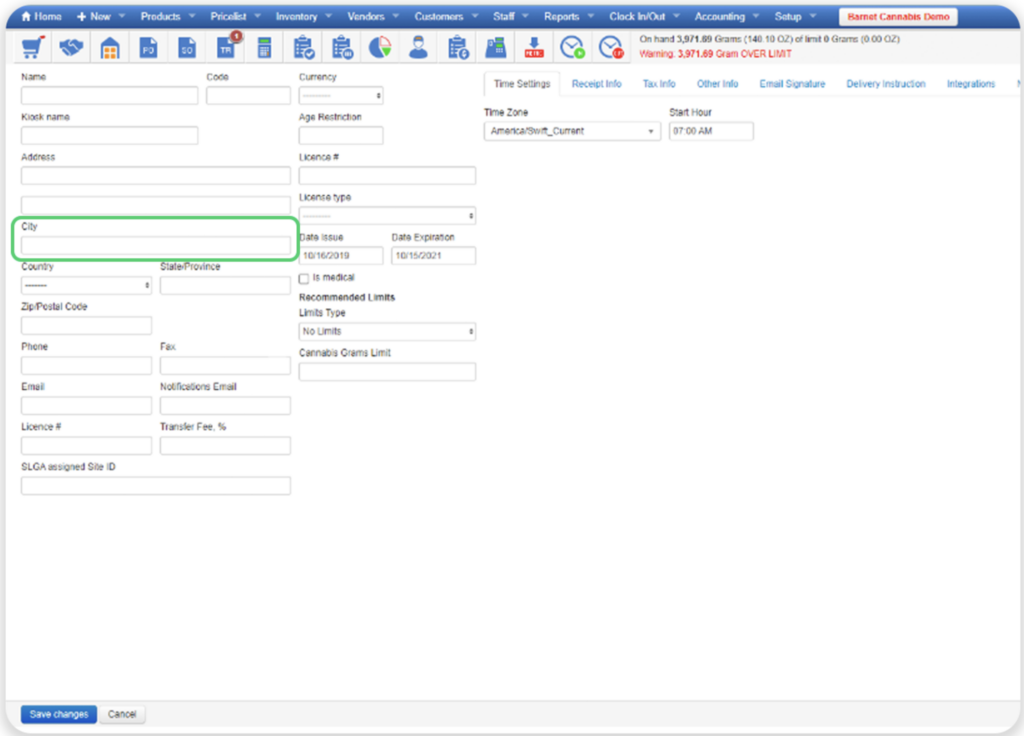
Step 4. Direct to the top middle-right of the page and click Integrations
Step 5. Scroll to the bottom under the Springbig section
Step 6. Click Active
Step 7. Insert the auth token via the Token field
Note: Ensure there are no edits such as spaces before or after.
Step 8. On the bottom-left, click Save changes

Part 2: Loyalty
Rewards Setup
*Rewards are only created in Springbig which will automatically sync to Barnet via the checkout
Step 1. Navigate to the Springbig main menu, click settings, and then rewards/offers

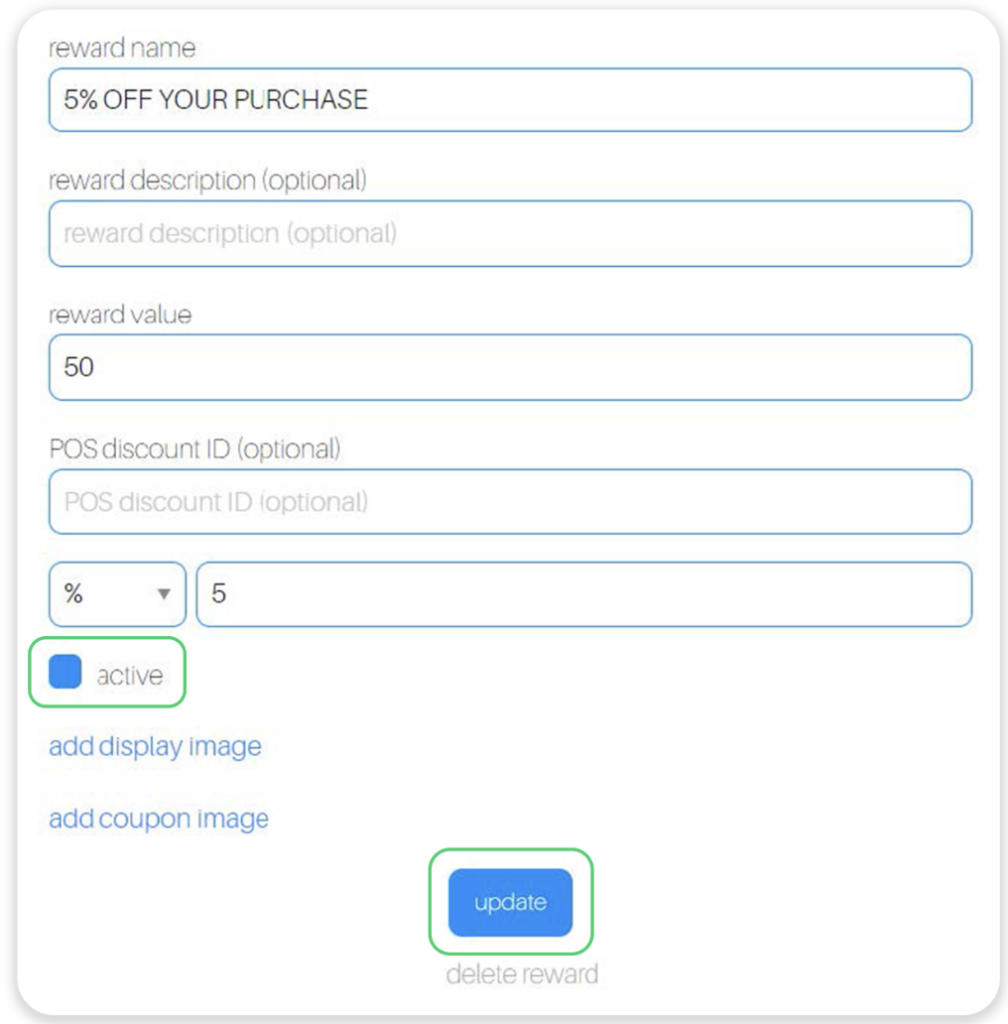
Step 2. Fill in these required fields on the offer setup:
Reward name
POS reward value
POS reward type (% or $).
POS discount amount
Step 3. Click the active checkbox
Step 4. Click update
Offers Setup
*Offers are only created in Springbig which will automatically sync to Barnet via the checkout
These are 3 types of Springbig offers:
Member offers:
Direct to the left-hand Springbig menu
Click settings
Click rewards/offers
Scroll down
Click + new offer
Campaign offers:
Direct to the left-hand Springbig menu
Click campaigns
Click new campaign
Scroll down
Click add extension
Select digital voucher
Autoconnect offers:
Direct to the left-hand Springbig menu
Click autoconnects
Click new autoconnect
Select intended autoconnect
Select track offer
Offers Setup:
Step 1. Navigate to the Springbig main menu, click settings, and then rewards/offers
Step 2. Fill in these required fields on the offer setup:
Offer for customer
Discount type (% or $)
(Note: Cannot be blank otherwise the offer won’t show)
Discount value
Expiration date
(Note: only member and autoconnect offers can be left as zero/omitted)
Offers per customer
Step 3. Ensure the offer is saved/completed:
Member offer:
Click active
Click update
Campaign offer:
Click done
Autoconnect offer:
Click done on the bottom

Part 3: Member Creation
Step 1. Direct to the Barnet admin
Step 2. Click the Customers tab and then the Customers Group sub-tab
Step 3. Select the designated customer group. In this case it’d the be Points Customers customer group.
Step 4. Under the reward type dropdown select Points and then click Save changes.
Note: This step is required for the customer creation process.
Step 5. Direct to the Barnet POS
Step 6. Click on the Customer tab>Add Customer
Step 7. Steps:
Click the Customer Group dropdown
Ensure to specifically select the customer group that has the Points reward type which in this case would be Points Customers
Click Continue
Step 8. Fill in desired customer information.
Note: Barnet only requires the first name field but ensure to always require at least either a phone number and/or email since Springbig relies on those as customer main identifiers)
Step 9. To collect explicit consent if the merchant setting, force signature, is enabled, check the With Customer Email/Text Consent box. This will include a signature in the form of an image showing the box was checked upon Springbig receiving the profile.
Note: Ensure opt outs come from the Springbig platform only
Step 10. Once the customer profile is complete, click Save Changes on the bottom-left
Note: Springbig will immediately receive the profile upon customer creation without first having to process a visit. Updates are also sent upon save.
Step 11. Member attributes Barnet sends to Springbig (creation & updates):
First name
Last name
Address1
Address2
City
Zip code
Phone number
Email
Birthday
Signature
POS user
Part 4: Visit & Redemption Process
Step 1. Direct to the POS portal
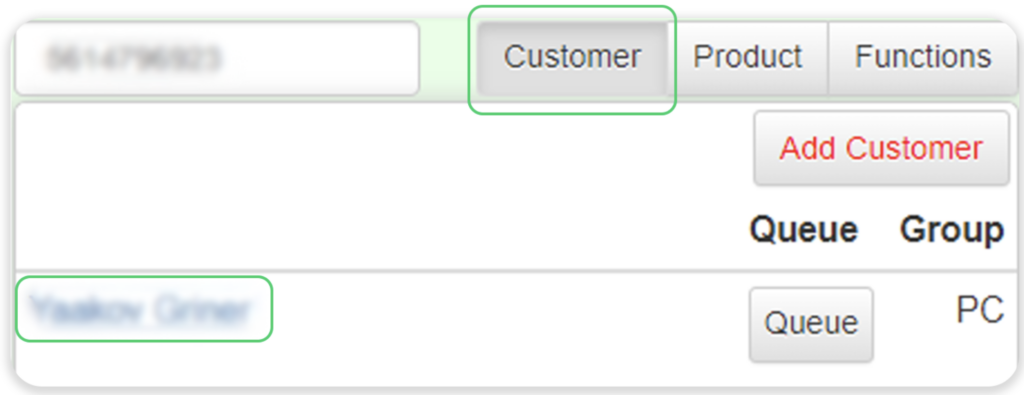
Step 2. Click the Customer tab and search for the desired customer
Step 3. Once located, click on the customer name to check them into the cart
Note: Ensure to only check in customers from the Points Customer group
Step 4. Navigate to the Product tab to add item(s) to the cart
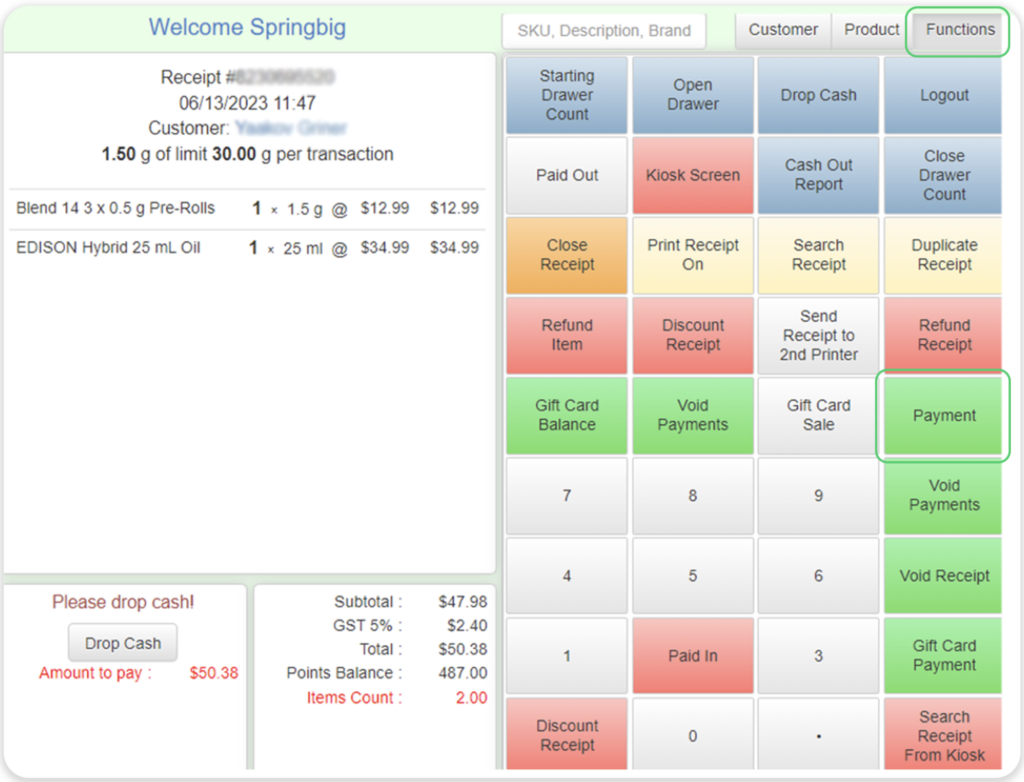
Step 5. To finalize the transaction, click the Functions tab and click then the Payment button
Step 6. Then, click Yes to confirm the age
Step 7. Next, enter the transaction amount and select the payment method
Step 8. Visit attributes Barnet sends to Springbig:
Brand
Category
SKU
Name
Price
Total price
Quantity
Sold weight
Unit of weight
Final total
Subtotal
Total discount
Location
POS user
Transaction date
Transaction total Note: pre-taxes by default but can request Barnet to change it to post taxes)
Total taxes
Order source
Payment method
Payment amount
Step 9. To process a redemption, click the Functions tab and then click the Payment button
Step 10. Then, click Yes to confirm the age
Step 11. The Springbig loyalty will then pop up and show eligible rewards/offers
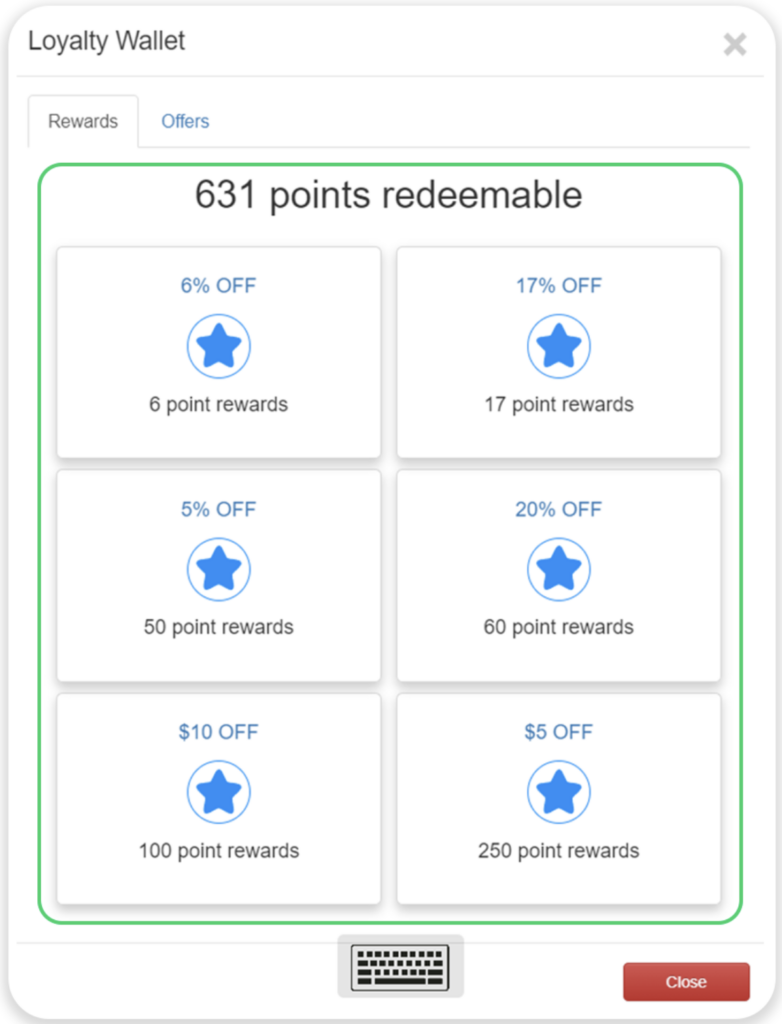
Step 12. Redemption notes:
No stacking. i.e., only one redemption at a time
Redemption only applies to the cart level, not the line item
Redemption applies to the subtotal, not the final total
Step 13. To cancel a redemption before processing a transaction, direct to the Functions tab and select Void Payments, then enter the code.
Note: Refunds/voids (this includes redemption refunds/voids) do not send and would have to be applied manually within the Springbig platform.