Welcome to the Springbig + Alleaves Integration Guide!
In this guide you will learn about:
Installing Alleaves POS
Setting up rewards & offers
Member creation
The visit and redemption processes
The refund process
Let’s get started!
User interface is subject to change at the discretion of your POS provider. For the most accurate and up-to-date information, please consult your POS provider directly.
Alleaves Integration Guide
Part 1: Installation
Please reach out to your Onboarding Specialist or Client Success manager regarding issuing auth token(s).
Step 1. Direct to the Alleaves online portal
Navigate to the top right
Click the gears icons (settings)
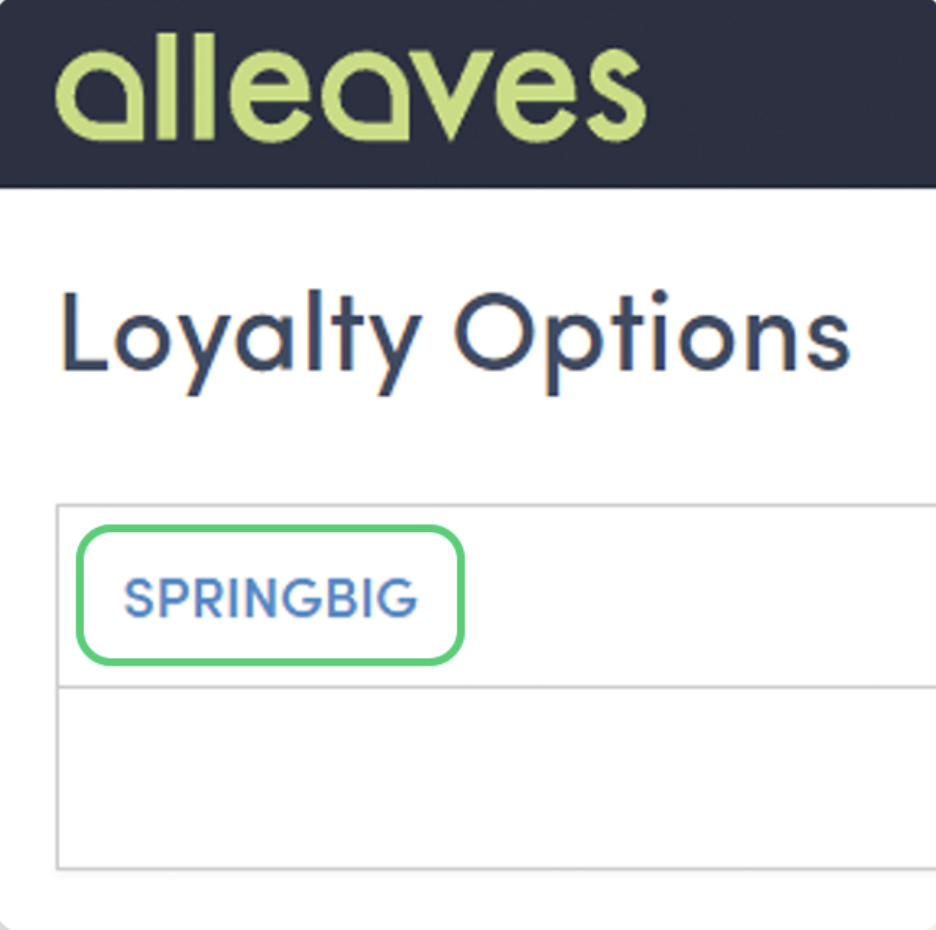
Step 2. Click Loyalty
Step 3. Then, click Springbig
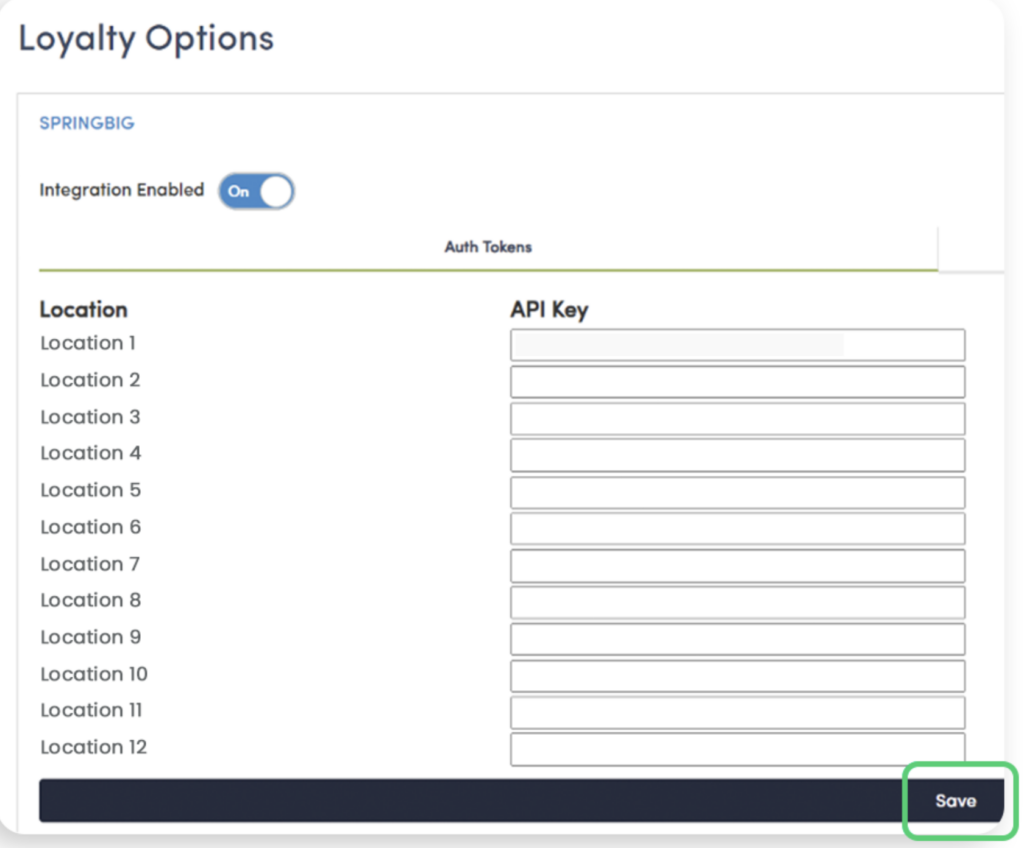
Step 4. Ensure Integration Enabled is toggled to ON
Step 5. Insert the auth token(s)
Note: Ensure there are no edits such as spaces before or afterward. Also, ensure each auth token is placed into its respective location. If there is more than one Springbig account being used, do not use the same auth token from one Springbig account for another Springbig account’s location.
Step 6. Click Save
Part 2: Rewards Setup
Rewards are only created in Springbig.
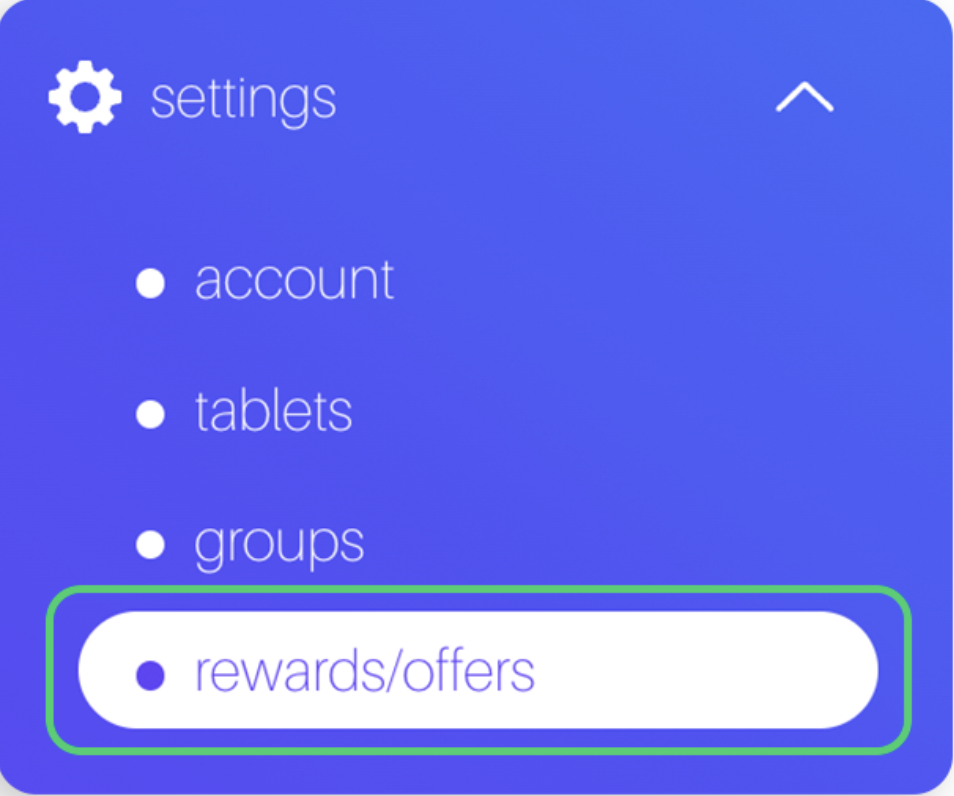
Step 1. Navigate to the Springbig main menu, click settings, and then rewards/offers
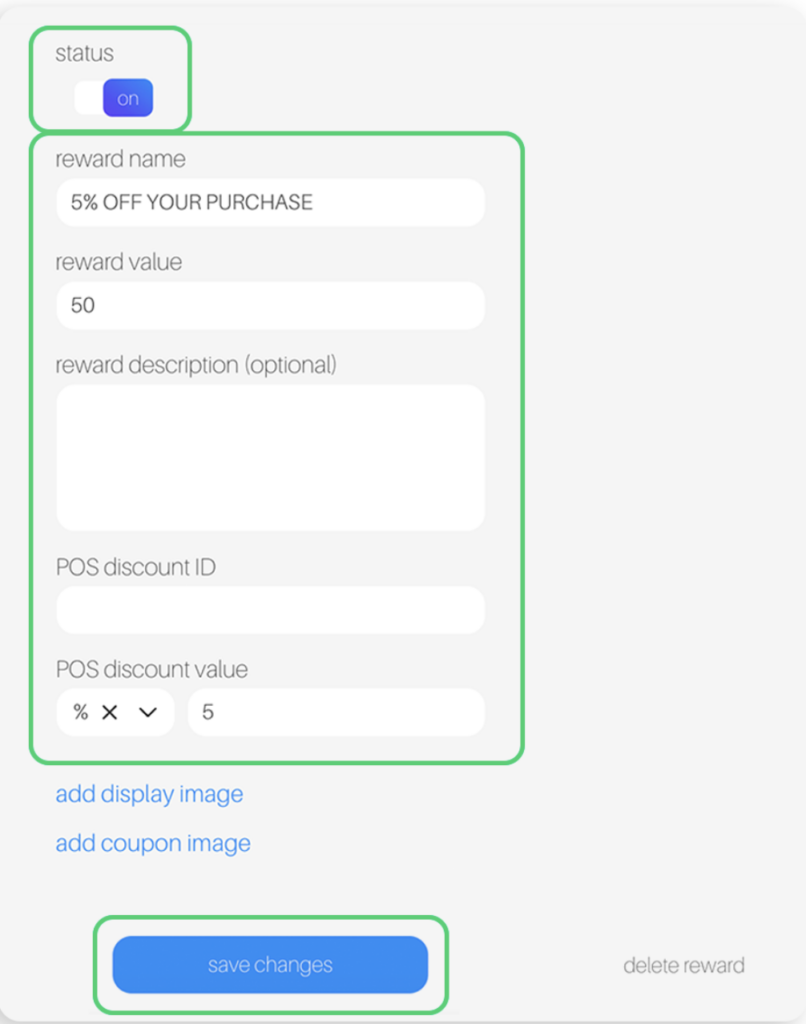
Step 2. Fill in these required fields on the reward setup:
Reward name
POS reward value
POS discount value (% or $).
Note: Cannot be blank, otherwise reward won’t show
POS discount amount
Note: Do not fill in the discount ID / POS string field
Step 3. Toggle the status at the top to on
Step 4. Click save changes
Part 3: Offer Setup
Offers are only created in Springbig
There are 3 types of Springbig offers:
Member offers:
Direct to the left-hand Springbig menu
Click settings
Click rewards/offers
Scroll down
Click + new offer.
Campaign offers:
Direct to the left-hand Springbig menu
Click campaigns
Click new campaign
Scroll down
Click add extension
Select digital voucher
Autoconnect offers:
Direct to the left-hand Springbig menu
Click autoconnects
Click new autoconnect
Select intended autoconnect
Select track offer
Step 1. Navigate to the Springbig main menu, click settings and then rewards/offers.
Step 2. Fill in these required fields on the offer setup:
Offer for customer
Discount type (% or $)
Note: Cannot be blank, otherwise the offer won’t show
Discount value
Expiration date Note: Only member and autoconnect offers can be left as zero/omitted
Offers per customer Note: Do not fill in the discount ID / POS string field
Step 3. Ensure the offer is saved/completed:
Member offer:
Toggle the status at the top to on
Click save changes
Campaign offer:
Click done
Autoconnect offer:
Click done on the bottom
Note: The Alleaves Discounts page has no interaction with Springbig loyalty.
Part 4: Member Creation
Step 1. Direct to the Alleaves online portal
Click on the Sale tab
Click Customer Management
Step 2. Click Add Customer
Step 3. Fill in the member information:
Only first name, last name, and date of birth are required for Alleaves member creations, but please fill in the email or phone number since Springbig uses those as unique member identifiers. Otherwise, there might be duplicate profiles with separate point balances
Step 4. When you are finished completing the profile, click Save
Step 5. To send a profile to Springbig directly without the need to complete a visit:
Direct to the SELL tab
Click Point of Sale
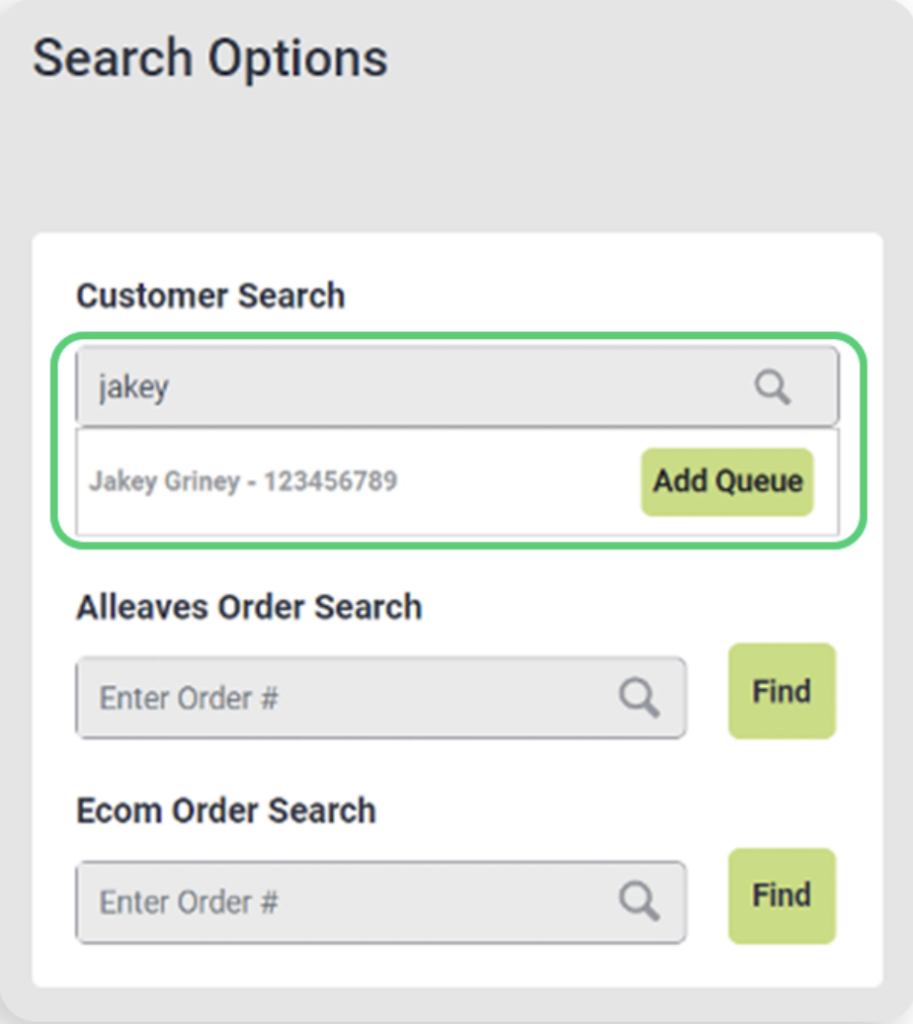
Use the customer search bar
Select the intended customer by clicking their name
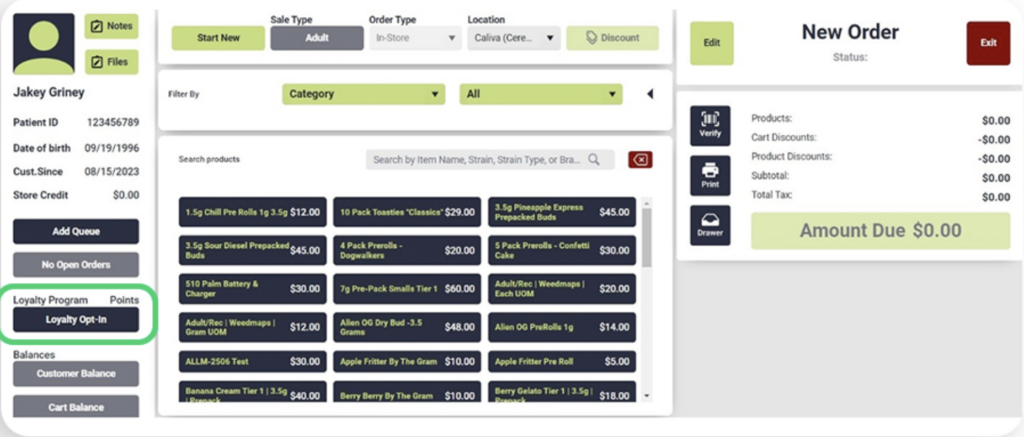
5. On the POS customer profile, click Loyalty Opt-in on the bottom left-hand of the page
6. Fill in the email and phone number, then enable the consent toggle and click Sign Up
Step 7.Member attributes sent from Alleaves to Springbig:
First name
Last name
Phone number
Email
Address1
Address2
City
Zip code
Medical card expiration
POS user
Note: Alleaves does not send explicit consent other than sending the customer profile
Part 5: Visit and Redemption Process
Visit and Redemption Process
Step 1. To check-in a customer:
Direct to the SELL tab
Click Point of Sale
Use the customer search bar
Select the intended customer by clicking their name
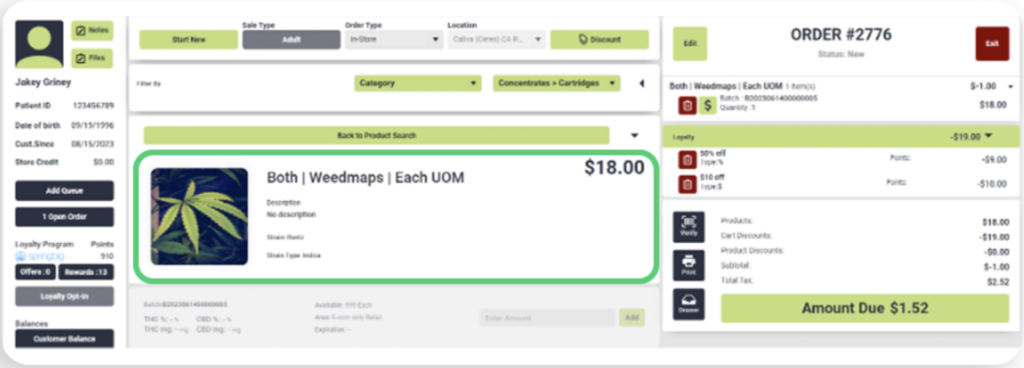
Step 2. Add item(s) to cart
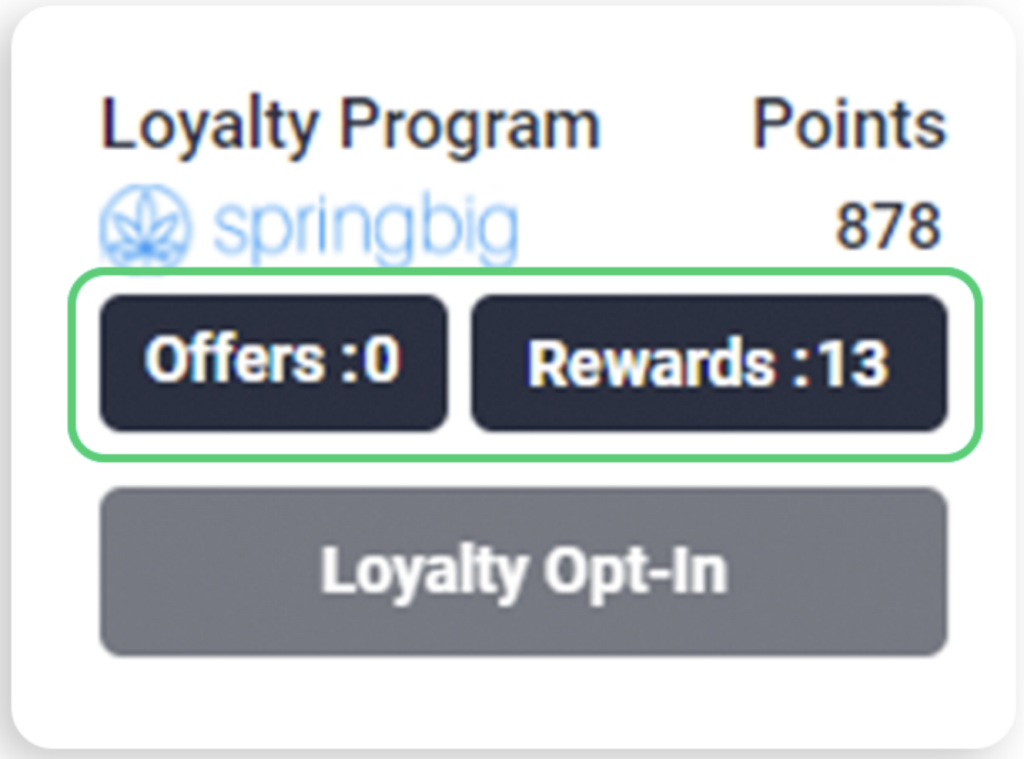
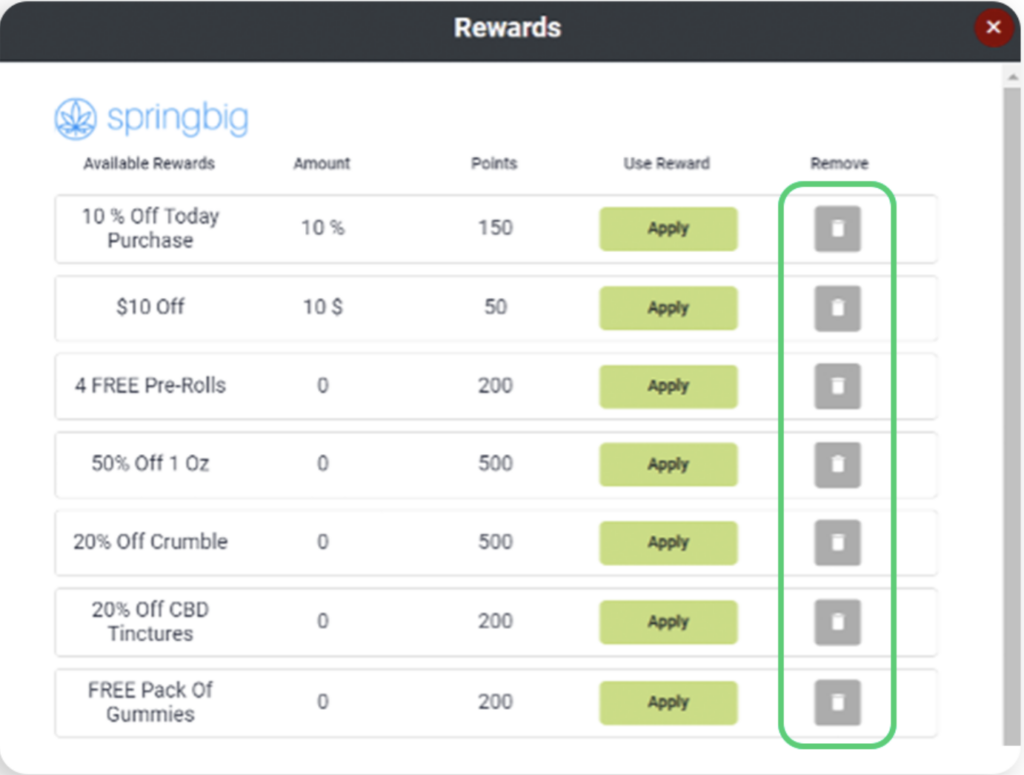
Step 3. Springbig loyalty:
Direct to the left hand of the page and select available offers/rewards
2. Select Apply
3. Note:
For rewards, must have sufficient amount of points
Discounts are calculated by the subtotal
Discounts are stackable by default
Discounts can reduce the subtotal to $0
Cannot redeem the same discount twice
Can redeem as many different rewards as long as there is a sufficient amount of points
4. To remove a discount, direct to the middle-right of the page under Loyalty and click the trash icon
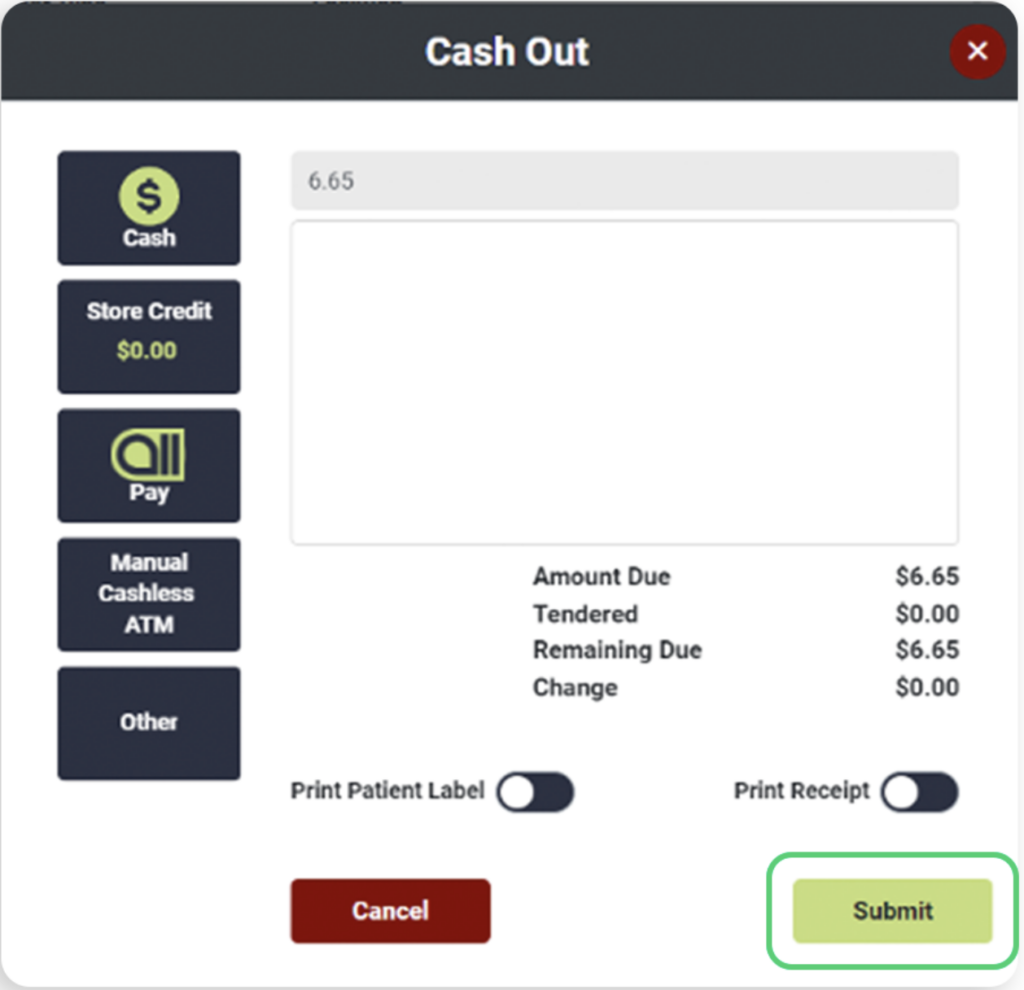
Step 4. To tender:
Click Amount Due on the bottom-right
Confirm age
Enter amount
Click payment method
Click submit
Step 5. Visit attributes sent to Springbig from Alleaves:
Transaction total
Transaction date
Order source
Location
Total price
Unit of weight
Solid weight
SKU
Price
Quantity
Category
Brand
Name
Discount
POS user
POS ID
Part 6: Refund Process
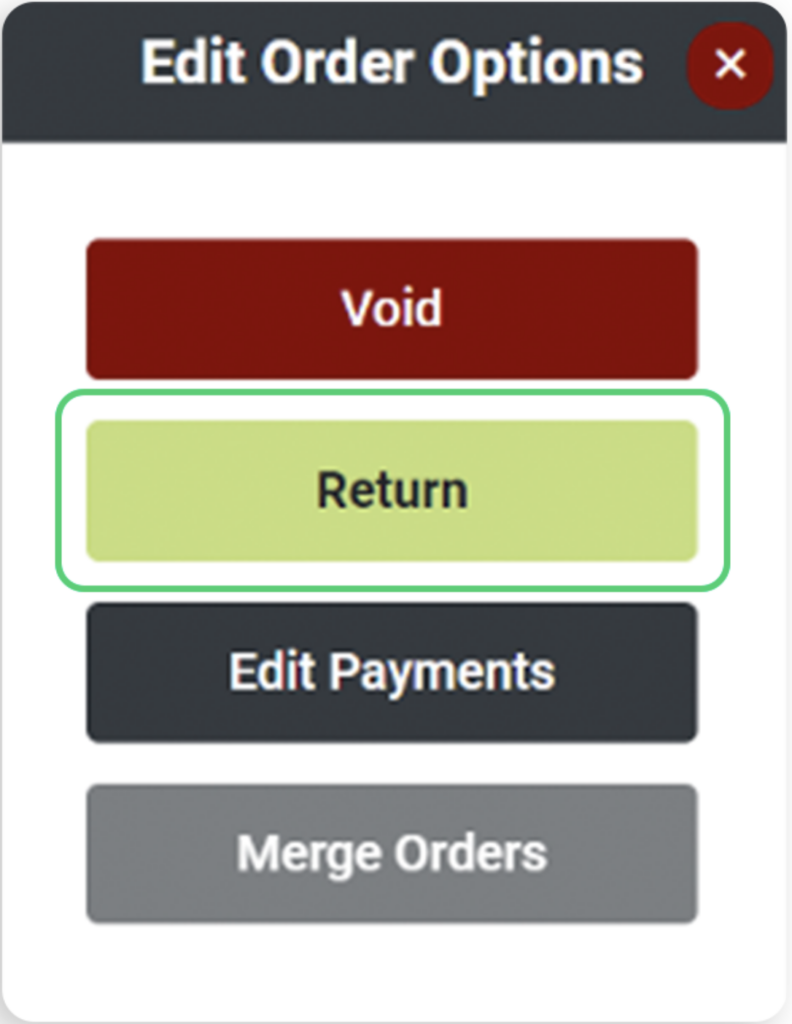
Step 1. After completing a transaction
Click Edit
2. Click Return
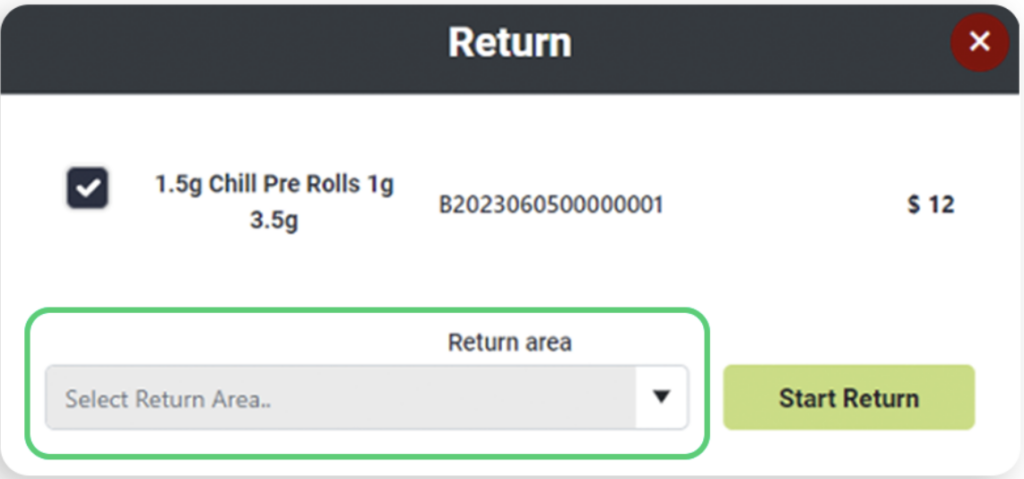
3. Select the item(s)
4. Select Return Area
5. Click Amount Due
6. Confirm age
7. Select return method
8. Click OK
Step 2. OR:
Direct to the SELL tab
Click Customer Management
Search for the intended customer
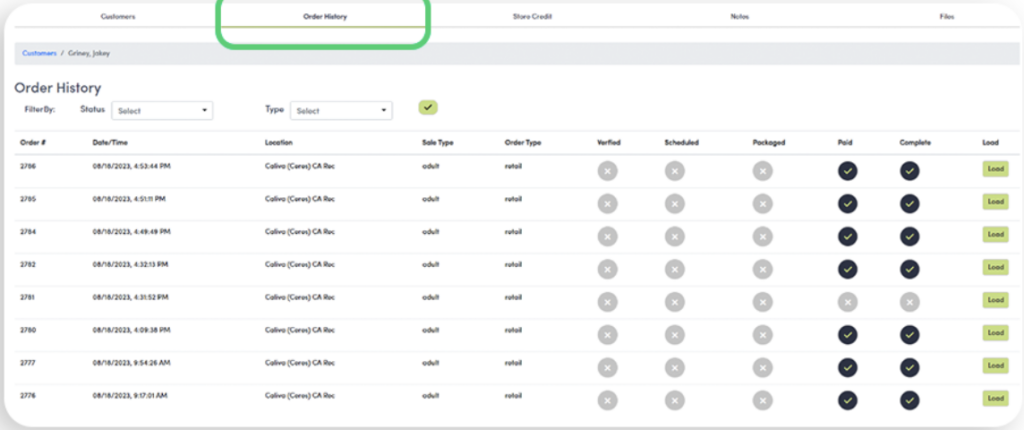
Click the Order History customer tab
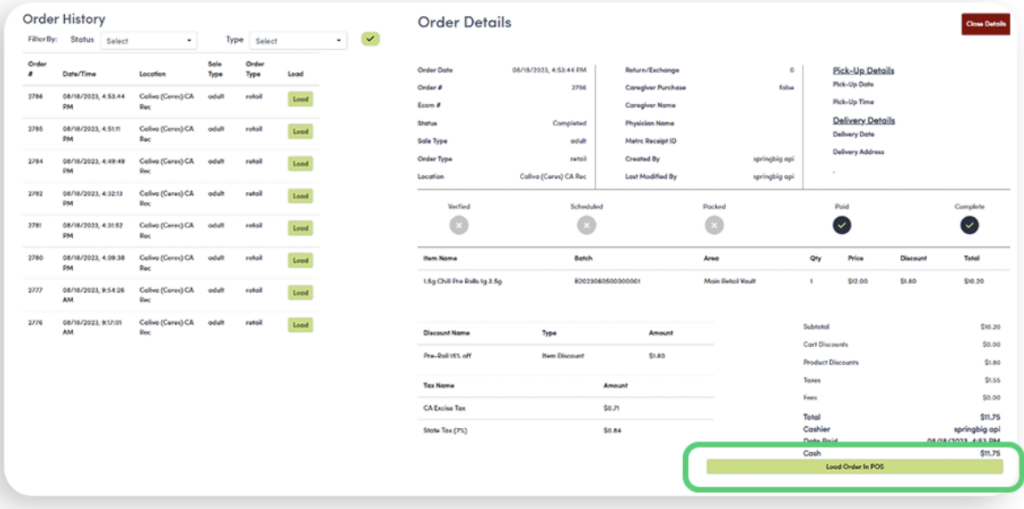
5. Click Load ot select the order to refund
6. On the bottom-right of the screen, click Load Order in POS
7. Repeat the steps as per bullet 1 in the Refunds section
Note: Voids do not give back points for the visit or redemption
Refunds only give back points for the visit, but not for the redemption