Email and App Autoconnects

Table of Contents

Overview

Native app push notifications and emails are some of the most powerful means of communicating with customers and can easily be incorporated into your autoconnects! Similar to how you can configure a text message, push notification, and email for a normal campaign, you can do the same with autoconnects to ensure that you send your customers the right message at the right time through their preferred channel of communication.

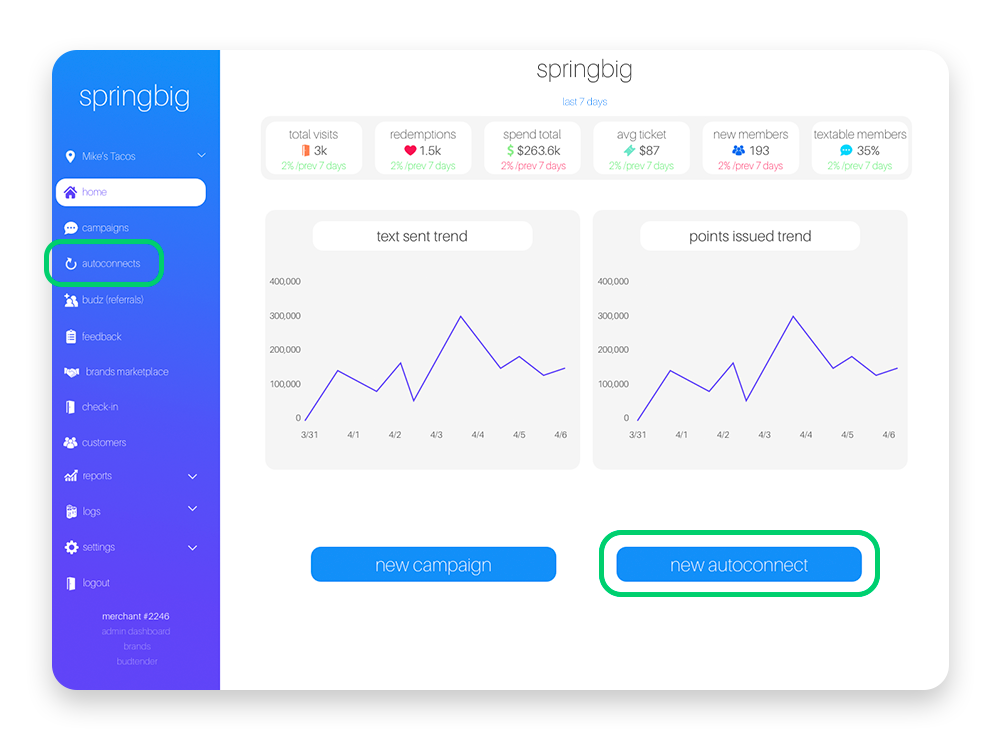
You can easily reach your Springbig autoconnect menu from the dashboard by either:


Step 1. Click the new autoconnect button from the homepage, or from the autoconnects option from the left-side menu.


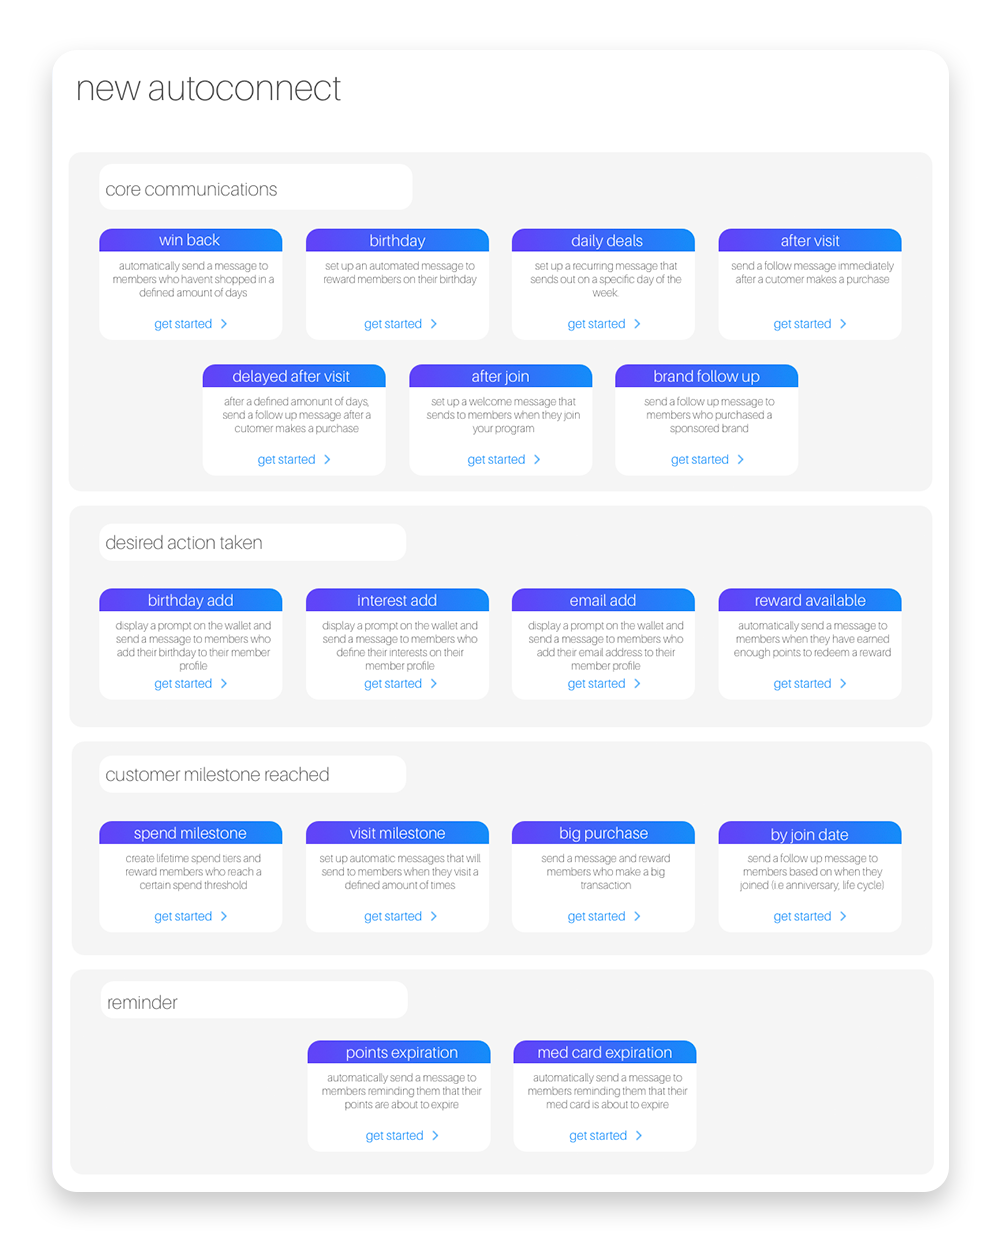
Step 2. From the autoconnect menu, select the type of autoconnect you would like to create.

  • For more information on each type of autoconnect, see the autoconnect guide.

Text Message Autoconnect

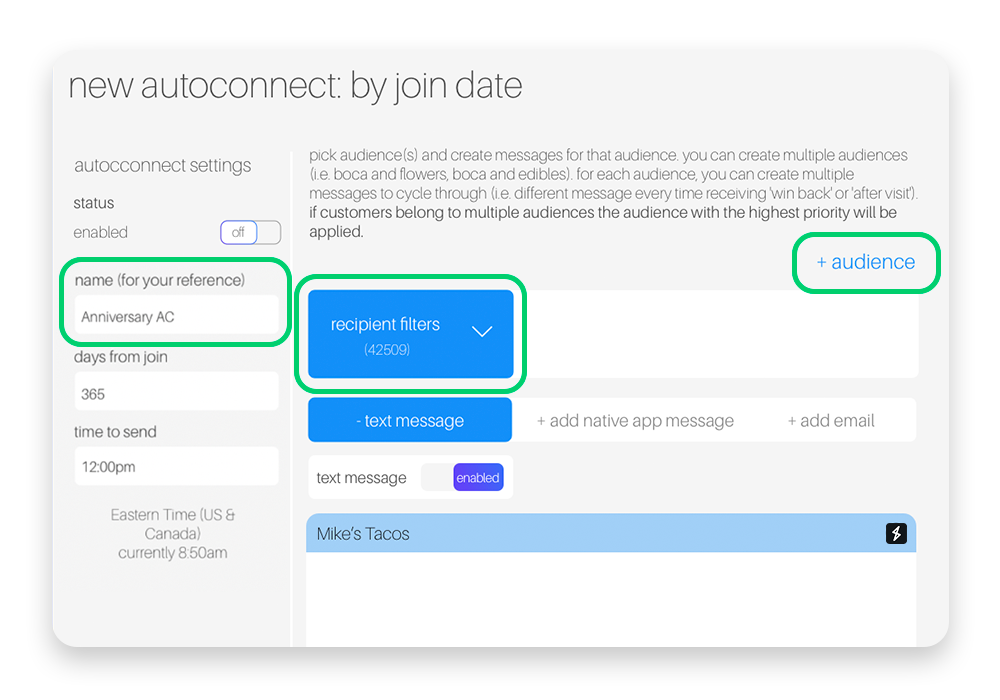
Step 1. In the first field, enter the name of your autoconnect.

Step 2. Open the filters dropdown to check out the different filters you can apply to each audience.

  • You can filter by location, interests, brands, etc.

  • You can use the + audience button to create multiple audiences, issuing each an offer that is likely to grab their attention.


Step 2. From the autoconnect menu, select the type of autoconnect you would like to create.

  • For more information on each type of autoconnect, see the autoconnect guide.

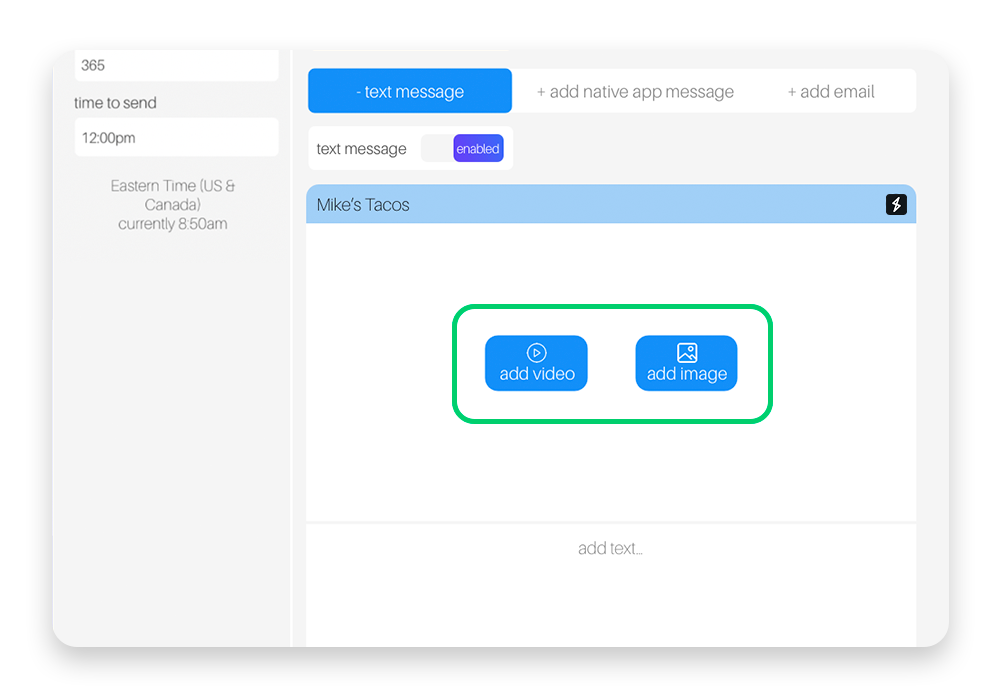
Step 3. Add any image(s) and/or video you would like displayed on your member’s stashboard in the autoconnect campaign.

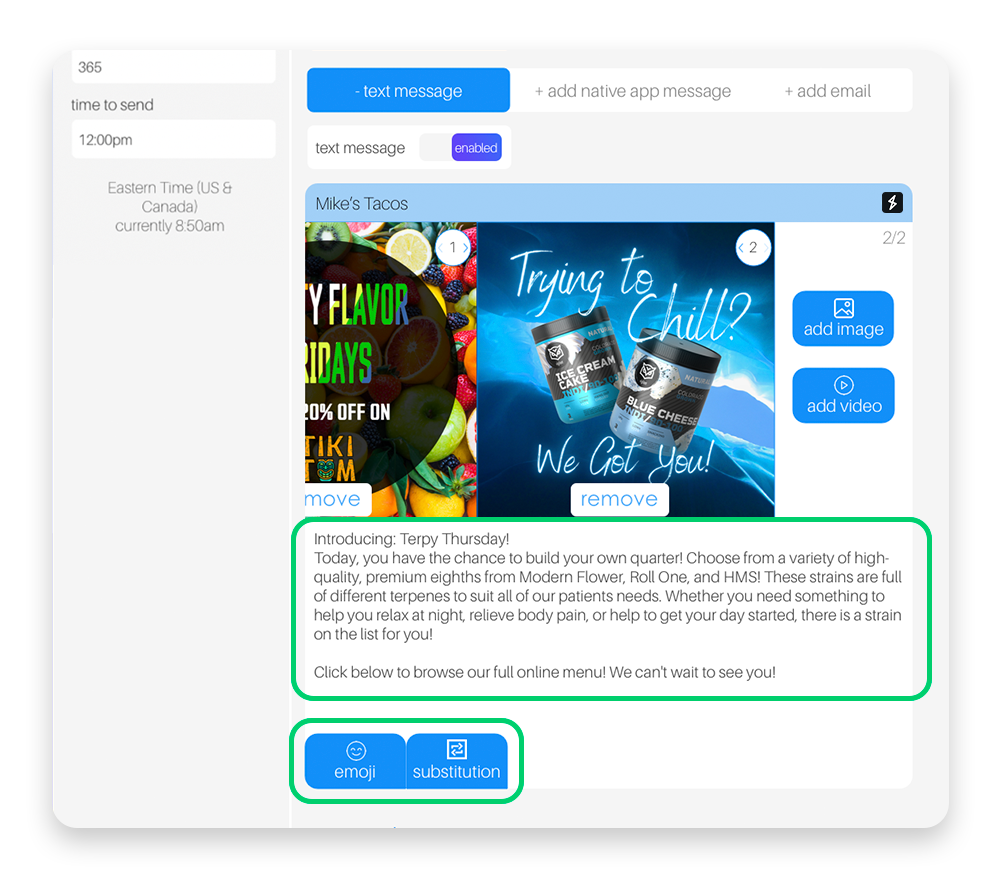
Step 4. Use the text box to type out the message you want to send to your member.

  • In your message, you can include emojis or substitute values.

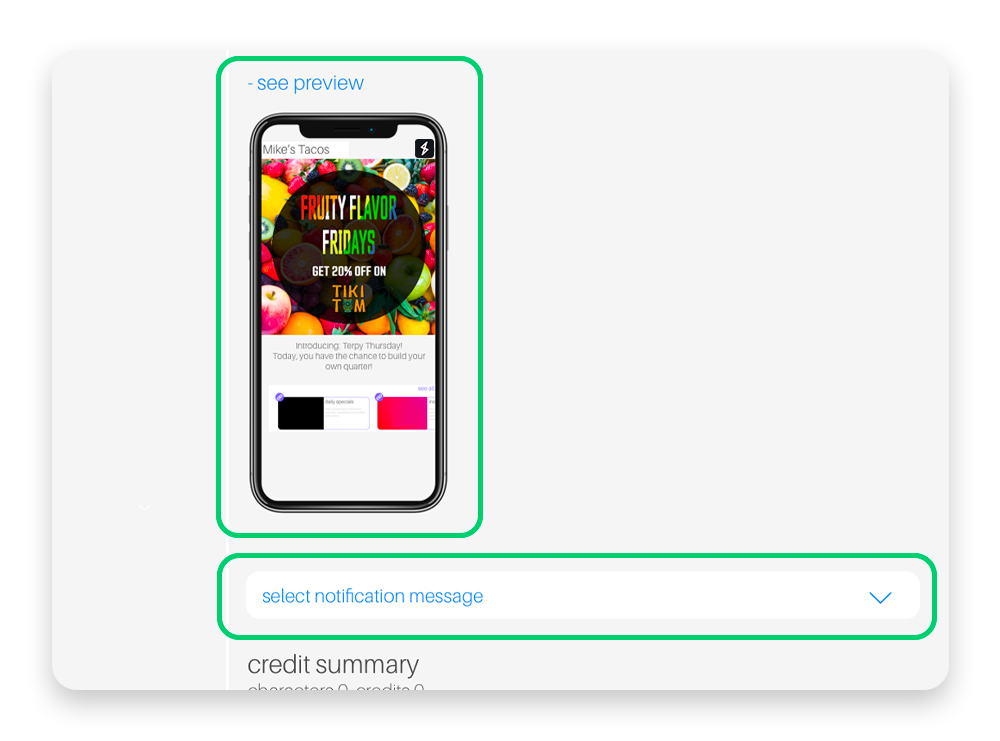
Step 5. Click the + see preview button to see a preview of your stashboard with your message and images/video.

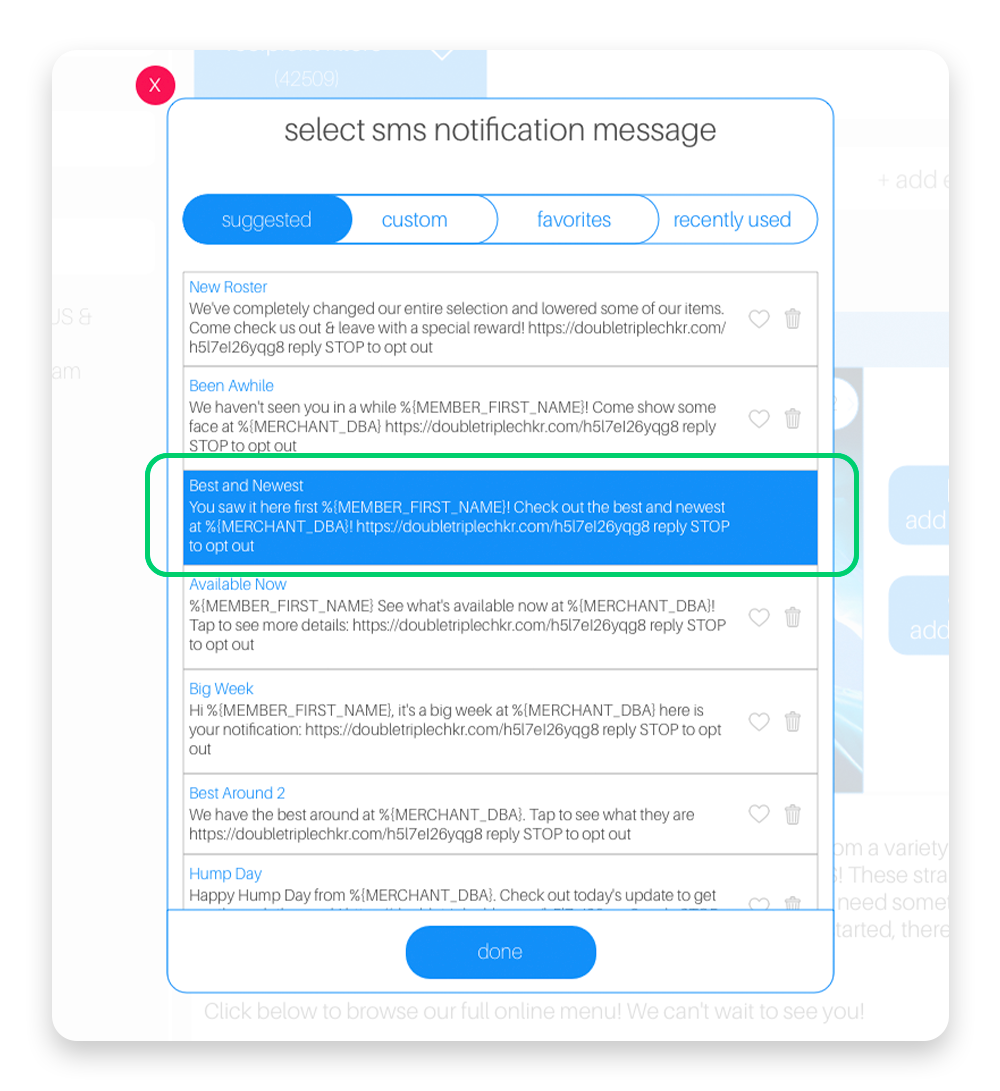
Step 7. Select the notification message you would like your members to see.

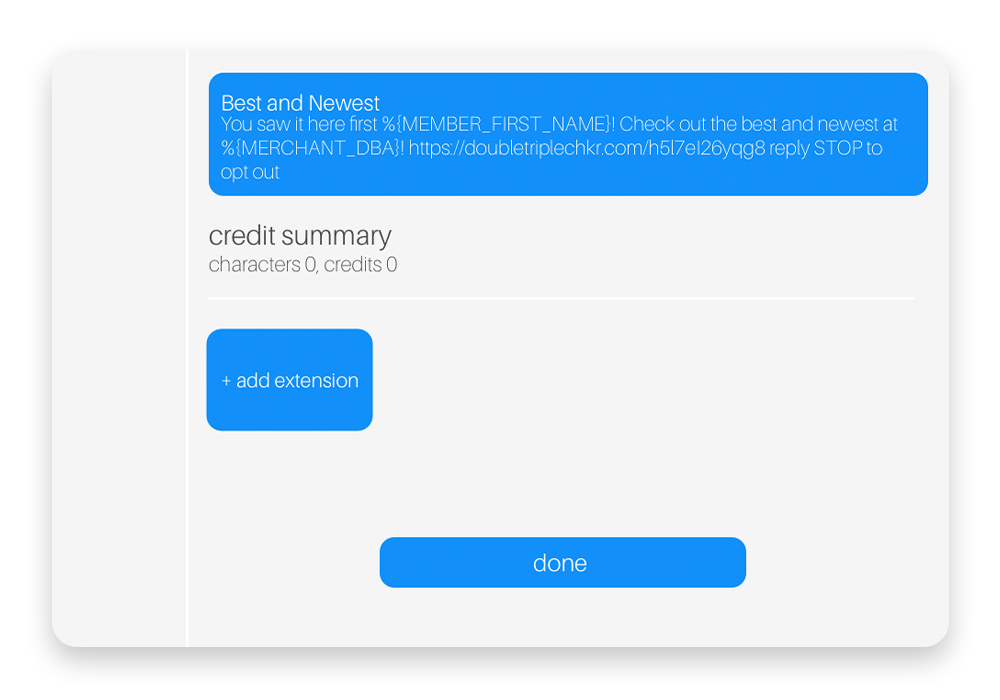
Step 8. Click the + add extension button to include a digital voucher, bonus points, instant points, target wallet, or any link.

  • Refer to the autoconnect extension guide

Step 9. Once you are finished creating your autoconnect, click the done button.

Native App Message

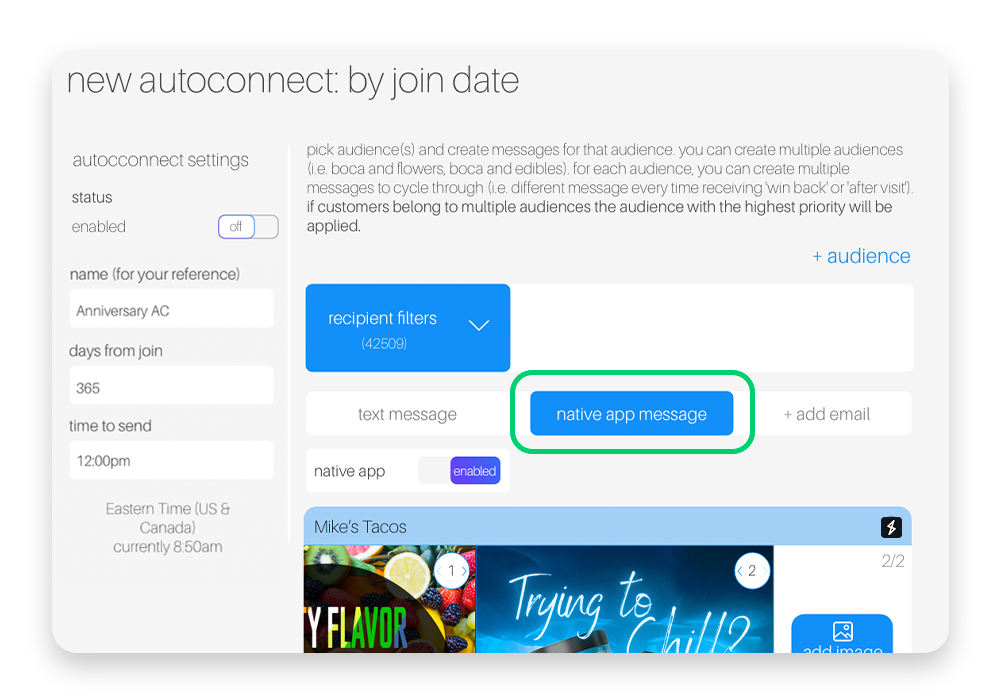
Step 1. Once you’ve completed configuring your stashboard message via the Text Message tab, click the Native App Message tab.

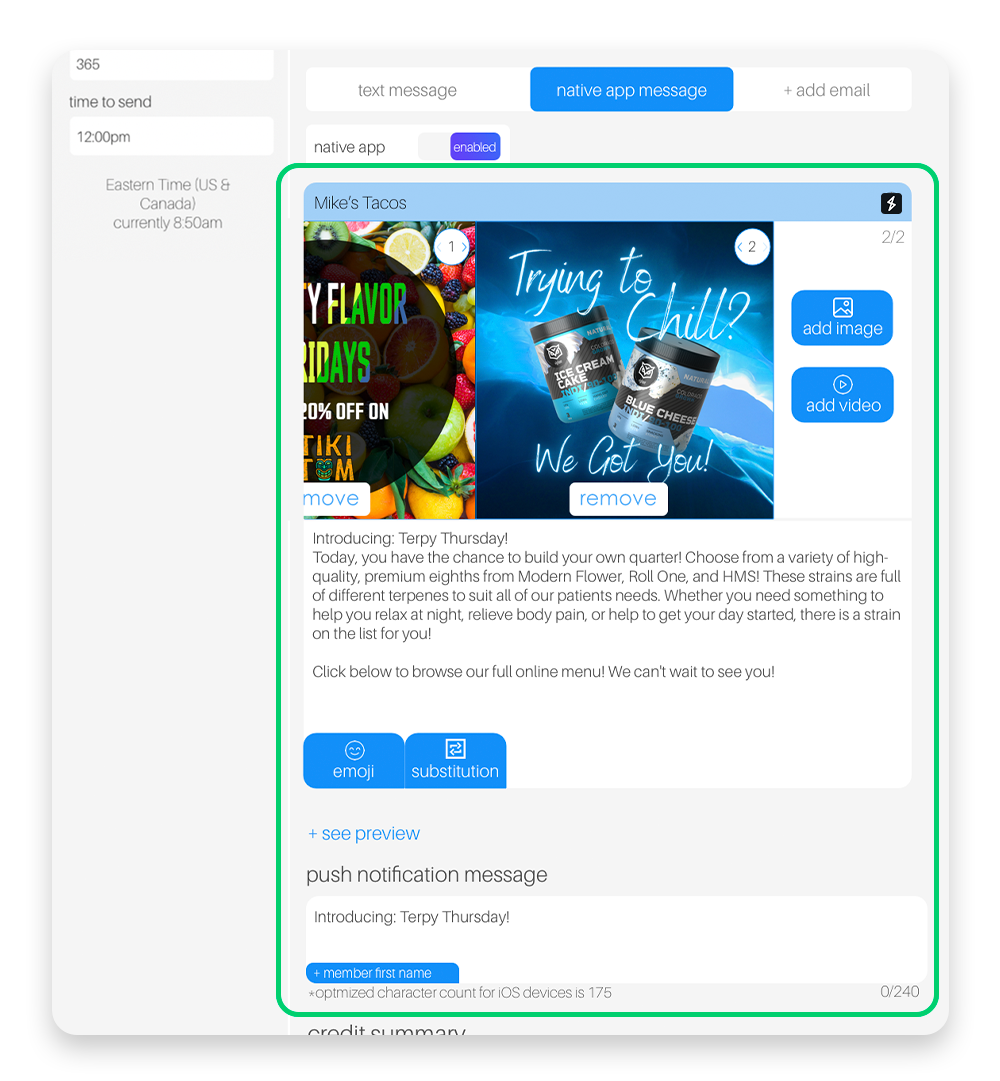
Step 2. Your previous configurations in the text message campaign will transfer over to the native app message and will be displayed as such.

  • You can use this time to make any edits or adjustments.

Step 3. With the native app, you can write your own push notification message instead of choosing from the pre-optimized notification library (step 7 of previous section).

Step 4. If satisfied with your Native App Message, you can either click done to set your autoconnect, or move on to the email tab.

Email Dashboard

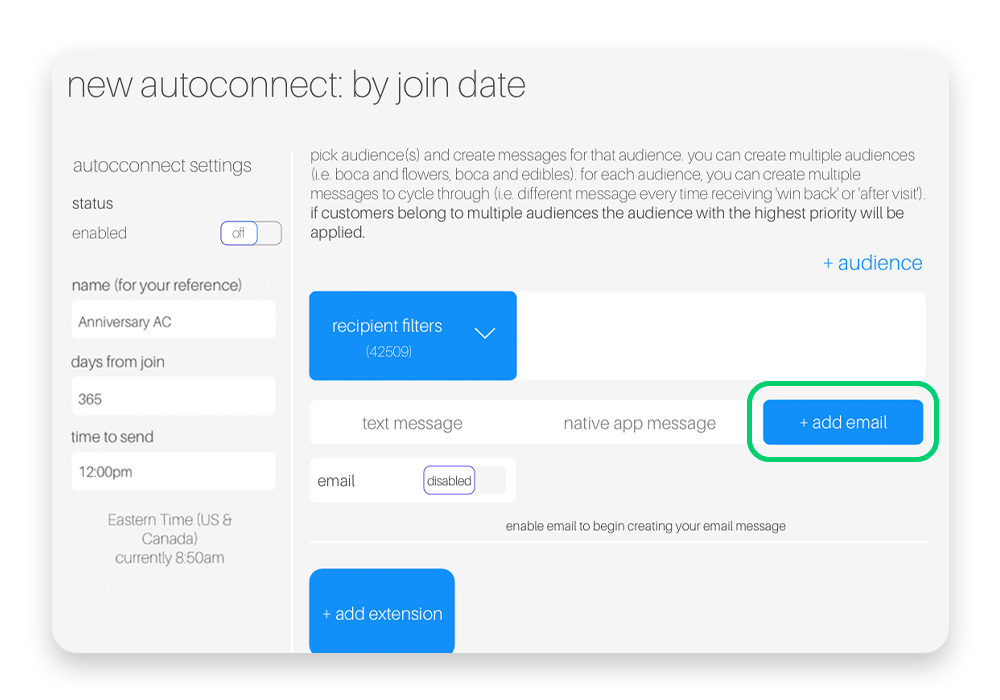
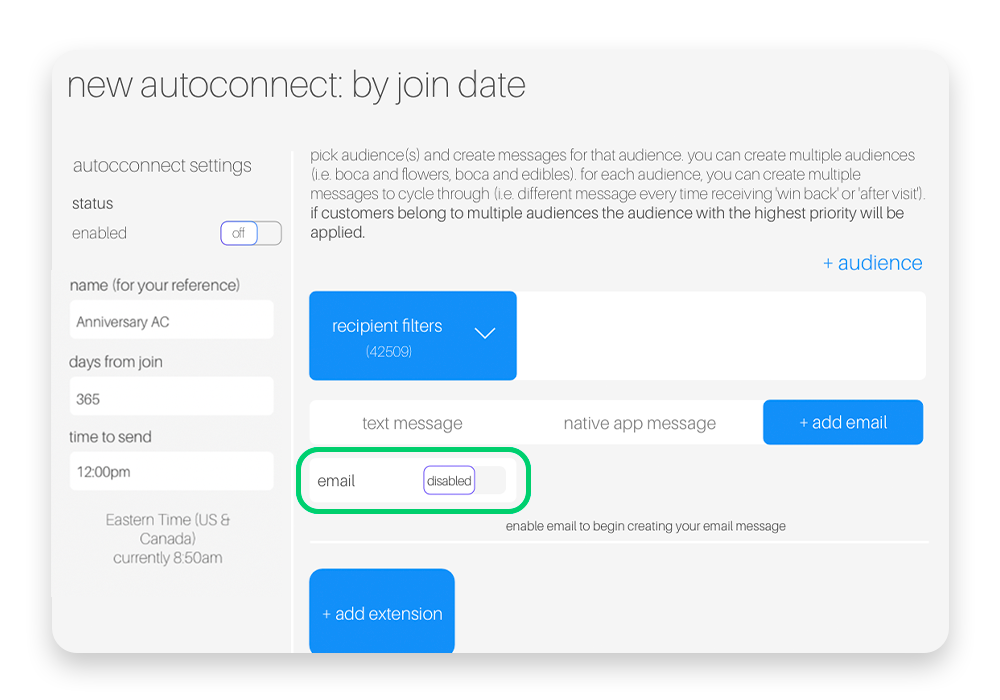
Step 1. Click the + add email tab to begin configuring your email message.

Step 2. Remember to click on the email toggle to enable email notifications.
 
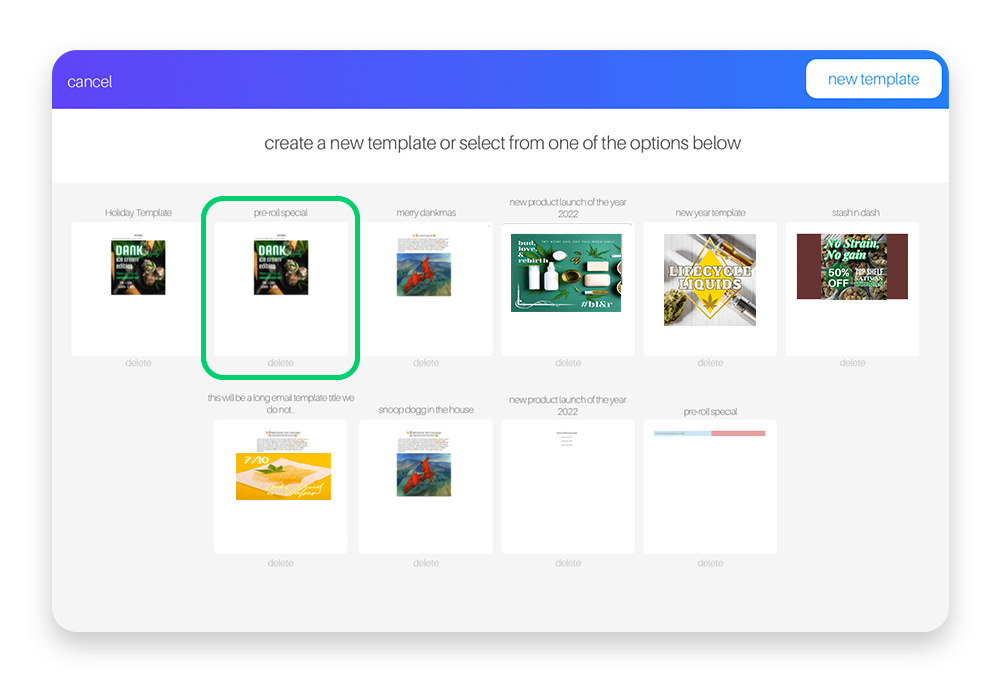
Step 3. You will then get an email template popup where you can select one of the premade email template to use for your message.
Step 4. You can also click the new template button to begin creating one from scratch.

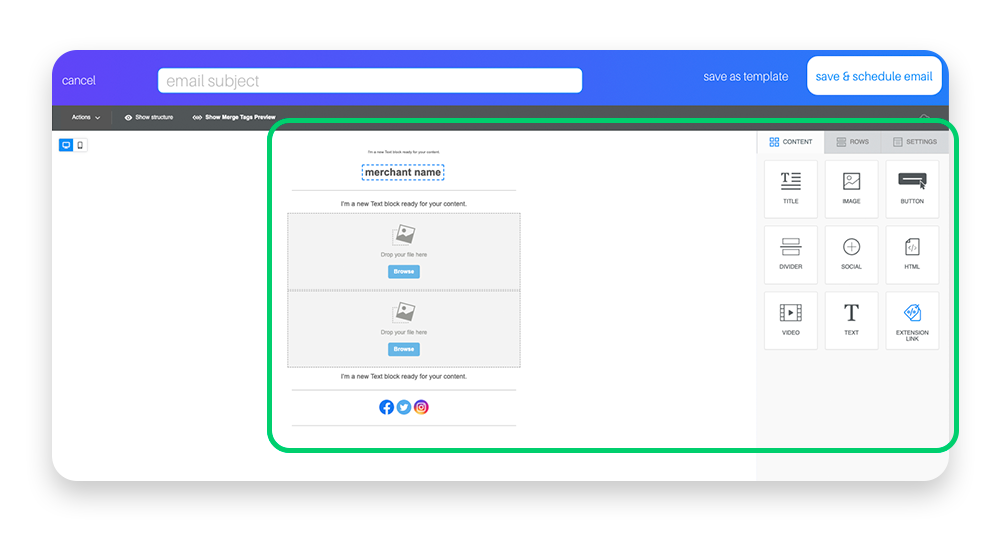
Step 5. If you decide to create a new template, you can use our user-friendly drag-and-drop template builder to do so.

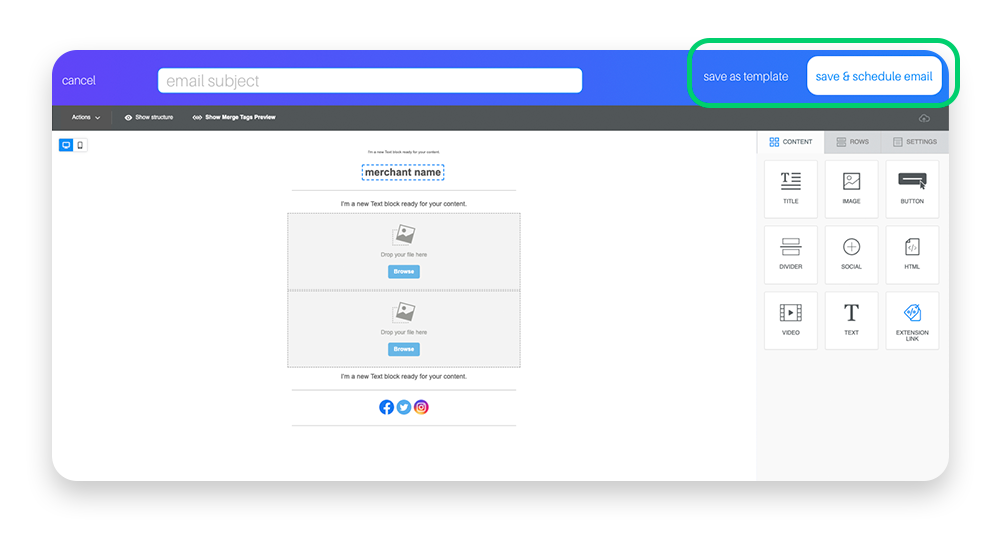
Step 6. When you are done, look to the top right corner to either save as template or save & schedule email.

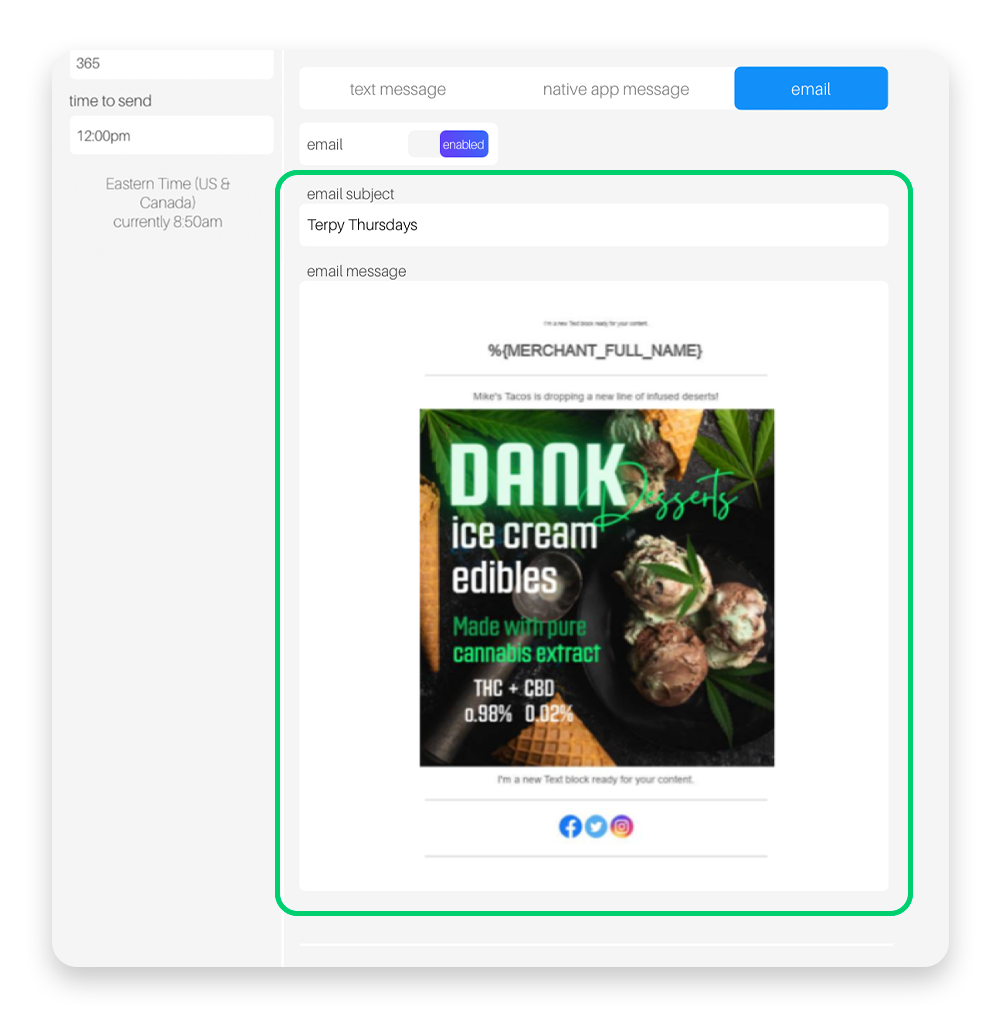
Step 7. Once you configure your email message and template, it will be displayed as such:


Prioritize Sending Methods

Next, you will want to configured your preferred sending methods for this autoconnect, allowing you to prioritize how the customer will receive the message based on their preferences. If you’d like the member to receive the autoconnect message from all 3 sending methods (text, push notification and email) then you can skip this part.

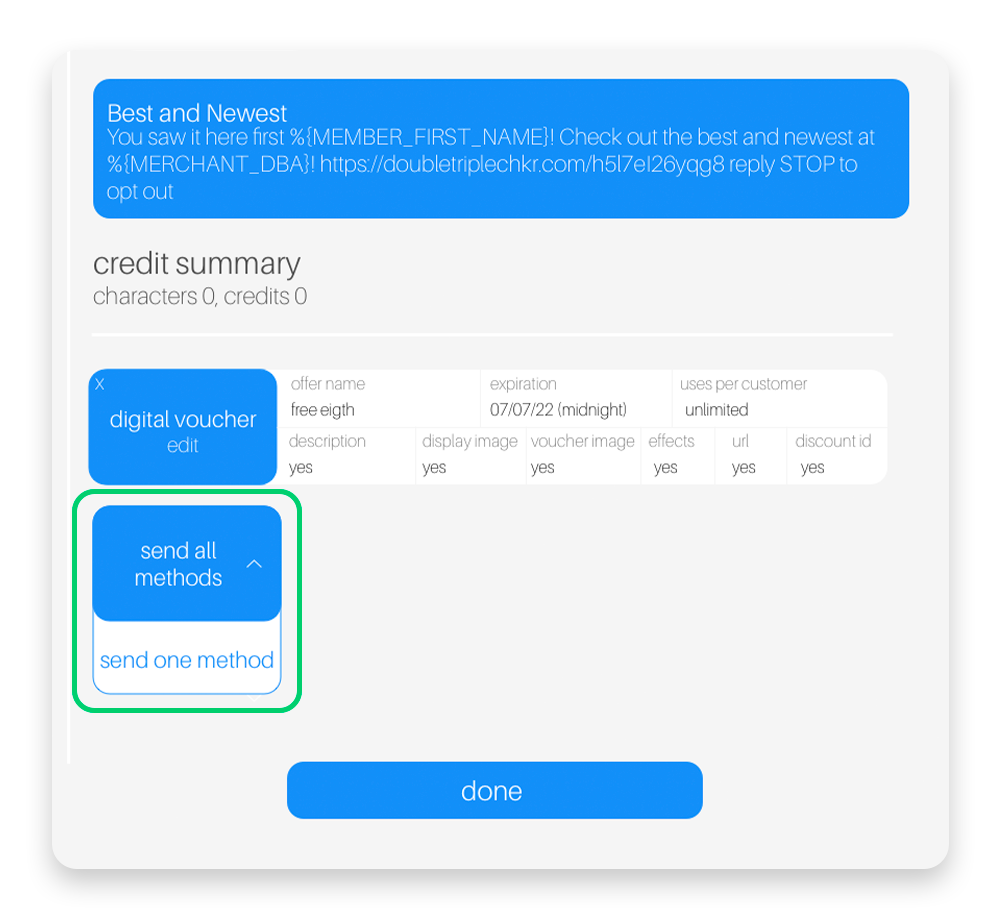
Step 1. Next, click the send all methods button to expand the dropdown. 

Step 2. From there, select send one method.

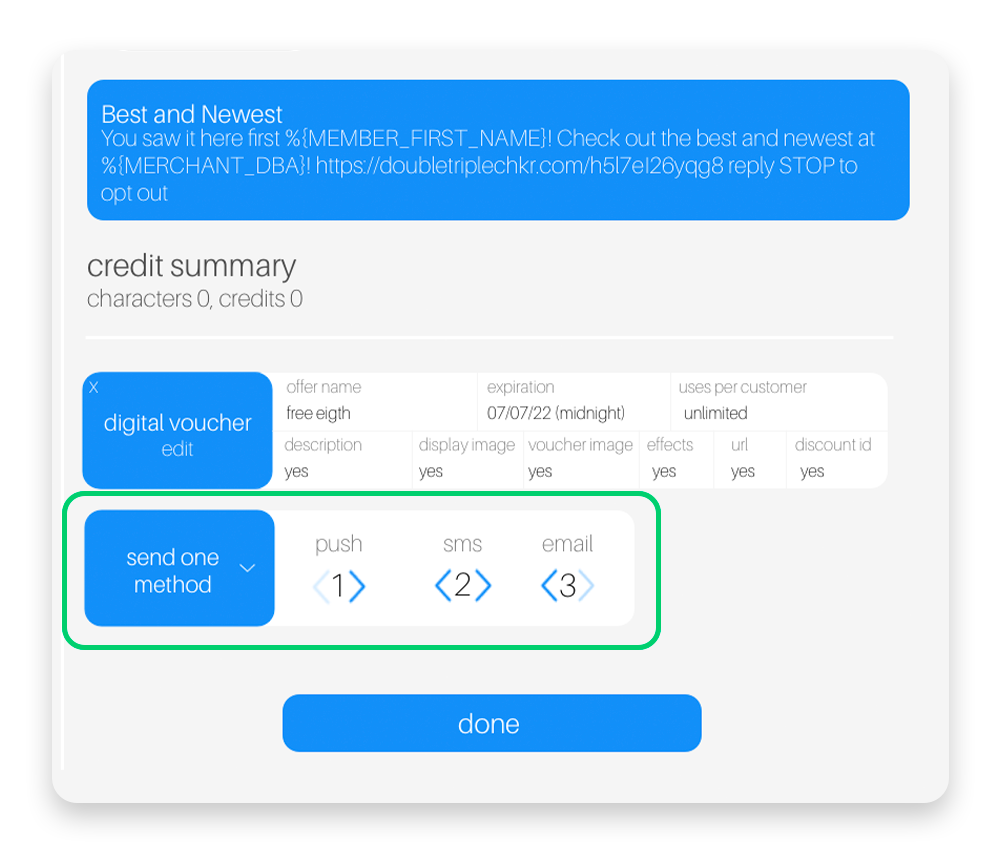
Step 3. Now you can see and rearrange the order in which your messages will go out to your recipients. In the below example, push notifications are first priority. If the customer does not have the app to receive push notifications, they will receive the message in sms, and lastly email if no other sending method applies.


Wrapping Up

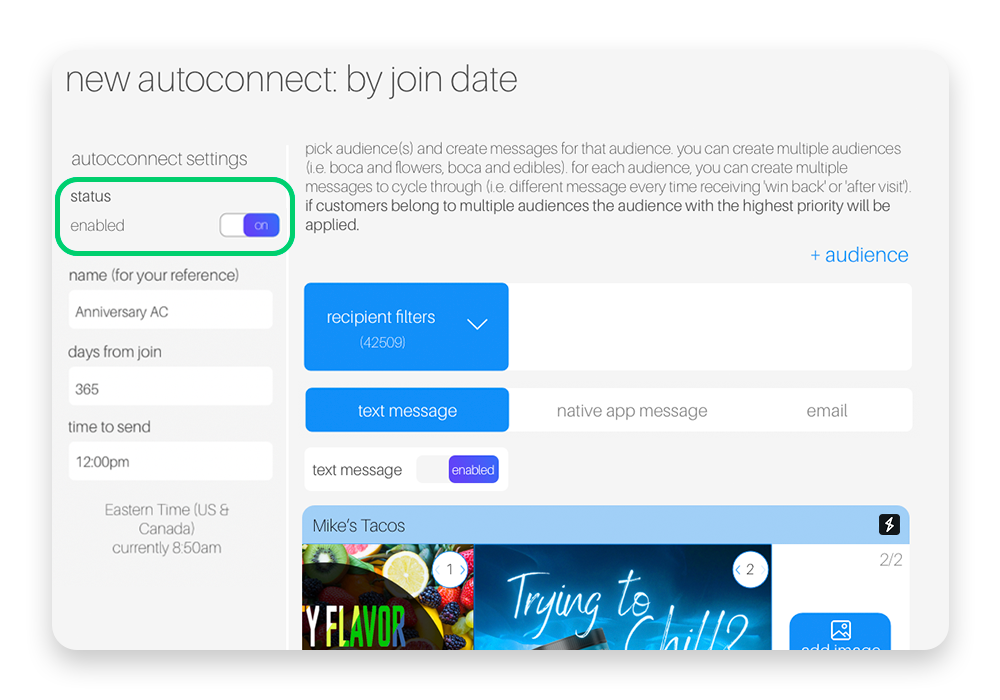
Once you are done configuring all aspects of your autoconnect, scroll back to the top of the page and locate the autoconnect settings on the left.

Click the status toggle to enable your autoconnect.

  • If you do not toggle this on, your autoconnect will not activate
    Once you’ve added all the audiences you want to target, scroll down to the bottom of the page and click the done button.
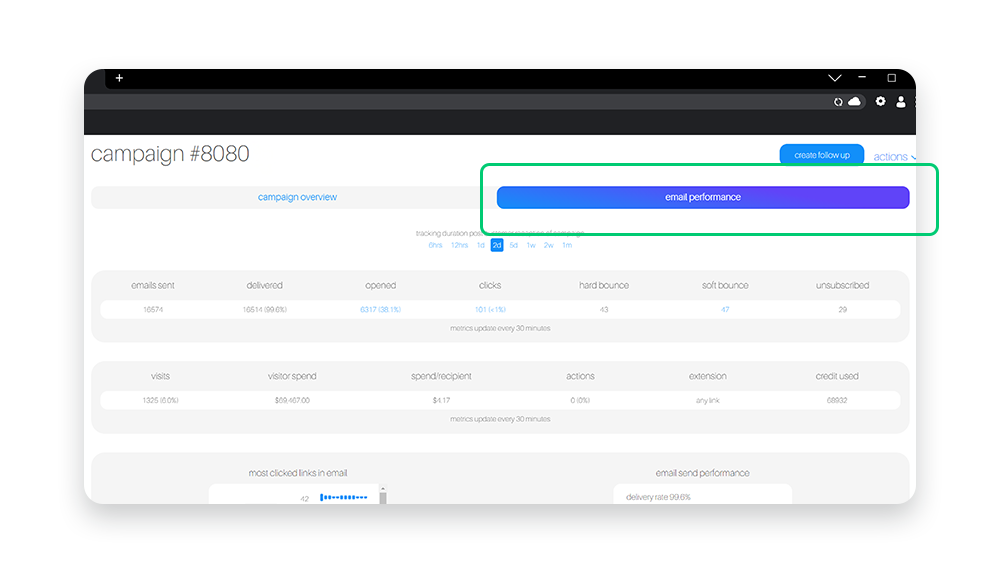
Email Reporting for Autoconnects

For merchants who elect to send Autoconnects via email, viewing the reports of your Autoconnect emails is quick and easy with the email performance tab. Simply click the tab to view 6 charts and a table that will allow you to understand the effectiveness of your Autoconnects sent via email.

Step 1: From the Autoconnects main page, click “view” on the Autoconnect campaign which you sent via email or included email as a sending method for.

Step 2: From here, click the “email performance” tab next to the “overview” tab. Once clicked, you’ll see 6 different email performance charts and a table under them highlighting key KPIs.

  • Note: Some of these charts allow you to interact with them to edit the data displayed. Simply click on the blue text within the title of the chart to do so.

Overview of Charts:

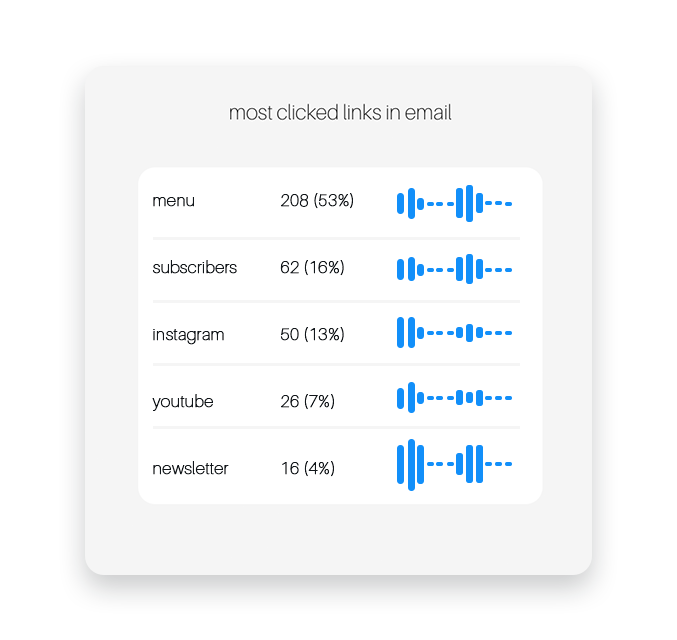
  • Most Clicked Links in Email:

    • This chart displays the number of clicks each of the links within your email received.
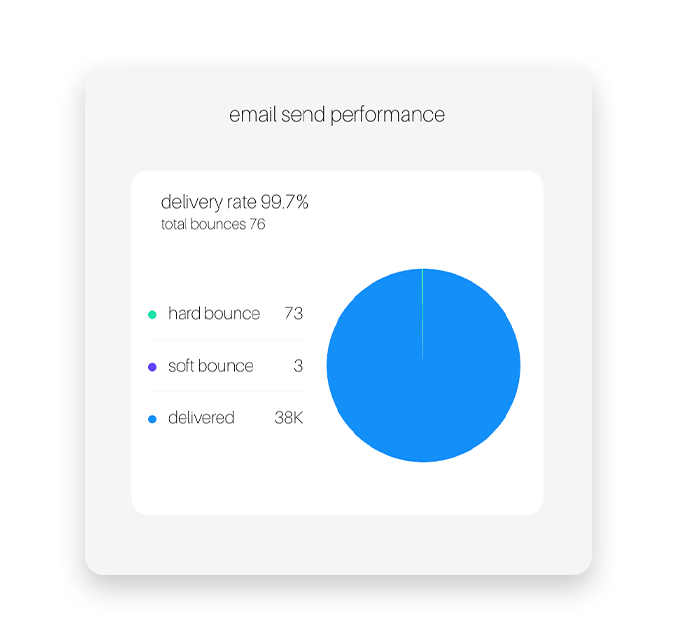
  • Email Send Performance

    • This chart displays delivery rate, hard bounce, and soft bounce rates.
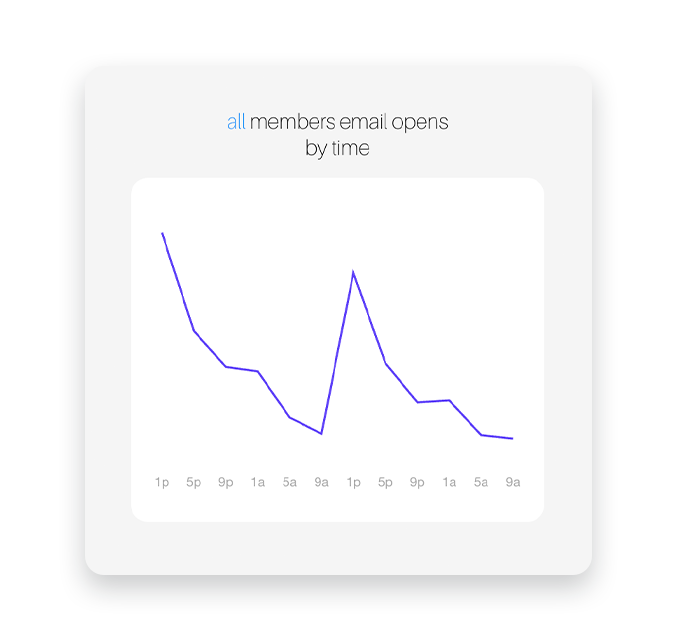
  • Member email opens by time

    • This chart shows member email opens or clicks over time.

      • Note: This chart can be edited to show different data depending on what you’re looking for. Simply click the blue text in the title of the chart to configure. For example, instead of seeing all member email opens by time, you could view all member email clicks by time.
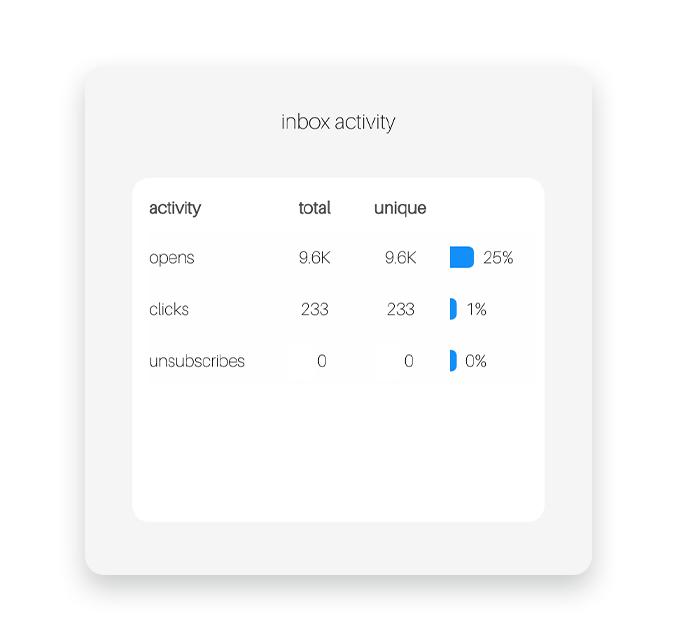
  • Inbox Activity

    • The chart displays opens, clicks, forwards, unsubscribes.
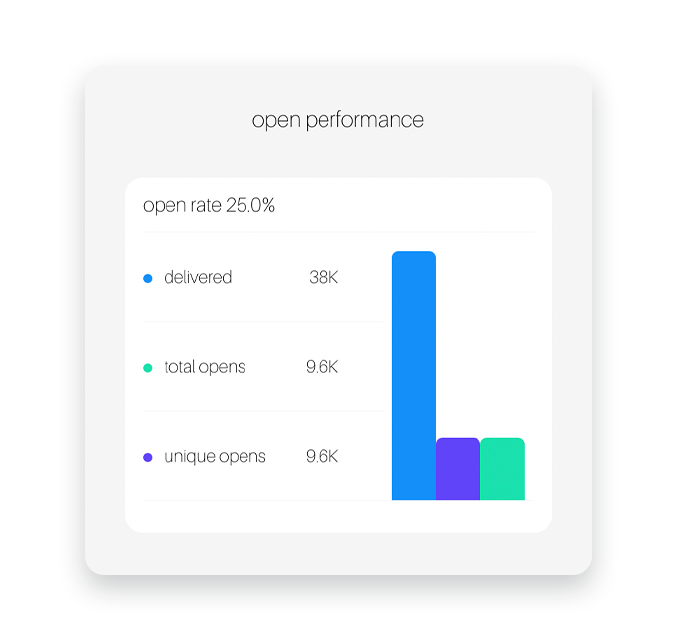
  • Open Performance

    • The chart displays delivered, total opens, and unique opens.
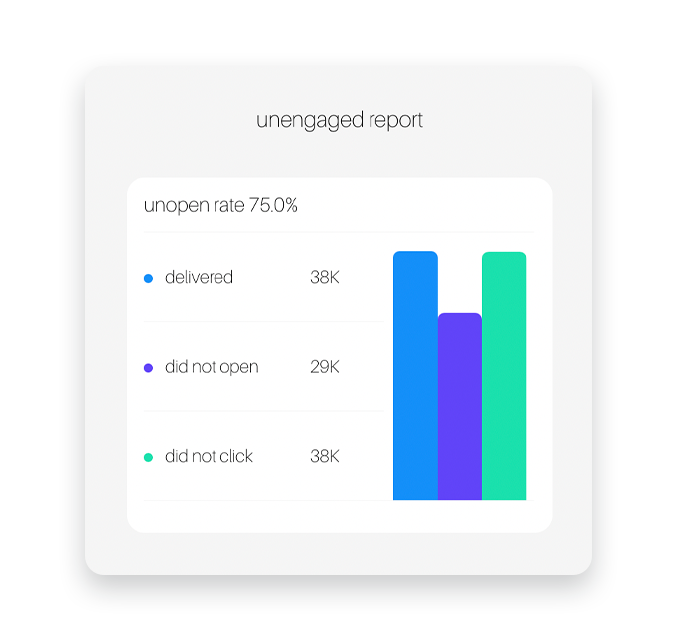
  • Unengaged Report

    • This chart displays delivered, did not open, and did not click.