LOYALTY POINT GUIDE
BOOST LOYALTY WITH CUSTOMIZED BONUS REWARDS
Create a loyalty experience that rewards your customers for every purchase and interaction. Loyalty points offer a fantastic way to thank members for their loyalty, letting them earn points to redeem for valuable rewards and exclusive offers. Setting up loyalty points for your store is quick and easy—just follow the steps below. If certain settings aren’t visible in your platform, reach out to support to ensure you have the right permissions in place. Ready to build lasting customer relationships and drive repeat visits? Dive into the guide below to bring your loyalty program to life.
Table of Contents
SETTING UP LOYALTY
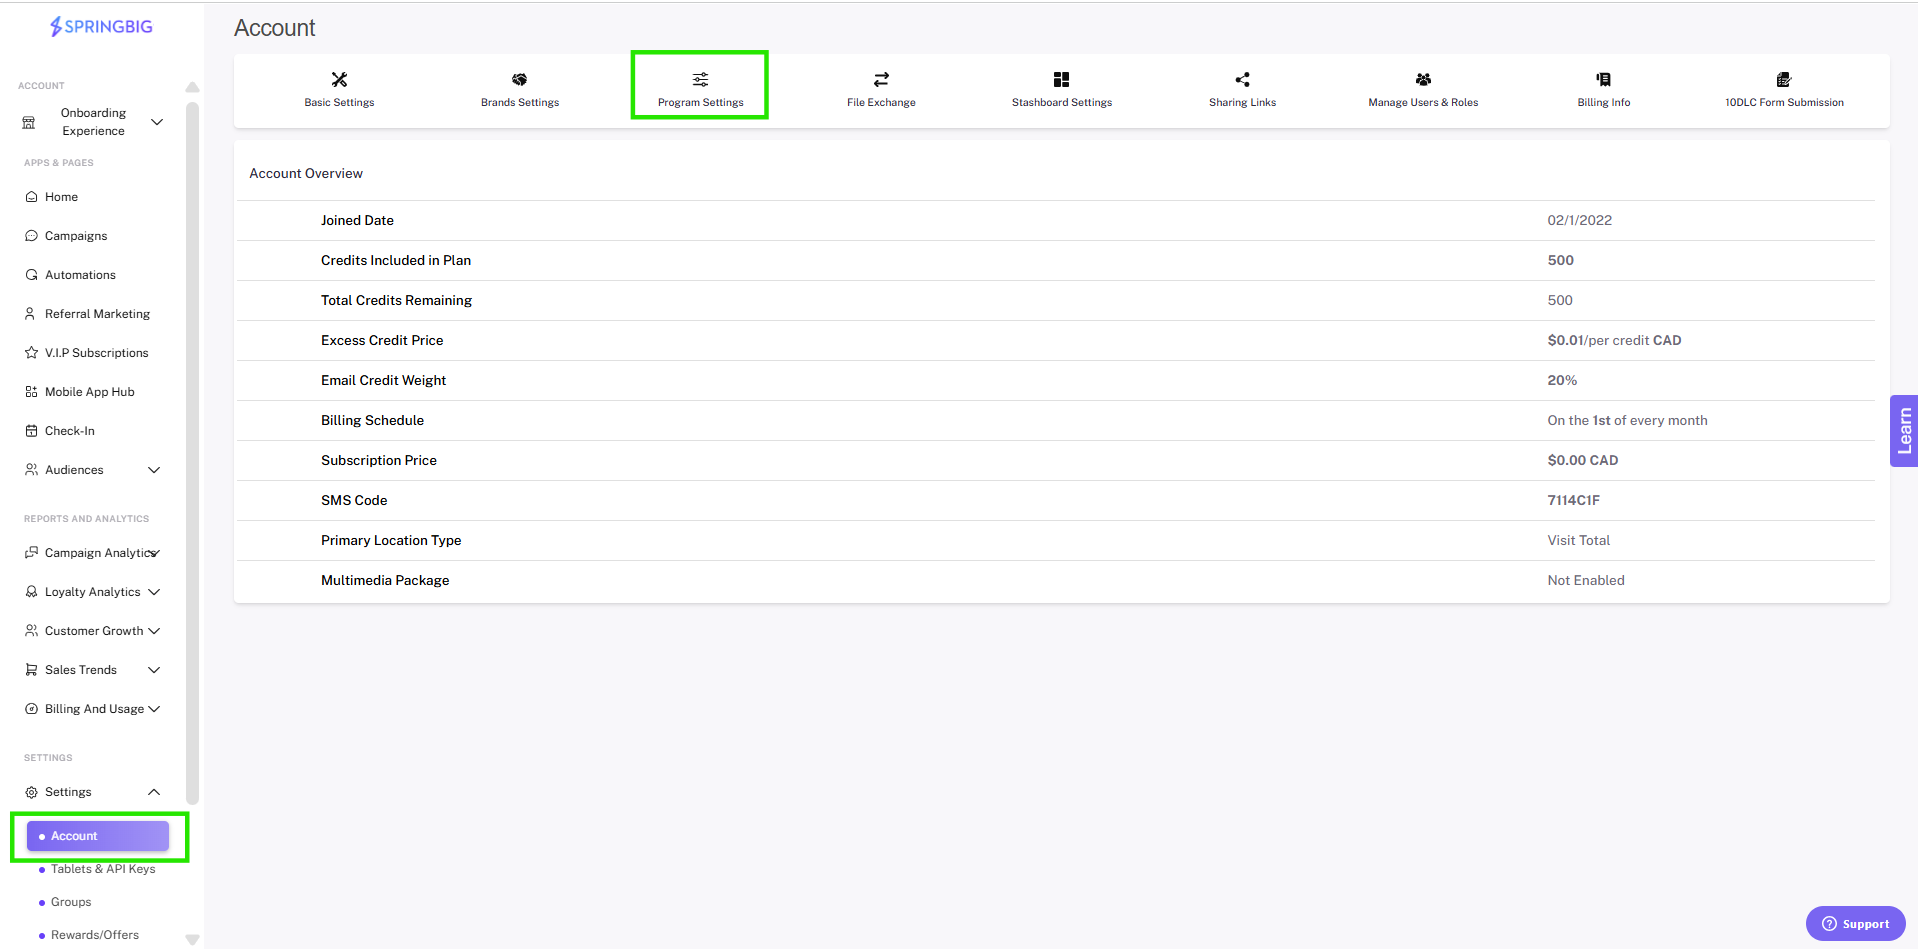
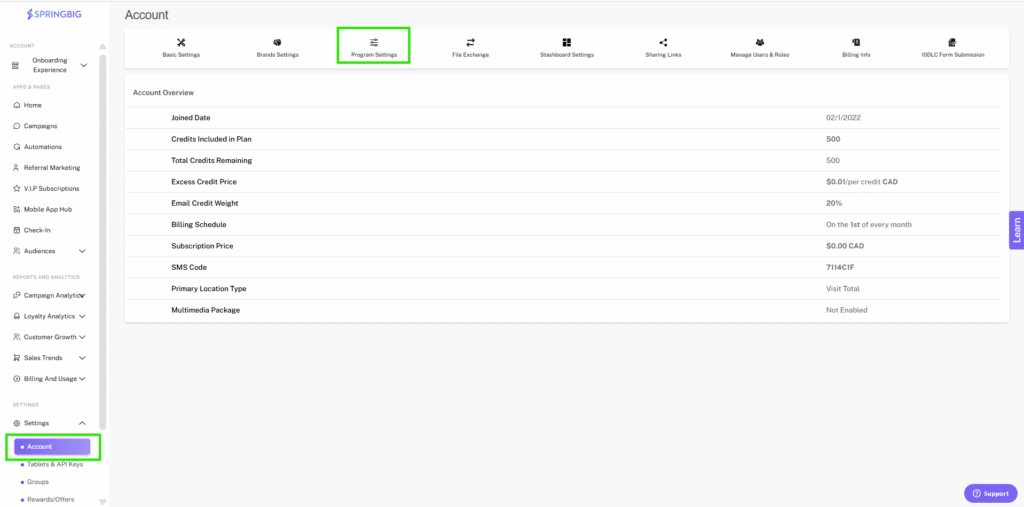
Step 1: Navigate to your program settings
From the main menu, open the settings dropdown and select account. From your account page, select the program settings option
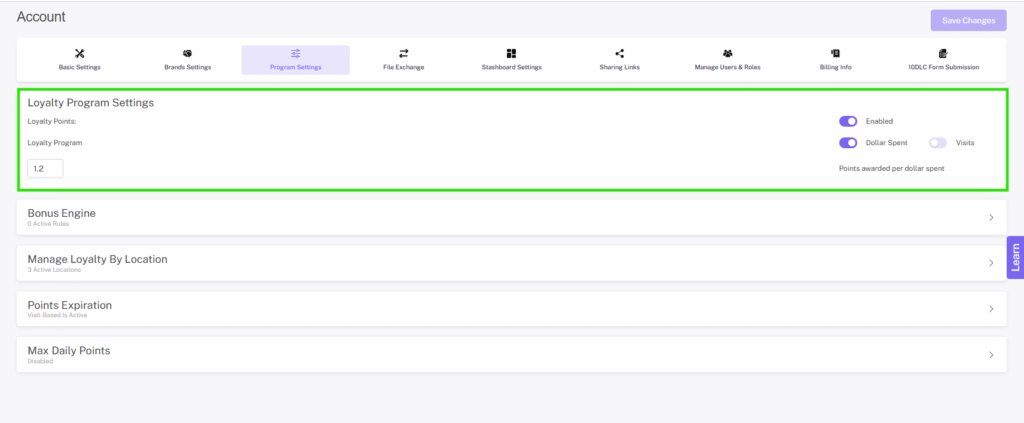
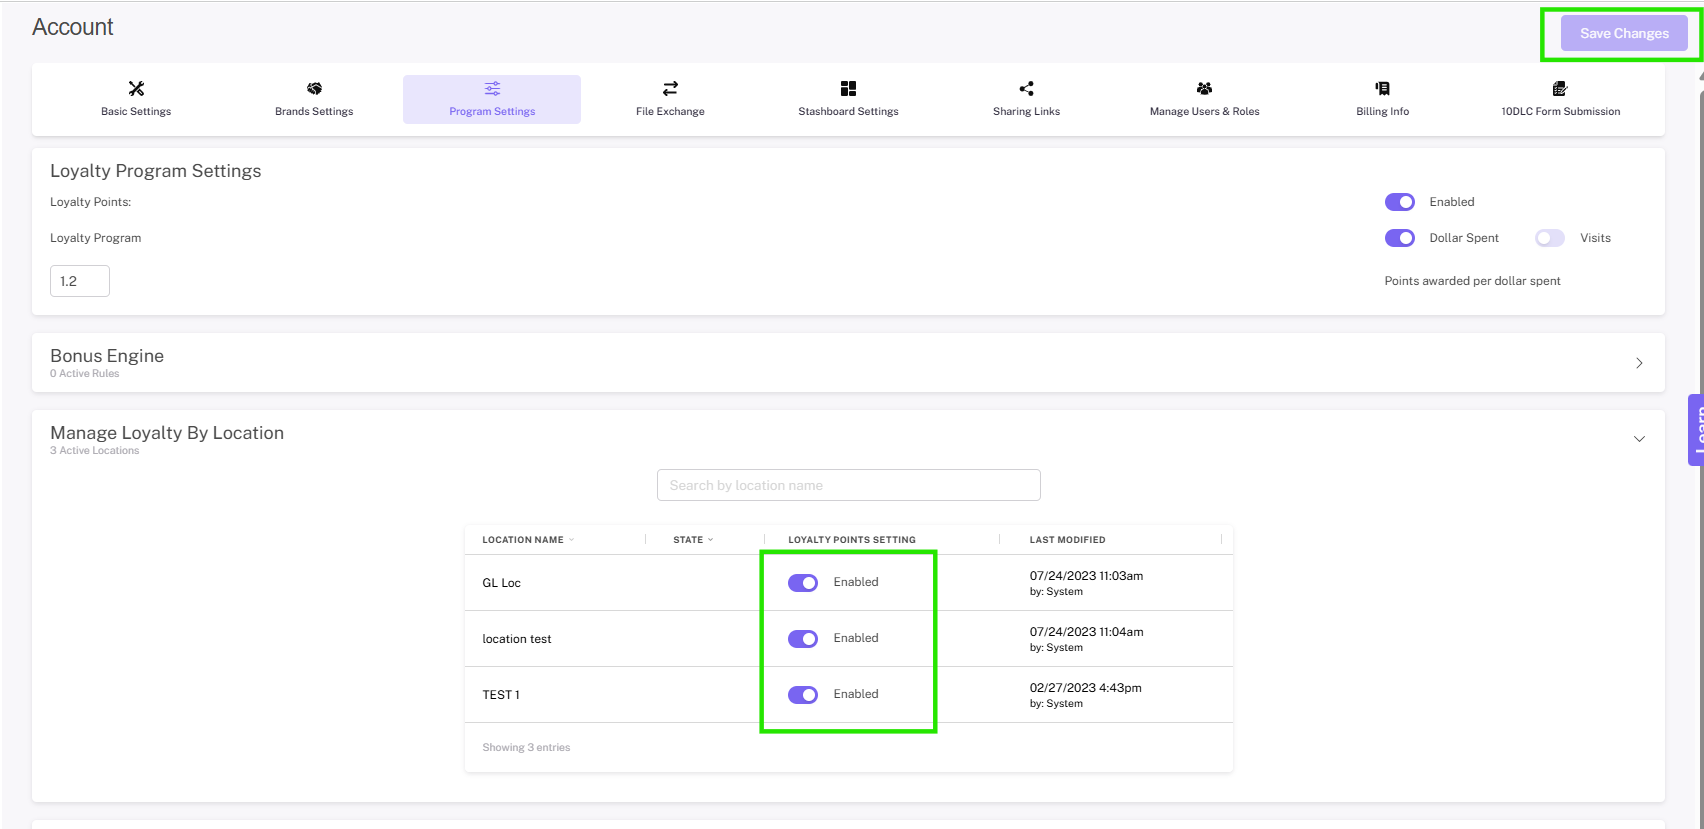
Step 2: Enable loyalty points
From the program settings page, enable loyalty points by clicking the toggle and switching it to on
NOTE: If you are actively integrated, as soon as you enable loyalty, members will start earning points.
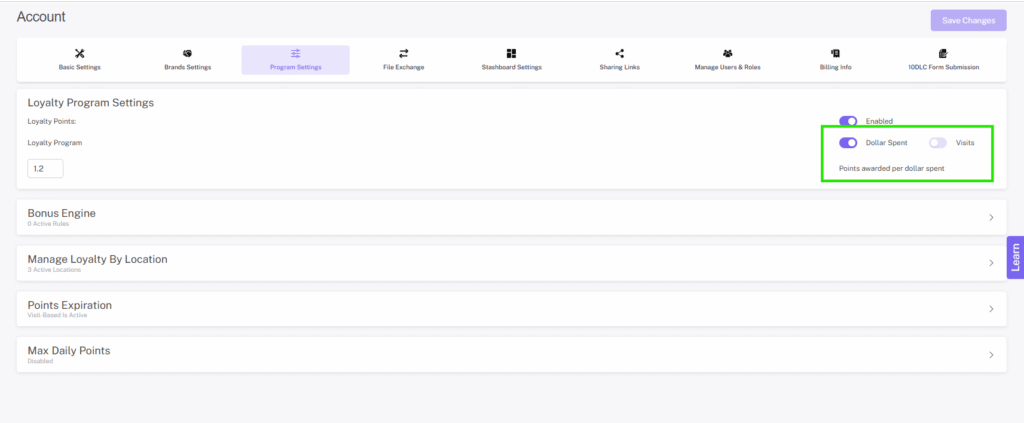
Step 3: Choose whether to assign loyalty points per dollar spend or per visit
VISIT VS. SPEND BASED LOYALTY
- Visit-based loyalty
- This type of loyalty program rewards members a set amount of points per visit regardless of how much they spend during that visit. This type of loyalty program is best used if basket size is relatively the same for each customer and each purchase. For cannabis retailers, we don’t recommend this type of loyalty program, but you do have the option if that is what’s best for your business.
- Spend-based loyalty
This type of loyalty program rewards members a set amount of points per dollar spent, which is best for ensuring that you’re rewarding your members adequately for their purchases without giving them too much or too little. Here at Springbig, this is what we recommend for a majority of cannabis retailers.
Make sure you check with your State/Provincial regulations to determine what program types are permitted.
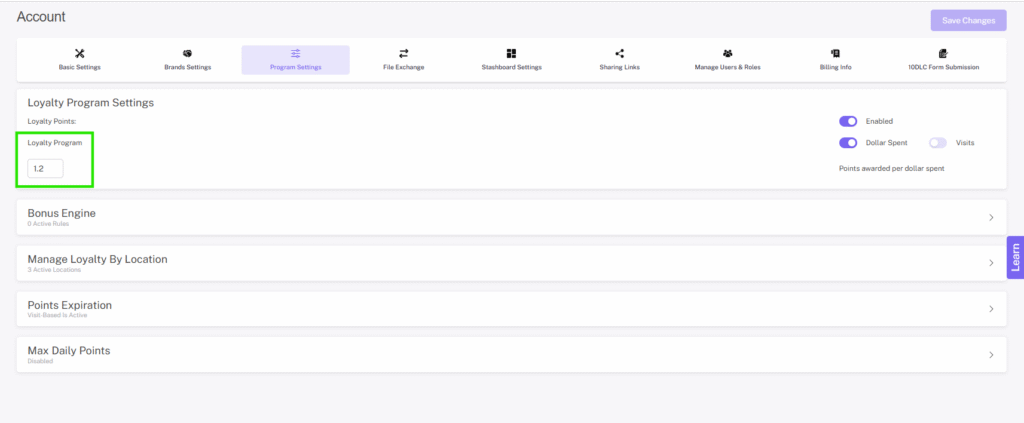
Step 4: Enter the amount of points you would like the customer to earn per spend or visit.
LOYALTY BY LOCATION
This feature allows merchants to manage loyalty by location. Merchants can now dictate which of their locations their loyalty program is active at by simply checking or unchecking the box next to each location.
Step 1: Navigate to your program settings
From the main menu, open the settings dropdown and select account. From your account page, select the program settings option
Step 2: Open the manage loyalty by location tab, from here, you can view a list of locations, or search for a specific location.
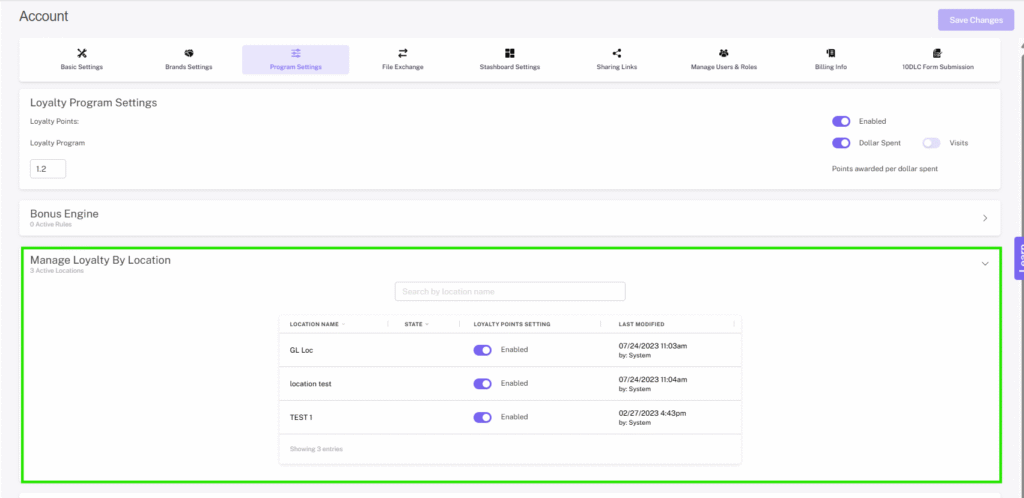
Step 3: By default, all locations will be set to on for your loyalty program. You can disable loyalty for a specific location(s), by moving the toggle to off for that location.
Note: be sure to click the update button at the bottom of the page to save your changes.
Note: New locations being added will automatically have loyalty turned on, no action is required.
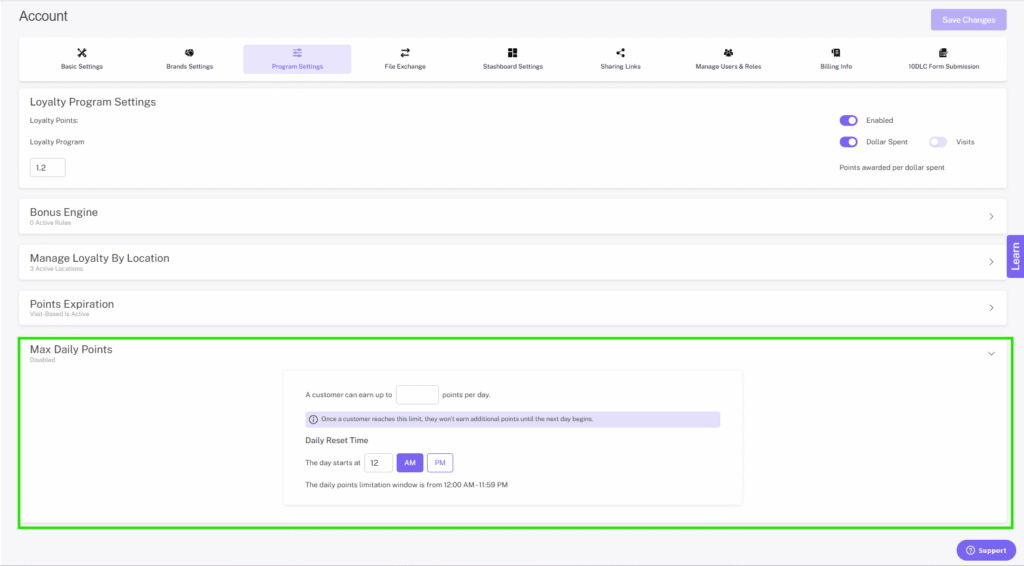
DAILY POINTS LIMIT
On the Program Settings page, you can set a daily point limit. This setting ensures that each customer can earn only a specified number of points per day. Retailers can determine the maximum daily points allowed and specify the start time for each day based on the store’s hours.
Step 1. Navigate to your program settings
- From the main menu, open the settings dropdown and select account. From your account page, select the program settings option
Step 2. Select the set maximum daily points limitation dropdown
Step 3. Enter in the maximum number of points a member can earn in a day
Step 4. Set the time for the day starts at field
Please note: The daily points limitation window is from 12:00 am – 11:59 pm
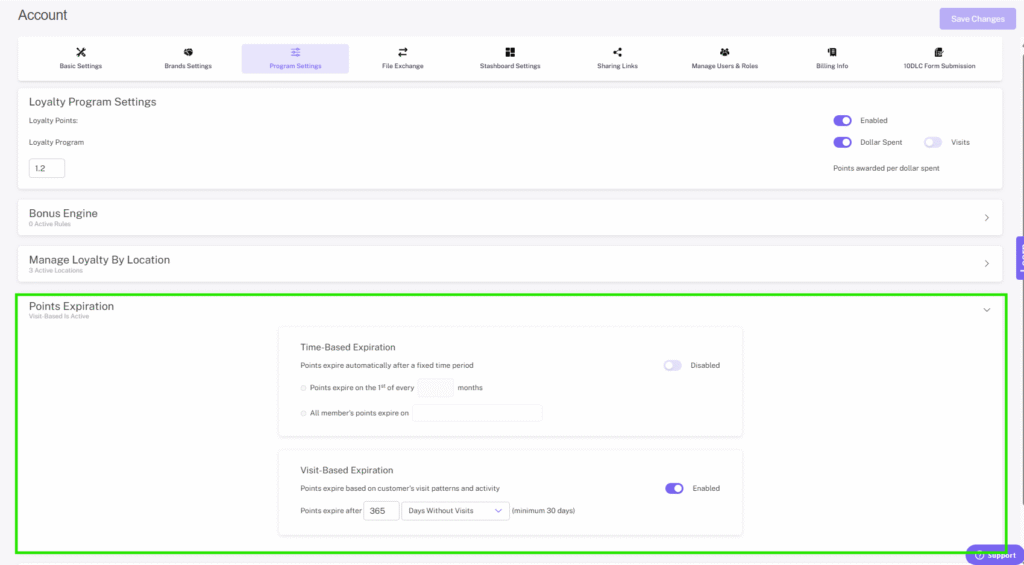
SETTING UP POINT EXPIRATION
The points expiration setting allows merchants to determine whether member points expire based on time or based on visits.
Note: Ideally this should be enabled when you first start with Springbig. Enabling a point expiration later on, when customers have already earned points, will erase historical points.
For time-based expiration, there are two options:
- Points expire on the 1st of every ___ month(s)
- All member’s points will expire on ____
For visit-based expiration, there are also two options:
- Number of days without visit until points expiration (30 days minimum)
- Number of days since visit until points removed from balance (30 days minimum)
Step 1: Navigate to your program settings
From the main menu, open the settings dropdown and select account. From your account page, select the program settings option
Step 2: Open the points expiration settings and select time based or visit based expiration:
TIME-BASED EXPIRATIONS
Sets points to expire on the first of every x months, or sets points to expire on a specific date.
If you select time based you will be prompted to select one of two options:
1: Points expire on the 1st of every ___ month(s)
- (___month(s) being how long until the points expire starting from when you configure the setting), setting enables retailers to set points to expire, for example, 12 months after they configure the setting.
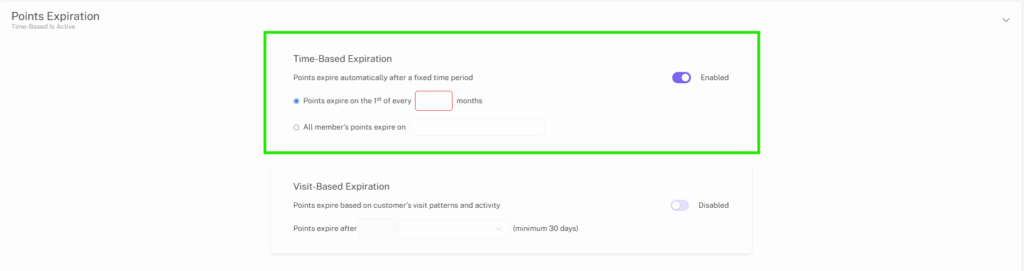
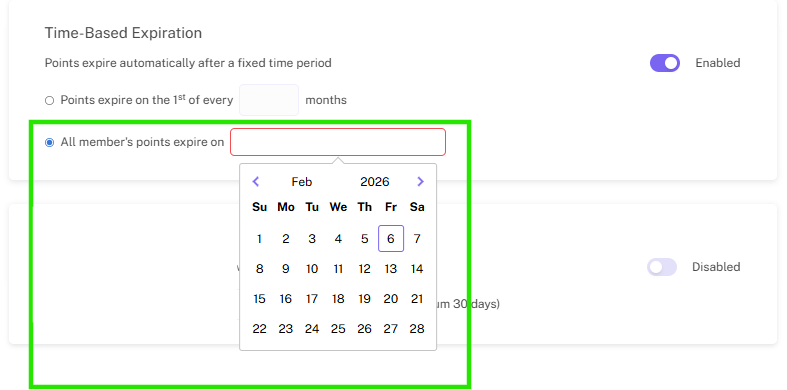
2: All member’s points will expire on ___
- All member’s points will expire on ___, setting allows retailers to configure points to expire on a specific date for all members. That means a retailer could set points to expire all at the same time on December 31st.
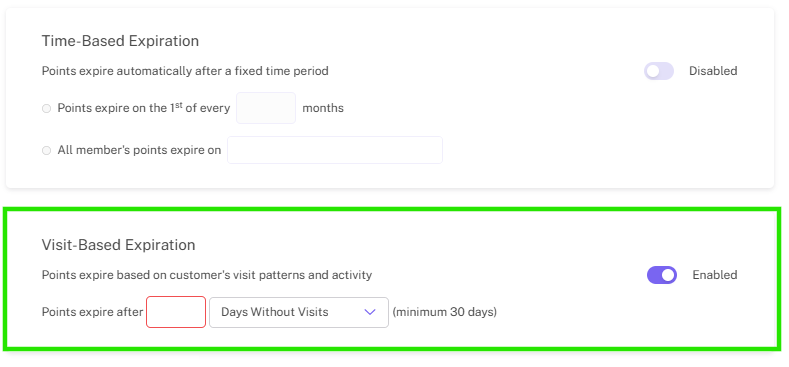
VISIT-BASED EXPIRATIONS
This sets points to expire after a member has gone a certain number of days without visiting your dispensary.
If you select visit based you will be promoted to select one of two options:
1: Number of days without visit until points expiration (30 days minimum)
Days without visit = All member’s points will expire if they do not make a visit in X days
- Number of day without visit until points expiration (30 days minimum): This option allows retailers to configure points to expire after the member has not visited for x amount of days.
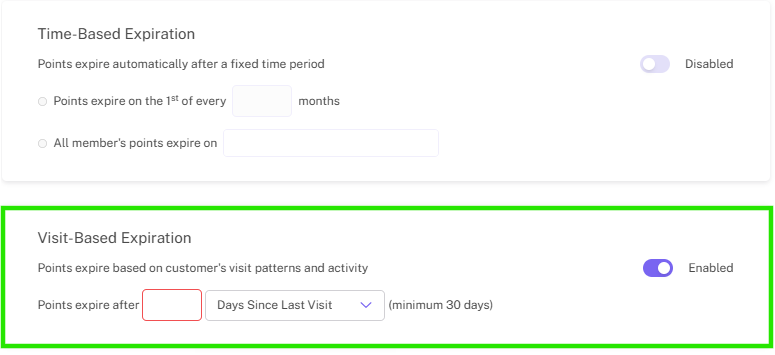
2: Number of days since visit until points removed from balance (30 days minimum)
Days since visit = The points earned on a specific visit that happened X days ago will expire but the member will retain points earned more recently that didnt surpass X days ago
- Number of days since visit until points are removed from balance (30 days minimum): This option allows retailers to configure points to expire x amount of days after the member’s last visit.
Step 3: Once you’ve configured the expiration setting the way you want, click save changes to lock in your loyalty settings!
LOYALTY POINT VIDEO & TALKING POINTS
Loyalty education starts in the store and on your website. Make sure your website features your program details and offerings. Teach your team about your program and how to talk about the loyalty program with customers.
Tip: Build a loyalty guide for your program outlining what’s offered, how to sign up, and how to take advantage of what you are offering. This guide can be added to your website, social media, and added in store to TV screens, flyers, and posted in high traffic areas like registers, waiting areas, and doors.
Check out this video about loyalty training.
There are plenty of great reasons to encourage members to engage in your dispensary’s loyalty rewards program, and to help your team, we’ve come up with some easy examples of how you can get your customers even more excited with some helpful talking points:
Are you signed up for our loyalty program?
Sounds easy enough, right? Just asking customers if they have signed up for your loyalty program is a good way to break the ice, and it might even be the first time they’ve heard about it! While you’re at it, make it sound more exclusive by asking if they are a VIP!
Do you have access to your loyalty wallet?
Customers are sure to engage more in your loyalty program if they know how to access their profile through the digital wallet, so show them how to access their rewards wallet, whether it is through the web wallet or your customized native app.
Do you know how to check your available rewards and offers?
Some member might not even know they’ve got rewards or offers waiting for them, so it’s always good to remind them to check their profile. Not only does it remind them to engage in the program, it gives you a chance to show them how to use their digital wallet.
Do you have any rewards you would like to use?
Asking member is they have any rewards they want to redeem is an easy way to remind them to check their loyalty profile and engage with your program.
Did you add your birthday for our birthday deals?
This is a great way to let customers know that your loyalty program will actually send them personalized gifts and offers, while also encouraging them to complete their profile- giving your dispensary important data on their preferences and interests.
You can access your points and rewards with this QR code!
Just in case a customer does not have their digital rewards wallet saved, giving them access to a QR code that connects to your join/login link is a quick way for them to access their rewards profile.
QR Code access: Settings — > Account –> Sharing Links