SPRINGBIG'S STANDARD WALLET
YOUR LOYALTY, SIMPLIFIED
Springbig’s Standard Wallet is an incredible tool for Dispensaries and Customers alike!
Springbig gives you a wallet for your customers to use to access their points and rewards, view and redeem exclusive offers that they receive from campaigns / autoconnects, update their profile preferences, and even shop directly on your menu!
The customer wallet can be accessed via the same sharing links pages as your join form.
Springbig’s Standard Wallet is the cornerstone of customer engagement, offering an intuitive and accessible way for customers to track rewards, points, and offers. This page explores all the powerful features of the Standard Wallet, ensuring you get the most out of your loyalty program. Ready for even more? Explore links to our V3 Wallet enhancements and mobile app features as well to take your program to the next level.
ACCESSING A CUSTOMER WALLET AS A RETAIL STAFF MEMBER:
Step 1. Navigate to the Customer List page in Springbig’s UI
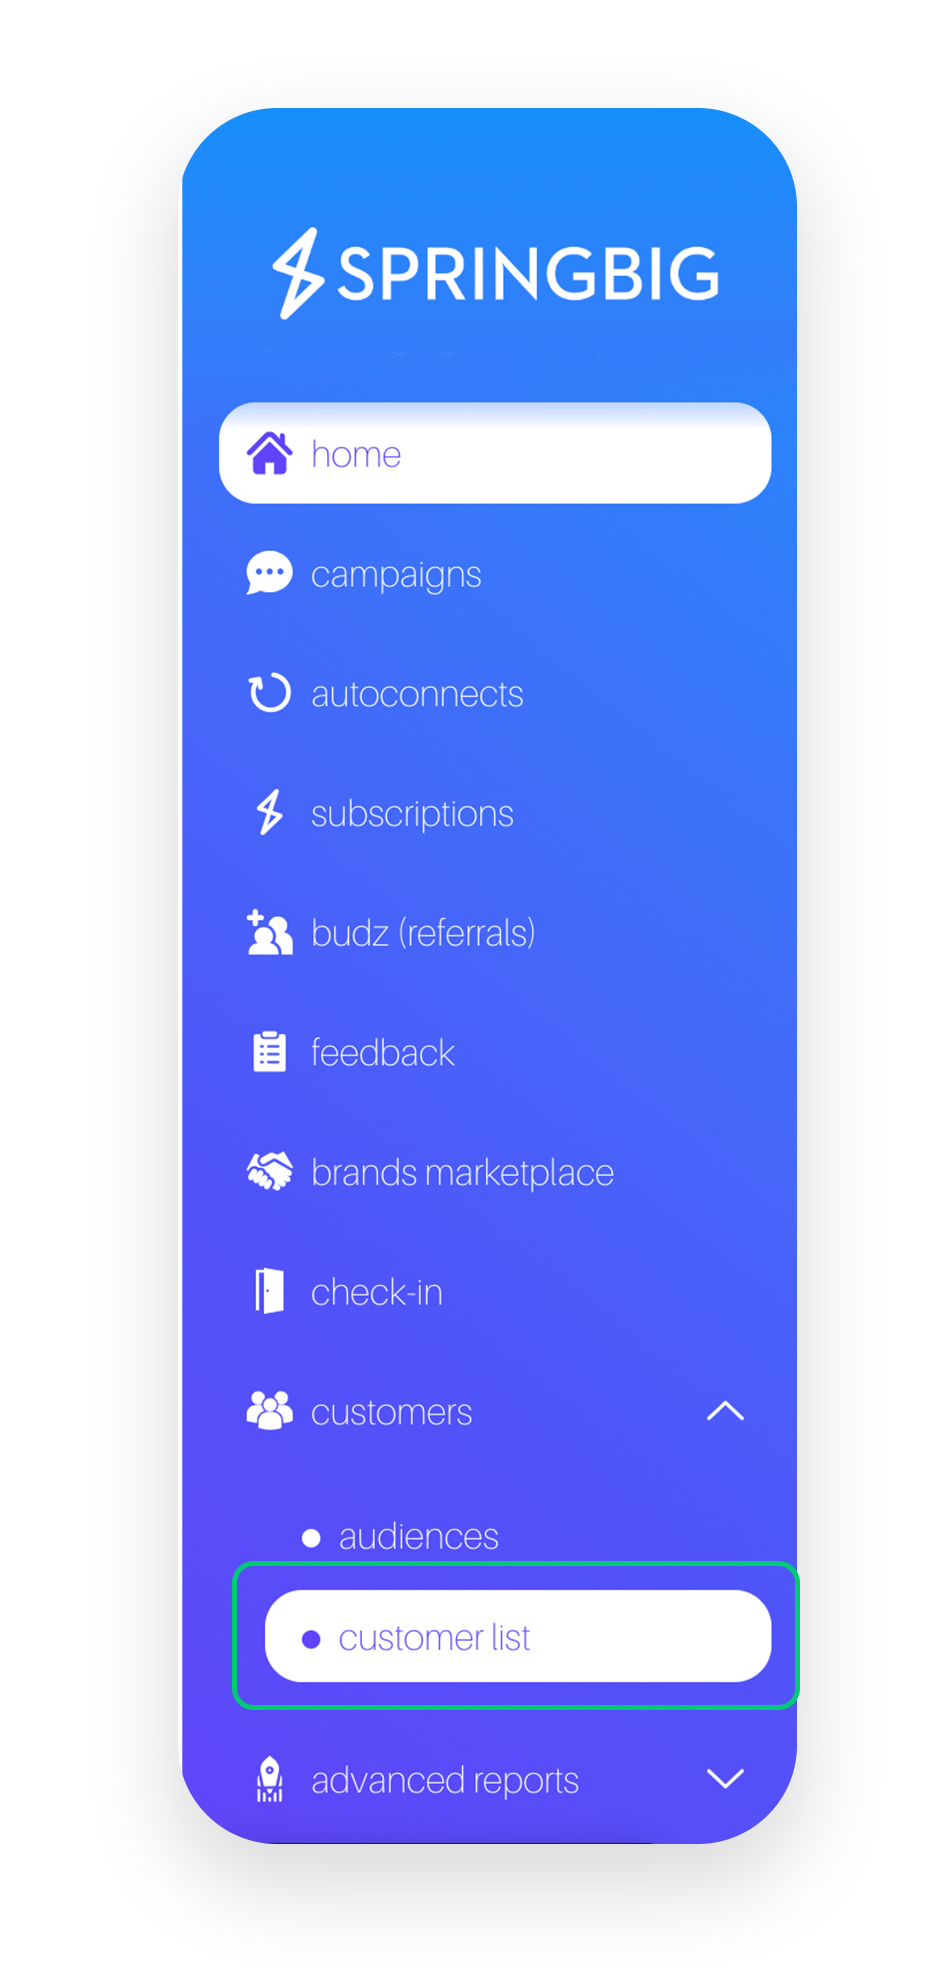

Step 2. Search for the customer in question by either phone number or email address
Step 3. Select view to view the customer’s profile details, then select view customer wallet to access the customer’s secure wallet

Pro Tip: Encourage the customer to save their wallet to their homepage, for easy access to this wallet moving forward!
ACCESSING A CUSTOMER WALLET AS A CUSTOMER:
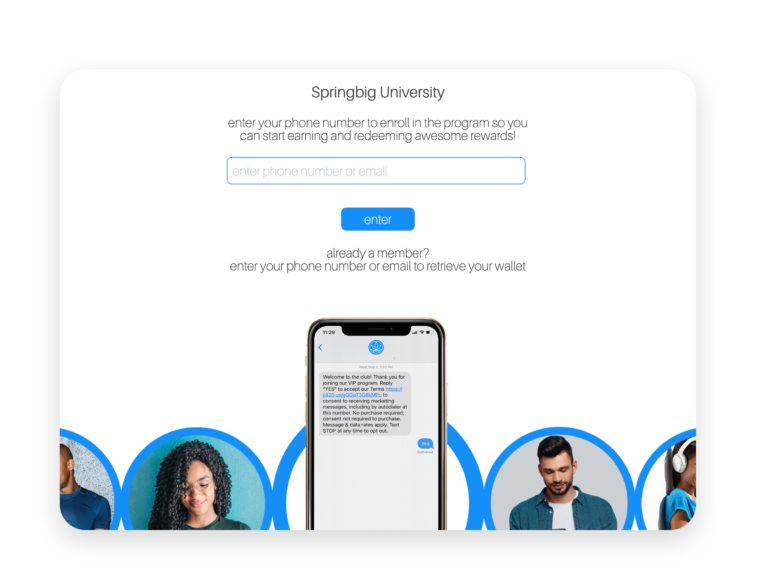
Step 1. Navigate to the Sharing Links page in Springbig’s UI (Settings –> Account –> Sharing Links)

Step 2. Select the Login Link and have the customer enter in their phone number and pin or have the customer scan the QR code for the Login Link to access the wallet on their device.

Pro Tip: Encourage the customer to save their wallet to their homepage, for easy access to this wallet moving forward!
THE REWARDS PAGE
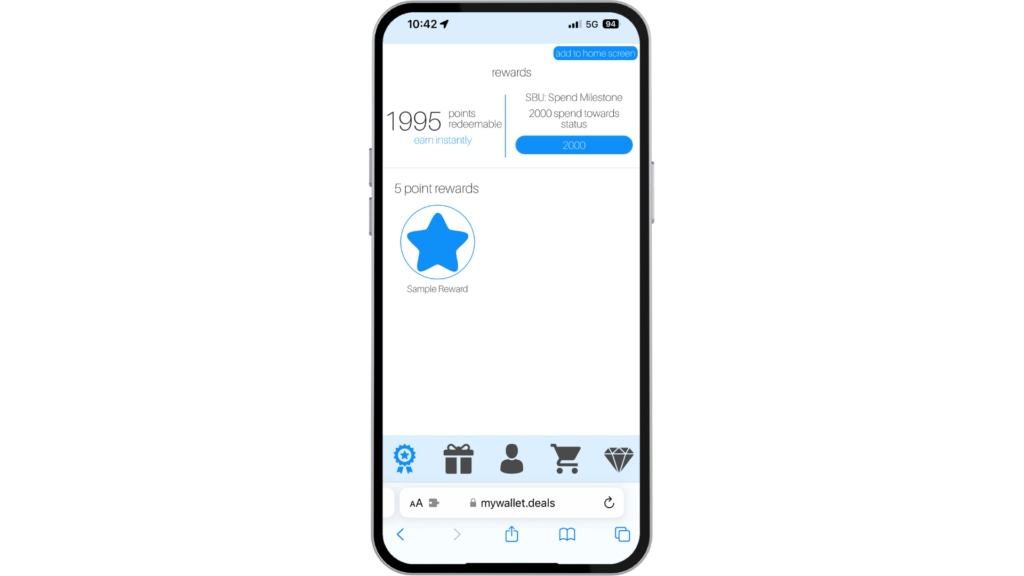
Springbig’s Reward Page offers a glimpse into your store’s loyalty program. Showing the customers what reward tiers you have available, and how many points customers need in order to redeem at your store.
At the top of the Rewards page, the customer’s point balance will be shown, allowing them to see how many points they have available the redeem. Below the available point amount, there are prompts to incentivize customers to provide additional information in their profiles: interests, email and birthday. These prompts will only appear if the Birthday Add, Interest Add or Email Add autoconnects are set up and enabled. To learn more about these Desired Action Autoconnects, click here.
On the top of the Rewards page, there is a spend status bar that is associated with any Spend Milestone Autoconnects set up in the store’s account. For more information around the Spend Milestone Autoconnect, please view the Autoconnects: Customer Milestone Reached course here.
Within the rewards page, you will see all of the reward tiers that have been built out in the store’s Springbig account. The rewards will be listed and accompanied by photos, which are called “display images” in the Springbig platform. If no image is added for the reward, a standard Springbig Star will appear in its place.
In Wallet Reward Redemptions
Customers are able to redeem rewards directly through the wallet, depending on the POS that is integrated with the store. For certain POS’, disabling the redemption in the wallet is the best work flow.
When a customer selects the “redeem” button, they will first receive a pop up, letting the customer know that the reward should be redeemed in store and in front of staff. From there, if the customer selects “proceed to offer”, the reward will be redeemed. The customer’s points will be removed from their profile, and they will be shown a confirmation page, with a ticking time stamp to confirm that no customers can fraudulently redeem. Each redemption is accompanied by a reward redemption confirmation code, in case more investigation is needed for the merchant.
Below is the list of POS’ that allow for in-wallet redemptions.
In wallet redemption POS’:
- Greenbits
- Treez
- Growflow
- THSuite
- MJ Freeway
- Cannapoint
- Profitek
- IndicaOnline
- Dispense First
IN WALLET REWARD REDEMPTIONS
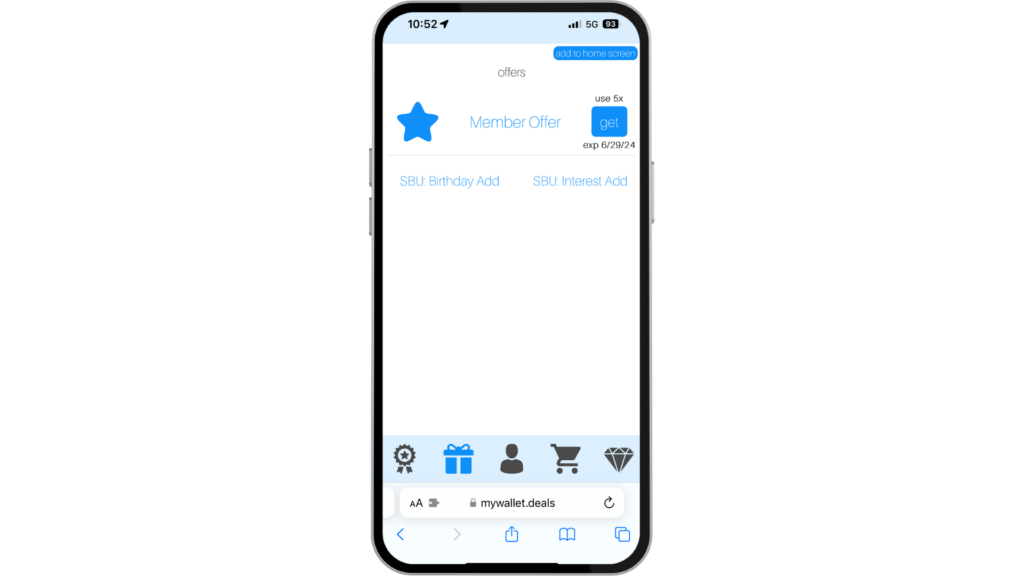
THE OFFERS PAGE
Springbig’s Offer Page shows the customer any individualized offers they have available in their account.
Customers are able to redeem offers directly through the wallet for added convenience. The customers will be able to view how many times the offer is available to them, along with when the offer will expire.
The offers will be listed and accompanied by photos, which are called “display images” in the Springbig platform. If no image is added for the reward, a generic Springbig Star will appear in its place.
When a customer selects the “redeem” button, they will first receive a pop up, letting the customer know that the offer should be redeemed in store and in front of staff. From there, if the customer selects “proceed to offer”, the offer will be redeemed. The offer will be removed from the customer’s offer page, and they will be shown a confirmation page, with a ticking time stamp to confirm that no customers can fraudulently redeem. Each redemption is accompanied by a offer redemption confirmation code, in case more investigation is needed for the merchant.
IN WALLET OFFER REDEMPTIONS
THE PROFILE PAGE
The Profile Page in the standard wallet is where your customers can go to view their own information.
Within the profile page, customers can view the contact info they’ve provided, including phone number, email address, birthday and interests.
The profile page includes a QR code that can be scanned by a bar code reader to automatically pull up the customer profile, if your POS allows for this.
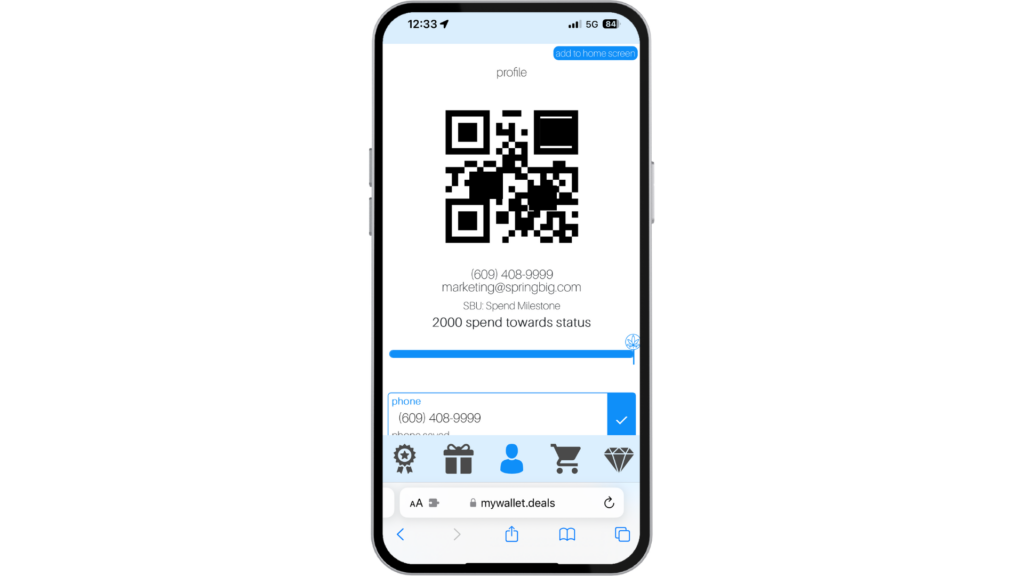
Below the QR code, the customer’s contact information and total spend is shown, along with a spend status bar to let the customer know how close they are to fulfilling the spend milestone. For more information around the Spend Milestone Autoconnect, please view the Autoconnects: Customer Milestone Reached course linked here.
Below the spend status bar is all of the customer’s information provided in the profile. Including: phone number, email address, first and last name, birthday, gender, address and their favorite location (if applicable)!
This information is editable by the customer, and allows them to update or edit this information at any time.

Below the editable contact information, there is an interest section. Any interests that are built out in the Springbig platform, will appear below the editable information. Customers are able to select or unselect interests in their profile at any time. Below are the steps to create interests in the Springbig platform.

To Create Interests:
Step 1. Navigate to the Settings drop down and select Groups
Step 2. Scroll down to the Interests drop down and select Add Interest to begin building out the interests
Please note:
- When creating the interests, the POS ID field is not mandatory.
- To create the interests, enter the interest name and add an image that will appear in the wallet.
- If no image is added, a standard Springbig Star will appear in its place.
- Once the name is added, be sure to add in a display name to appear in the wallet.
Add Your Heading Text Here
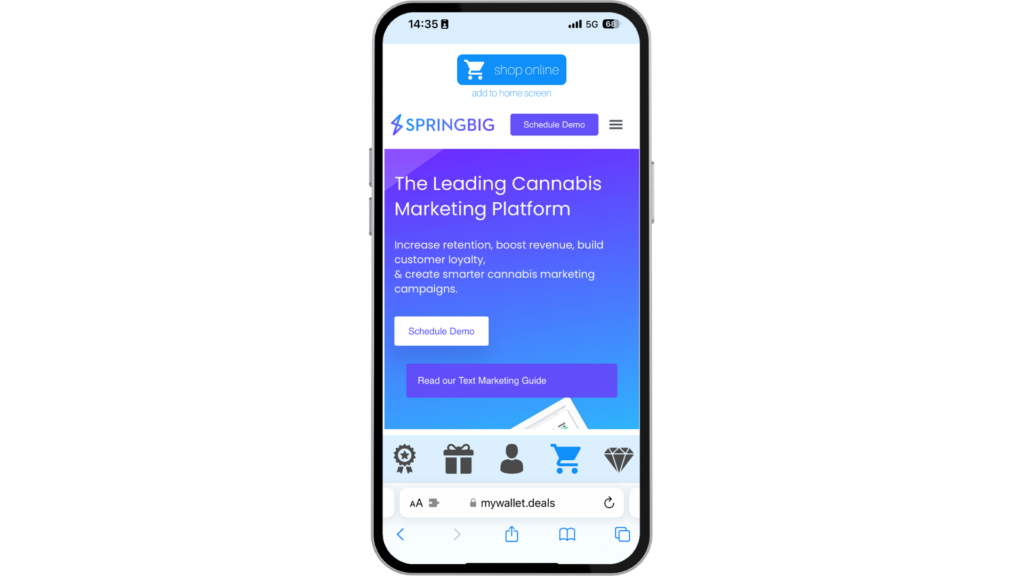
THE CART PAGE
The Cart Page in the standard wallet is where your customers can go to view your online store, or website. Customers are able to complete purchases directly from the customer wallet, if your online menu is posted within the Online Menu field in the account’s basic settings.
This page is configured within your Springbig settings, by following the steps below.
To Set Up the Cart Page:
Step 1. Navigate to the Springbig UI.
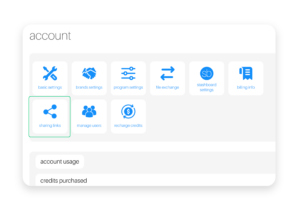
Step 2. Select the account page under the settings drop down.
Step 3. Select basic settings.
Step 4. In the profile box that appears in the basic settings page, select the edit button.
Step 5. Enter the website that you would like to appear in the online menu field.
Step 6. Be sure to press the save changes button to lock in the online menu link.