Welcome to the Springbig + POSaBIT Integration guide!
With Springbig’s integration with POSaBIT, your customer data and transactions will be seamlessly shared with Springbig.
In this guide you will learn about:
Installing POSaBit
Creating members
Linking rewards from Springbig to POSaBIT
Linking offers from Springbig to POSaBIT
Redeeming rewards/offers
Let’s get started!
Springbig + POSaBIT Integration Guide
User interface is subject to change at the discretion of your POS provider. For the most accurate and up-to-date information, please consult your POS provider directly.
Part 1: Installation
Step 1: To get started, sign into your POSaBIT account.
Step 2: Open the Settings dropdown menu from your POSaBIT dashboard.
Step 3. From the list, click on integrations.
POSaBIT Integration: Choosing Springbig
Step 4: Click New Integration to start configuring your integration settings.
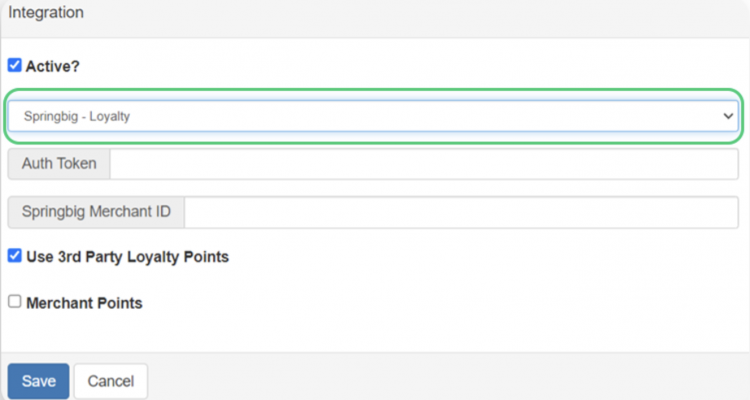
Step 5: You’ll then be taken to the integration page where you need to click Select Integration, then choose Springbig – Loyalty from the dropdown menu.
POSaBIT Integration: Configuring Settings
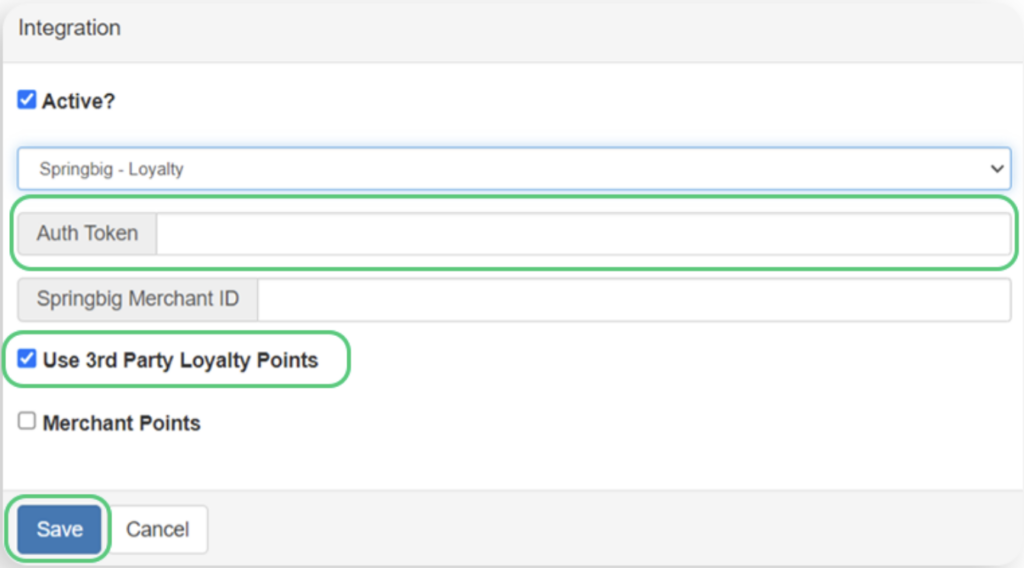
Step 6: After selecting Springbig as your integration, enter the auth token you obtained from your Springbig Account Manager.
Step 7: Use the checkbox to indicate whether or not you would like to use Springbig’s points.
Note: If the Use 3rd Party Loyalty Points box is checked, then you will be using points.
Step 8: When you’re done, click the Save button to save your settings.
Note: the Secret key should not be filled out, but it will not be an option once you select Springbig – Loyalty.
Part 2: Member Creation
Overview: This section will show how to create new members and the data that’ll be sent to Springbig.
Note: Only customers that have consented via the customer consent page will be sent to Springbig. POSabit requires a phone number on file to send transactions to Springbig.
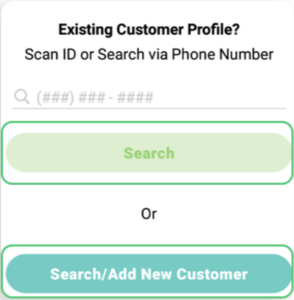
Step 1: In order to create a new customer, click Search/Add Customer ID, then on the next page select Add New.
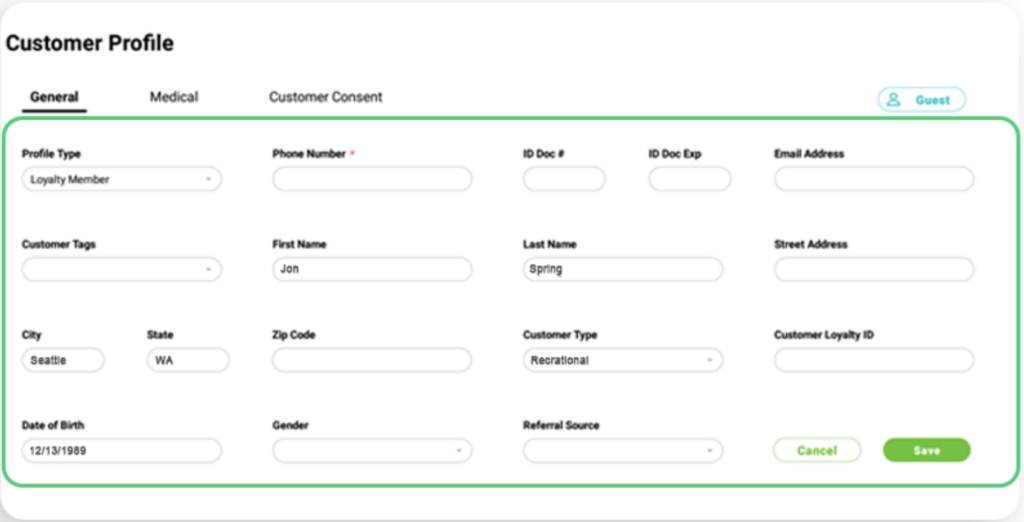
Step 2: When you create a new customer, the following values will be sent to Springbig:
First and last name
Phone Number
Email Address
Address (City, State, Postal Code)
Birthday
Medical Card Expiration
Purpose (Med/Rec)
Gender
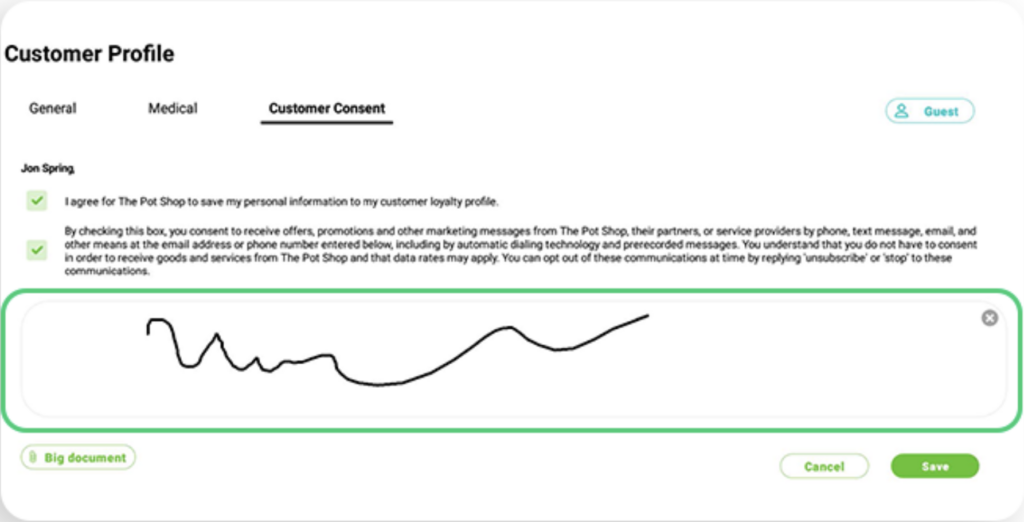
Customer Consent Page
Step 3: In order for a member to be sent to Springbig, the customer will have to fill out the Customer consent page.
Note: The customer must click the checkbox to agree to the terms and privacy policy.
Note: The Customer Signature is required in order to create their profile, and click save to capture the customers consent.
Order Page
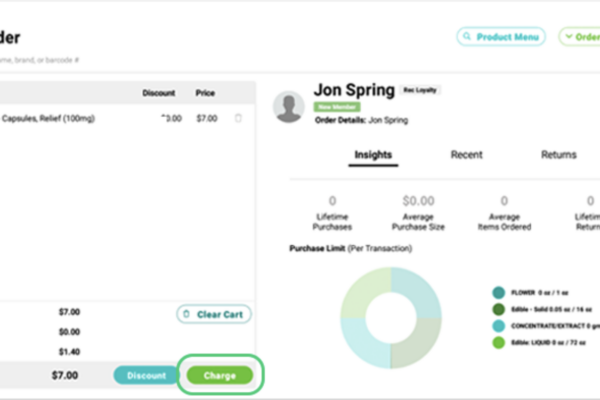
Overview: After the customer is saved, you will be redirected to the order page. There, you can fulfill the order for your customer.
Step 4: On the order page, click the charge button to be taken to the checkout page.
Checkout Page
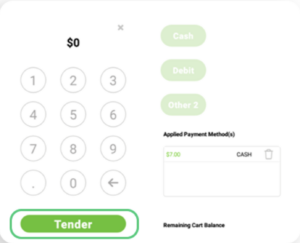
Step 5: On the checkout page, click on Tender to send Springbig the customer profile, the consent form, and the order.
Member Data Springbig will receive:
First and Last name
Phone Number
Email Address
Address (City, State, Postal Code)
Birthday
Purpose
Gender
Medical Card Expiration
Location List
Visit Data Springbig will receive:
Date of Visit
Order Total
Products: (name, category, brand, quantity, price
Backend View of Data
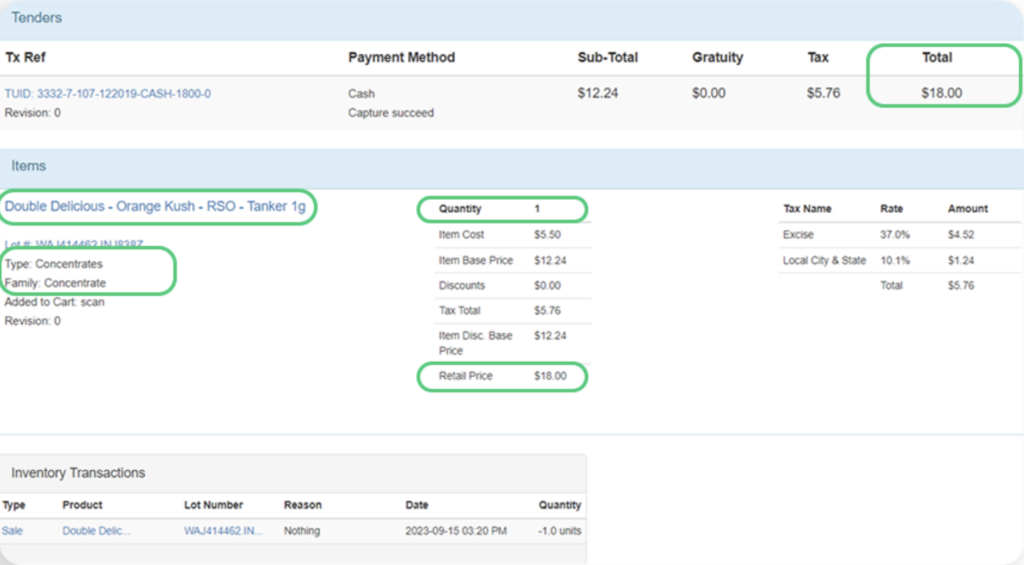
This page will display the Overview of the sales, explaining the data that gets sent to Springbig:
Date: Month, Day, and Year the purchase was made.
Product Brand: The brand that made the product.
Product Name: Official name of the item purchased.
Product Category: Type of product purchased.
Product Quantity: Number of times this item was purchased in the transaction.
Product Price: The cost of that specific item.
Order Total: Total amount spent for all items purchased.
Part 3: Reward Linking
Overview: This section will demonstrate how to configure rewards within the Springbig platform.
Step 1: To get started, sign in to your Springbig Account.
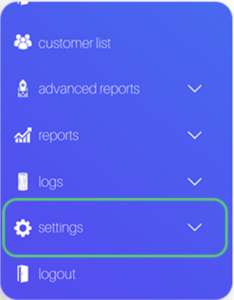
Step 2: On your Springbig Dashboard, select Settings
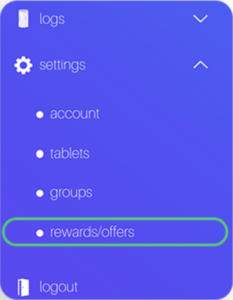
Step 3: From Settings, select Rewards / Offers.
Configuring Rewards
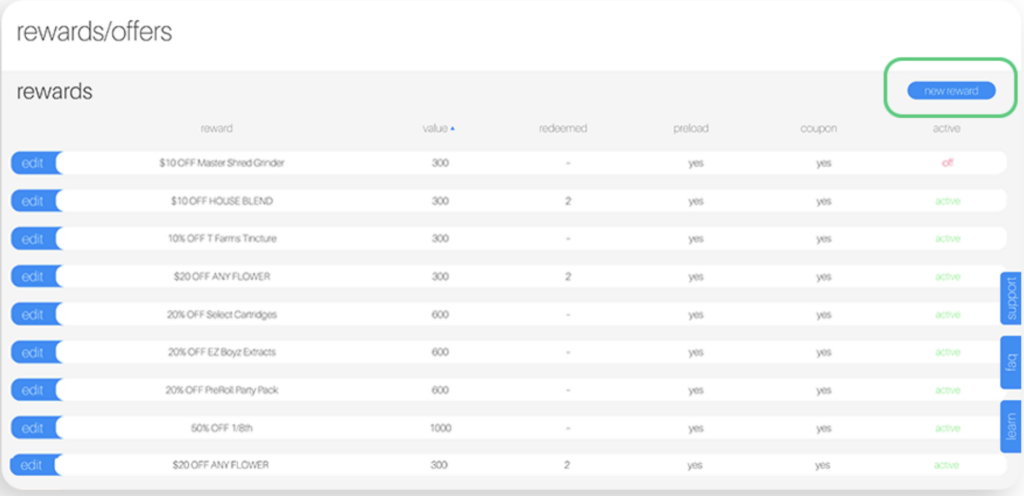
Step 4: Select New Reward, located on the top right of the page.
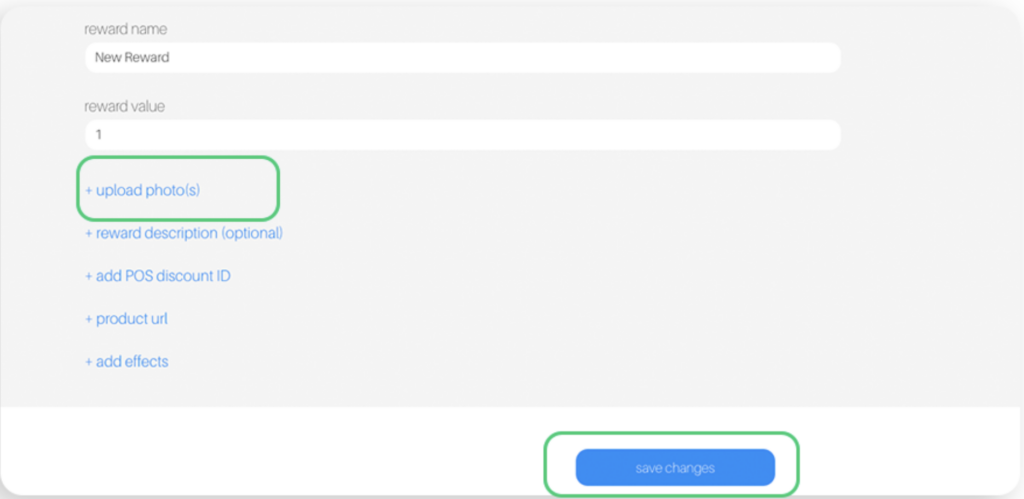
Step 5: Change Status to On, and fill out the fields you would like to have included for your reward.
Note: POS Discount ID should be left blank.
Step 6: You can attach images to enhance the look and feel of your reward. These would only be usable when a member received a campaign with the reward included and click Save.
Getting started (POSaBIT)
Overview: This section will demonstrate how to configure rewards within the POSaBIT platform.
Step 1: To get started, sign in to your POSaBIT platform.
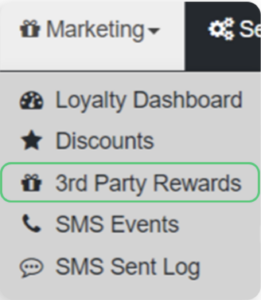
Step 2: Locate the Marketing dropdown and select 3rd Party Rewards.
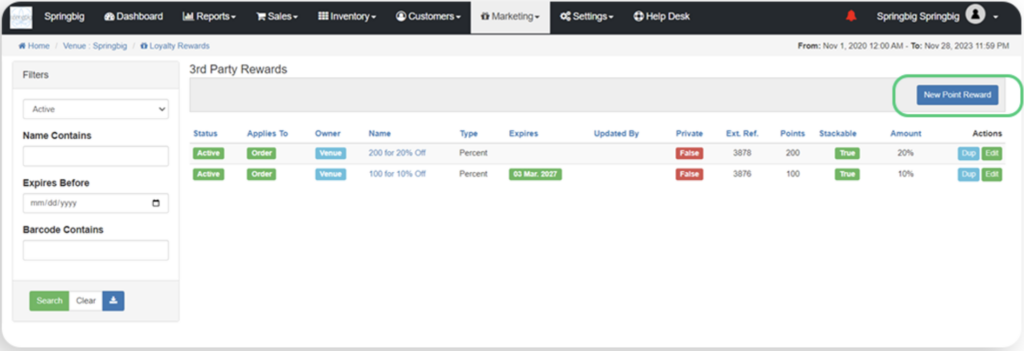
Step 3: On the next screen, click on the New Point Reward button.
Configuring Rewards
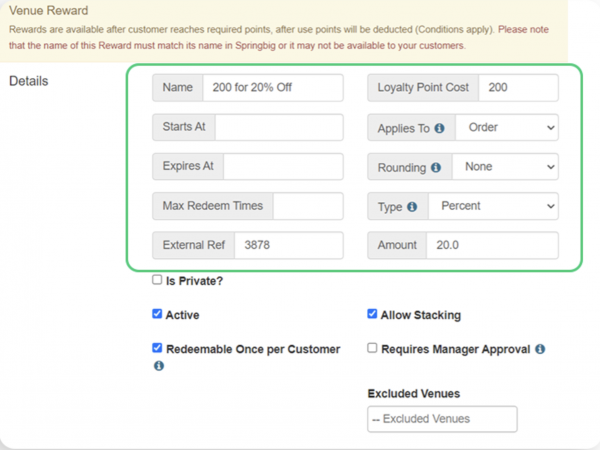
Step 4: Set up the custom reward, make sure that the name and value (loyalty point cost) exactly matches the name and value (loyalty point cost) you entered when creating the reward within Springbig.
Step 5: Once you have completed the form, click the Save button to create the reward.
Part 4: Offer Linking
Overview: This section will demonstrate how to configure offers within the Springbig platform.
Step 1: To get started, sign in to your Springbig Account.
Step 2: On your Springbig Dashboard, select Settings
Step 3: From Settings, select Rewards / Offers.
POSaBIT Integration: Configuring Offers
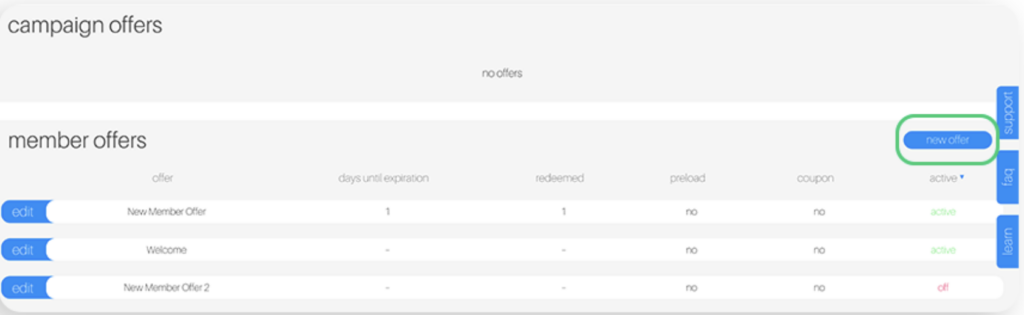
Step 4: Scroll down to the offers section, and select New Offer.
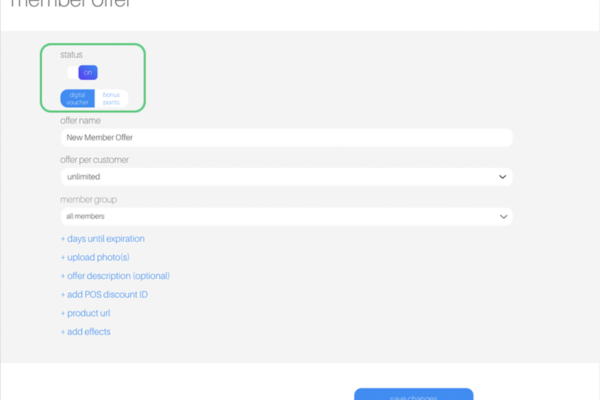
Step 5: Change Status to On, and fill out the fields you would like to have included for your offer.
Digital Voucher: A personalized discount that is only available to select customers.
Bonus Points: Reward your customers with bonus points or point multiplying using bonus points.
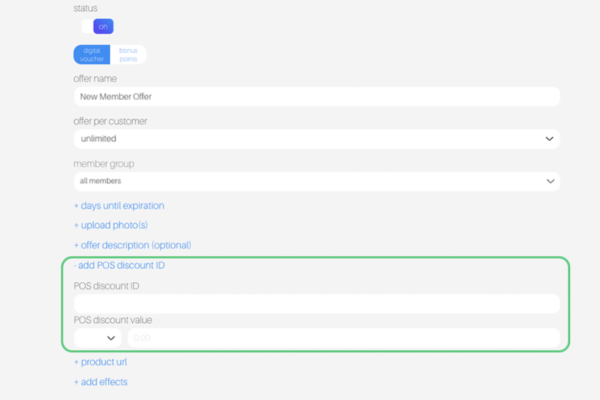
Note: POS Discount ID and POS Discount Value should be left blank.
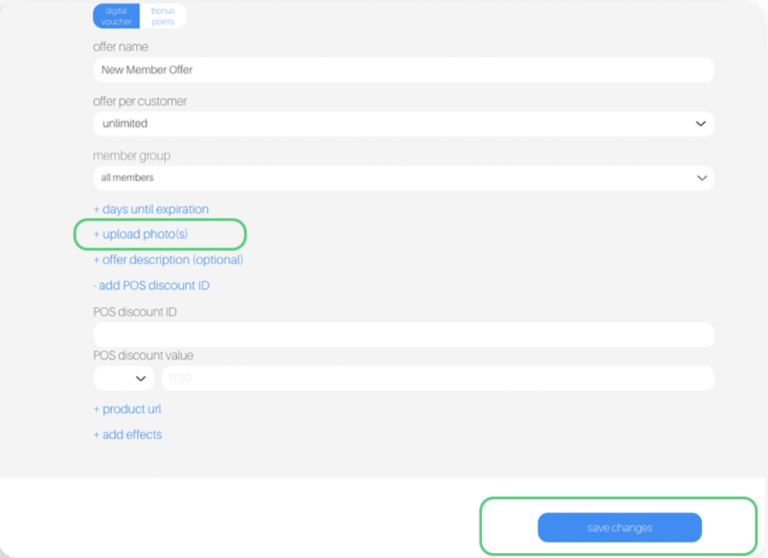
Step 6: You can attach images to enhance the look and feel of your offer. Images are only usable when a member receives a campaign with the reward included. Lastly, click Save.
POSaBIT Integration: Getting Started (POSaBIT)
Overview: This section will demonstrate how to configure Offers within the POSaBIT platform.
Step 1: To get started, sign in to your POSaBIT account.
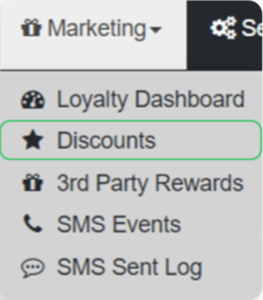
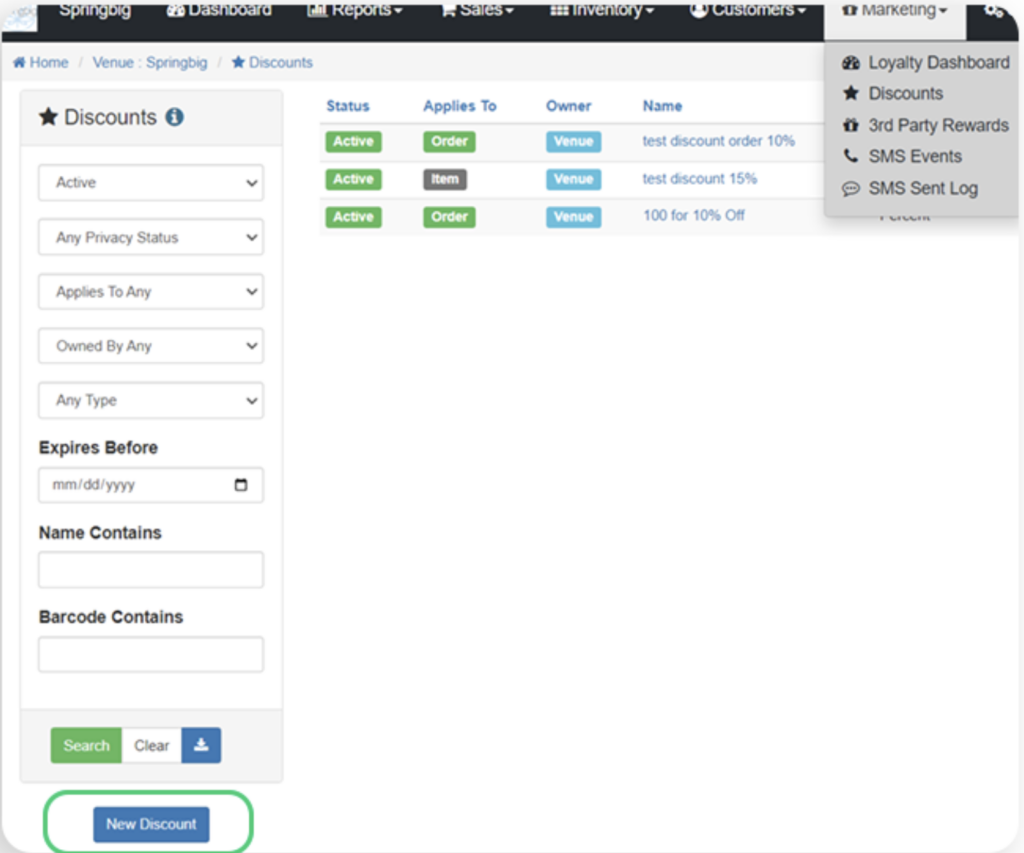
Step 2: Locate the Marketing dropdown and select Discounts.
Step 3: Next, click on the New Discount to begin creating your discount.
POS Redemption Process
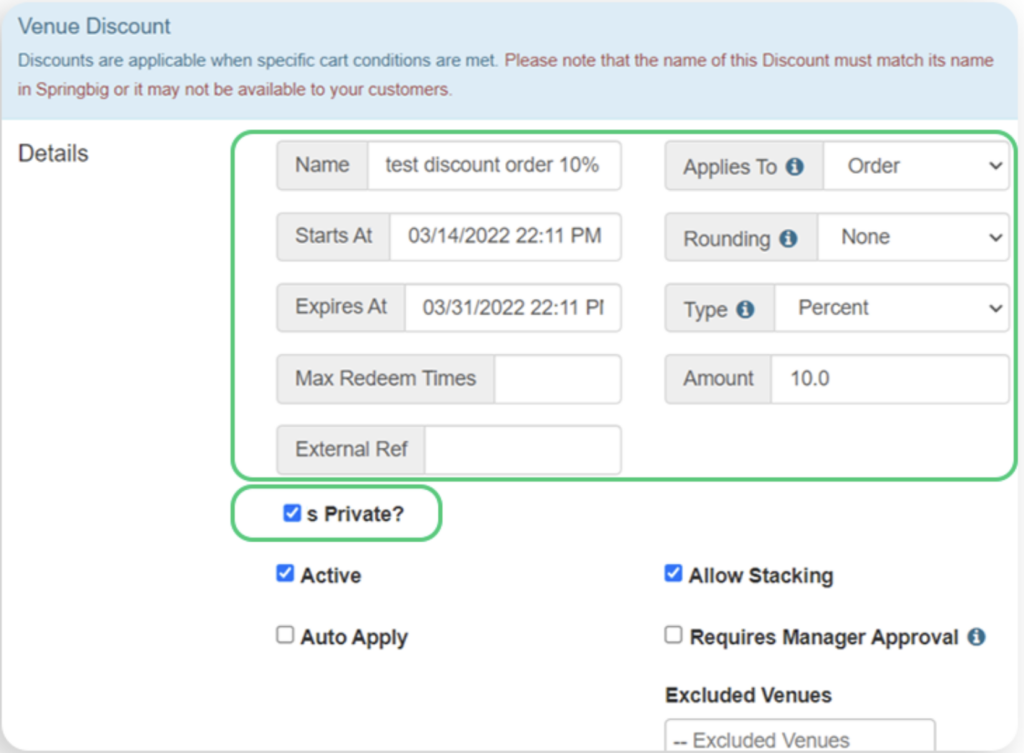
Step 4: Setup the custom discount to make sure that the discount name in POSaBIT matches exactly the name you entered while creating the offer within Springbig.
Note: Make sure to select the Is Private checkbox whenever creating a discount.
Step 5: Click the Save button to create the offer.
POSaBIT Integration: Finding Existing Customer
Overview: This section will show how Budtenders would redeem Rewards or Offers for customers from the POS.
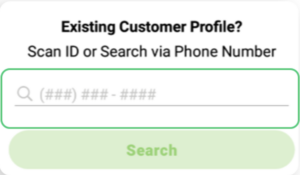
Step 1: To begin, use this field to type in the existing customer’s phone number, then click SEARCH to pull up their profile linked to Springbig rewards.
POSaBIT Integration: Rewards / Offers
Overview: Once you find the existing customer, their profile will open up on the POSaBIT Dashboard.
Step 2: Navigate to the Loyalty tab.
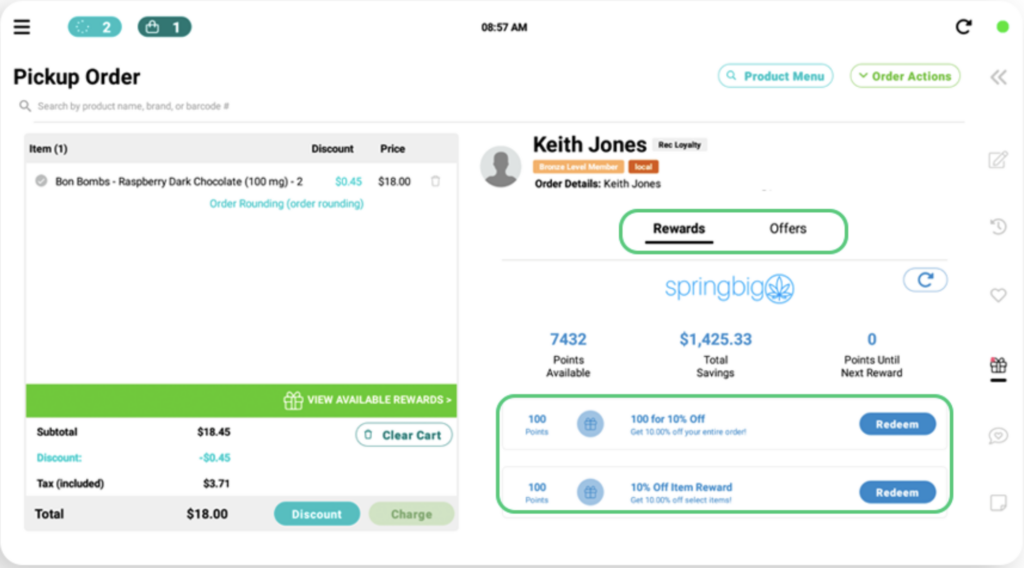
Step 3: Use the Rewards tab to see the rewards that can be redeemed with points, or the Offers tab to redeem an offer sent via campaign.
POSaBIT Integration: Redeeming Rewards/ Offers
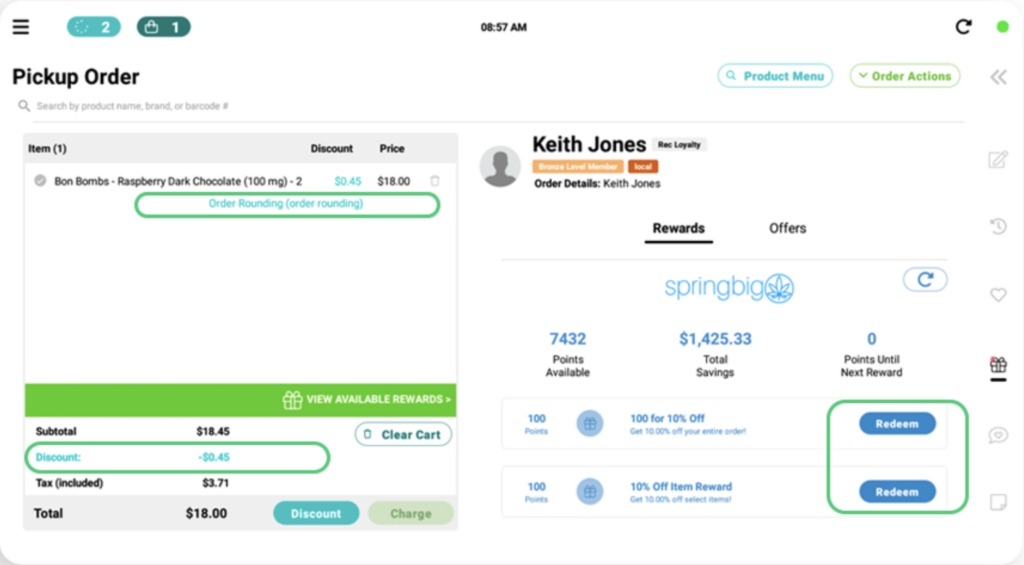
Step 4: Once you locate the Reward / Offer the customer wants to use, select REDEEM to use it for their purchase.
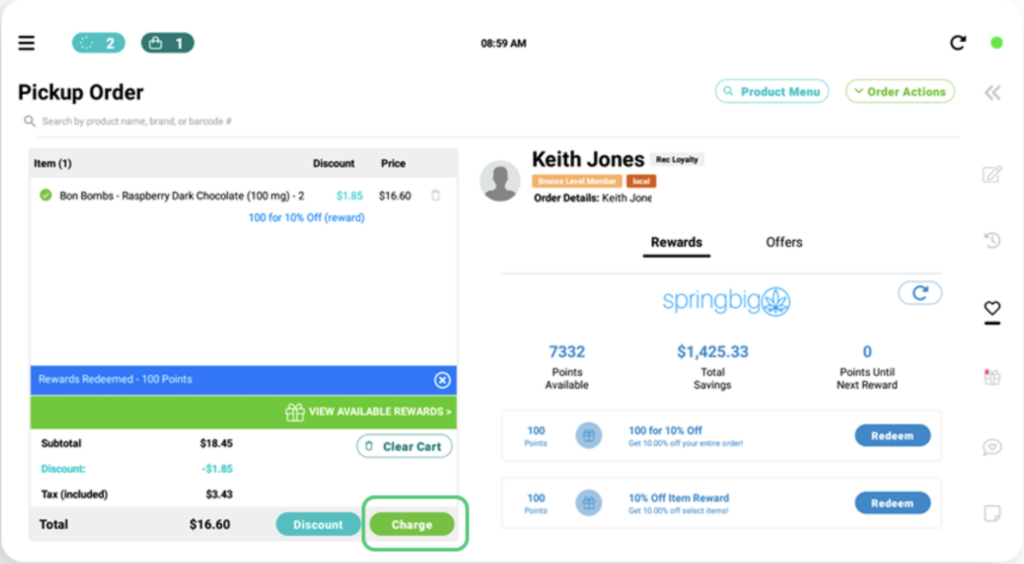
Note:Once you redeem the reward, it will appear under the item/items and the discount amount will be displayed under the subtotal.
Step 5: Click Charge to checkout and complete the redemption process.