LIST IMPORTING GUIDE
LIST IMPORTING IN THE SPRINGBIG SYSTEM: BEST PRACTICES
Understanding the implications of list importing in the Springbig system is crucial. Importing lists can override significant amounts of information in customer profiles, so it’s essential to comprehend what/who you’re importing and how it will impact customer data once processed.
KEY POINTS TO REMEMBER
- Impact on Customer Profiles: Importing lists can alter customer profiles and may even trigger autoconnect messages to customers, depending on what autoconnects are enabled in the account.
- Header Requirements:
- All headers must match exactly as shown in this course. They should be in lower case and separated by an underscore (_) if necessary.
- Not all headers are required, but every import must include either a phone or an email column.
- Avoid importing customers without a phone or email; doing so creates blank profiles with only names, which cannot be linked to any POS ID or existing customer profile.
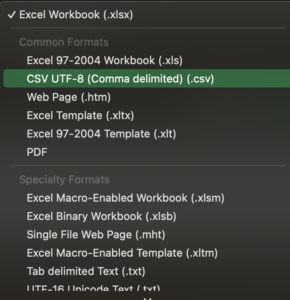
- File Format: The file must be saved as a .csv (CSV UTF-8) format.
OVERVIEW
In this course, we will cover each import header in detail. Additionally, we’ll share Excel tips and tricks to simplify list formatting and discuss best practices for the list importing process within the Springbig system.
Table of Contents
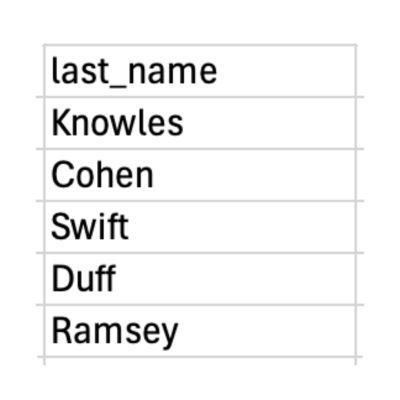
FIRST AND LAST NAME FORMATTING
Step 1. Headers should read first_name and last_name ONLY.
Step 2. Ensure there are no numbers/symbols instead of names-
Note: Names are NOT mandatory, so if there are numbers or symbols in these fields, please ensure they are removed for import.
Step 3. If first and last names are in the same column- follow the steps below to separate them:
- Ensure that there are enough columns next to the “first and last name” column for these to be separated out (We suggest 3-5 additional columns).
- Highlight the row with the First and Last name in it.
- On the top of the excel sheet select data followed by text to columns.
- From here you click next then select what delimiters such as spaces or commas.
- Note: This is how you will have your names separated, if there is a space between the first and last name select spaces, if it is ‘first name, last name’ select comma.
- Click finished and the first and last names will split into 2 separate columns depending on where there is a space in the cell.
Step 4. Ensure that the top of the columns have the correct headers for first_name and last_name
Note: It is important to make sure there are NO spaces before of after the headers copy, this will cause the import to fail if there are any unnecessary spaces within the headers.

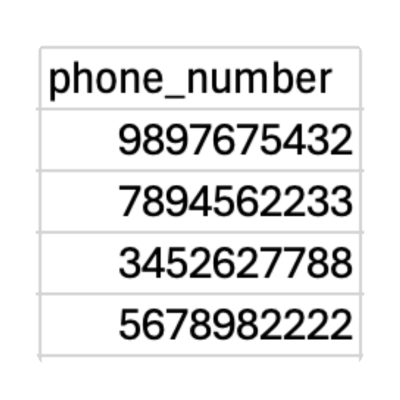
PHONE NUMBER FORMATTING
Step 1. Ensure that the phone number header is as it is supposed to be: phone_number
Step 2. Ensure that there are no symbols throughout the phone number column. If there are, find and replace them, leave the replace row empty.
Step 3. Sort the phone numbers in both A-Z and Z-A order to ensure that there are NO phone numbers UNDER or OVER the 10-digit requirement.
Step 4. If there are any phone numbers beginning with 1, like “12345678999” use the steps below to remove those unwanted 1’s
- In order to avoid these extra 1’s manually utilize the following formula and adjust the row numbers accordingly. (=IF(LEN(A1)=11, RIGHT(A1,10),A1) )
- Note: Whenever you are using a formula in excel copy the entire column /cells with the formula and select special paste , values only.
Step 5. Ensure that the header is still correct: phone_number
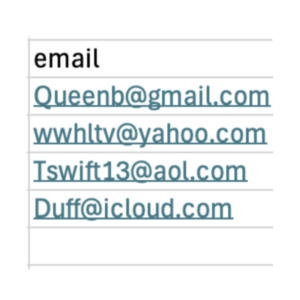
EMAIL FORMATTING
Step 1. Ensure that the phone number header is as it is supposed to be: email
Step 2. Sort the email by A-Z and Z-A to ensure that there is no incorrect information in this field.
Step 3. Using excel’s filtering tool, filter the list of emails for any emails without an @ symbol. Any emails without an @ symbol are not full emails and should be removed before importing.
Step 4. Select all emails & right click the column and select remove hyperlinks if there are any.
Step 5. Ensure that the header is still correct: email
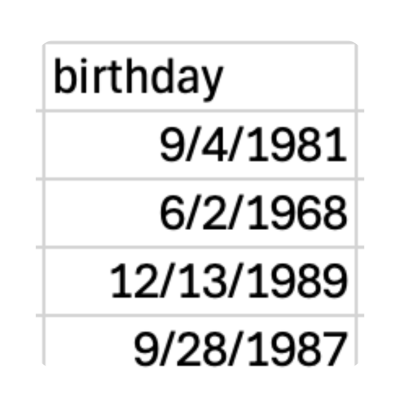
BIRTHDAY FORMATTING
Step 1. Ensure that the phone number header is as it is supposed to be: birthday
Step 2. Ensure that the birthdays are in correct importing format (07/29/1997)
Note: The correct format for birthdays is MM/DD/YYYY
Step 3. If the birthdays are NOT in this order, use the steps below:
Select all the birthdays in the entire column
Utilize the “format cells” function to format the numbers accordingly
All birthdays should be formatted: 3/14/2012
Step 4. Ensure that the header is correct without any spaces: birthday
GENDER FORMATTING
Step 1. Ensure that the header is correct: gender
Step 2. Ensure that there are only “female”, “male”, and “other” in the gender column.
Step 3. If there is anything other than female/male/other use the steps below to remove:
- EITHER filter the unwanted words out of the column
- OR Utilize the Find & Select button to remove the unwanted words
Step 4.Ensure that the header is correct: gender

CUSTOM GROUP FORMATTING
Step 1. Ensure that the header is titled as such: custom_group_list
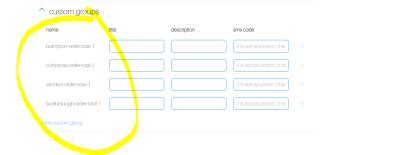
Step 2. Ensure that all of the locations match their name EXACTLY as what is in the platform in the name column (i.e. brampton-order-total-1).
Note: To locate the custom groups available, log into the Springbig platform and go to settings, then click on groups and the second dropdown is called custom groups. Click on custom groups and you’ll see all the custom groups you can use.
Step 3.Ensure that if there are multiple custom groups they are split by only a comma and 1 space: “, ” (no quotes).
Step 4. Ensure that the header is titled: custom_group_list

INTEREST / LOCATION FORMATTING
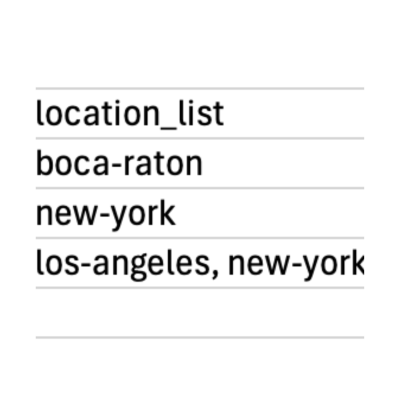
Step 1. Ensure that the header is correct: interest_list or location_list
Step 2. Ensure that all of the interests/locations listed match their name EXACTLY as what is in the platform (i.e. “vape carts” =”vape-carts” in the groups section on the UI) use vape-carts.
Note: Typically to replace the space in between the words a dash will be used to replace it.
An example is a location called Hudson Yards will be hudson-yards. All lowercase and using the dash to replace a space between the words.
Step 3. If multiple interests/locations are there for 1 profile, ensure that they are separated only by a comma and 1 space: “, “ (no quotes)

BRAND / CATEGORY FORMATTING
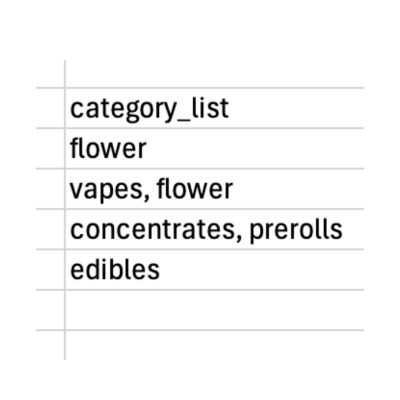
Step 1. Ensure that the header is correct: brand_list or category_list
Step 2. Ensure that all of the brands/categories listed match their name EXACTLY as what is in the platform (i.e. “Gabbys Ganja” =”gabbys-ganja” in the groups section on the UI) use gabbys-ganja.
Step 3. If multiple interests/locations are there for 1 profile, ensure that they are separated only by a comma and 1 space: “, “ (no quotes).
Step 4. Ensure that the header is correct: brand_list or category_list

PRIMARY LOCATION FORMATTING
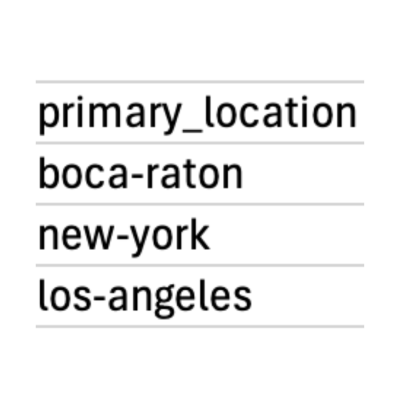
Step 1. Ensure that the header of the column is titled as such: primary_location
Step 2. Ensure that all of the primary locations listed match their name EXACTLY as what is in the platform (i.e. “Delray Beach” =”delray-beach” in the groups section on the UI) use delray-beach
- Primary location can only contain ONE value, so ensure that there are not multiple locations in 1 cell.
Step 3. Ensure that the header is correct: primary_location
ALLOWED SMS & ALLOWED EMAIL FORMATTING
Note: If your platform settings require a signature to be on file for a customer to be opted-in, please contact support@springbig.com for assistance importing allowed sms.
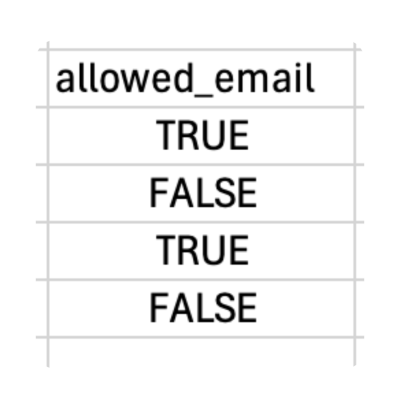
Step 1. Ensure that the headers are titled as such: allowed_email or allowed_sms
Step 2. Ensure that only TRUE or FALSE are present in the cells of this column. The only other value that is allowed in the allowed_sms and allowed_email columns would be NO value (empty cell).
Step 3. If there is anything else in the column, use the replace & find tool to remove them or select them from the filtering drop down menu and clear the contents of these unwanted cells.
Step 4. The lines that do NOT have email addresses- should NOT have a status (same goes for phone number).
Note: If there is a TRUE status for allowed_sms for a profile that does not have phone_number- the UI will count that customer as who is opted in on the customer breakdown page (we want to avoid this).
Step 5. Filter your list to for no emails and then no phone numbers ensuring that members who don’t have an email or a phone number are NOT True or False and are just left blank.
Step 6. Ensure that the headers are titled as such: allowed_email or allowed_sms

ADD POINTS / RESET POINTS FORMATTING
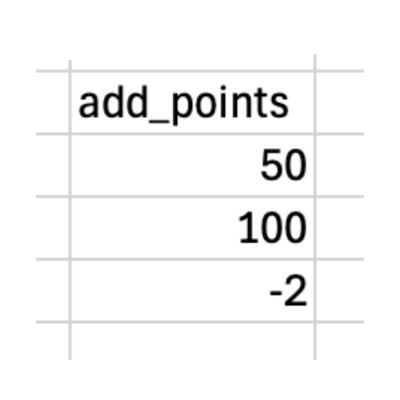
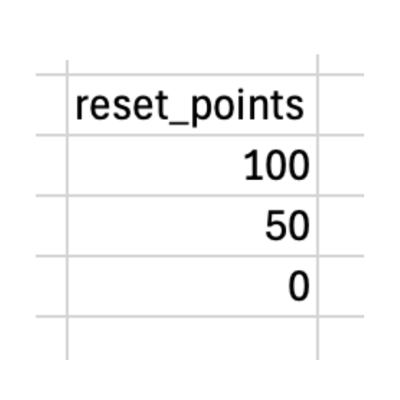
Step 1. Ensure that the header of the column is titled as such: add_points OR reset_points
Note: You can NOT have both add points and reset points on the same list!
- ADD points= ADDING points to the profile’s point balance
- RESET points= REPLACING the profile’s balance with this new balance
Step 2. All numbers must be whole numbers, no decimals. If there are any decimals, please use these steps:
- Select the column the numbers are in.
- Select the Number page from the box that appears.
- Move the decimal place from 2 to 0 on that page, select okay.
- This will round the points up to the highest whole number.
Step 3. Ensure that there are no negative values in the add/reset point column.
Step 4. Ensure that the header is correct: add_points or reset_points
PURPOSE FORMATTING
Step 1. Ensure that the header of the column is titled as such purpose
Step 2. Ensure that only medical and recreational are present in the column, you can also use med and rec.
Step 3. Purpose is not required, so if anything other than medical/med or recreational/rec is present, remove those values.
Step 4. Ensure that the header is correct: purpose

MEDICAL CARD EXPIRATION FORMATTING
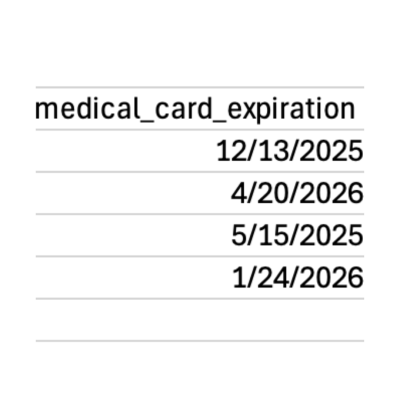
Step 1. Ensure that the header is correct: medical_card_expiration
Step 2.Ensure that the med card expirations are in correct importing format (07/29/1997)/ (MM/DD/YYYY).
Step 3. If the expirations are NOT in this order, use the steps below:
- Select all the med card expirations in the entire column.
- Right click on the column and select format cells, then select date from the sidebar menu.
- All expiration dates should be formatted: 3/14/2012
Step 4. Ensure that the header is correct: medical_card_expiration
ADDRESS 1 & 2 FORMATTING
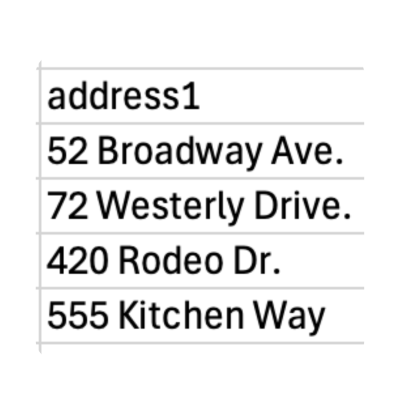
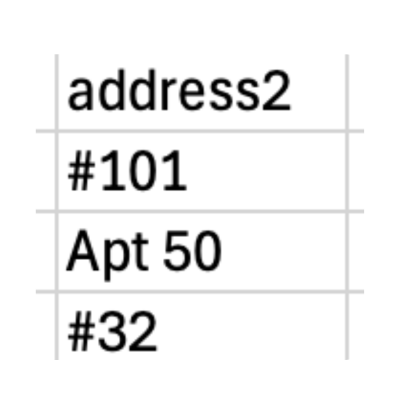
Step 1. Ensure that the columns are titled as such: address1 and address2
Step 2. Address 1 should contain the actual street address while address 2 should contain the apartment/suite/unit number or letter.
Step 3. These fields can contain any information that is given, but keeping them clean and splitting up into address 1 & 2 is always beneficial for cleaner data.
Step 4. Ensure that the headers are correct: address1 and address2
CITY, STATE, ZIP FORMATTING
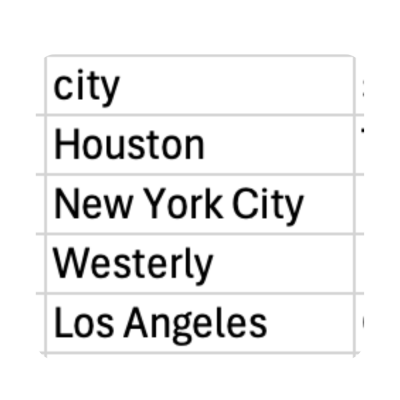
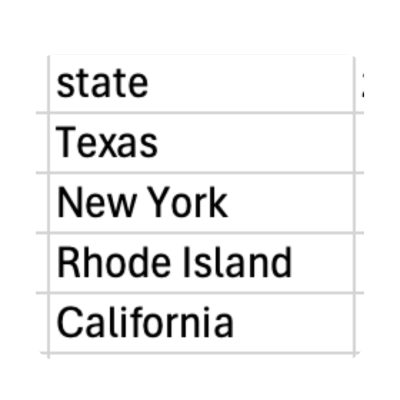
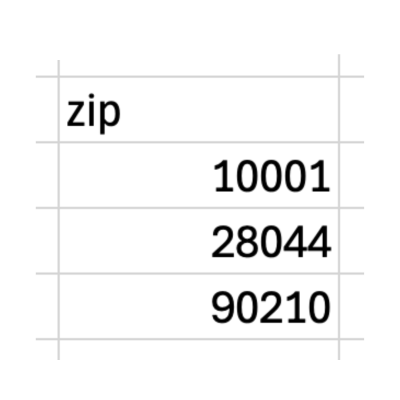
Step 1. Ensure that the columns are titled as such: city, state, zip
Step 2. These fields can contain any information that is given:
- City can contain any city, town, etc.
- State can contain any state, Provence, region, etc.
- Zip can be numerical or alphanumerical depending on country.
Step 3. Ensure that the headers are correct: city, state, zip
REMOVING SYMBOLS FROM PHONE NUMBERS
Excel Support
Step 1. If phone numbers on the list show as such (555) 555-5555→ go to the home page on excel
Step 2. Go to the Find & Select button

Step 3. Select the replace button from the Find & Select dropdown.
Step 4. You can now remove the symbols by entering each symbol into the “Find What” field and leaving the “replace with” field empty→ select “replace all”
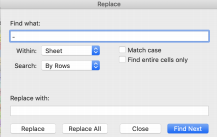
Step 5. Complete this for every unwanted symbol you may see “(“, “)”, “-”, “ “, etc.
SWITCHING VALUES
Excel Support
Step 1. If something like “NULL” was written in the cell, you can place NULL in the field titled “Find What” and place nothing in the “Replace With” column.
Step 2. If there is a group in the list provided, but it does not match the group in the NAME field of the group itself in the UI (circled in yellow) you can input the provided location name in the “Find What” field and replace it with the correct group name from the UI.
REMOVING DECIMALS FROM POINTS
Excel Support
Step 1.Select the column the points are in, right click and select “format cells”.
Step 2. Select the “Number” page from the box that appears.

Step 3. Move the decimal place from 2 to 0 on that page, select okay.
Step 4. This will round the points up to the highest whole number.
ROUNDING DECIMALS DOWN
Excel Support
Step 1. If you would like to ROUND THESE VALUES DOWN- utilize the “=rounddown(*select all cells in the column*)” formula.
Step 2. Don’t forget to copy and paste VALUES ONLY to have these numbers stick without the formula being attached.
BIRTHDAY OR MED CARD EXPIRATION FORMATTING (DATE FORMATTING)
Excel Support
Step 1. Once highlighted, right click on the column and select “format cells”.
Step 2. Select “Date” from the sidebar menu.
Step 3. Scroll down until you see the format of 3/14/2012
REMOVING NO PHONE / NO EMAIL
Important List Import Notes
Step 1. Select the blanks in the phone column.
Step 2. Then select the blanks from the email column.
Step 3. If there are any customers that are here, please remove them as we CANNOT import blank profiles into the system (delete any lines that do no contain a phone or email).
Step 4. Ensure that you reselect the phone and email cells, and un-filter before saving the file.
SAVING A LIST FOR IMPORT
Important List Import Notes
Step 1. Files for import should ALWAYS be saved as a .csv file.
Please see the image below for the CSV version (CSV UTF-8)
FILTERING TO SPECIFIC DATA
Important List Import Notes
Step 1. Utilize the text filters option in excel to identify cells that contain certain information or cells that do not contain certain information.
Step 2. Use the dropdown to find the “does not contain” option and enter in a “@”
Step 3. This will return all of the emails that DO NOT contain the @ symbol which is necessary in the email field→ clear the contents from these cells that are selected by excel.
Step 4. Useful tip for trying to identify lines that DO contain data as well (select contains instead of “does not contain”).